Keep a workout and nutrition journal with wger
wger is a fitness journal that brings workout routines, training logs, body measurements, and nutrition into one browser application. On Olares, you can keep your plans and records on your own device and return to them between sessions.
Start in the browser to plan a workout, record what you did, and keep track of your weight and food. You can then access the same journal from a desktop or mobile client, or use Lares or Hermes Agent to query your records.
Install wger
- Open Market and search for "wger".
- Click Get, then Install. When prompted, set ADMIN_PASSWORD to a password of at least 12 characters and save it. Wait for installation to complete.
Use wger
Open wger from Launchpad and sign in to the browser version.
Sign-in credentials
Use admin as the username and the ADMIN_PASSWORD you set during installation as the password.
Create a workout routine
- Open Training > Routines and click +.
- In the Add panel, set:
- Name: Enter a name for the routine.
- Start and End: Choose the dates the routine should cover.
- Fixed weekly schedule: Leave this on if the training days should repeat each week.
- Click Save to open the routine in its edit view.
- Click Add training day, name the day, and click Save in the day panel.
- Click Add exercise. In the new exercise block, set:
- Search by exercise name: Find and select an exercise.
- Sets: Enter the number of sets you plan to do.
- Weight and Repetitions: Enter the planned values for each set.
Return to Training > Routines and reopen the routine. Confirm that the training day, exercise, and planned sets are still there.
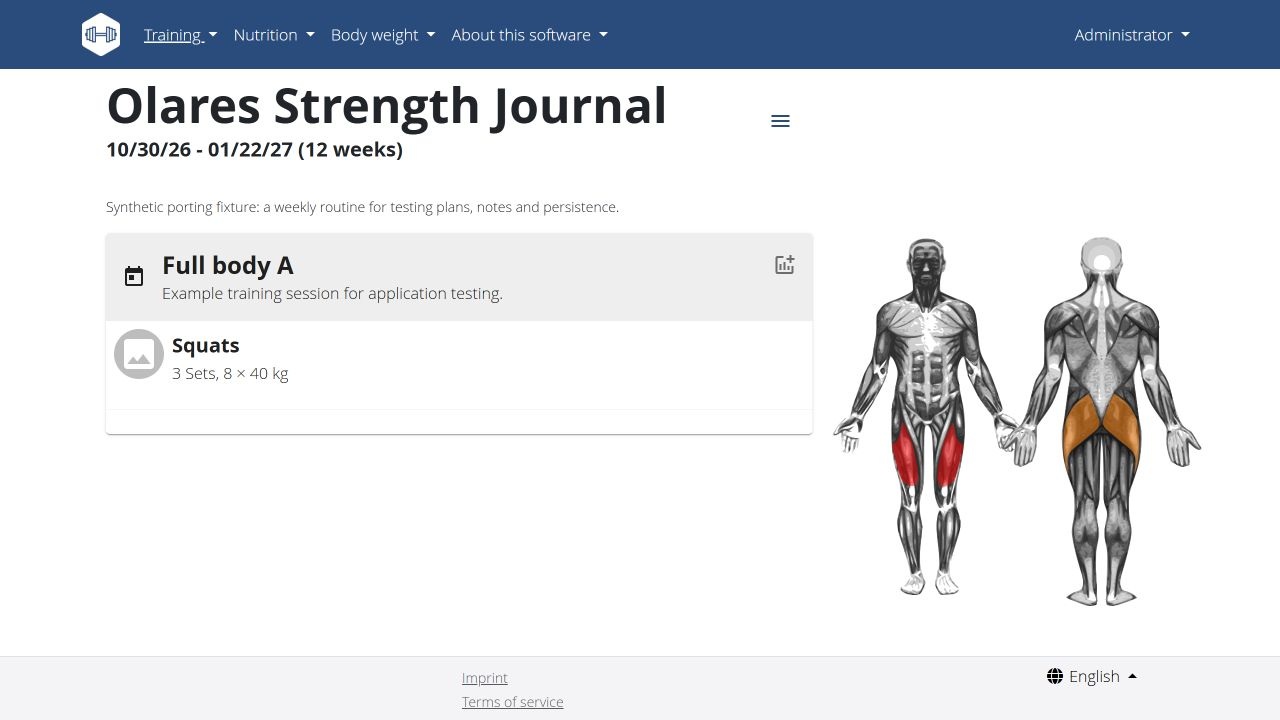
Log a training session
- Open Training > Routines and select the routine you want to log.
- Find the training day you completed and click add_chart beside it to open the training log.
- In the training log, check:
- Date: Set the date you completed the session.
- Exercises: Replace the prefilled weight and repetitions for each set with what you completed. Only rows with a weight or repetition value are saved.
- Click Submit beneath the exercise rows to save the sets. A Success! message confirms the submission.
- Check the saved session and exercise entries in the routine.
- To record optional session details, use the separate form above Exercises:
- Add notes or select a General impression.
- Click that form's Submit.
Keep planned values in the routine and actual results in the log. This lets you reuse the same routine without replacing earlier training records.
Track your body weight
Open Body weight > Weight overview.
Click + to open the Add panel. Set:
- Weight: Enter your measurement and choose KG or LB.
- Date and Time: Check when you took the measurement.
Click Submit and check that the measurement appears in the table below the graph.
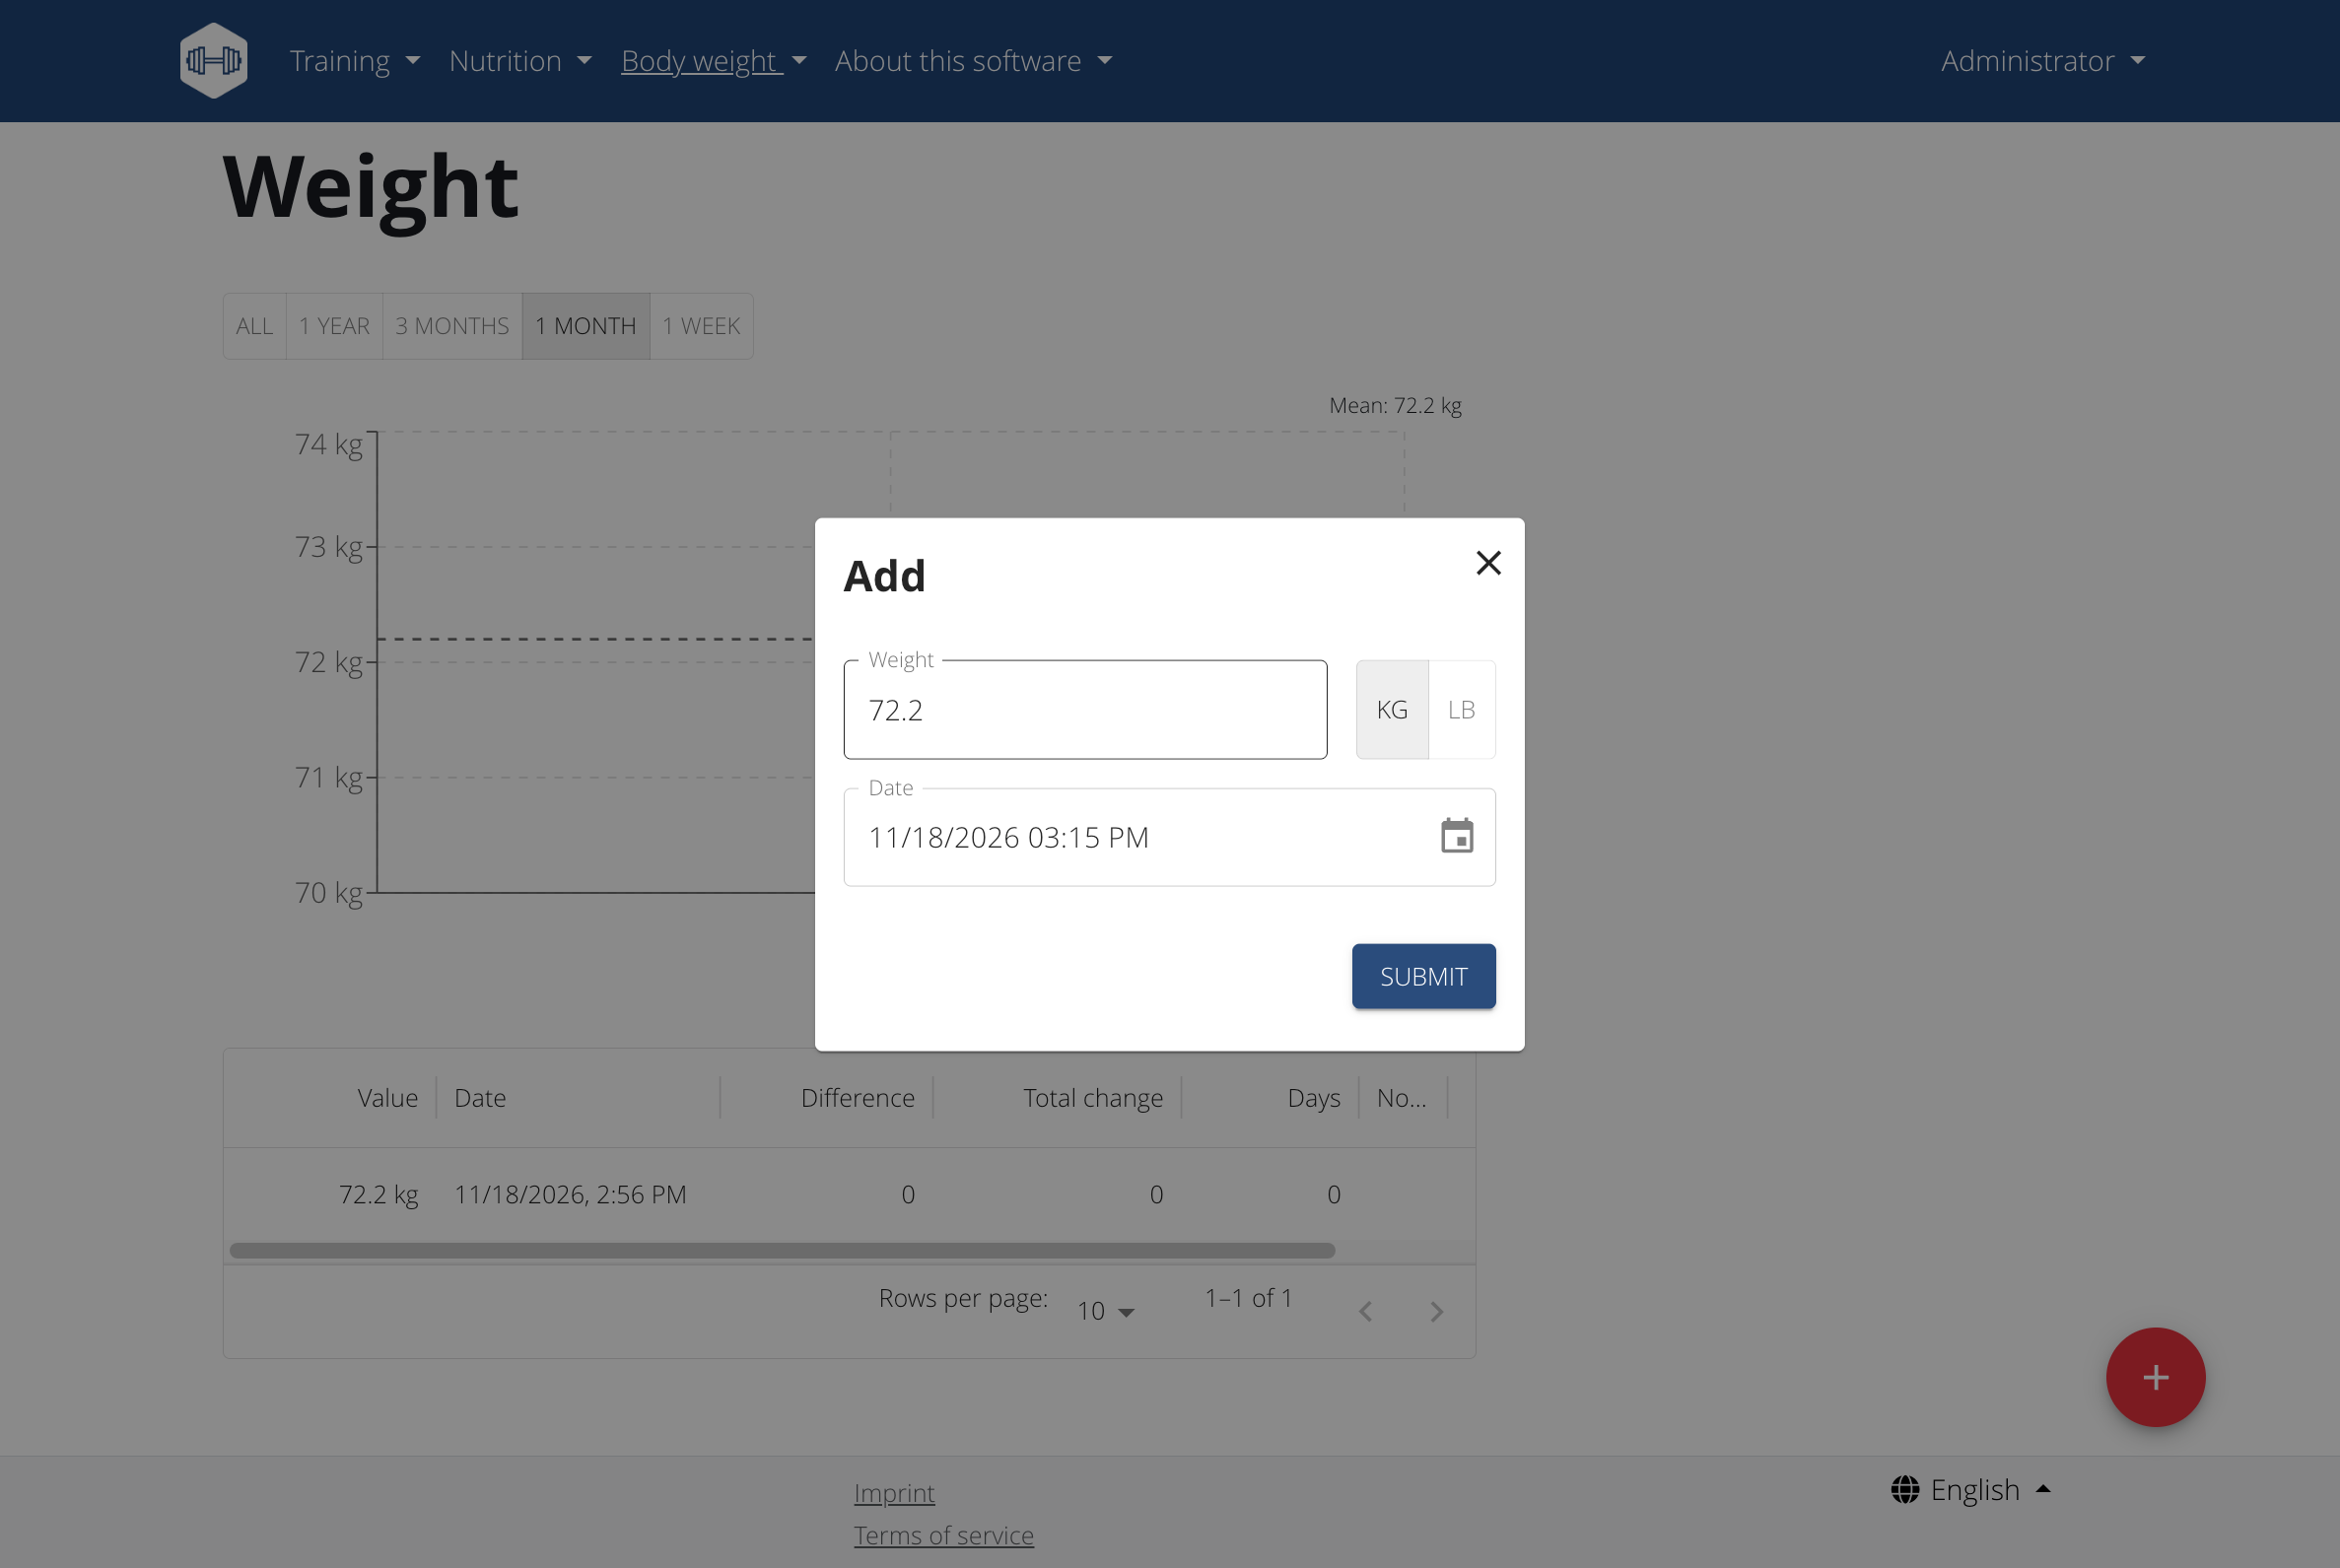
Add later measurements as you take them. Use the filters above the graph to review your progress.
Log food in your nutrition diary
A diary entry needs an ingredient and a nutrition plan. Create those first, then record what you ate.
Add an ingredient
- Open Nutrition > Ingredient overview and click Add.
- Enter the ingredient's values per 100 g:
- Name: Enter the food name.
- Energy, Protein, Carbohydrates, and Fat: Use the values on the food's nutrition label.
- License: Select a license for the ingredient.
- Click Save.
Record a diary entry
Open Nutrition > Nutrition plans and click +. In the plan panel:
- Description: Enter a name for the plan.
- Only track calories: Leave the default on to log food without setting up scheduled meals.
Submit the plan, open it, and click Add nutrition diary entry.
In the diary entry panel:
- Search for and select the ingredient you added.
- Enter the amount and date.
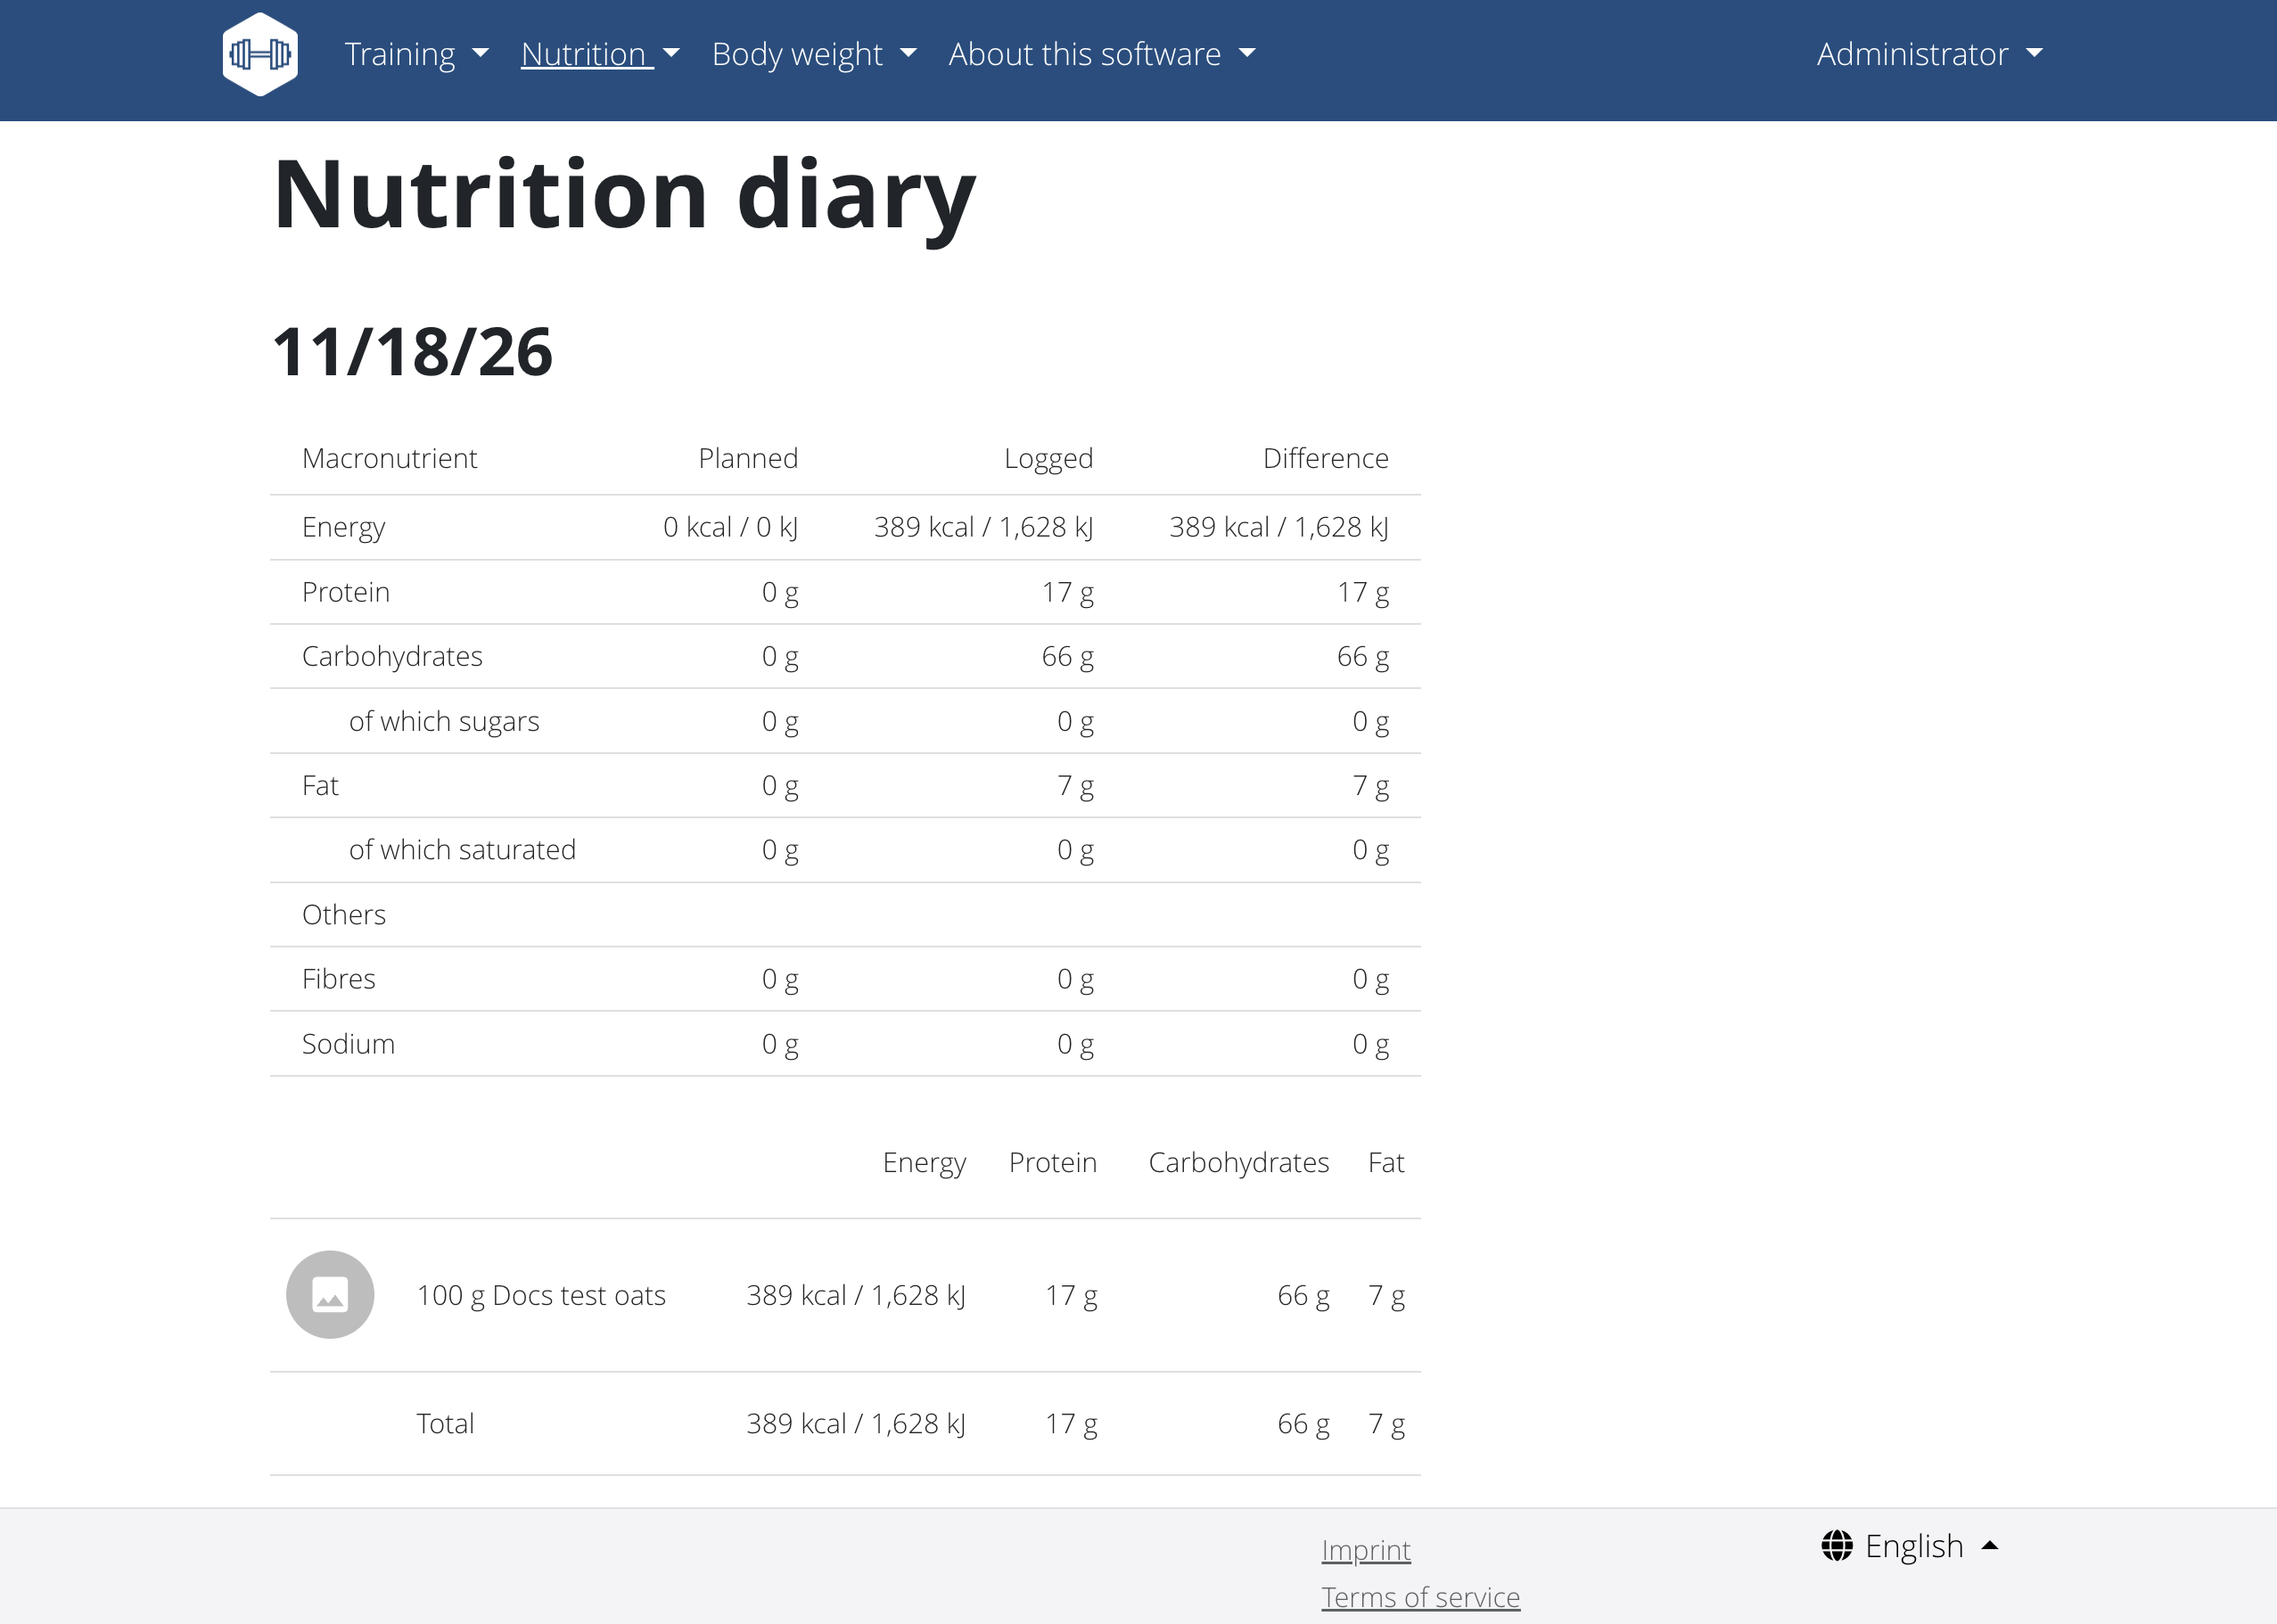
Click Submit. Under Logged, check that the date and nutrition totals appear.
Click the date to open the daily diary. Confirm that the ingredient and amount appear there.
Connect a desktop or mobile client (optional)
To access your journal on another device, connect a wger client to your Olares instance.
Prerequisites
- wger Chart 0.0.10 or later is installed.
- LarePass is installed on the client device.
Download a client
| Platform | Download |
|---|---|
| Windows and macOS | wger client releases |
| Linux | wger client releases or Flathub |
| Android | Google Play, F-Droid, or wger client releases |
| iPhone | App Store |
For GitHub releases, choose the installer that matches your operating system.
Connect to your Olares journal
Enable LarePass VPN on the client device.
In Olares Settings, open Applications > wger > Entrances > wger Mobile. Keep Authentication level set to Internal, then copy the Endpoint.
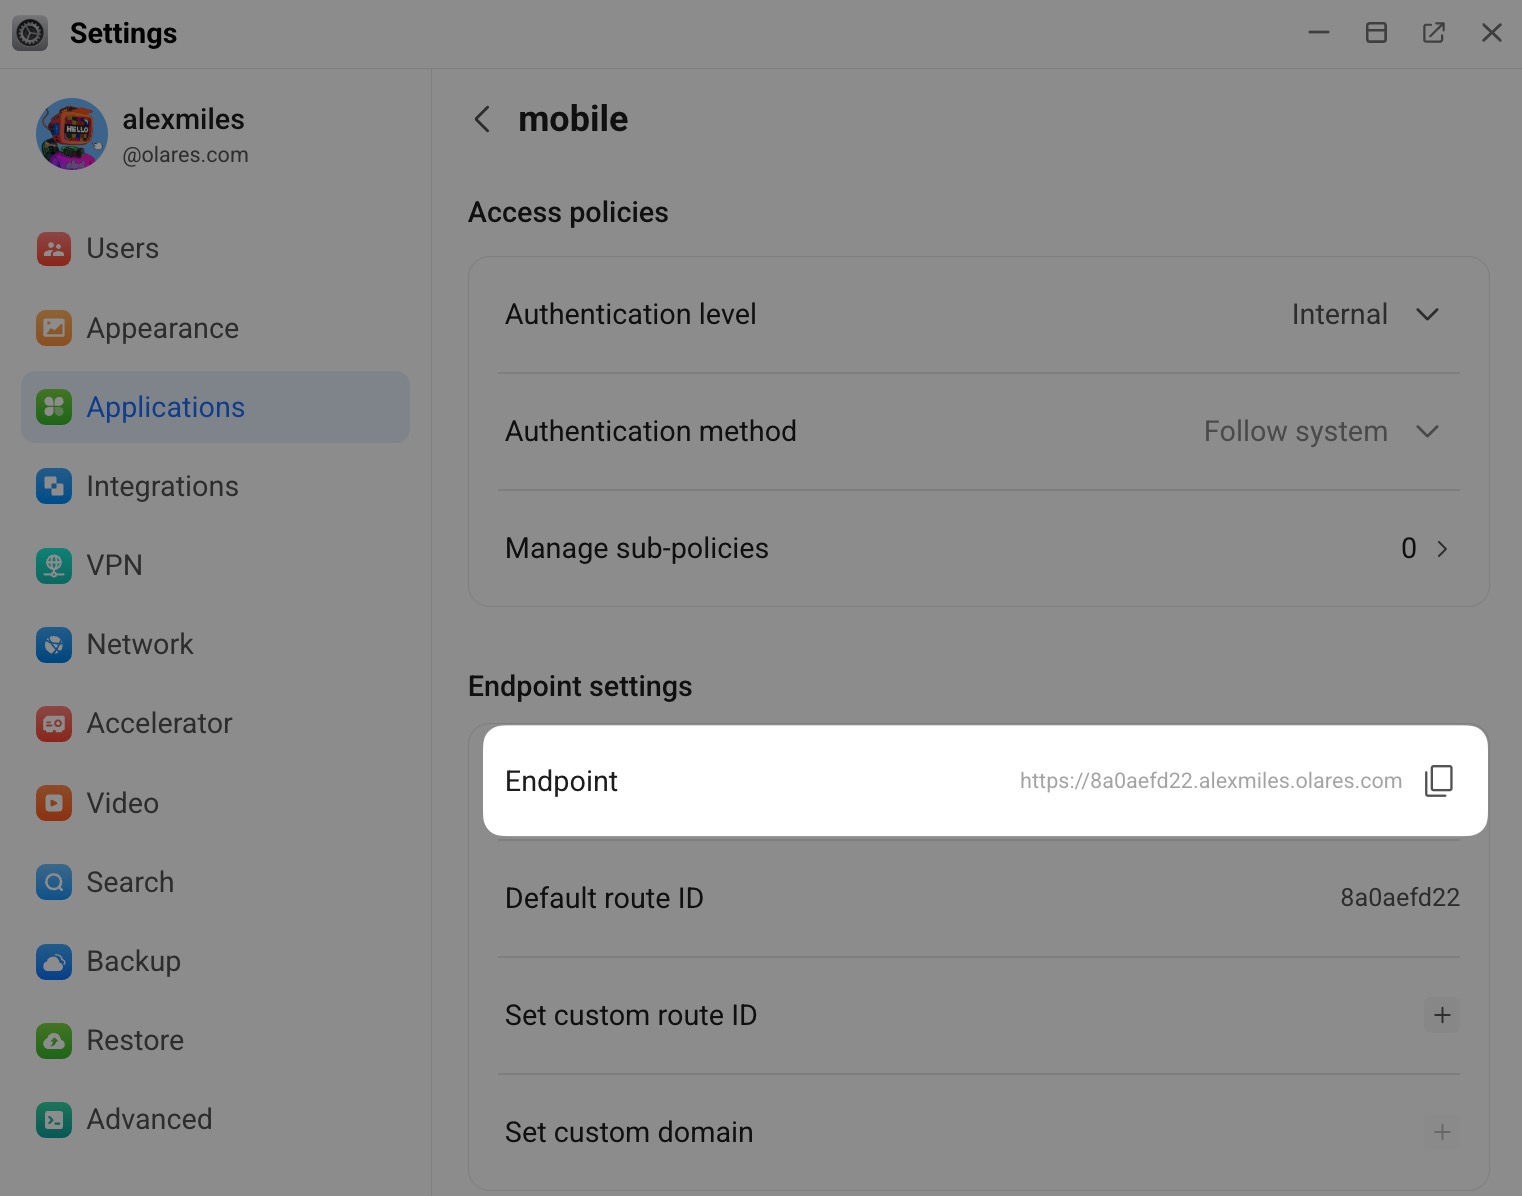
Open the wger client's sign-in screen and expand Advanced. Set:
- Server: Select Self-hosted.
- URL of the wger instance: Enter the copied endpoint.
- Sign-in method: Select Username and password.
- Allow self-signed certificates: Leave this off.
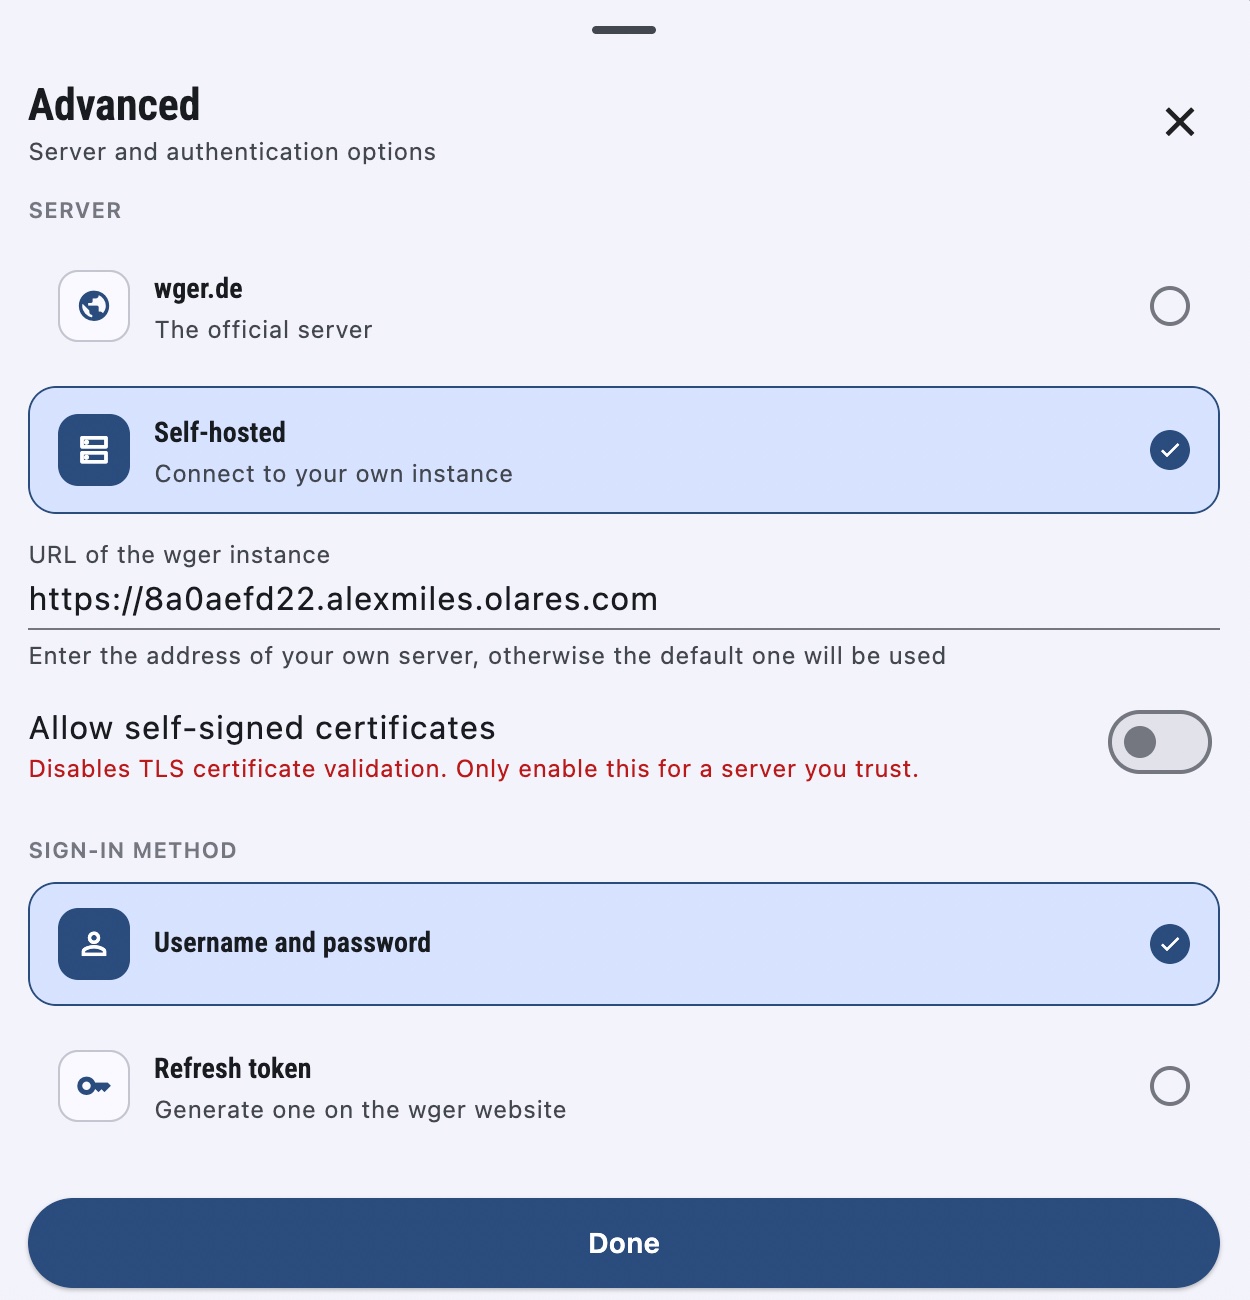
Tap Done, then sign in with
adminand the password you set during installation.Keep LarePass VPN enabled while the client syncs. Check that the routine you created in the browser appears in the client.
Use wger with an AI assistant (optional)
Connect an AI assistant to wger through MCP to query your journal and record body weight. The setup examples below use Lares and Hermes Agent. MCP requires wger Chart 0.0.10 or later.
Which account does MCP use?
This preview connection accesses the wger admin account, regardless of which wger account you use in a client. To query the records created above, keep them in admin. Anyone with the MCP token can access that account's records and enabled creation tools.
First complete the Lares setup or Hermes Agent setup, with a chat model available through Router.
Get the connection details
You need two values to connect an assistant:
- MCP endpoint (
WGER_MCP_ENDPOINT): In Olares Settings, open Applications > wger > Entrances > wger MCP and copy the Endpoint. - MCP token (
WGER_MCP_TOKEN): In Files, open Data > wger > data > state > mcp-credentials >auth.privateand copyMCP_STATIC_TOKEN. Do not use the separate wger API key in the file.
Connect an AI agent
Choose an agent below. Both use the same queries later in this guide.
Query your journal
After connecting an assistant, ask it to read the records you created above. Replace the bracketed names with your own:
Find my "[routine name]" routine in wger. Show its training sessions
and completed sets so far. Then check "[nutrition plan name]" and show
the food entries I logged. If either has no entries, say so rather
than estimating values.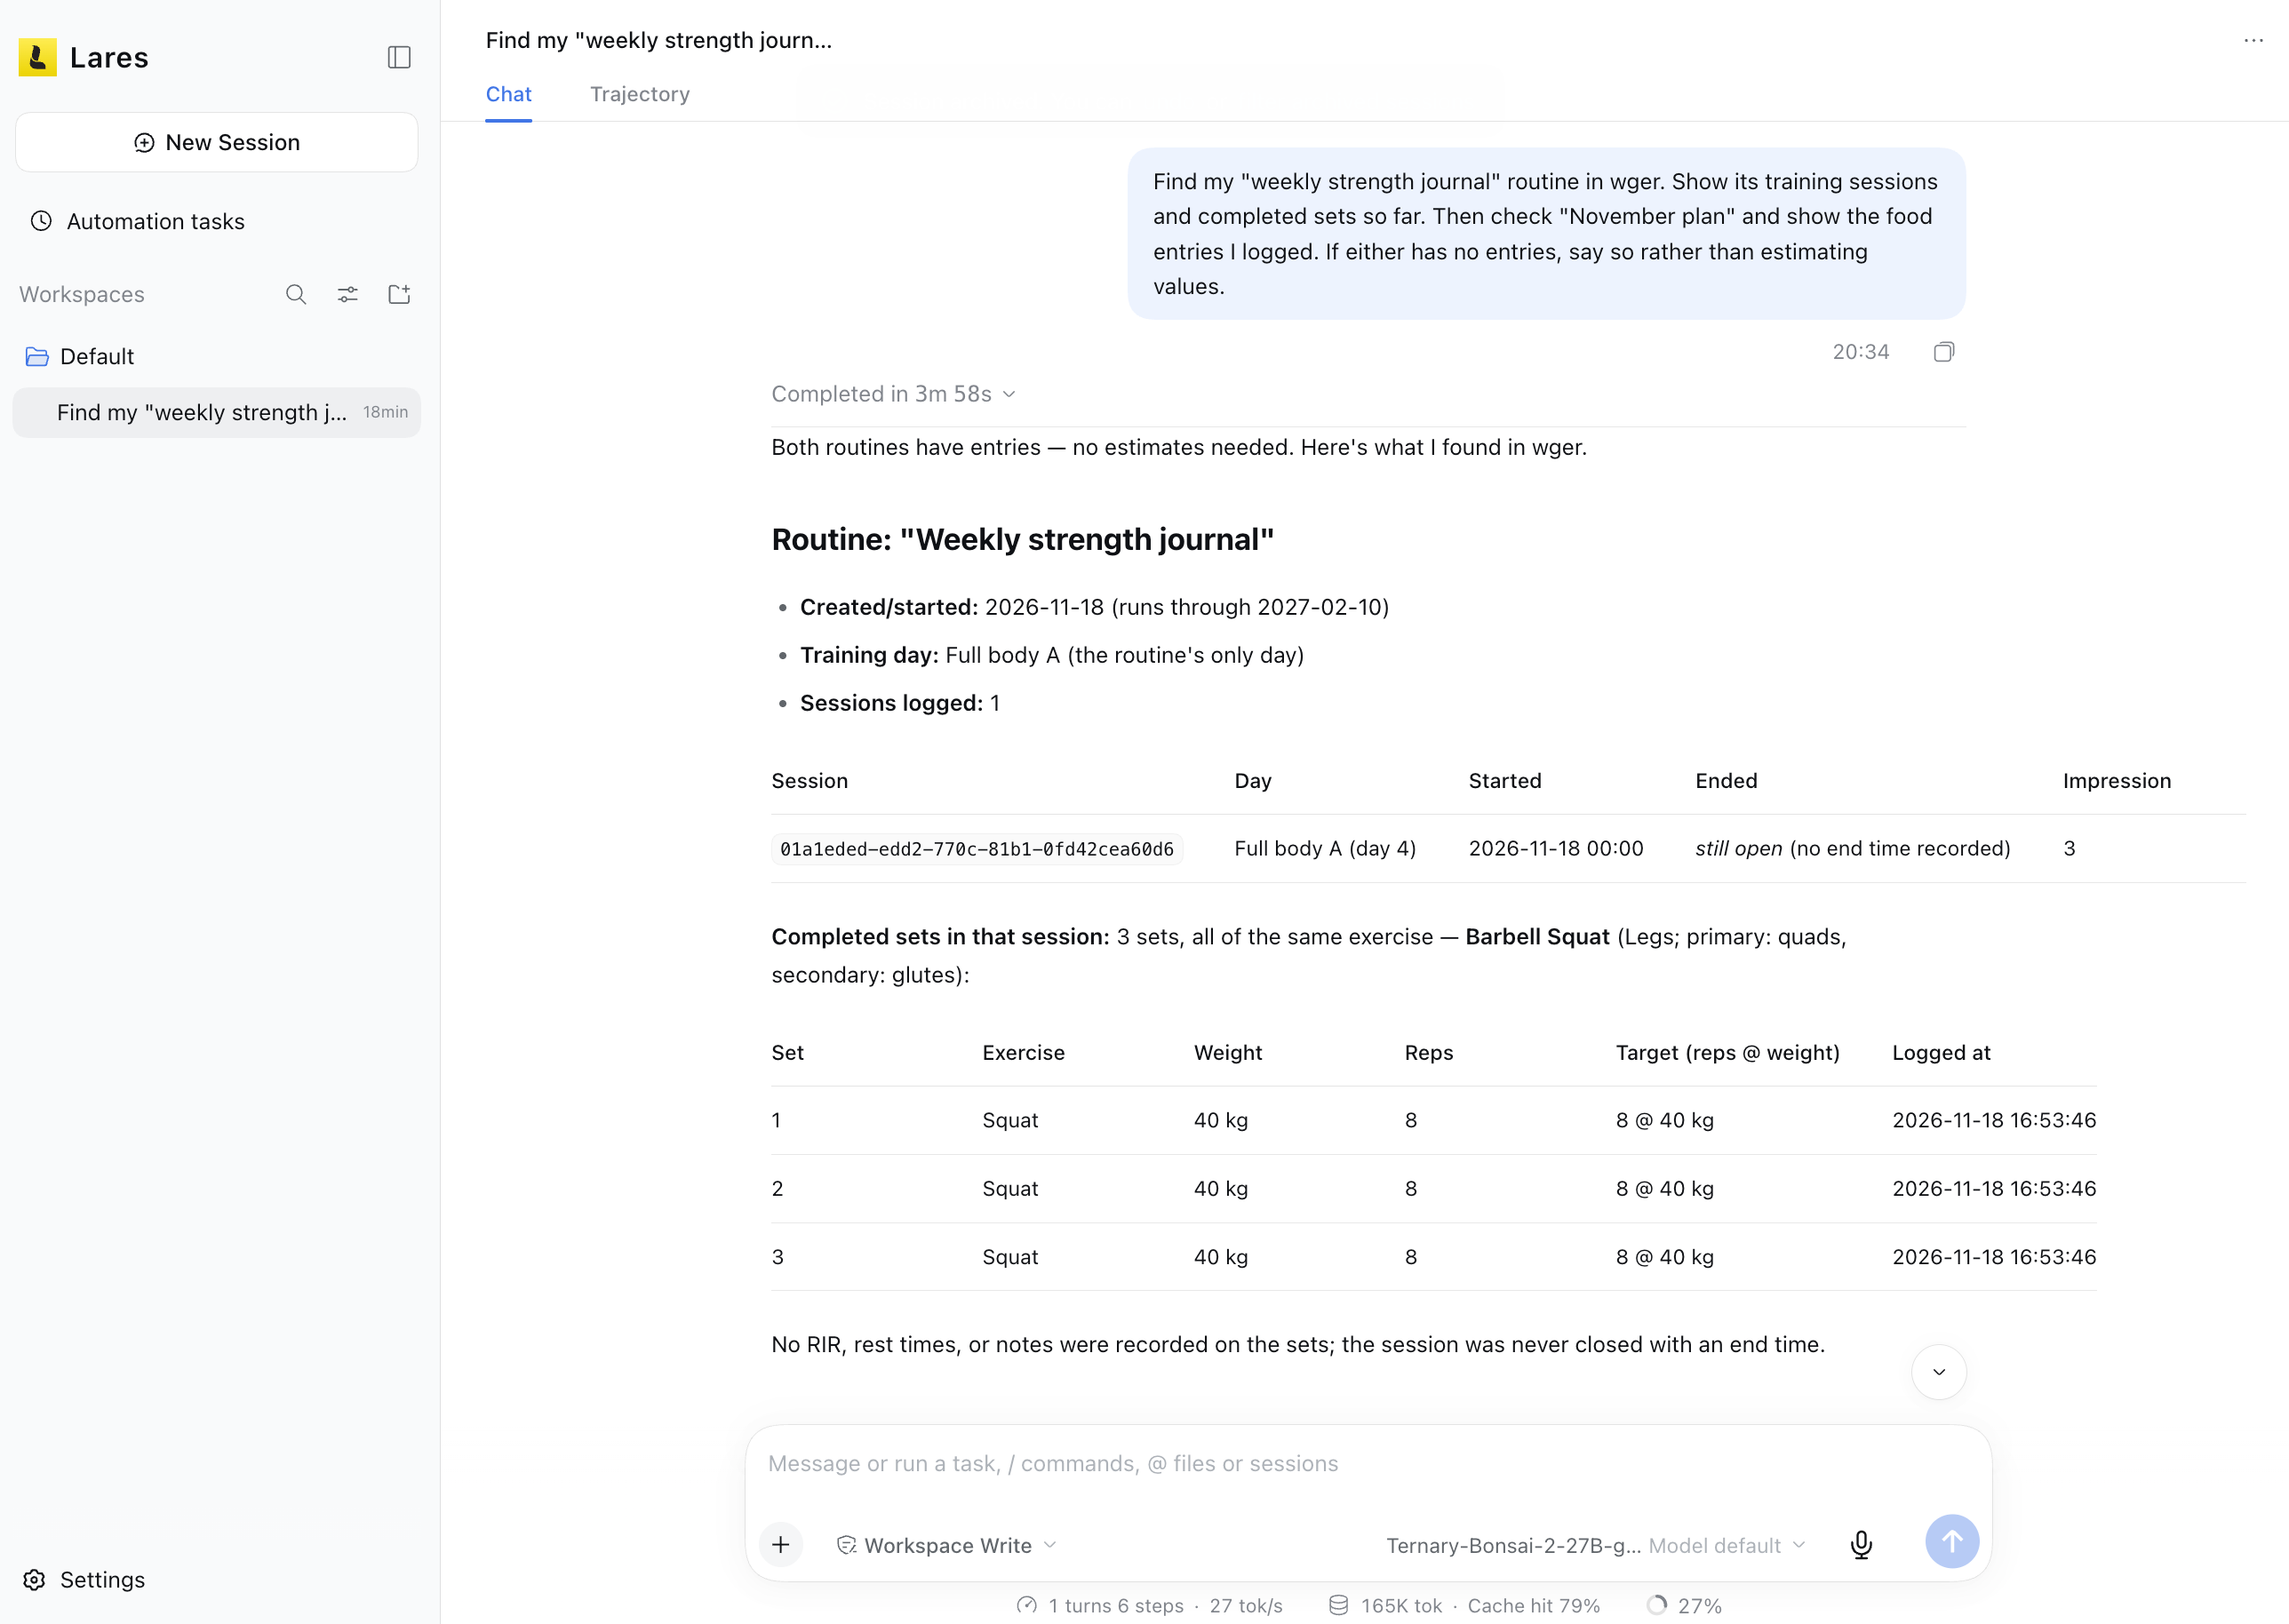
Compare the answer with the training log and the nutrition plan's Logged section in wger.
Record your body weight
Ask the assistant to save a measurement. Replace the bracketed details with your own:
I weighed [weight] [kg or lb] on [date]. Please add that to wger with
the note "[distinct note]". If I've already recorded that entry,
don't add it again. Show me the entry when you're done.
Verify the saved entry under Body weight > Weight overview in wger.
Learn more
- wger documentation: Learn about routines, nutrition, and other features.