Run local LLMs with Ollama, vLLM, llama.cpp, and SGLang
Olares provides four Engine Base applications, each built on a different inference engine: Ollama Engine Base, vLLM Engine Base, llama.cpp Engine Base, and SGLang Engine Base.
Choose the base app for the engine you want and clone it to deploy a model. Check deployment readiness in the model app, then use Router to view model details and connect clients.
Before you start
Your Olares system has been upgraded to v1.12.7 or later.
If you want to skip manual configuration and quickly try out a model, install a pre-built model app from Market instead. These apps package the recommended model-and-engine combinations validated for Olares.
Check available pre-built model apps
- Qwen3.6-27B (llama.cpp)
- Qwen3.6-35B-A3B (llama.cpp)
- Qwen3.6-27B MTP (llama.cpp)
- Qwopus3.6-27B MTP (llama.cpp)
- Gemma-4-12B (vLLM)
- Qwen3.5-9B (SGLang)
- Gemma 4 26B (Ollama)
- Ornith 35B (Ollama)
Locate Engine Base apps
Open Market and search for "Engine Base".
Four engine base apps appear: vLLM Engine Base, SGLang Engine Base, Ollama Engine Base, and llama.cpp Engine Base.
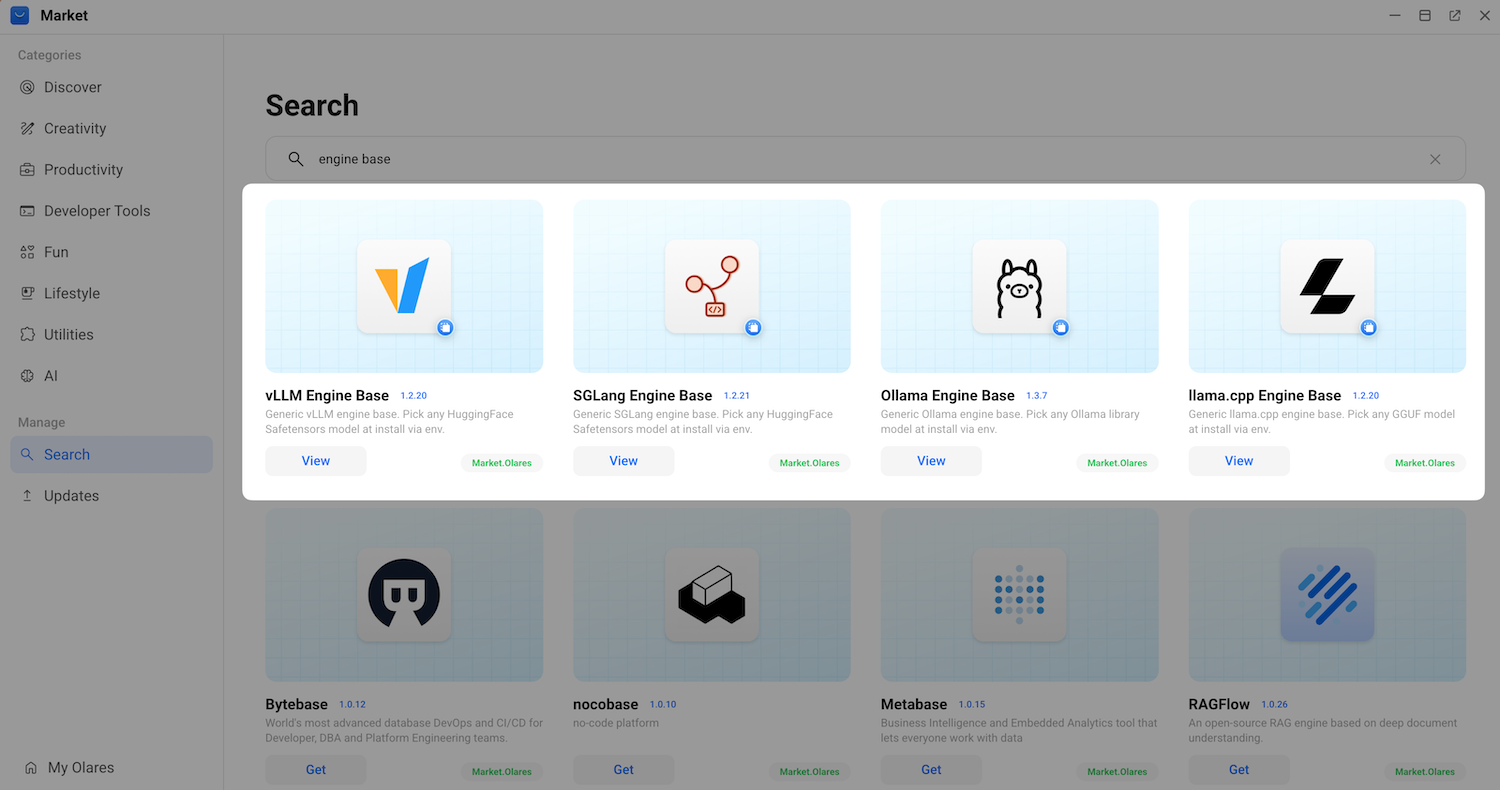
Choose the engine base that fits your model and serving goal. Start with the model format: a GGUF file uses llama.cpp, an Ollama model tag uses Ollama, and a Hugging Face repository with
.safetensorsweights uses vLLM or SGLang.Engine Base Model source When to choose llama.cpp Engine Base GGUF files from Hugging Face You want to run a quantized GGUF model, have limited GPU memory, or need CPU execution. This is the recommended engine on Olares One. Ollama Engine Base Model tags from the Ollama library You want the quickest setup and broad model compatibility for chat or embedding tasks. Ollama downloads the selected model by its native tag. SGLang Engine Base Hugging Face repositories with .safetensorsweightsYou need structured generation or advanced reasoning optimizations and the model supports SGLang. vLLM Engine Base Hugging Face repositories with .safetensorsweightsYou need high-throughput serving for several concurrent requests and the model supports vLLM. If Market already provides a pre-built app for the model, use that app unless you need to change the engine or its startup parameters. The packaged model-and-engine combination has already been validated for Olares.
Create a new model instance
An Engine Base app serves as a template. To run a model, you must first clone the base app into an independent running instance.
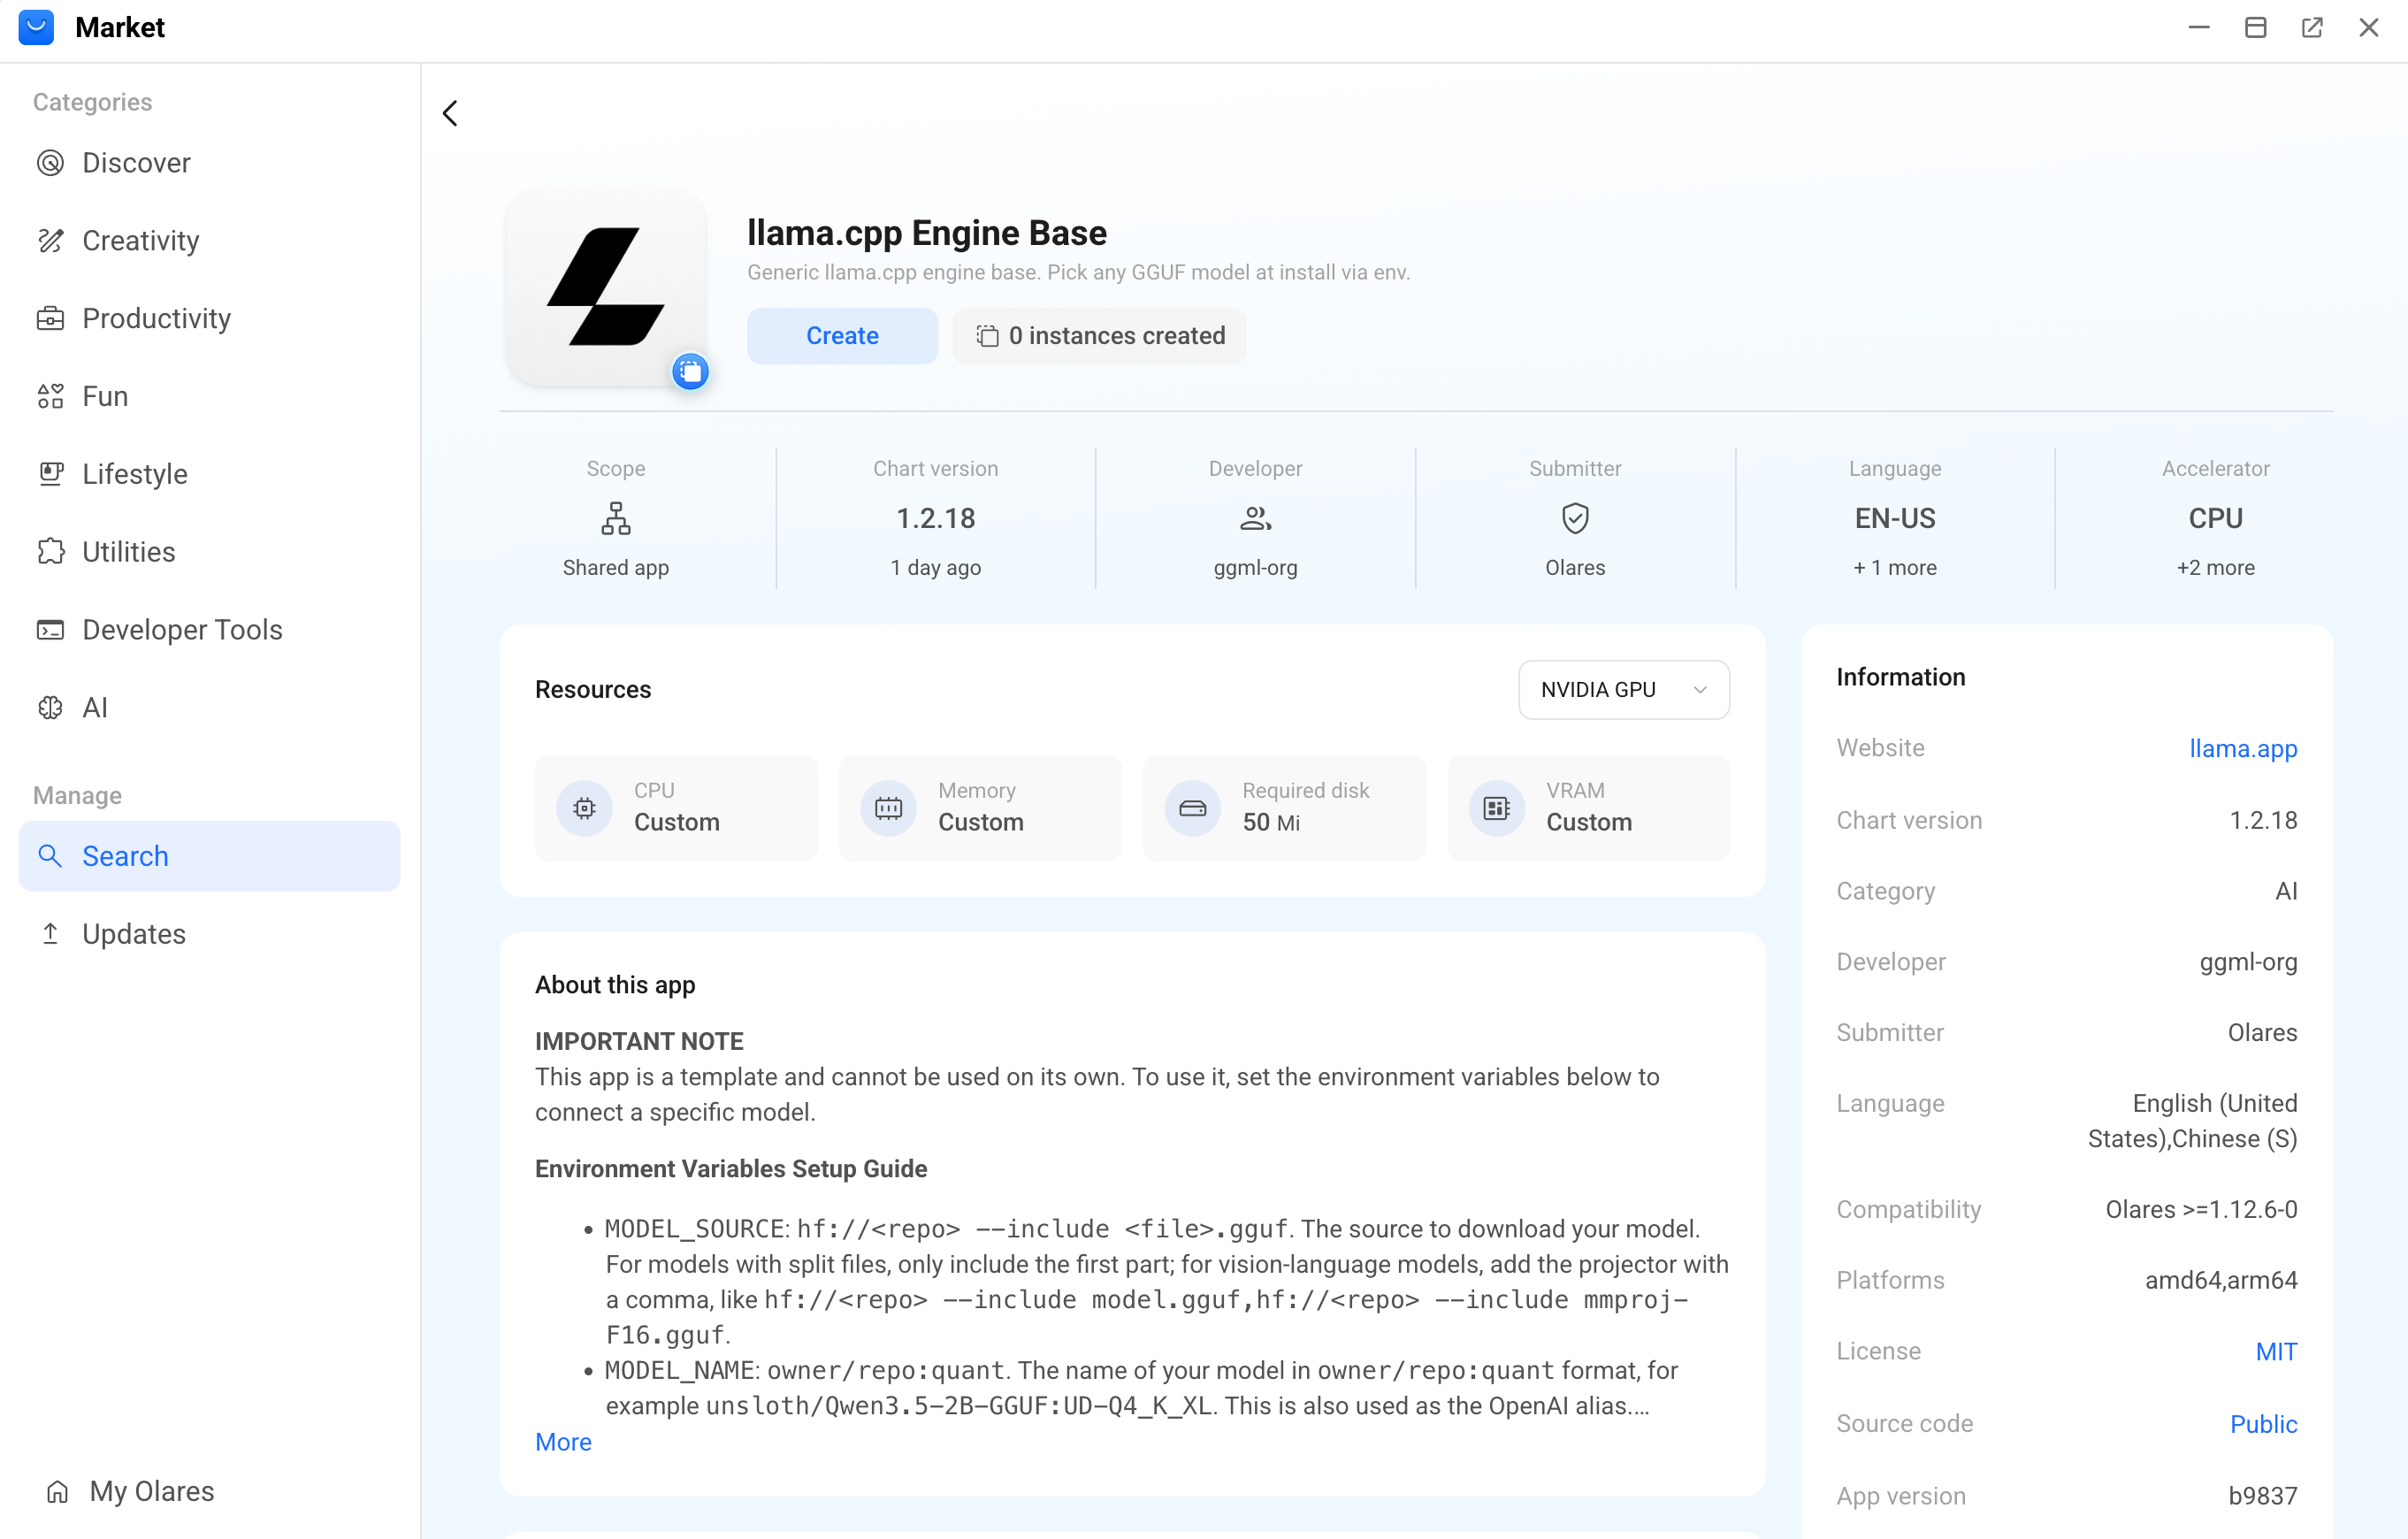
Select the base app that matches your preferred inference engine, and then click View on it. For example, llama.cpp Engine Base.
Click Create to initialize a new instance.
Select the hardware accelerator for the instance to run on, and then click Confirm.
Specify the instance identity settings:
- New app name: Enter a unique name for the instance. This name is displayed as the app name in Market and Settings. For example,
Qwen3.6-35B-A3B. - Shortcut name for [client]: Enter a unique shortcut name for the instance. This name is displayed on the Launchpad. For example,
qwen3.6-35b-a3b.
- New app name: Enter a unique name for the instance. This name is displayed as the app name in Market and Settings. For example,
Click Create to proceed to the environment configuration.
Configure engine environment variables
After creating the instance, the configuration window opens. Define where your engine pulls the model, how much memory it uses, and what capabilities it exposes to other client apps.
In the Configure environment variables for [New-app-name] window, fill in the following details according to the target model and engine.
Click Confirm to save the configuration and start the instance installation.
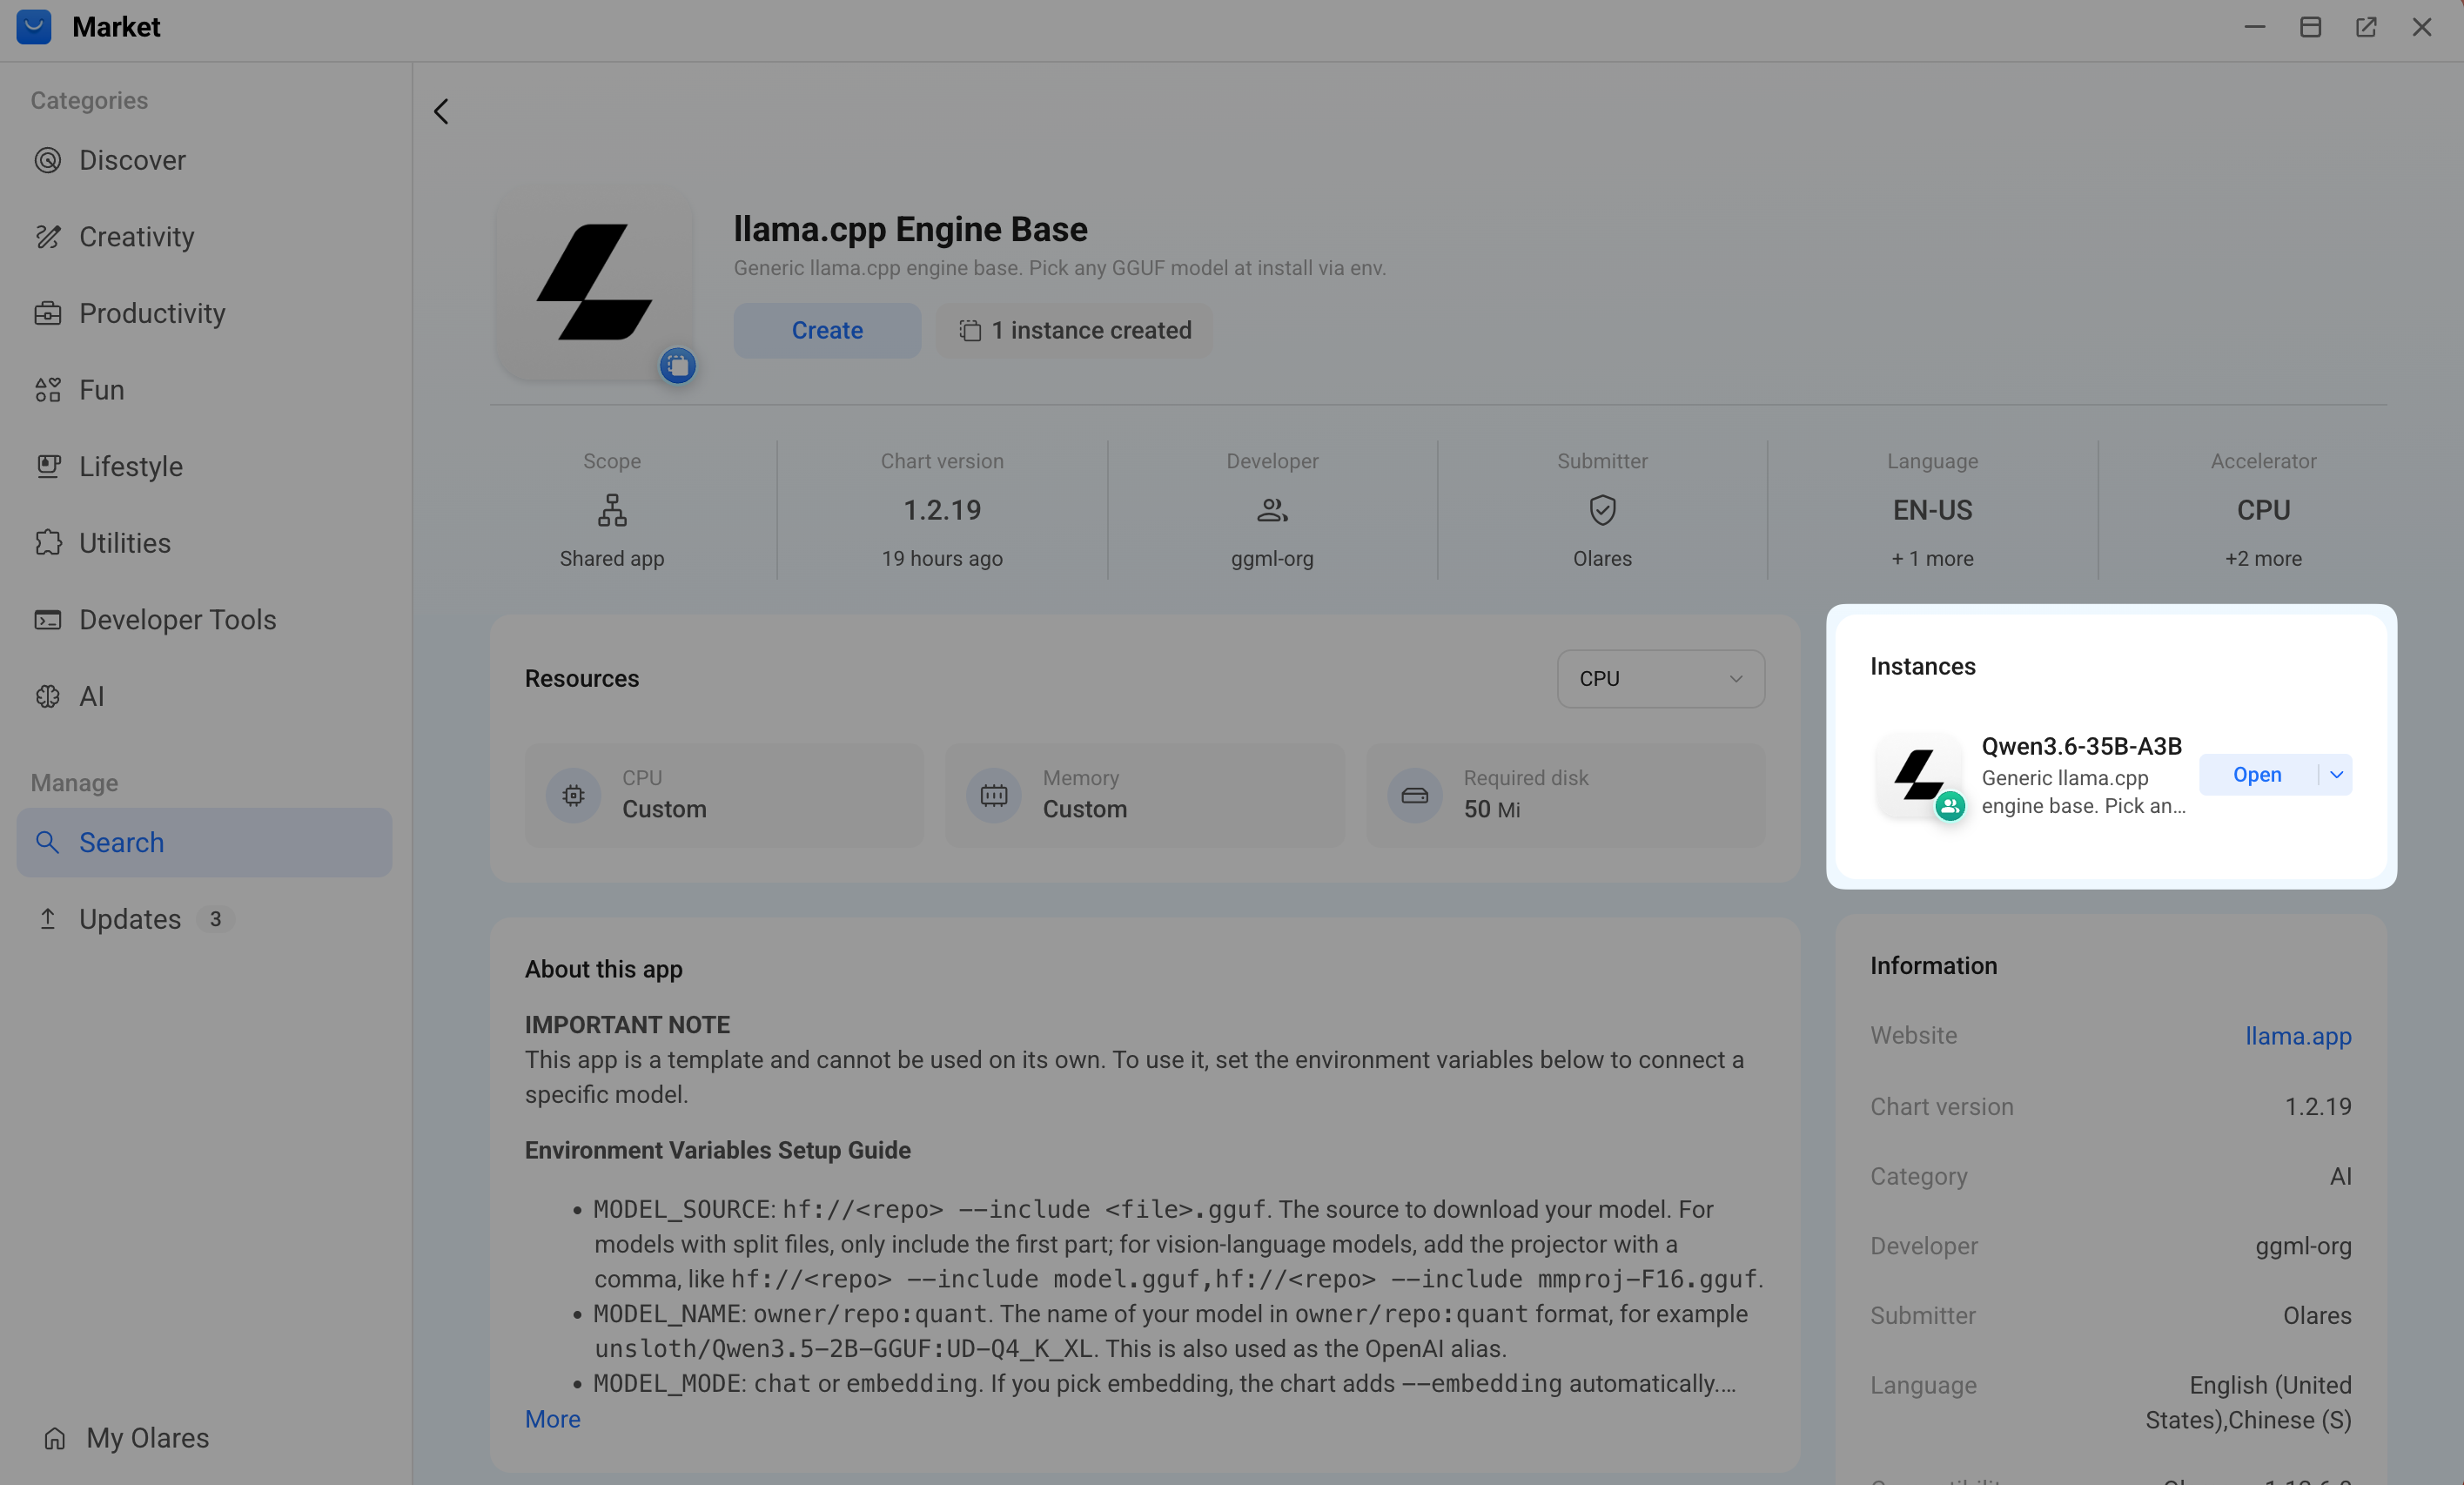
An Instances panel appears on the right side of the page, showing the installation progress. Once the setup completes, the instance's operation button changes to Open, indicating that the base service is running. A model app with the same name also appears on the Launchpad.
INFO
Model instances created from Engine Base apps show a
From templatetag next to the app name. You can see this tag when viewing the app in Market or Settings.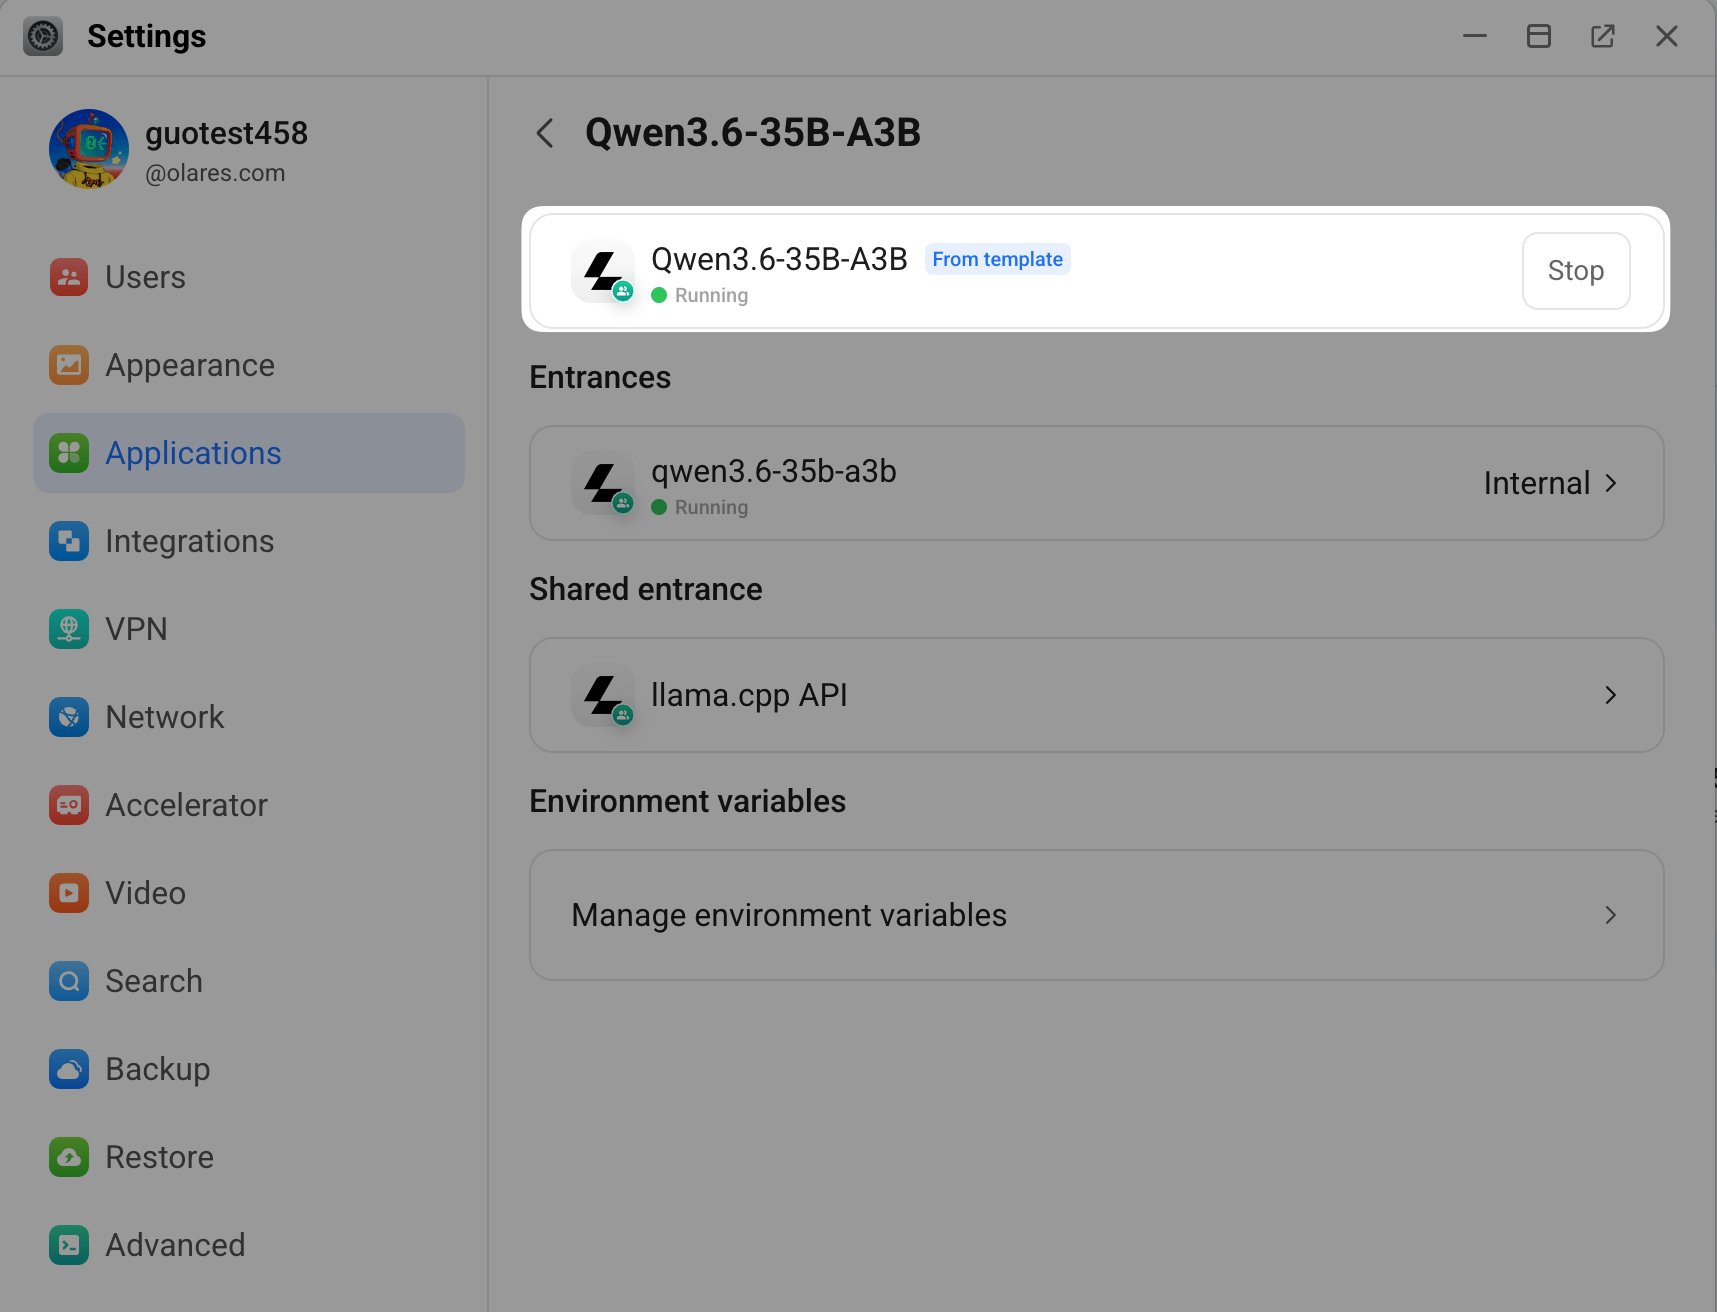
Update environment variables later
To change these variables after installation, go to Olares Settings > Applications > [App-Name] > Manage environment variables. Click the edit icon next to a variable, update its value, save your change, and then click Apply.
Monitor deployment and configure the model service
Use the model app's Model Console to track downloads and check whether the model is ready and the engine is running. View model details, context settings, and client connection information in Router.
Locate the model instance in the Instances panel on the Engine Base app details page, or find it on the Launchpad.
Open it to launch the dedicated model console.
The console opens on the Status tab by default, and the model files start downloading automatically.
Under Service status, track the readiness of the model and the engine:
- Model: Shows Ready after the files are downloaded and verified.
- Engine: Shows Running after the inference service is online.
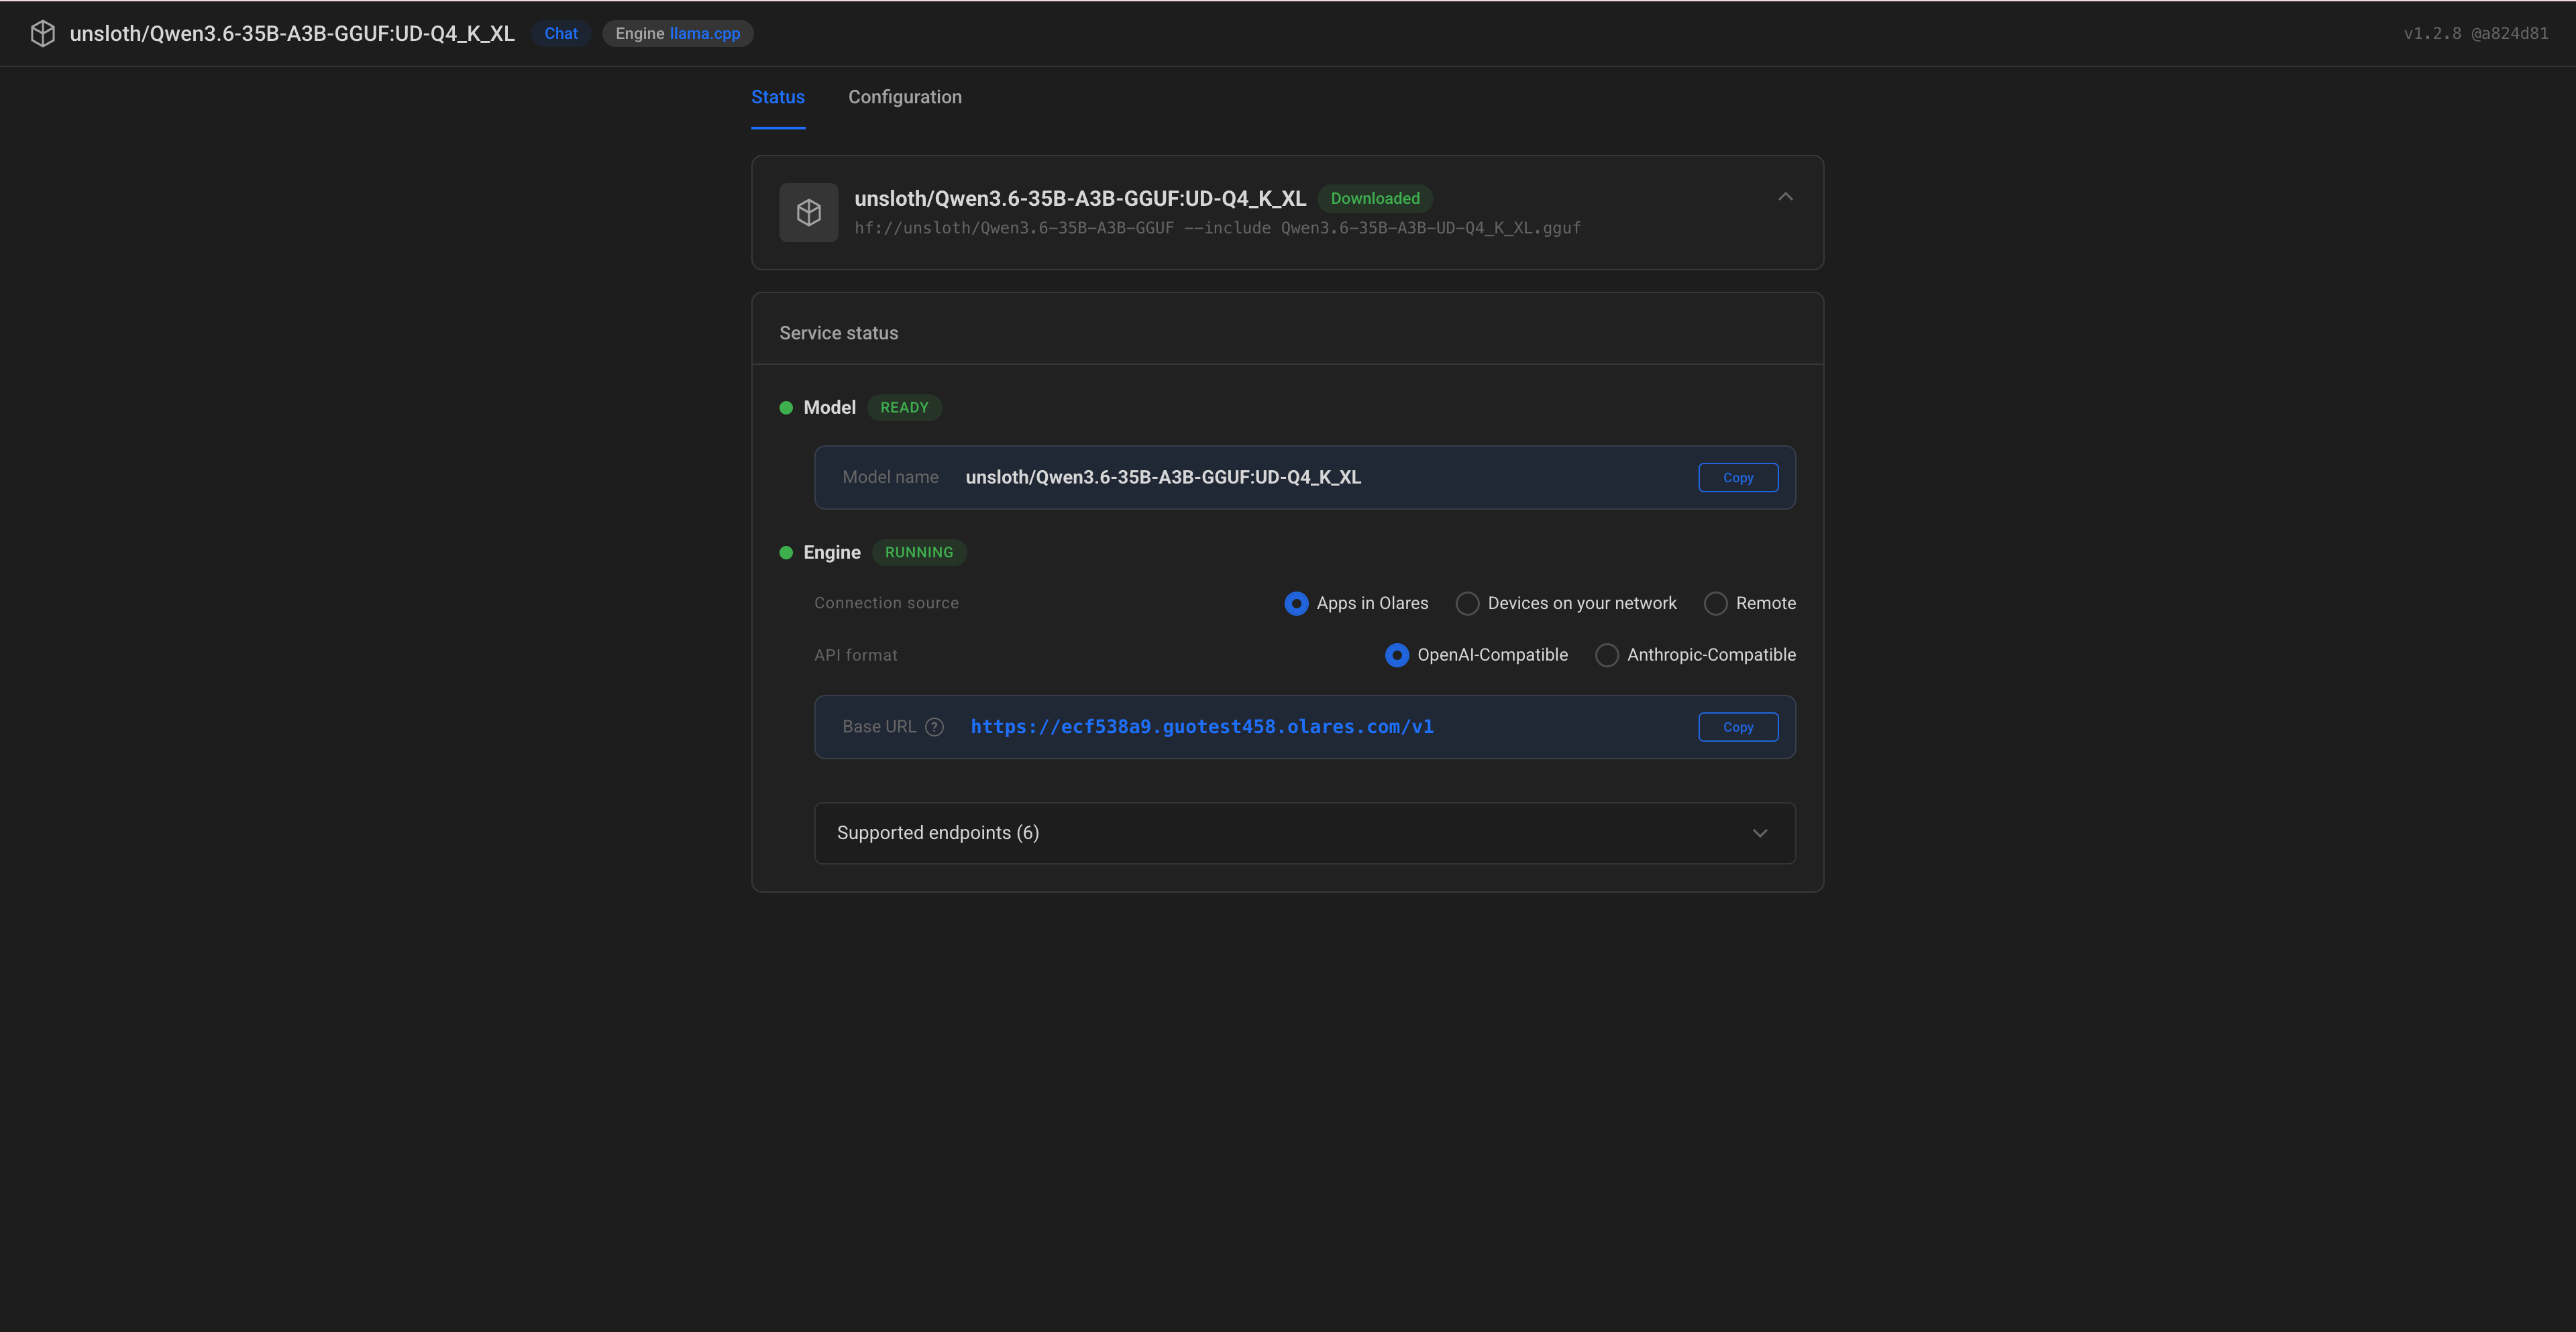
If either status does not become ready, see Model or engine is not ready.
View model details in Router
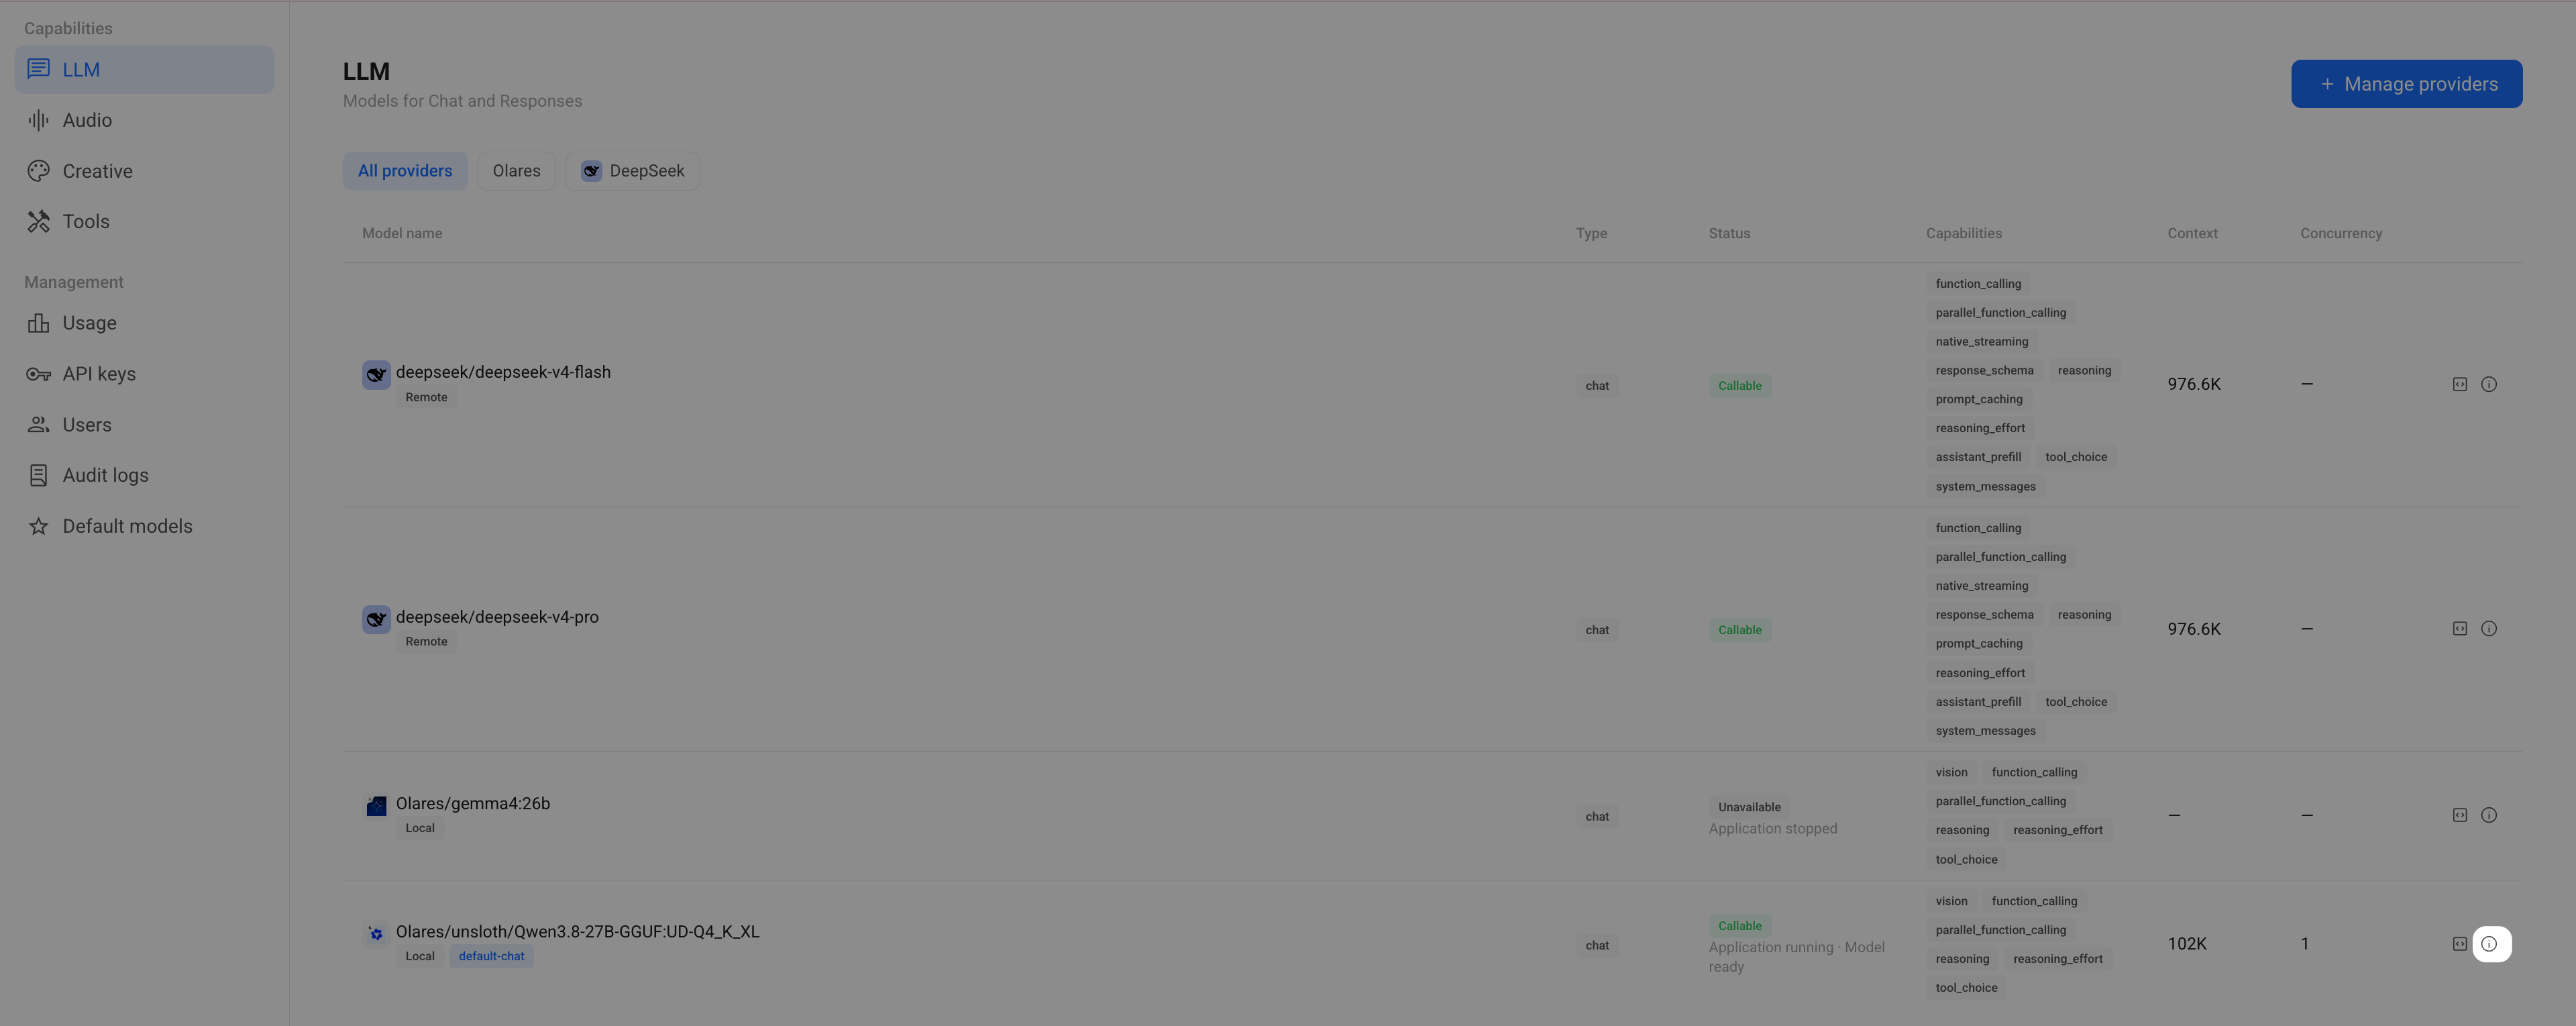
After deployment, open Router to review the model's capabilities, context window, and engine arguments. The following example uses Qwen3.8-27B (llama.cpp):
In Router, open LLM, find the model, and click the information icon at the right end of its row to open Model card.
Review Context window and Engine args. For the llama.cpp model shown below,
-c 104448gives the configured context size: 104448 tokens. The list and model card display this as 102K. Use the exact value from Engine args when a client asks for a token count.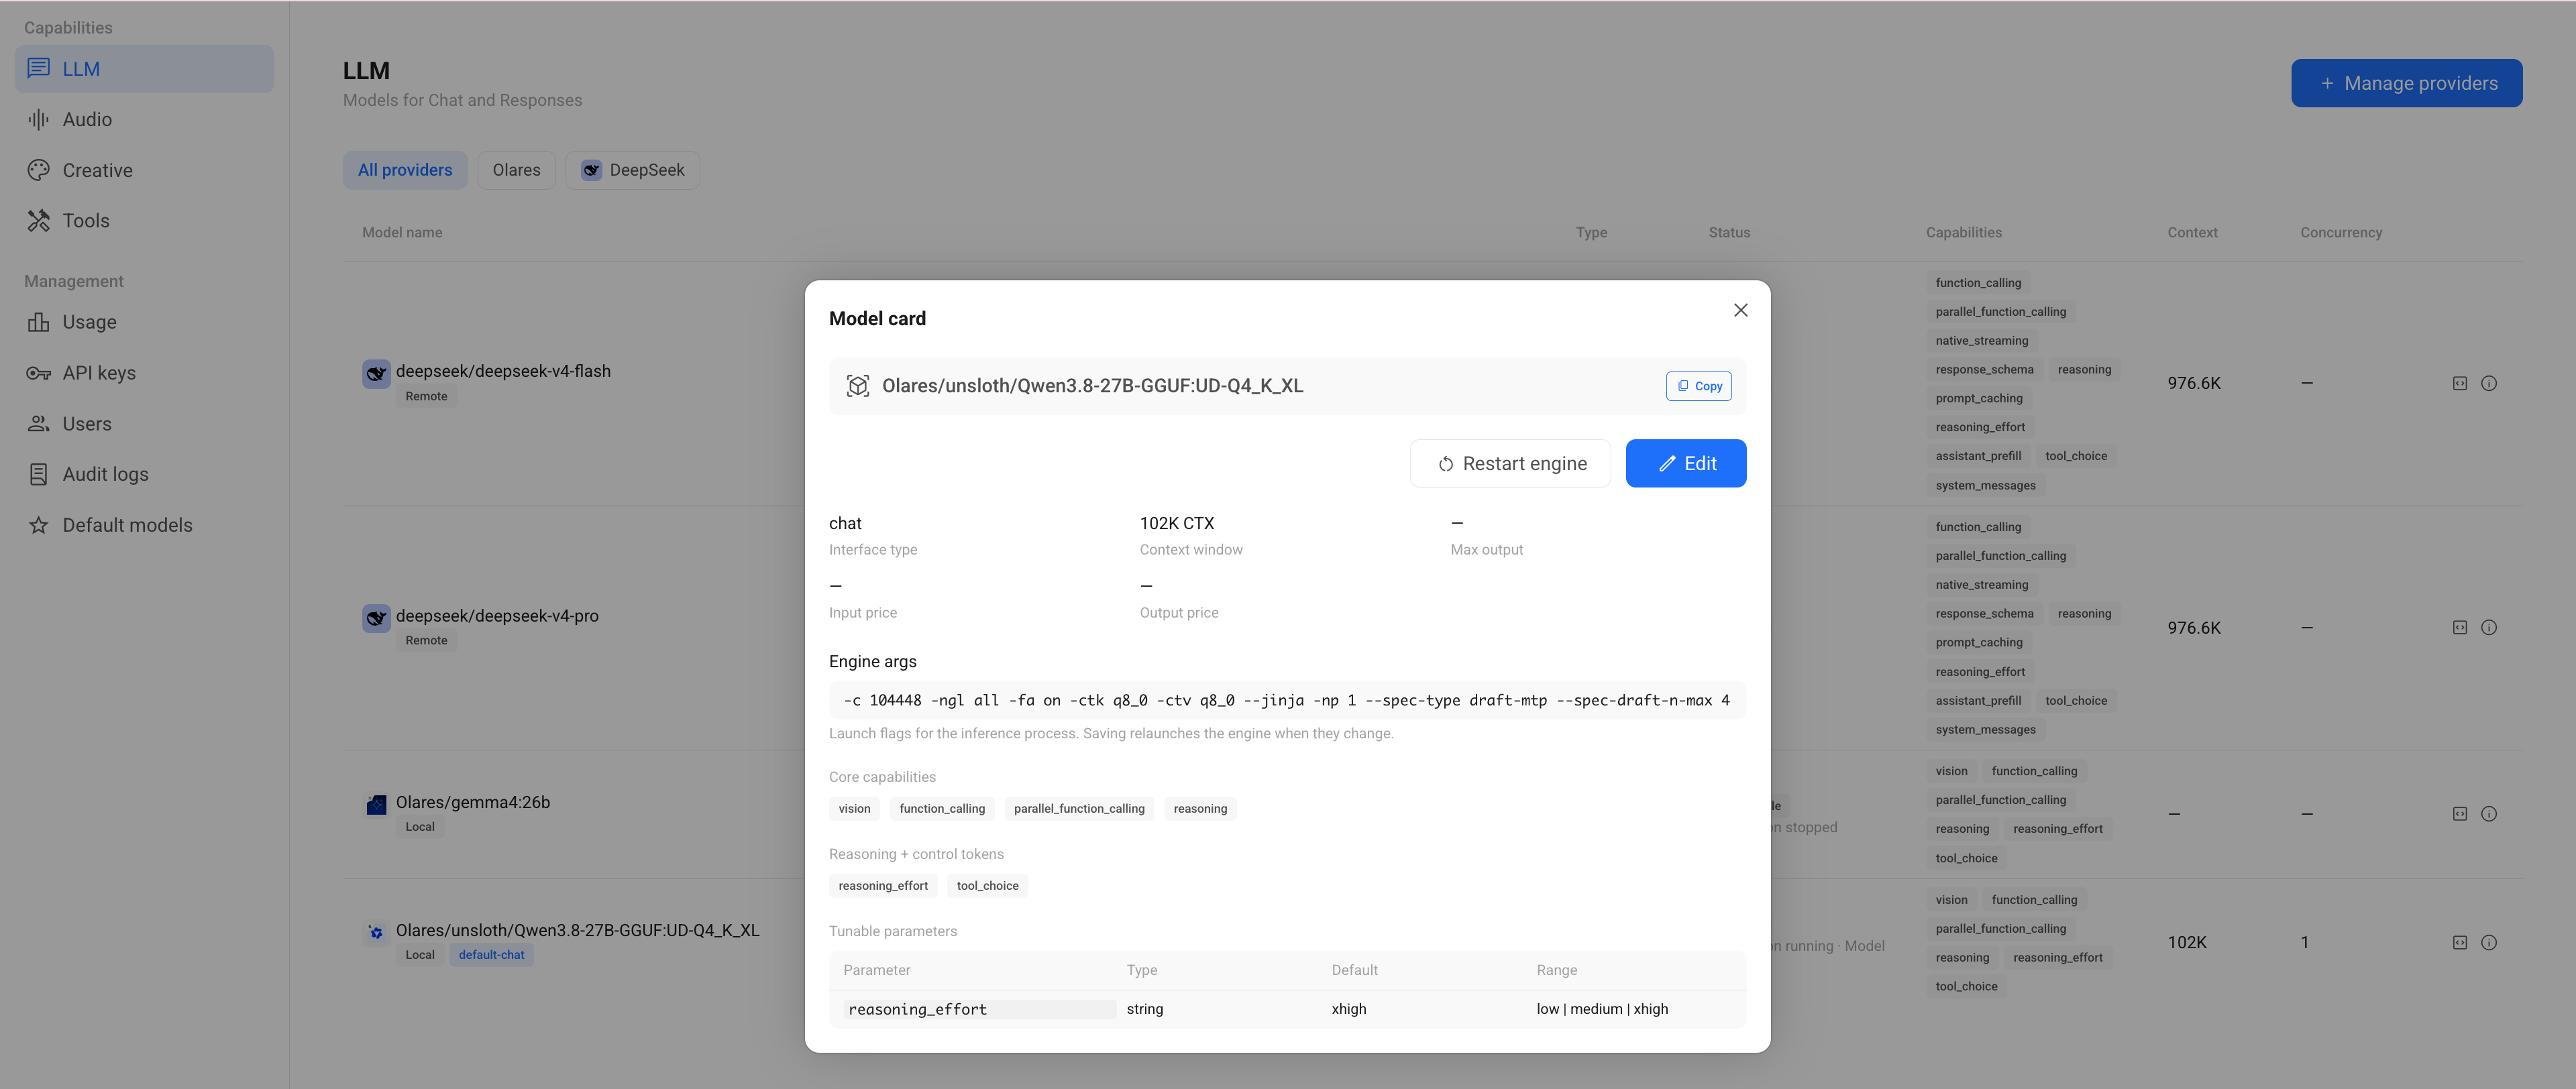
Use the value shown for your own model instance. 104448 is an example, not a fixed value for every installation. The -c parameter is specific to llama.cpp. Other engines use different context parameters.
The client's context setting must not exceed the engine's configured context size. Increasing the client setting alone does not increase the engine's capacity. If you change the model behind default-chat, review the client's context setting as well.
To change engine arguments, use Edit in the model card. Saving changed arguments relaunches the engine.
Connect client apps to the model service
On Olares 1.12.7 and later, clients connect to your model instance through Router. Router provides the client-facing URL, model name, and access controls.
Open Router from Launchpad. Find your chat model on LLM. Before sending a request, confirm that it shows Callable. If it is unavailable, check the reason shown below its status.
On Default models, select the instance as the default chat model. The app tutorials use Qwen3.8-27B (llama.cpp). You can select the chat instance you created here instead.
Return to the model row and click View connection example. Select Apps in Olares for an installed client, then copy the Base URL, including
/v1.Follow Connect OpenCode to a custom provider. Use the Router Base URL and add
default-chatas the model ID. To keep the client on this instance regardless of the default model setting, use its full Model name from Router instead.Send a short message in OpenCode. In Router, check Usage to confirm that the request reached the intended model.
For external clients, use the appropriate connection tab and a Router-issued API key. For embedding instances, use their full model name instead of default-chat. See Connect AI apps for details.
References
Engine tuning arguments
Use the ENGINE_ARGS variable to add custom settings that adjust memory usage, context limits, and processing behaviors. Separate multiple arguments with spaces. Select your inference engine below to view some commonly used tuning arguments.
Recommended models and parameters
The following per-engine recommendations are validated best practices. Use them as a starting point, then adjust for your hardware.