Create a Blender scene with Lares
Blender is a 3D creation suite for modeling, animation, and rendering. On Olares, you can use its desktop interface in a browser or ask Lares to work on the same scene through Model Context Protocol (MCP).
This guide uses Lares to build a solar-system illustration, then save an editable Blender project and a PNG in Files. You can also turn the scene into a short looping animation.
Prerequisites
- Olares 1.12.7 or later.
- Lares configured with a model that can call tools, installed on the same Olares as Blender.
Install Blender
Open Market and search for "Blender".
Click Get, then Install, and wait for installation to complete.
During installation, select a compute mode that matches your hardware and workload:
| Mode | When to choose it |
|---|---|
| Intel | Use an available Intel integrated GPU for this viewport-based example and desktop streaming, especially when a local model uses your discrete GPU. |
| CPU | Use it when no suitable GPU is available. Watching the desktop uses more CPU because the stream is software-encoded. |
| NVIDIA | Use an assigned NVIDIA GPU for heavier Blender rendering. Sharing it with a busy local model can slow both apps. |
The MCP configuration is the same in all three modes. The example below does not require an NVIDIA GPU.
Start Blender
- Open Blender from Launchpad and wait for the default scene to appear.
- Leave the Blender application running. You can close its browser tab. Lares can continue working with the scene.
The browser displays a streamed desktop. To watch scene changes with less delay, enable LarePass VPN on your computer before opening Blender.
On the same local network?
You can use the Olares .local address instead. See Access Olares services locally for the address format and Windows setup. Lares uses the internal MCP entrance regardless of how you view the desktop.
Configure Blender in Lares
Open Olares Settings and go to Applications > Blender > Entrances.
Select Blender MCP and copy its Endpoint URL.
Open Lares and go to Settings > MCP. Click Add server and enter these values:
Setting Value Server name blenderTransport Streamable HTTPMCP URL The copied endpoint. Append /mcponly if it is missing.Headers {}Click Save. Lares connects to the server and loads its tools automatically.
Start a new conversation and send:
textUse Blender MCP to inspect the current scene. Tell me the Blender version, scene name, and the names and total number of objects. Do not change anything.
Lares should call a Blender tool and report the scene contents. A new default scene normally contains Camera, Cube, and Light.
Use the Blender MCP entrance, not the Blender desktop entrance. This package's internal MCP connection does not require an application token, so leave the headers empty. Keep it internal for this same-device workflow.
Create a solar-system illustration
Save any work you want to keep before continuing. Lares changes the same scene you see in the browser, and the first prompt clears that scene.
Send the following prompts one at a time in the same conversation. Wait for each step to finish before sending the next. The sizes and speeds are for an illustration, not a scientifically accurate scale model.
Set up the sun and camera
In Files, create Home > blender-renders. Use a different folder name in all prompts if it already contains work you want to keep.
Send this prompt:
textUse Blender MCP to start a new solar-system illustration. Clear the current scene. Put an orange glowing sun of radius 1.5 at the center. Add a point light at the sun with energy 26000 and shadows disabled. Put a 42 mm camera at (14, -36, 13.5), looking at the center. Use Eevee (BLENDER_EEVEE), 48 viewport samples, and a 1600x900 image. Render a PNG to /config/Home/blender-renders/lares-solar-system.png. For this Olares package, use bpy.ops.render.opengl(write_still=True, animation=False) in a VIEW_3D temp_override with CAMERA view and RENDERED shading. Do not use bpy.ops.render.render() for this MCP workflow. Use only bpy, bmesh, and mathutils. Complete this step in one execute_blender_code call and report the saved image path.Open Home > blender-renders in Files and check that
lares-solar-system.pngexists before continuing.
The last paragraph gives Lares the rendering settings for this package. You do not need to write or run Python yourself. Later prompts intentionally replace this example PNG as the scene develops.
Add planets and orbits
Send:
Continue the current Blender scene without clearing it. Add the eight
planets in order from Mercury to Neptune, with colors that suggest each
planet. Place them at different angles on circular orbits in the XY plane.

Use these orbit-radius / planet-radius pairs in order:
3.0/0.30, 4.2/0.48, 5.7/0.54, 7.1/0.38,
9.3/1.45, 11.4/1.15, 13.0/0.80, 14.3/0.78.

Draw a thin, dim blue ring for each orbit, with tube radius 0.02.
Keep the sun and camera. Render the PNG again using the same viewport
method and path. Complete this step in one execute_blender_code call.
Check the updated image. If planets overlap too much, ask Lares to spread them around their orbits before adding details.
Add surface details
Send:
Continue the current scene. Give Jupiter and Saturn broad horizontal
cloud bands. Add three thin, flattened rings around Saturn. Give Earth
blue oceans and green land, and add a small moon beside it.

Use procedural materials, without downloading textures. Keep the camera
and orbits unchanged. Render the PNG again with the same viewport method.
Finish and save
Send:
Finish the current solar-system illustration. Add a cool fill light at
(-24, -30, 18) with energy 6000 and another area light at (20, 26, 10)
with energy 3000. Aim both at the center. Add a dark starry background.

Keep all eight planets visible. Render the PNG again with the same
viewport method, then save the editable project to
/config/Home/blender-renders/lares-solar-system.blend.
Tell me where to find both files in Olares Files.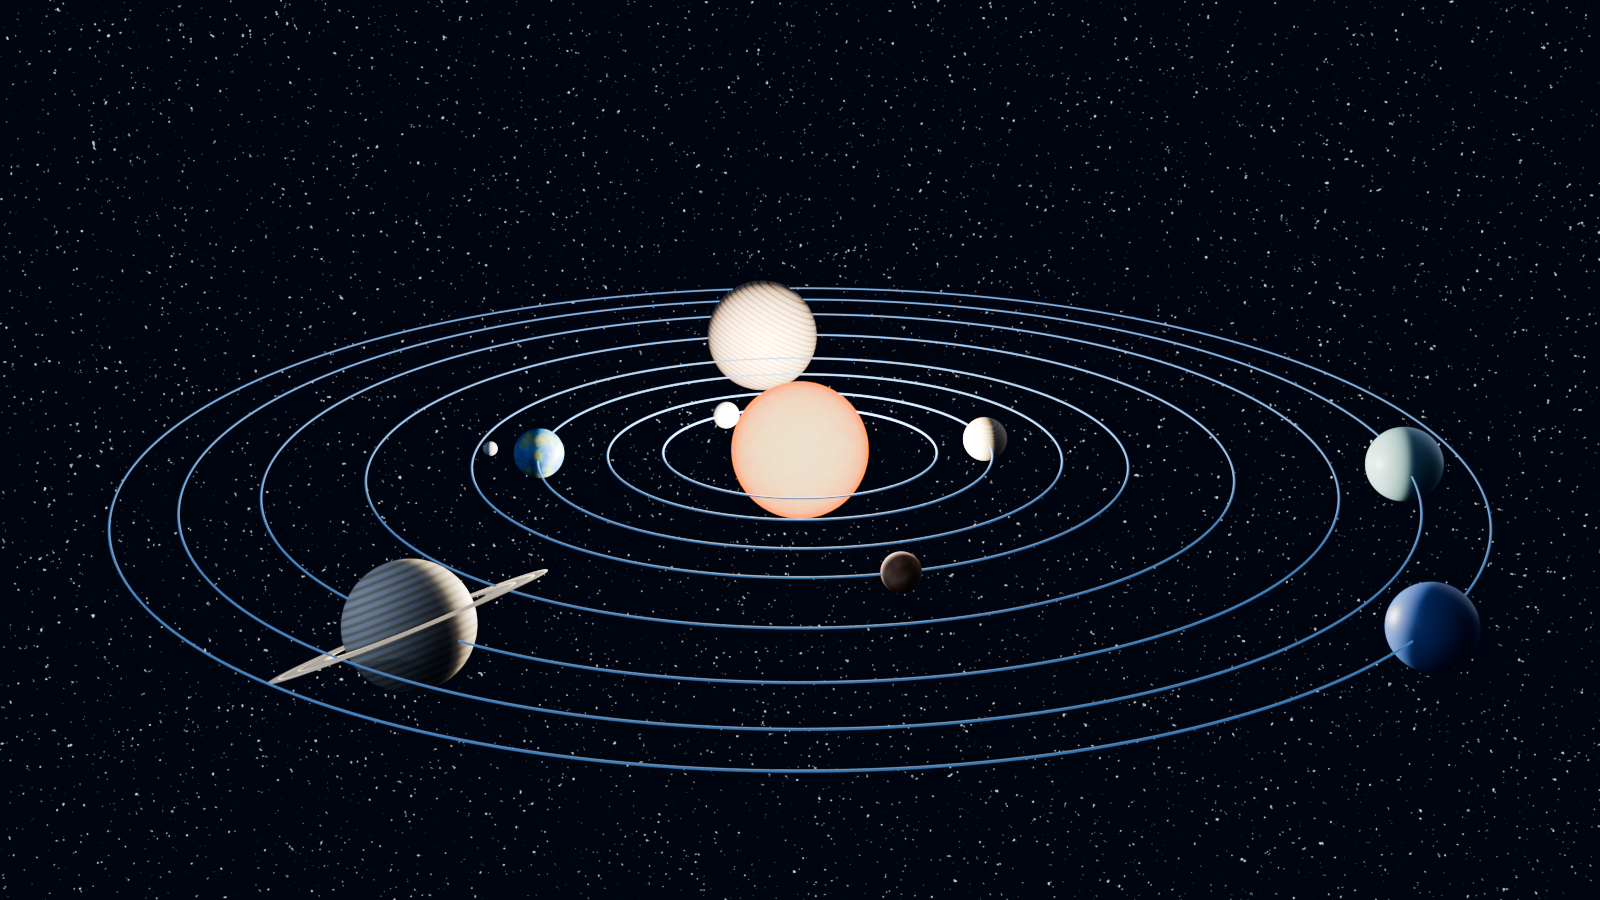
This example was rendered with Blender on Olares. Your result can differ with the model and any follow-up changes.
Find and use your files
Open Files and go to Home > blender-renders:
| File | What you can do with it |
|---|---|
lares-solar-system.png | Preview, download, or share the rendered image. |
lares-solar-system.blend | Reopen the project in Blender to continue editing. |
Blender's /config/Home corresponds to Home in Files. Lares and Blender have separate working folders, so ask Blender to save shared outputs under /config/Home, not /tmp or Lares's own workspace.
Animate the planets
Once the still image looks right, continue in the same conversation. This example produces 72 frames at 24 frames per second, making a three-second loop.
Ask Lares to set up the motion before rendering:
textAnimate the current solar system without clearing it or changing the camera. Use frames 1-72 at 24 fps. All planets should orbit counterclockwise when viewed from above, at a steady speed. Give Mercury, Venus, Earth, Mars, Jupiter, Saturn, Uranus, and Neptune 8, 6, 5, 4, 3, 2, 2, and 1 full orbits respectively over the loop. Keep the orbit rings, sun, and camera still. Keep each planet on its orbit and Saturn's rings attached to Saturn. Drive each planet's orbit with an Empty at the origin and a linear frame expression: start_angle + turns * 2 * pi * (frame - 1) / 72. Do not use eased keyframes. Frame 73 should match frame 1. Export only frames 1-72. Report the orbit counts before rendering.Check the reported counts, then ask:
textRender frames 1-72 at 960x540, with 24 viewport samples, as JPEG images at quality 92. Use the same VIEW_3D camera and rendered-shading context with bpy.ops.render.opengl(animation=True). Set the output prefix to /config/Home/blender-renders/lares-solar-system-frames/f. Use image output, not FFMPEG. Save the updated .blend project. When finished, report the output folder and number of saved frames.In Files, open Home > blender-renders > lares-solar-system-frames. Check that it contains 72 images.
Convert the frames to an MP4
The Blender build covered by this guide does not include FFmpeg video output. Download the frame folder to a computer with FFmpeg installed. Open a terminal in that folder and run:
ffmpeg -framerate 24 -start_number 1 -i f%04d.jpg -c:v libx264 -pix_fmt yuv420p -crf 20 solar-system.mp4This creates solar-system.mp4 beside the downloaded frames. Use a new filename for another export.
FAQs
Why can't Lares find Blender tools?
Check that Blender is running and that the server is enabled in Lares. Confirm the transport is Streamable HTTP and the URL comes from Blender MCP, with /mcp at the end. If the connection still fails, open Blender from Launchpad once and retry the read-only scene check.
Do I need to leave the browser tab open?
No. Keep the Blender application running, but open its browser tab only when you want to watch or edit the scene. For a sluggish desktop stream, use LarePass VPN or the local address described above.
Why was the project saved without a PNG?
In this package's MCP workflow, regular rendering through bpy.ops.render.render() can finish without writing an image. Ask Lares to use the viewport render method in the first prompt, then check Files again. This workaround applies to the package covered by this guide.
Why is Lares taking a long time?
Ask for one scene change at a time. For example, split surface details into separate requests for the cloud bands, Saturn's rings, and Earth. Wait for each tool call to finish before asking for the next change.
Learn more
- Lares: Configure the assistant used in this example.
- Access Olares services locally: Connect to the streamed desktop from your computer.