Automate workflows with n8n
n8n is a self-hostable workflow automation tool built around a visual node editor. You can connect apps and APIs, transform data, run JavaScript when a workflow needs custom logic, and trigger automations from schedules, webhooks, forms, or events.
On Olares, n8n runs on your own device, so your workflow definitions, credentials, and execution history stay under your control.
This guide uses release monitoring as a practical example. The same patterns apply to many automations: calling an API, transforming data, saving results to another app, and receiving real-time events through webhooks.
Learning objectives
In this guide, you will learn how to:
- Install n8n from Market.
- Create the first n8n owner account.
- Build a workflow that calls an API and transforms the response.
- Save workflow results to another app, using NocoDB as an example.
- Receive real-time events through webhooks, using GitHub releases as an example.
- Download and import workflows as JSON.
Install n8n
Open Market and search for "n8n".
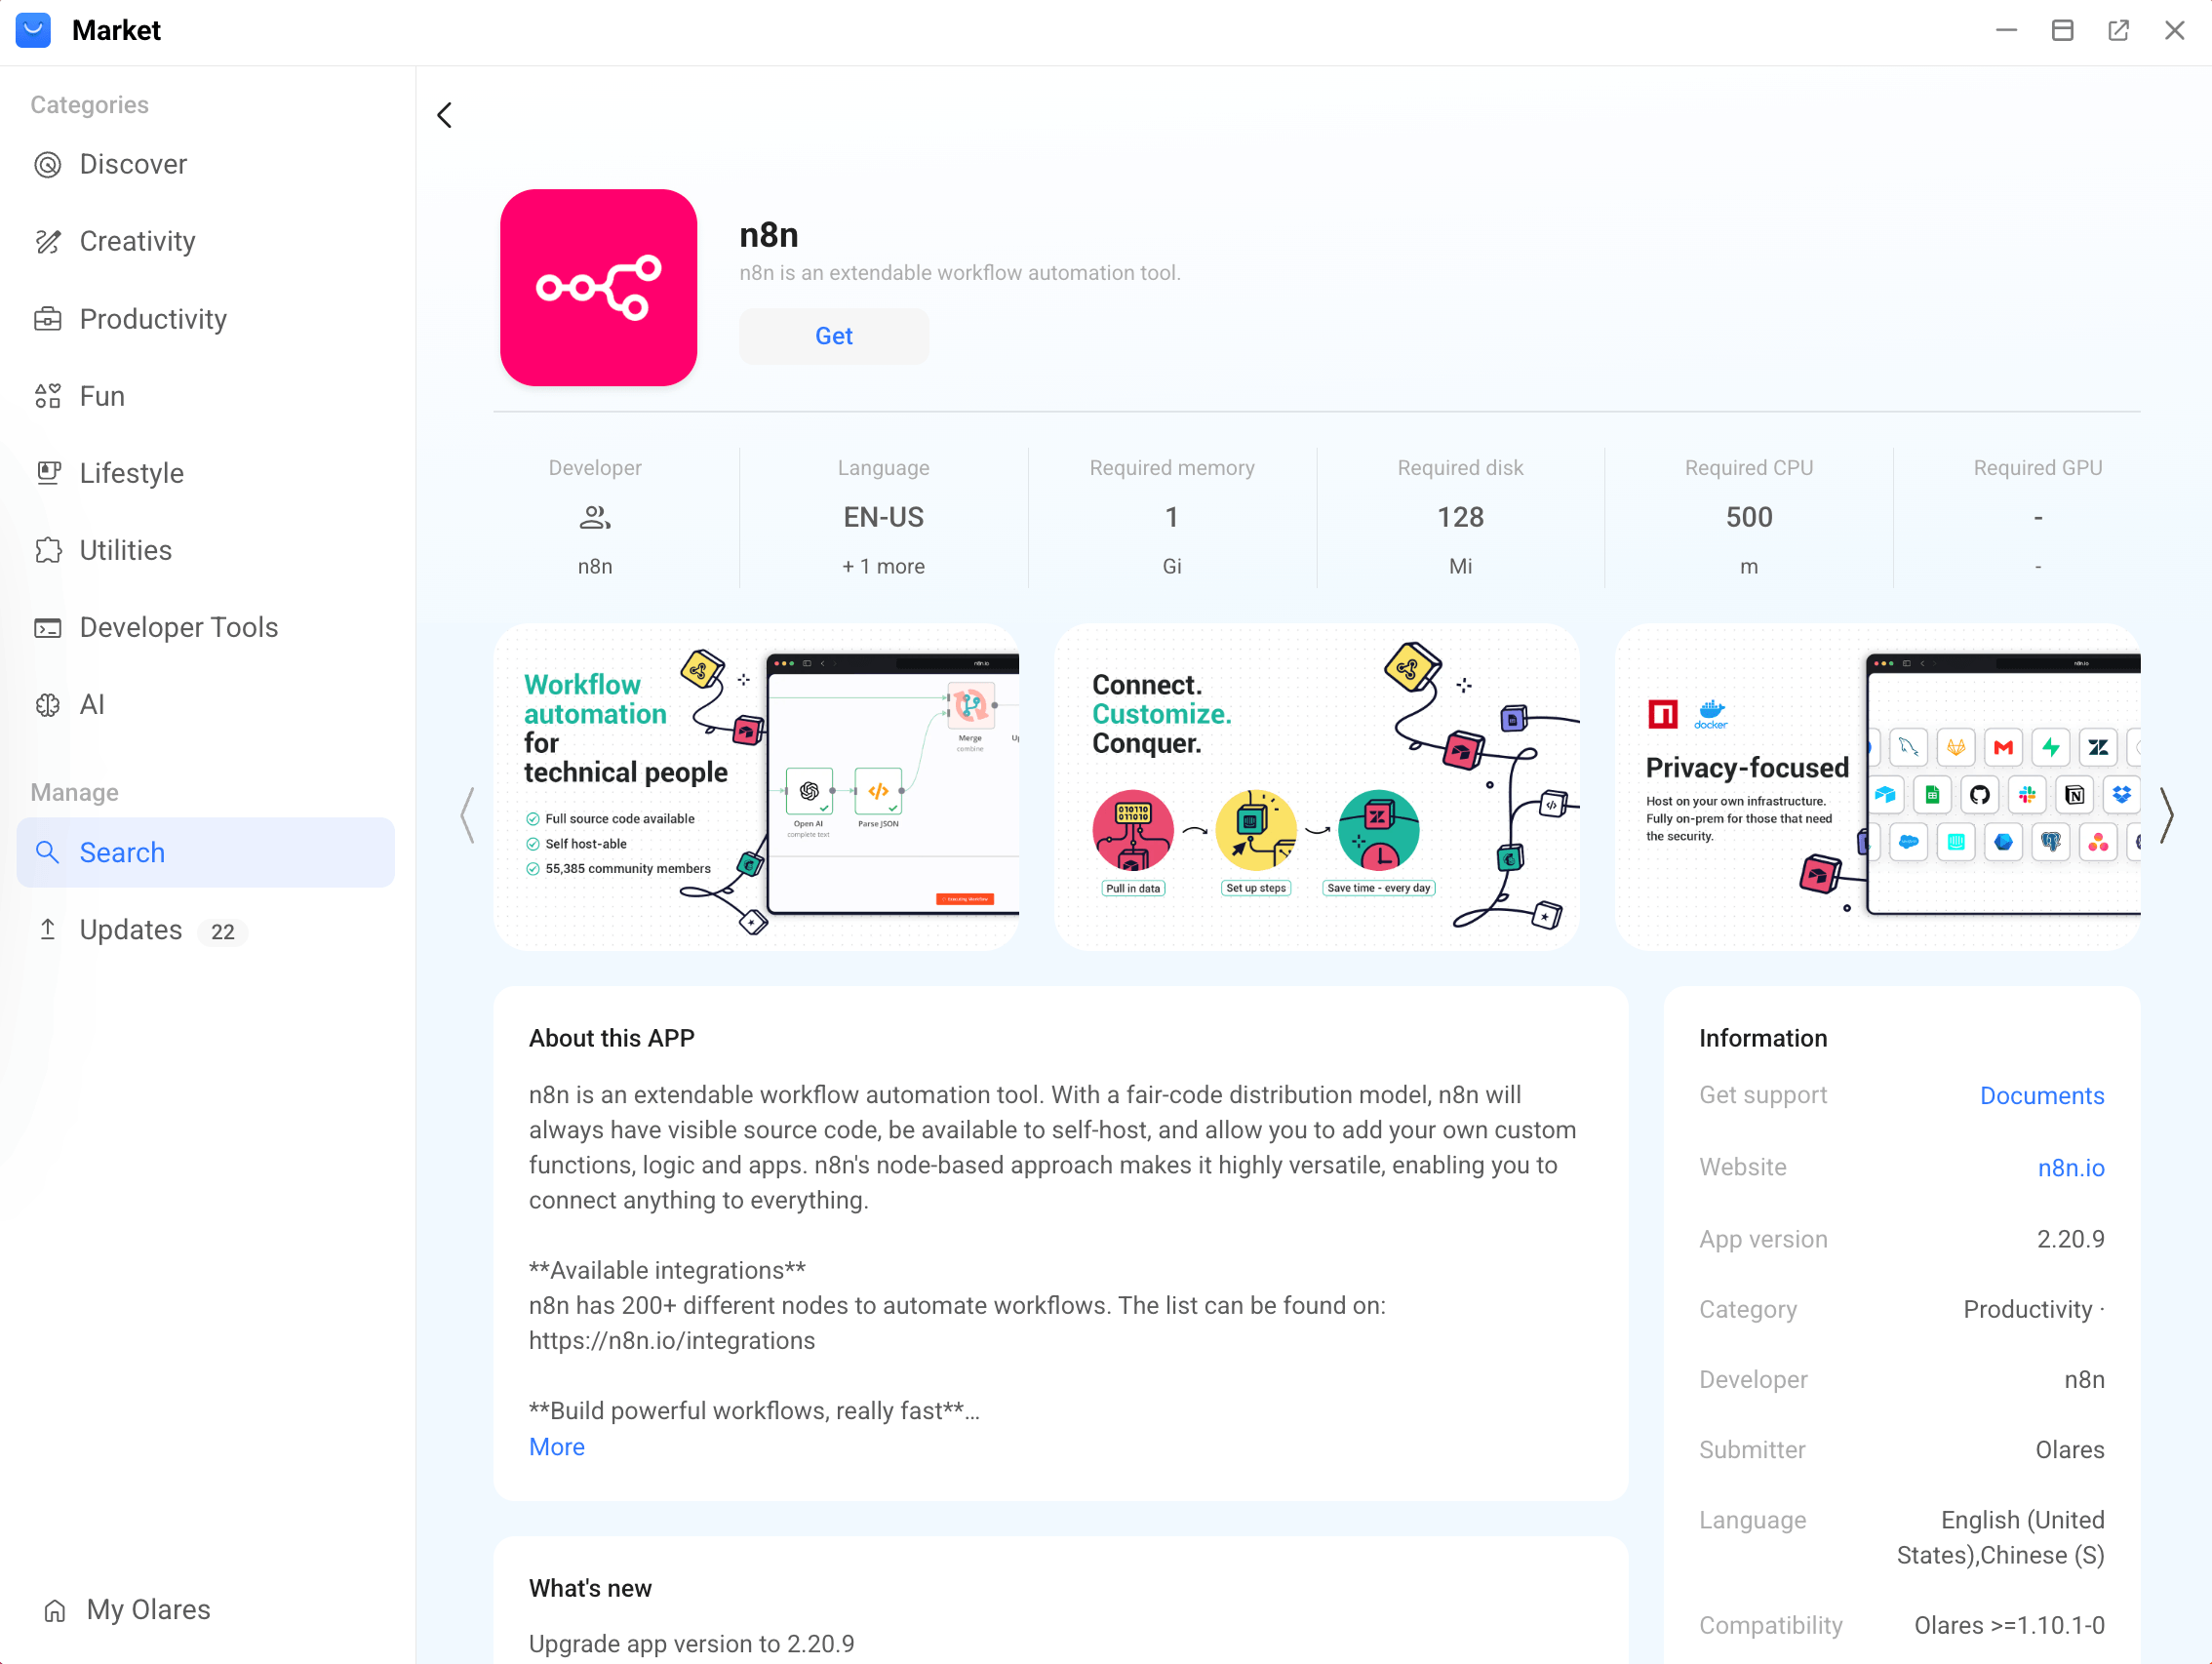
Click Get, then Install, and wait for installation to complete.
Set up n8n
Open n8n from Launchpad.
On the setup page, enter your email, first name, last name, and password. The first registered user automatically becomes the owner of the n8n instance.
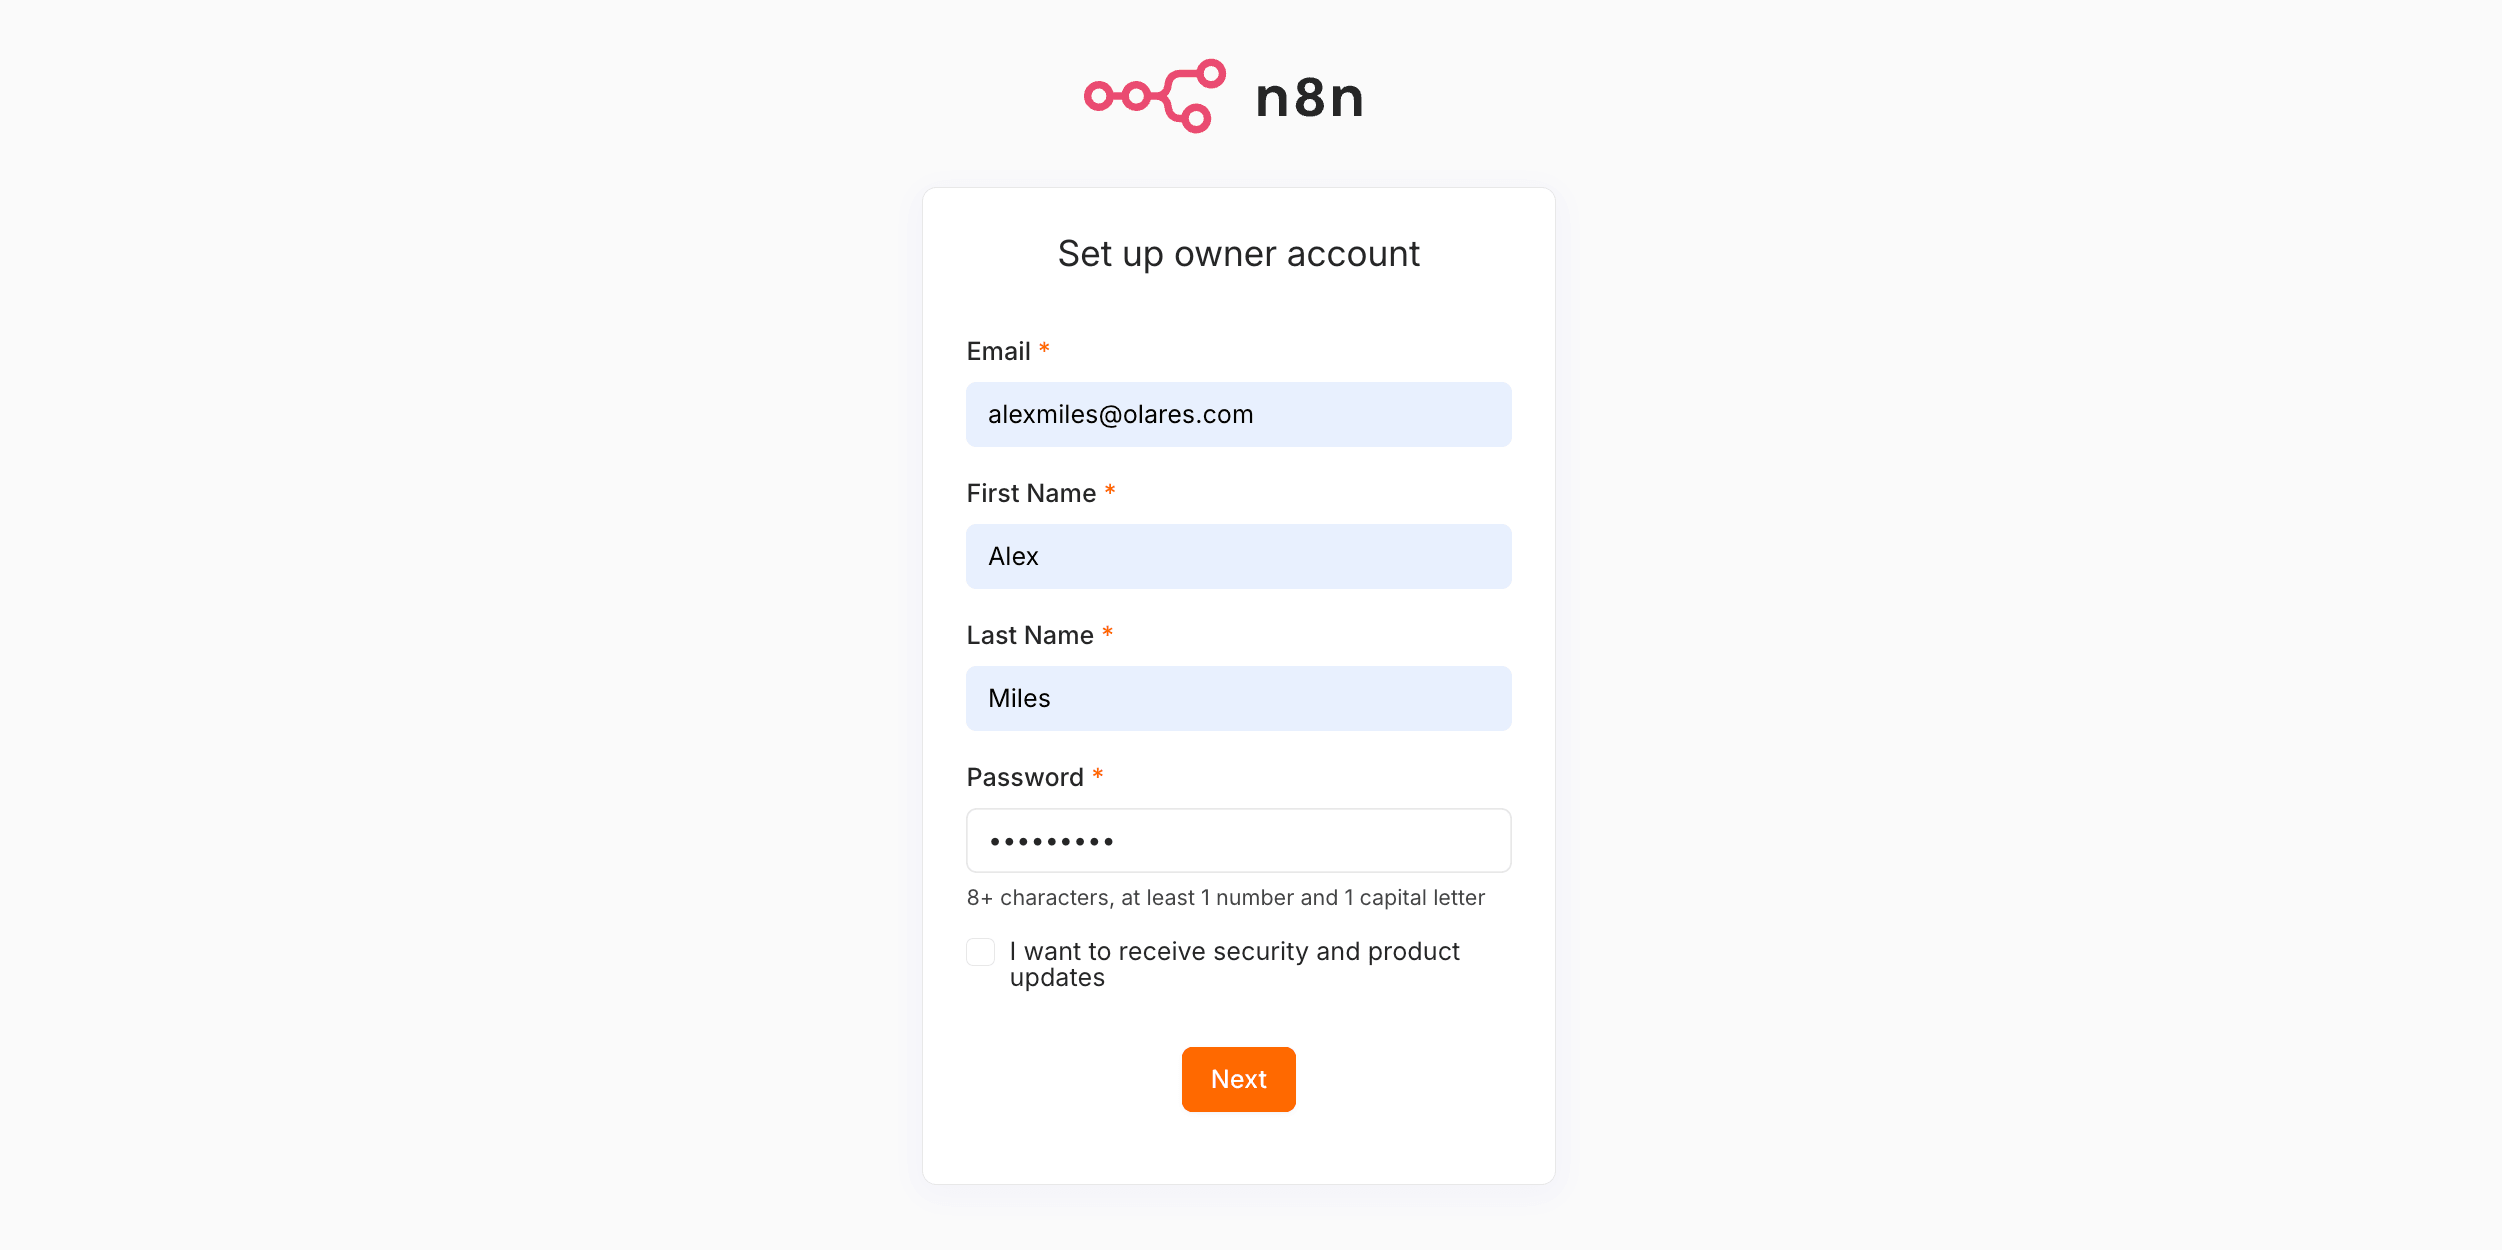
Click Next. n8n opens the editor page, where you can create your first workflow.
Build your first workflow
This example checks the latest GitHub release for n8n and extracts the fields you need for upgrade tracking. To monitor another project, replace n8n-io/n8n in the request URL with another owner/repository, such as immich-app/immich.
Create the workflow
Click Build a workflow to open the editor page.
Click Add first step, then in the right panel, select Trigger manually.
Click add after the Manual Trigger node, search for "HTTP Request", and add it.
In the HTTP Request node, go to the Parameters tab and set:
- Method:
GET - URL:text
https://api.github.com/repos/n8n-io/n8n/releases/latest - Authentication:
None
- Method:
Click Execute step. The output panel shows the API response.
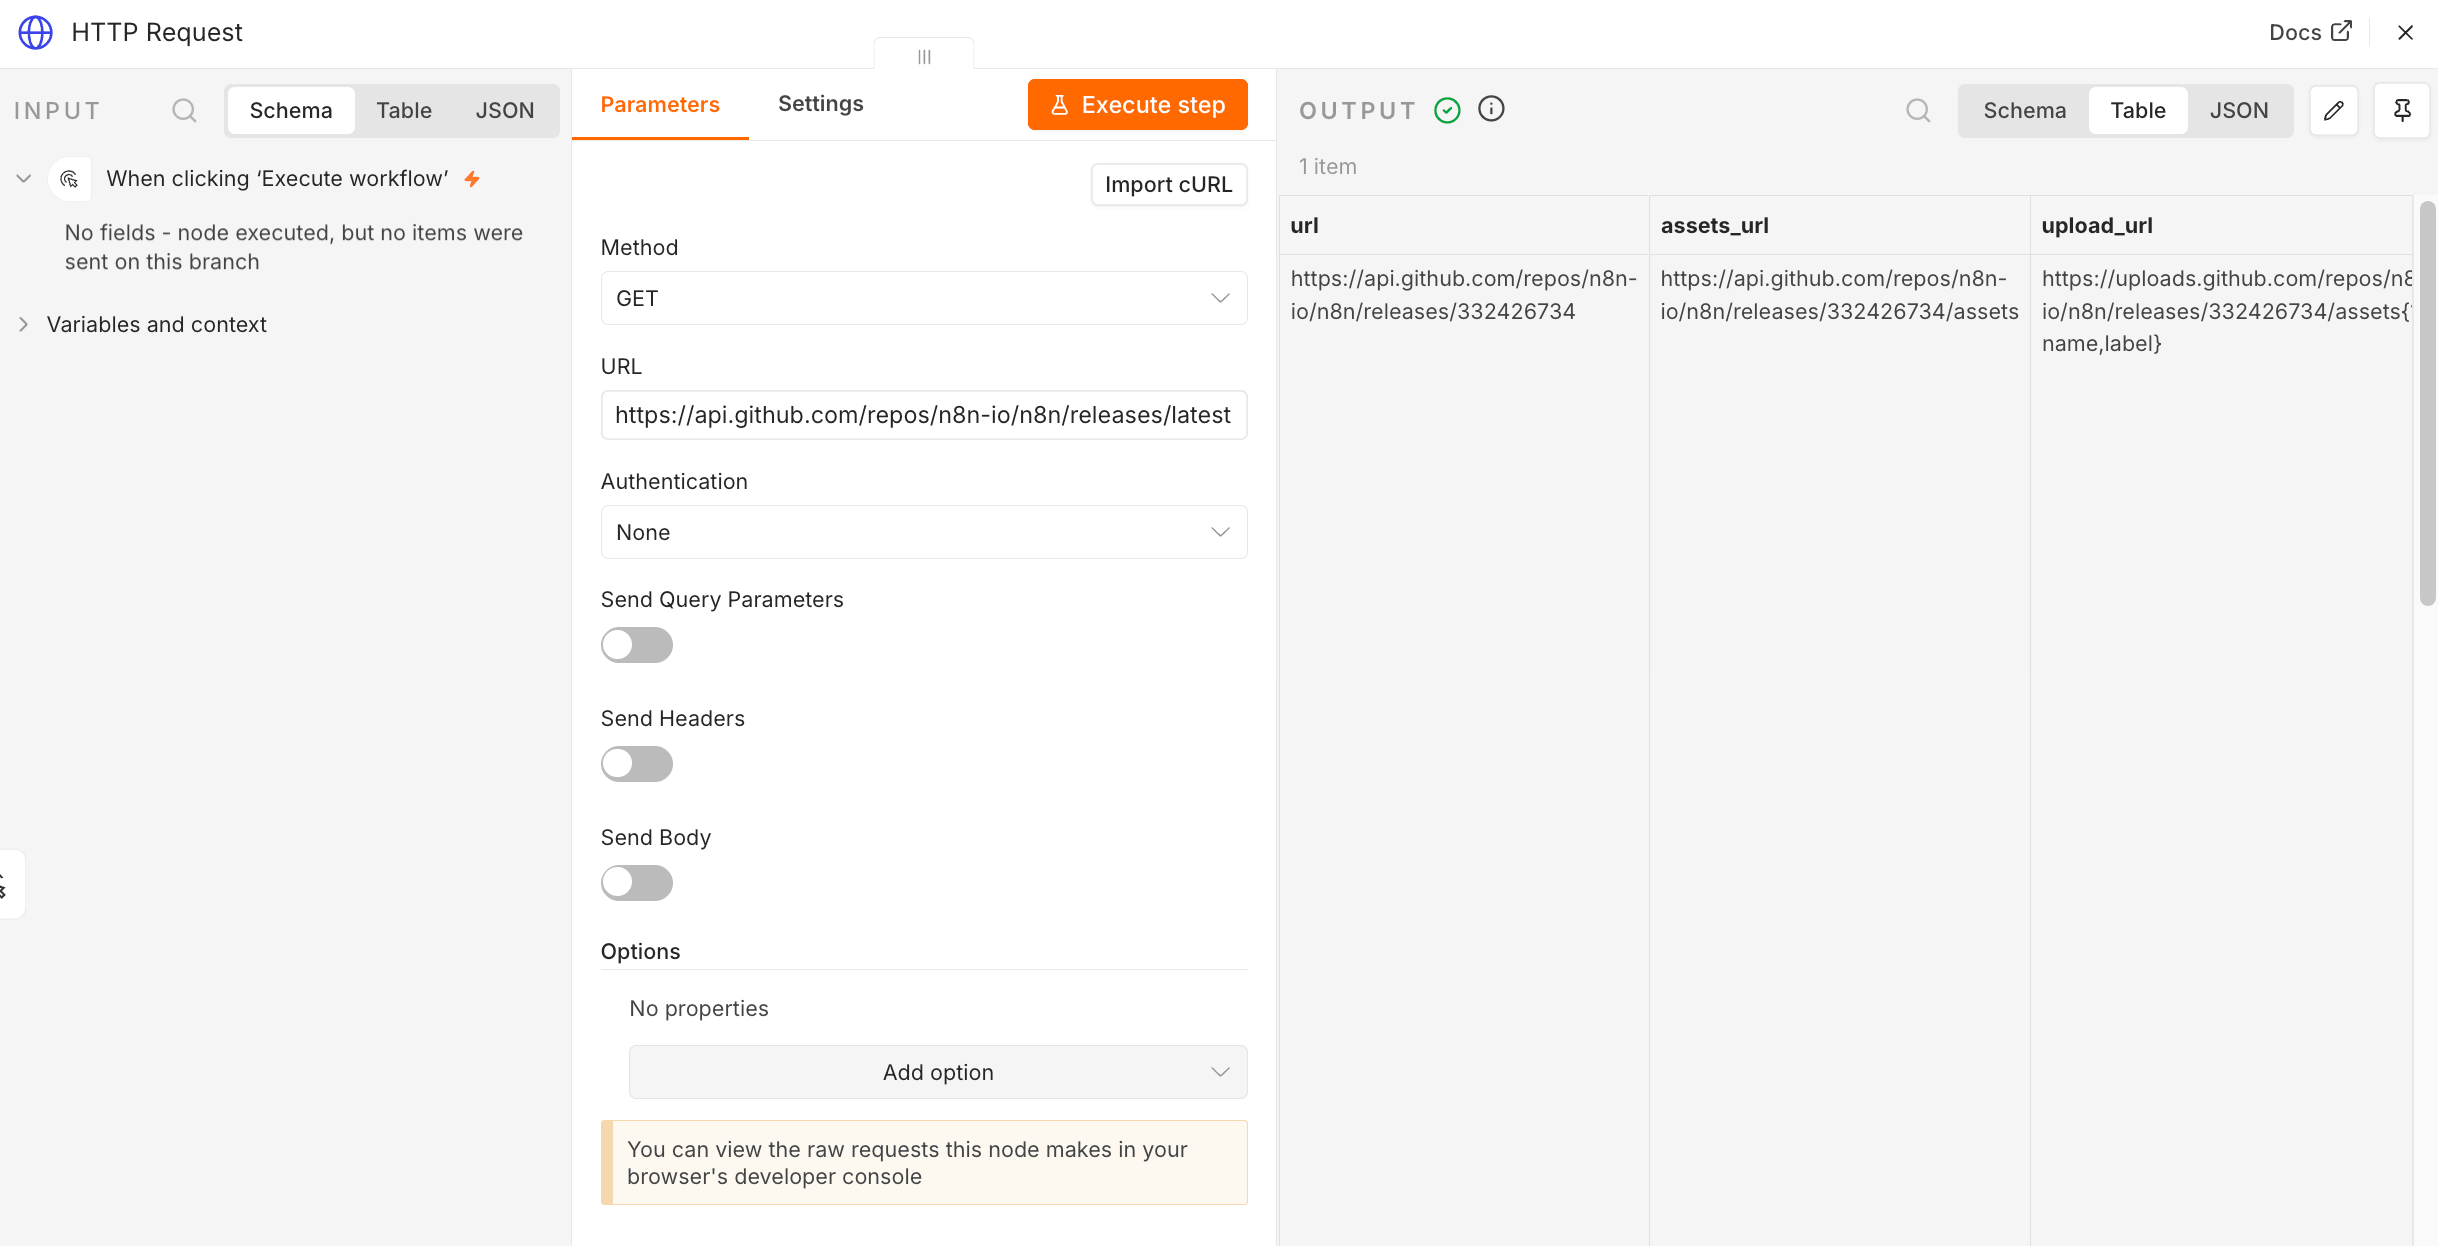
Keep the release details you need
Add an Edit Fields node to turn the full API response into a compact release summary.
Click add after the HTTP Request node, search for "Edit Fields", and add it.
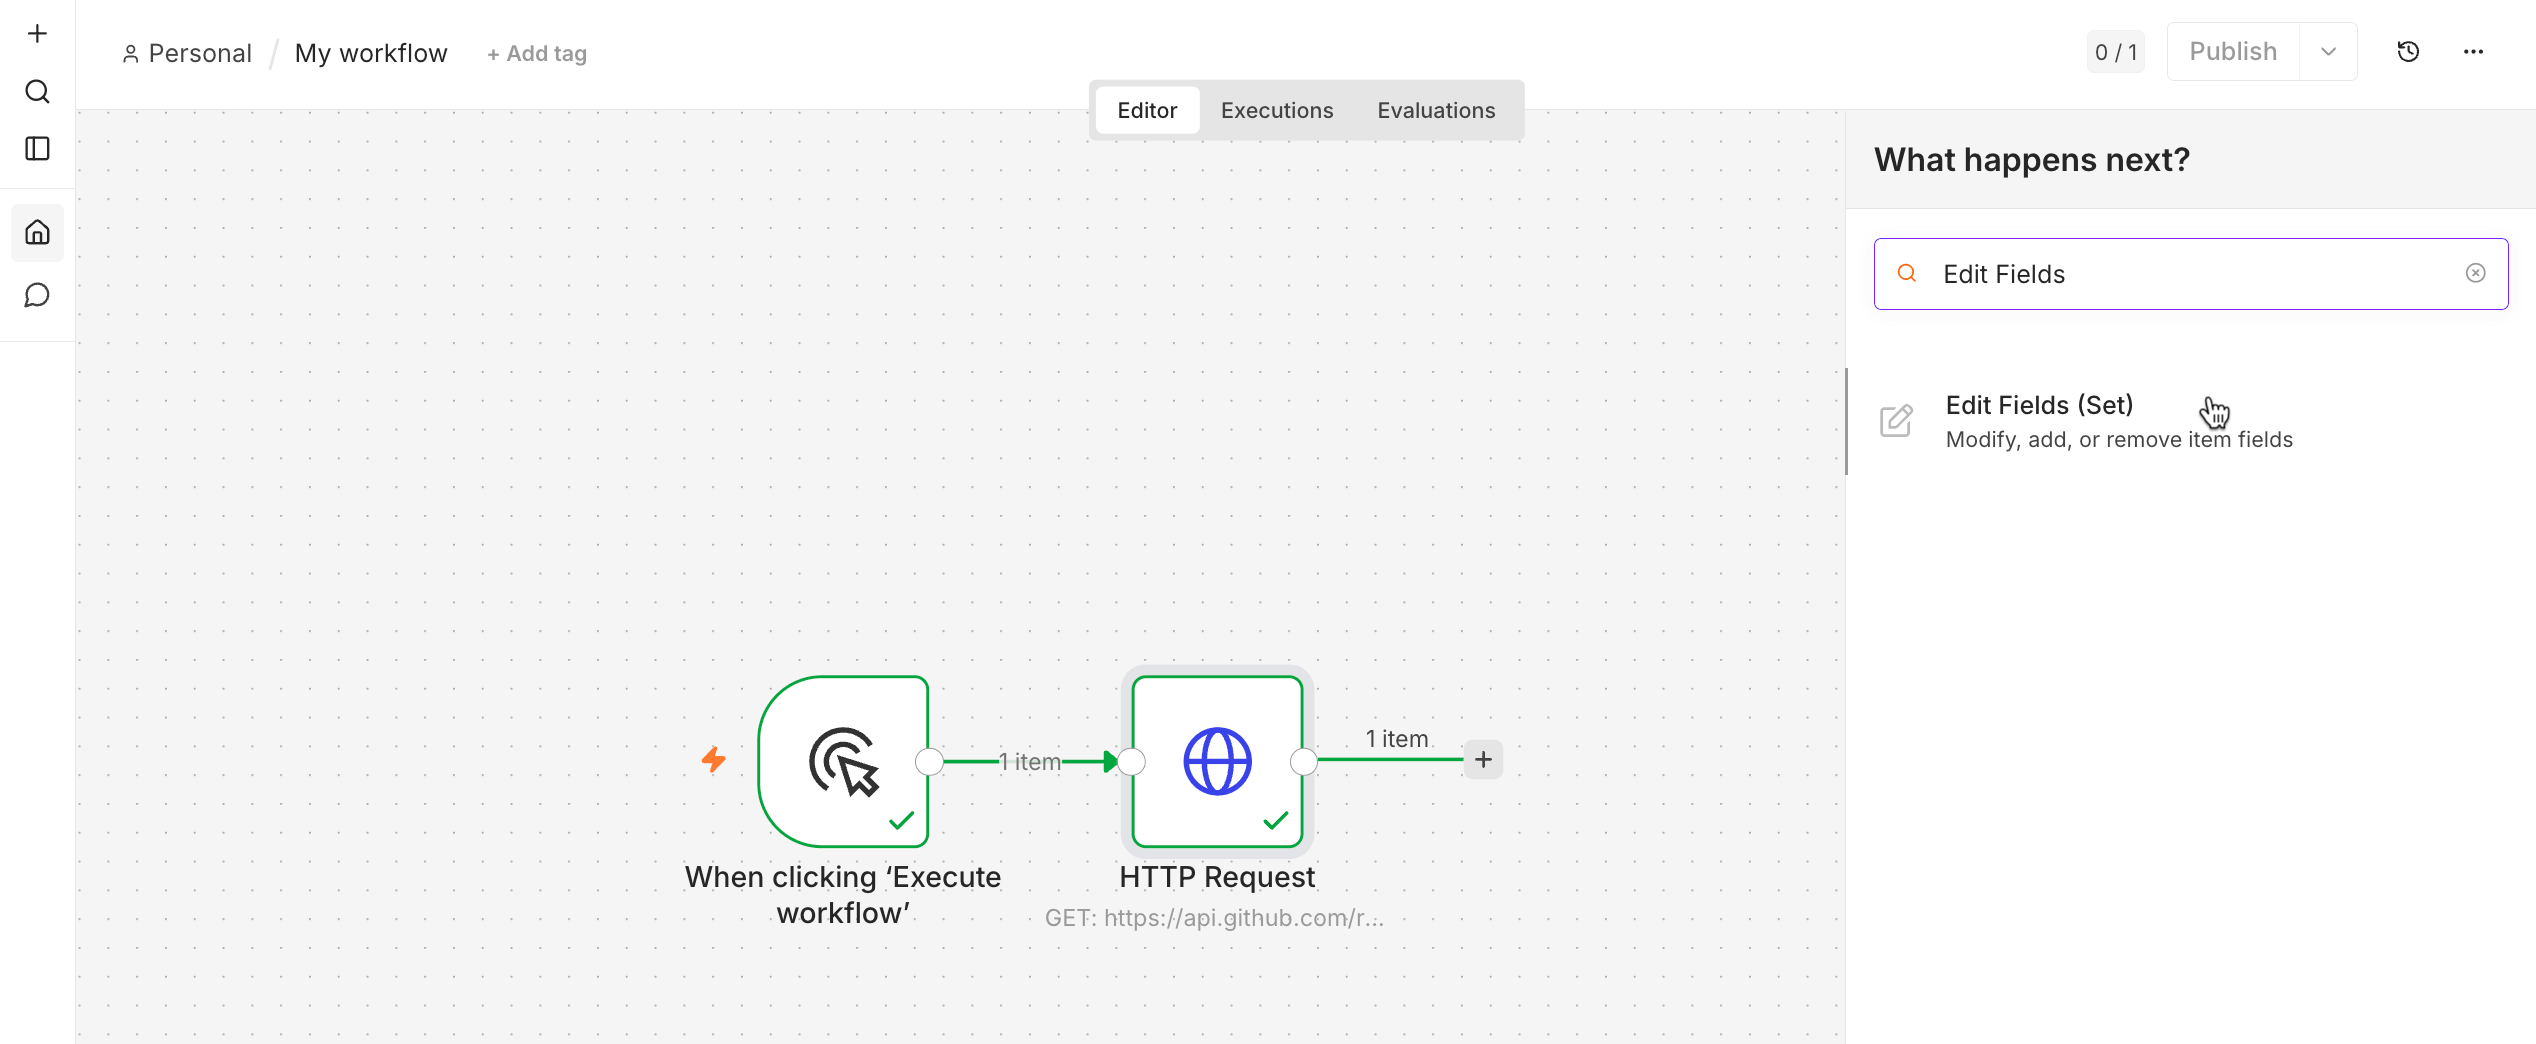
Set Mode to Manual Mapping.
Click Add Field and add the following fields. For each field, set the name, type, and value:
Field Type Value appString n8nlatest_versionString {{ $json.tag_name }}published_atString {{ $json.published_at }}release_notesString {{ $json.html_url }}is_prereleaseString {{ $json.prerelease }}Click Execute step.
Click the node name at the top-left corner and rename it, for example
Monitor n8n releases.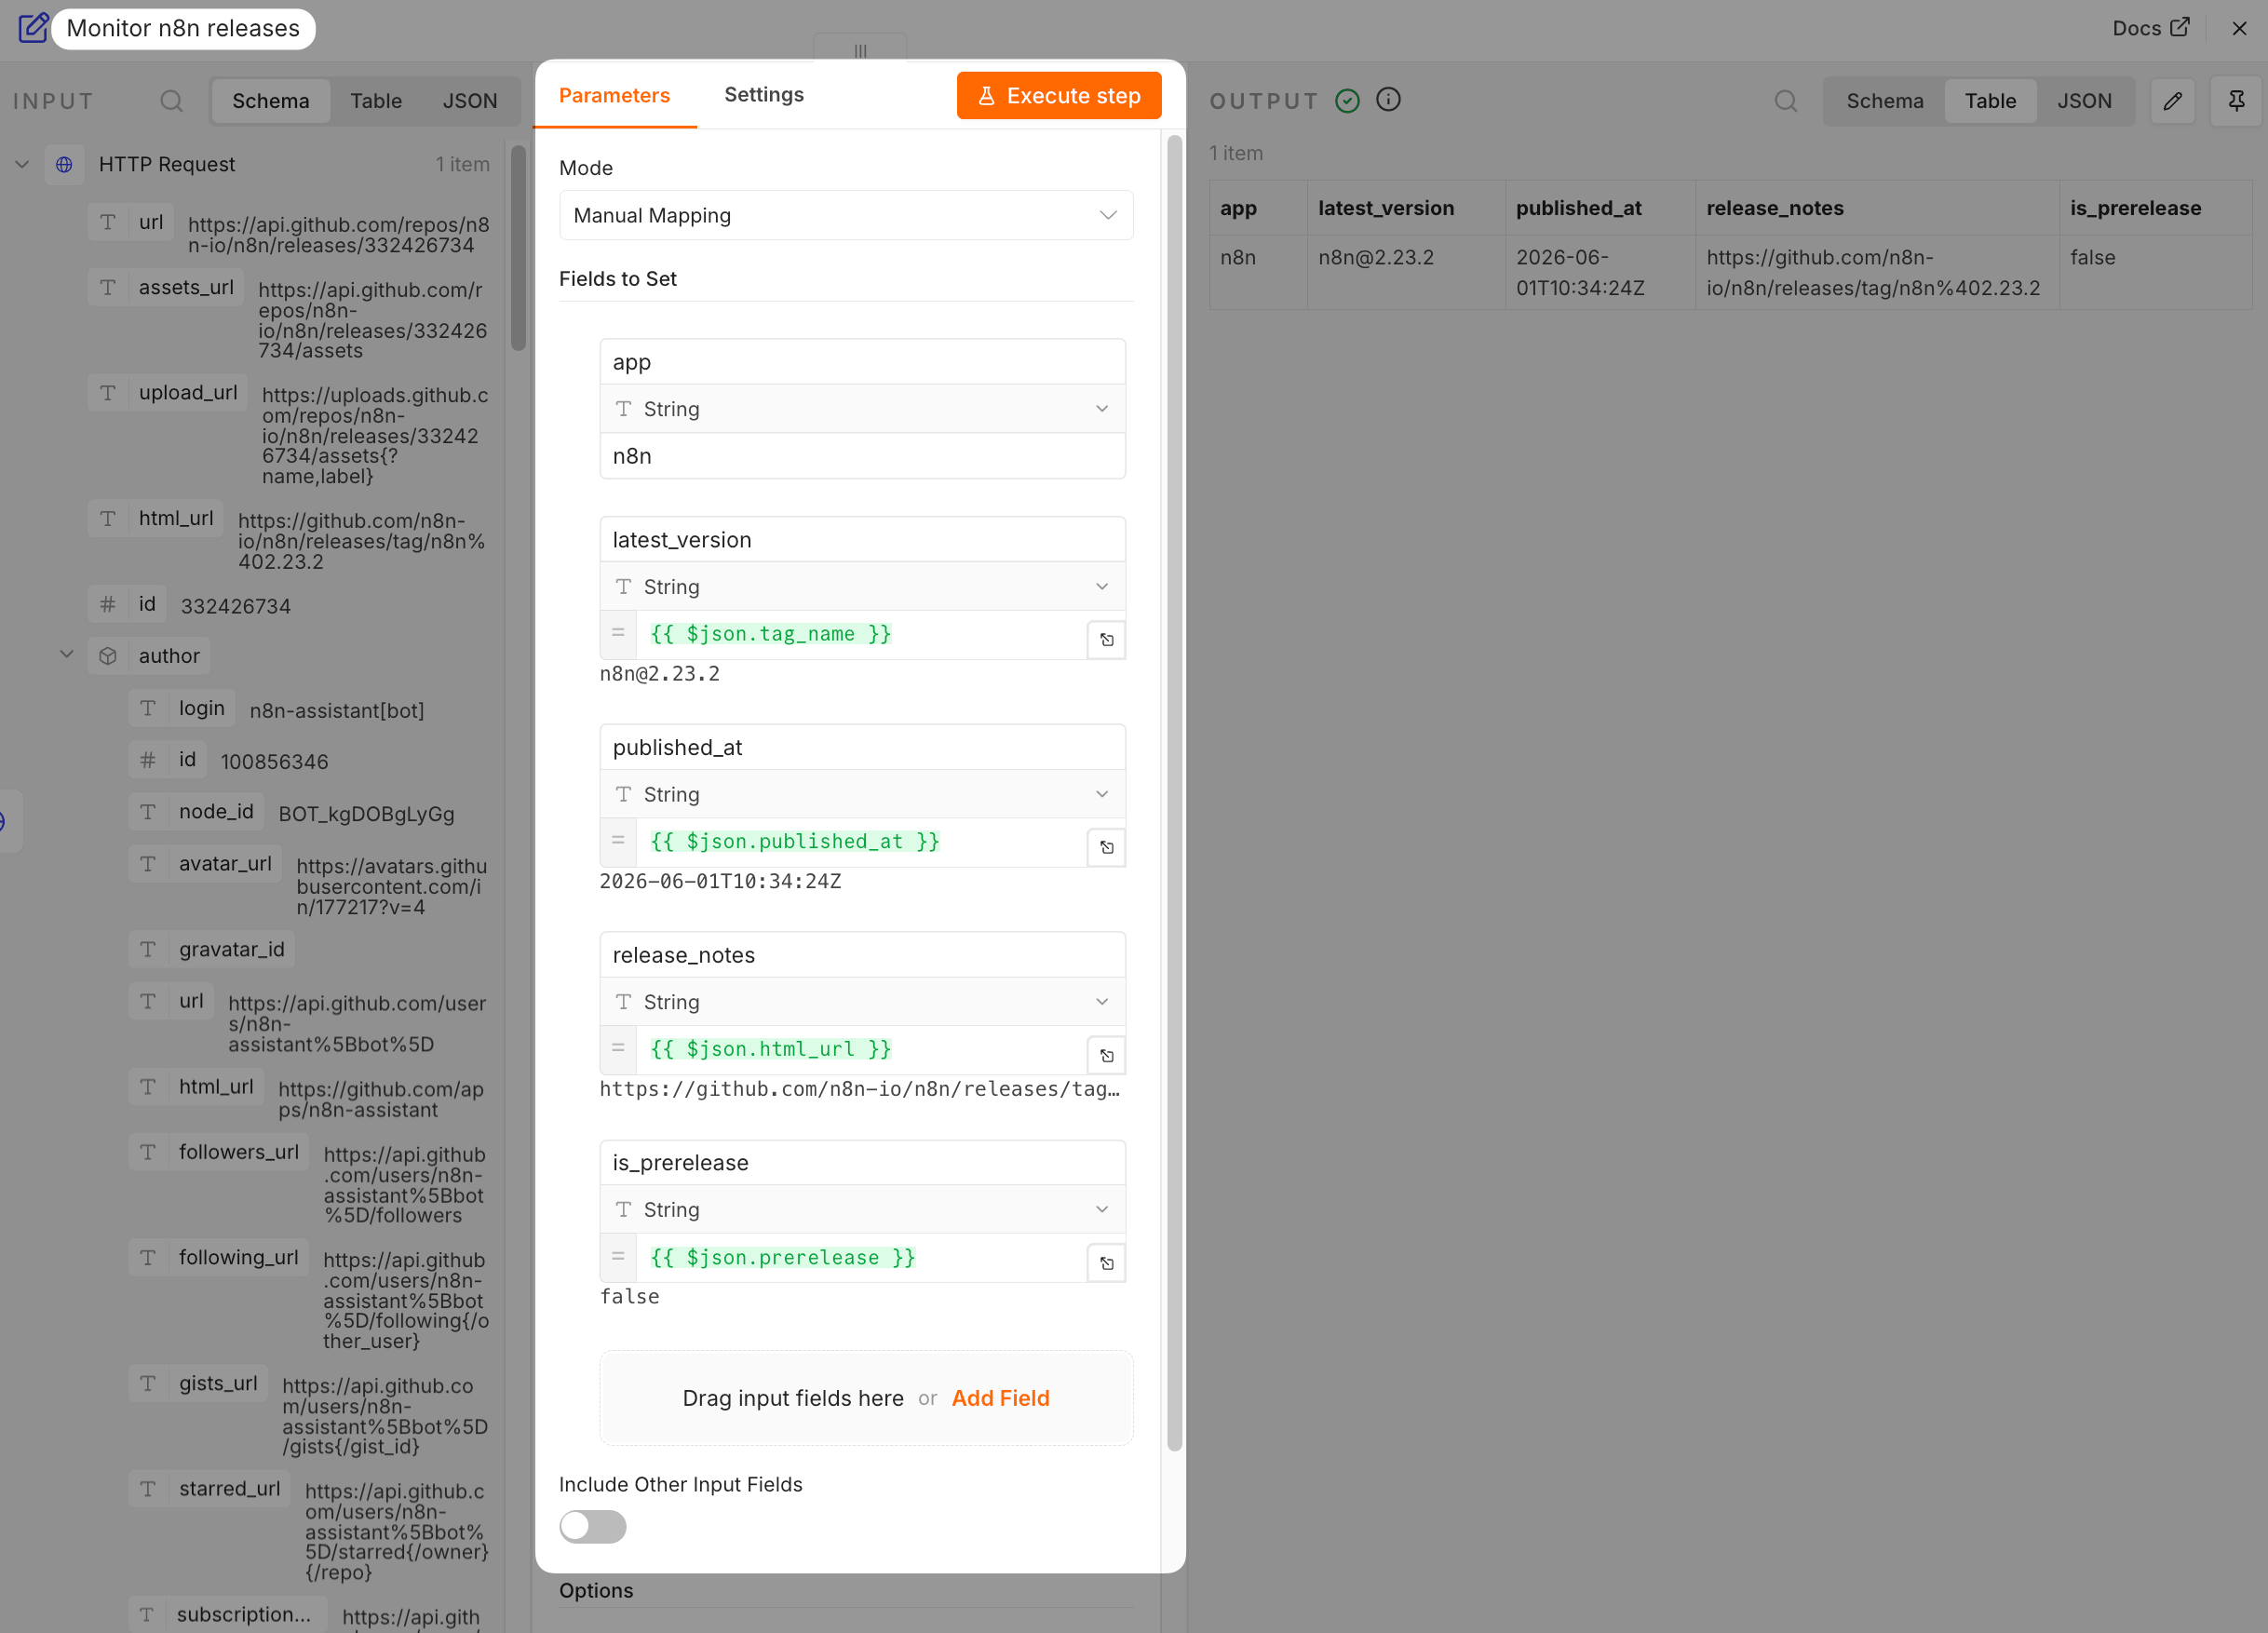
Test before publishing
n8n supports manual executions while you build, and production executions after you publish. Test each node before publishing the workflow.
Run and inspect executions
Run the workflow once from the editor, then use the Executions tab to review the run history and node outputs.
Open the workflow you created.
Click Execute workflow at the bottom of the editor.
Wait for the run to finish. Successful nodes show green check marks, and the connection labels show how many items moved between nodes.
Click Executions at the top of the editor.
Select the target execution to inspect each node's input, output, status, and timing.
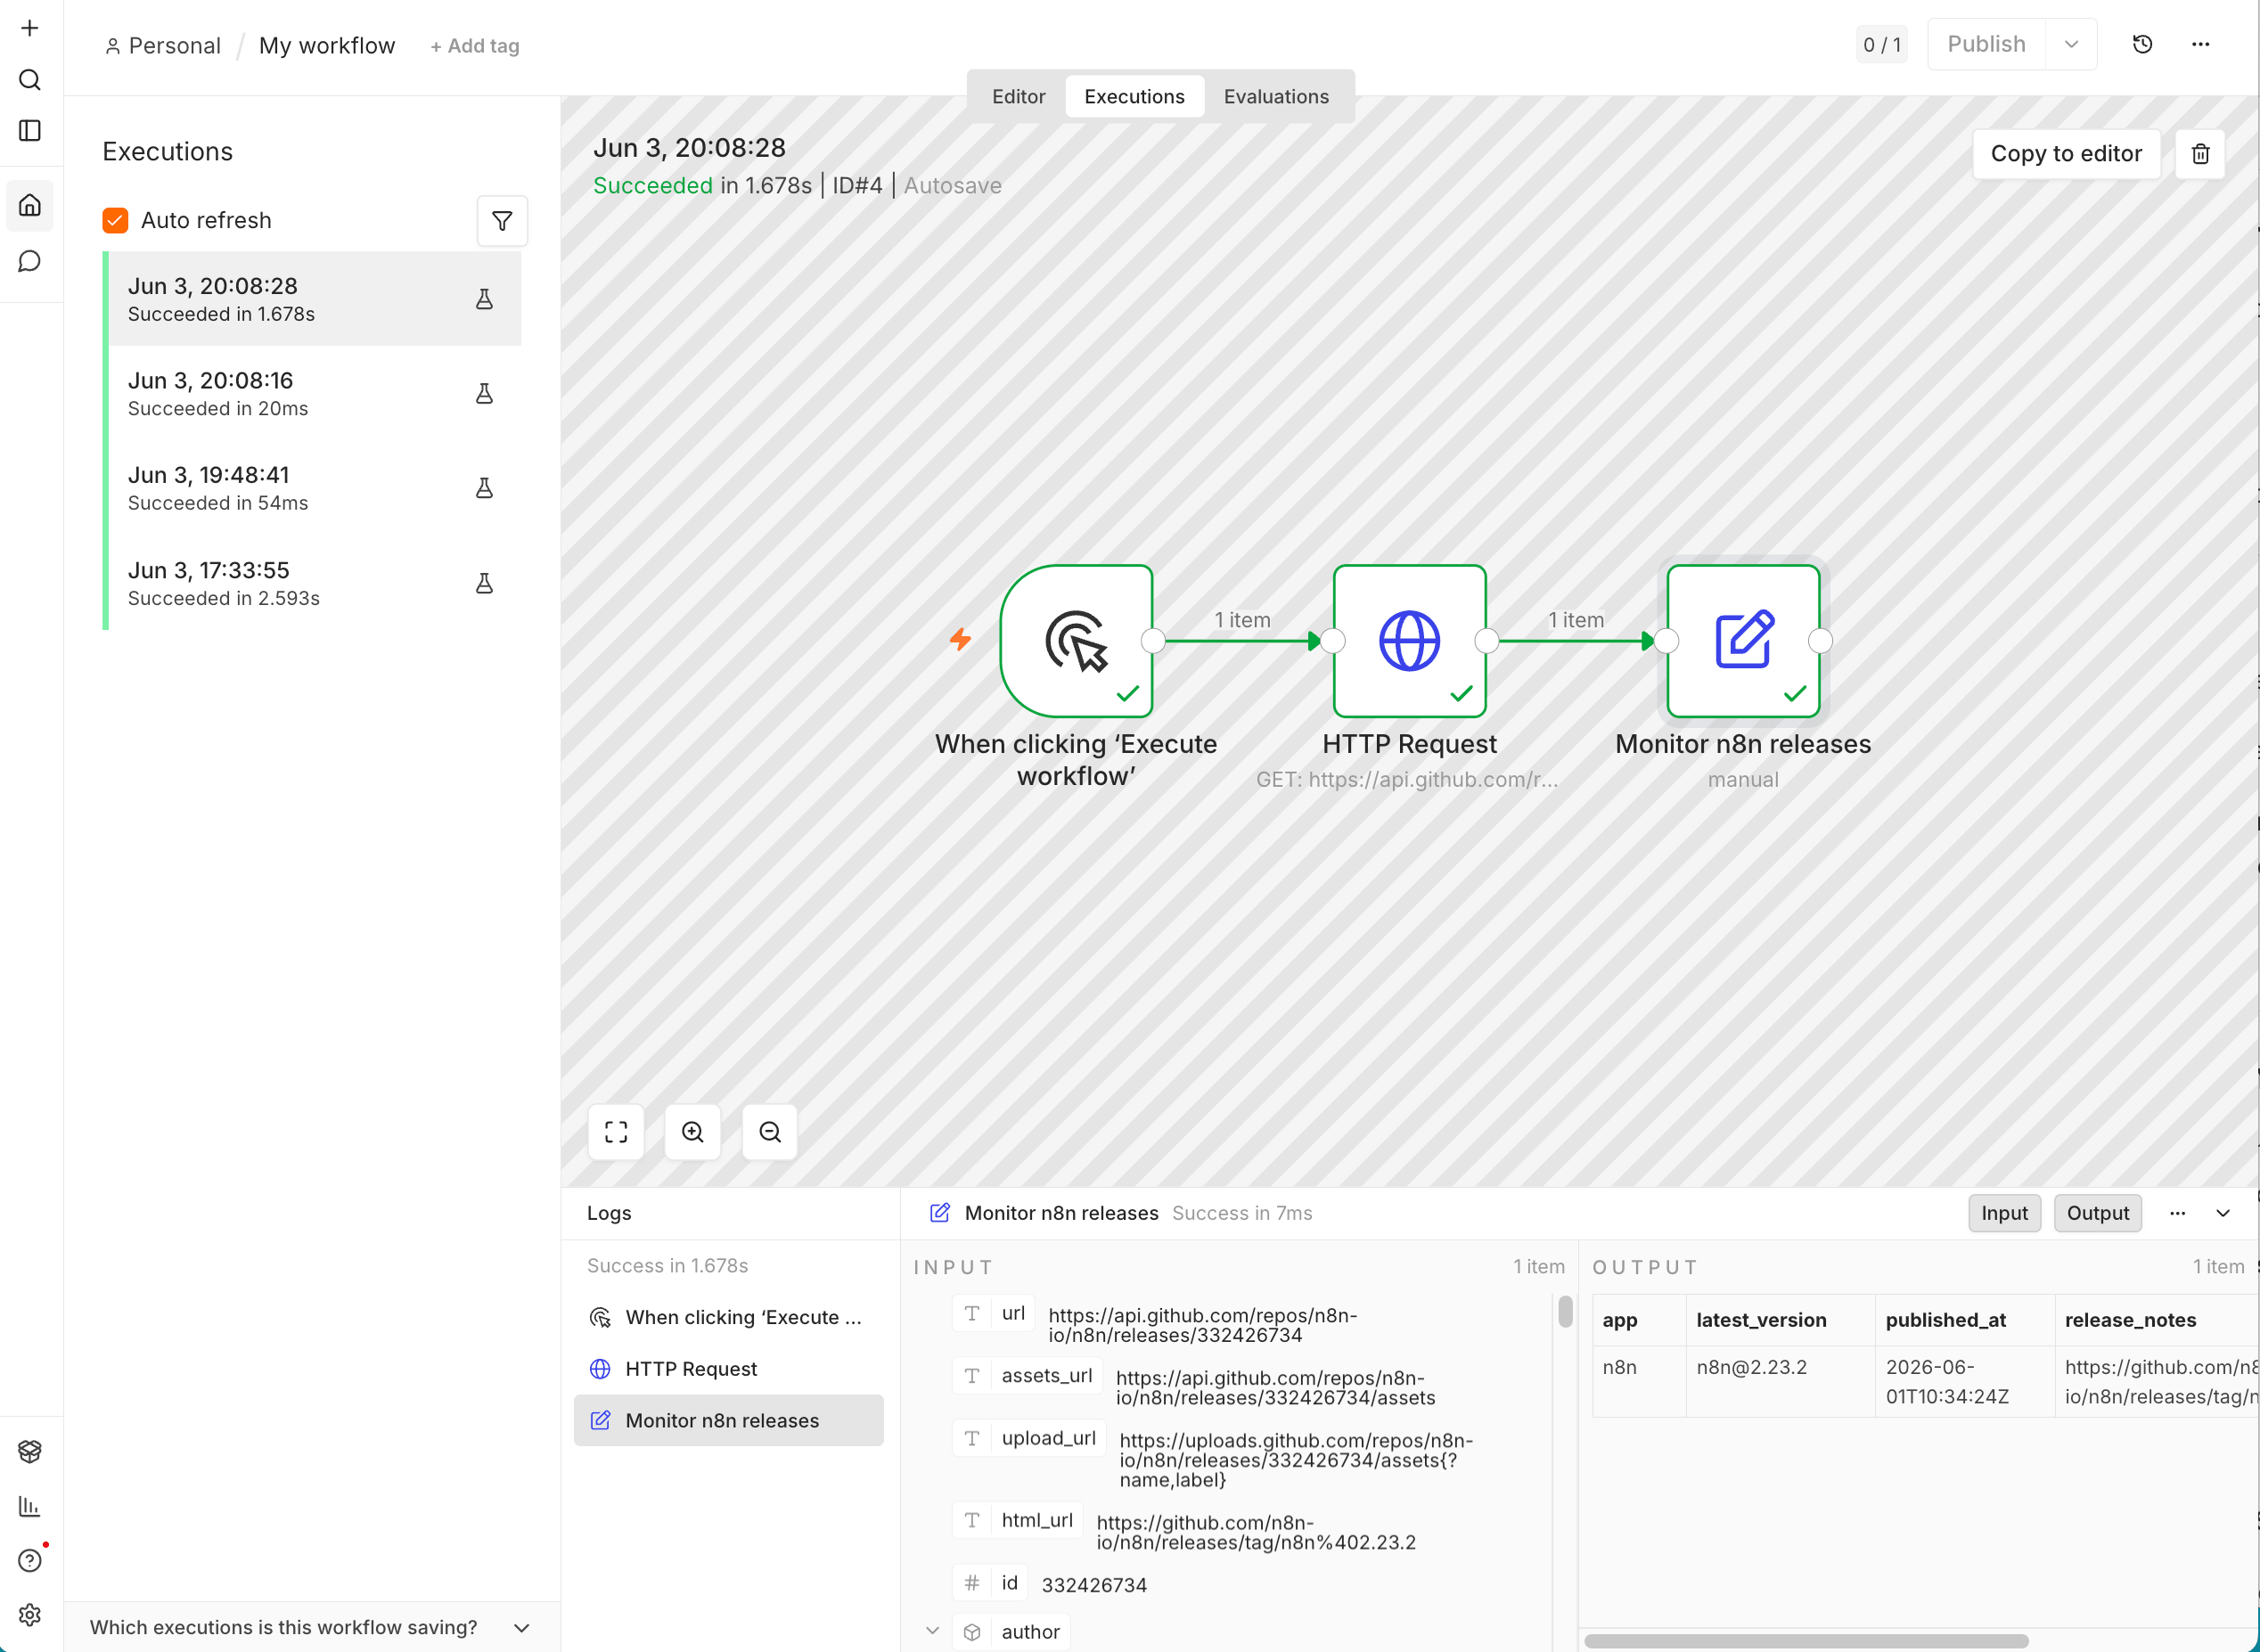
When the workflow is ready to run automatically, replace Manual Trigger with On a schedule, then click Publish. For a release monitor, a daily or weekly schedule is usually enough.
Save workflow results to NocoDB
This example saves the release summary to NocoDB. You can use the same pattern to write form submissions, monitoring results, webhook payloads, or API responses to a table.
n8n stores credentials separately from workflow logic, so you can reuse the same NocoDB API token across multiple workflows.
Set up NocoDB first
If you have not created a NocoDB base and table yet, follow Build a self-hosted spreadsheet database with NocoDB, then return here.
Prepare NocoDB
Open NocoDB and create a table, for example
Release checks.Add the following columns. Use text fields to keep the first test simple:
Column Type appSingle line text latest_versionSingle line text published_atSingle line text release_notesURL is_prereleaseSingle line text
Get NocoDB connection details
How app endpoints work
When a client connects to another Olares app, it uses that app's endpoint as the network address. If the app exposes multiple endpoints, choose the one that matches the feature or protocol the client needs.
- Go to Olares Settings > Applications > NocoDB > Entrances.
- Select NocoDB.
- Copy the Endpoint URL.
- In NocoDB, go to Account Settings > API Tokens, create a token, and copy it.
Keep your API token secure
The API token can access your NocoDB data. Do not share it, include it in screenshots, or commit it to public repositories.
Add the NocoDB node
Return to the workflow that contains the
Monitor n8n releasesnode.Click add after the
Monitor n8n releasesnode, search for "NocoDB", select it and select Create a row.Click Set up credential and enter the NocoDB connection details:
Field Value API Token The NocoDB API token you created earlier. Host The NocoDB endpoint URL from Olares Settings. Click Save. A connection test runs automatically.
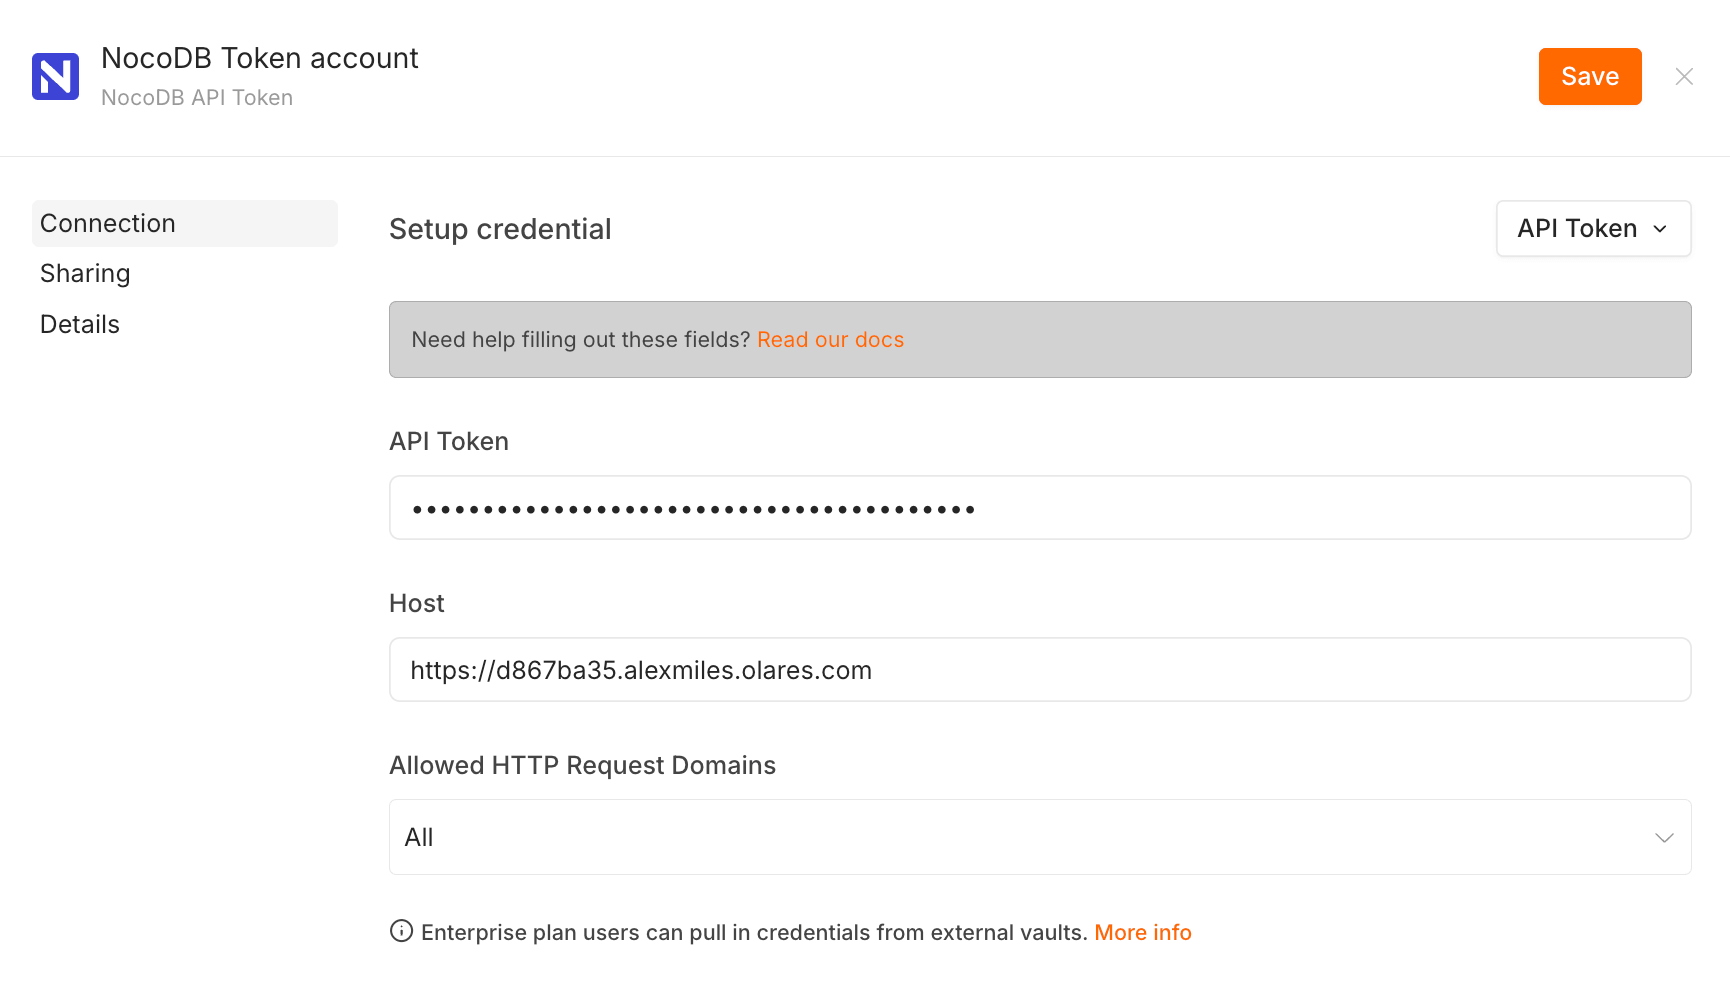
In the NocoDB node, go to the Parameters tab and set:
Setting Value Resource RowOperation CreateBase Name or ID Select the base that contains Release checks.Table Name or ID Select Release checks.Data to Send Select the option based on your needs. Click Execute step. If the node succeeds, return to NocoDB and check that a new row appears in the
Release checkstable.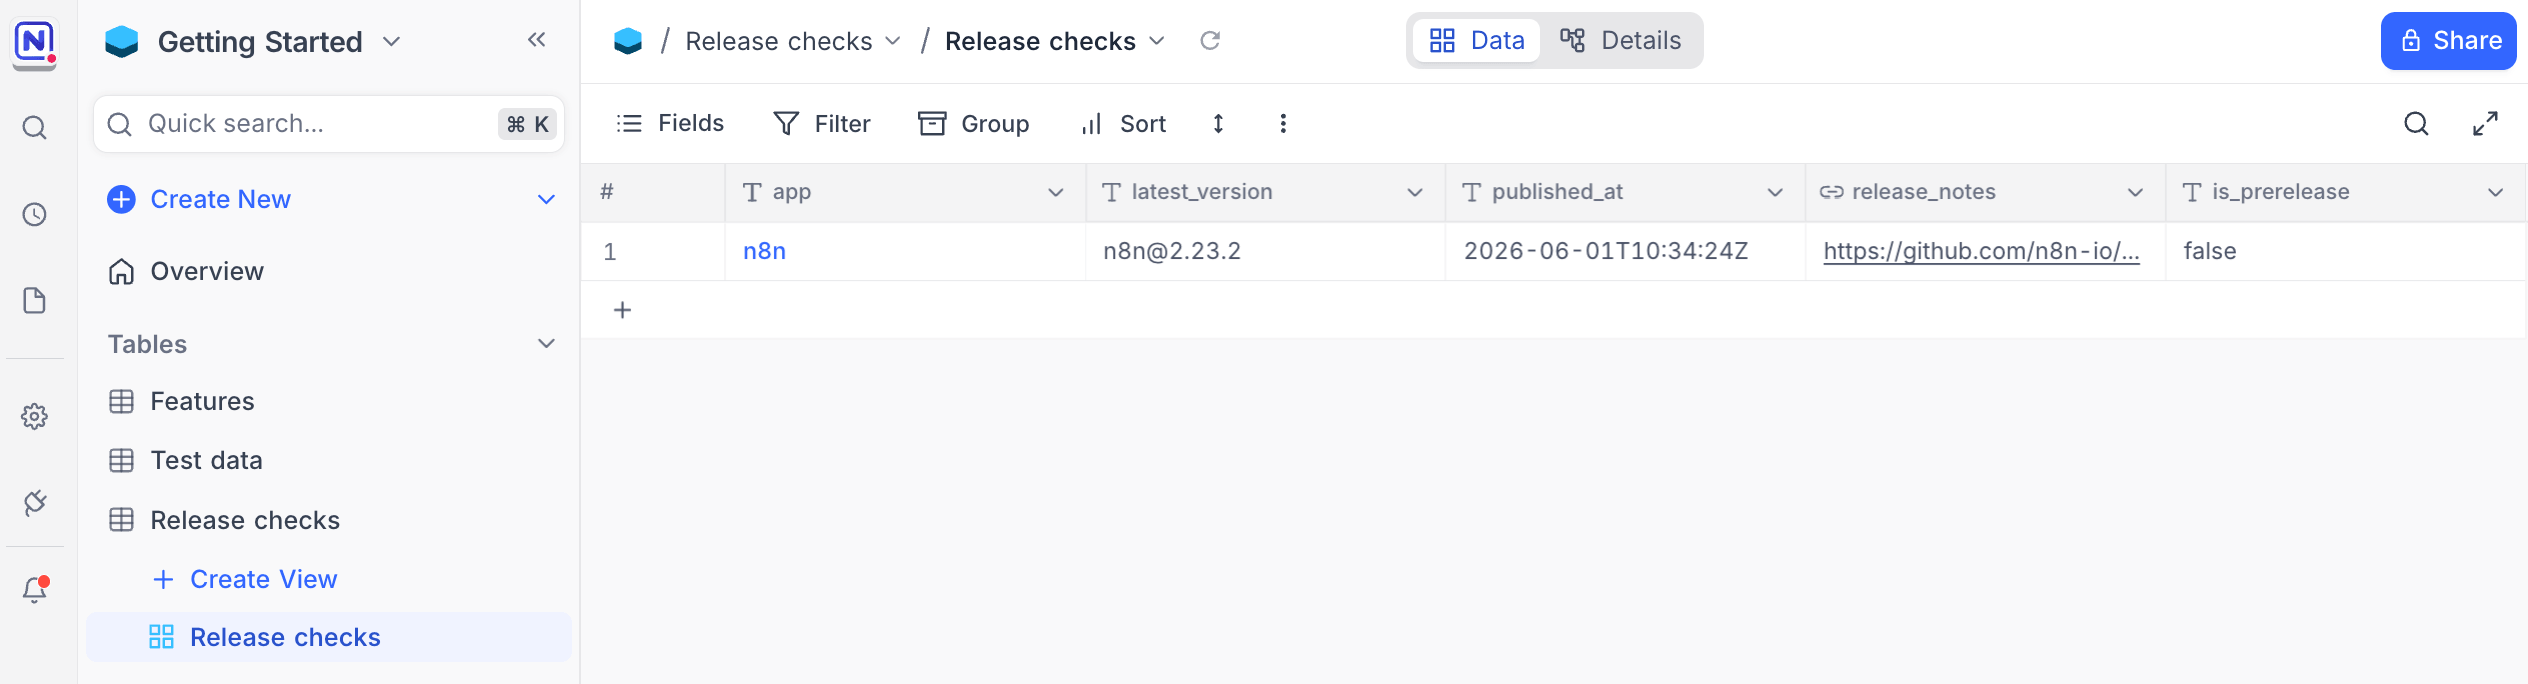
Click Execute workflow to test the complete flow.
To record release checks automatically, replace Manual Trigger with On a schedule, then click Publish after testing.
Receive events through webhooks
Webhook workflows let external services send events to n8n in real time. This example receives release events from a GitHub repository you own or administer, then extracts the release details.
You can only add a GitHub webhook to a repository where you have admin access. To monitor a public repository you do not control, such as n8n-io/n8n, use the scheduled HTTP Request workflow earlier in this guide.
Public entrance security risk
You can set the n8n entrance to Public to use webhooks without LarePass VPN. However, this exposes the n8n entrance to the internet. For better security, keep the default Internal authentication level and use LarePass VPN whenever possible.
Create the webhook workflow
Enable LarePass VPN before listening
When the n8n entrance uses the default Internal authentication level, enable LarePass VPN in the desktop client before clicking Listen for test event. Keep the VPN connected while configuring and testing the webhook.
In n8n, click add in the upper-left corner, then select Workflow.
Click Add first step, then in the right panel, select On webhook call.
In the Webhook node, go to the Parameters tab and set:
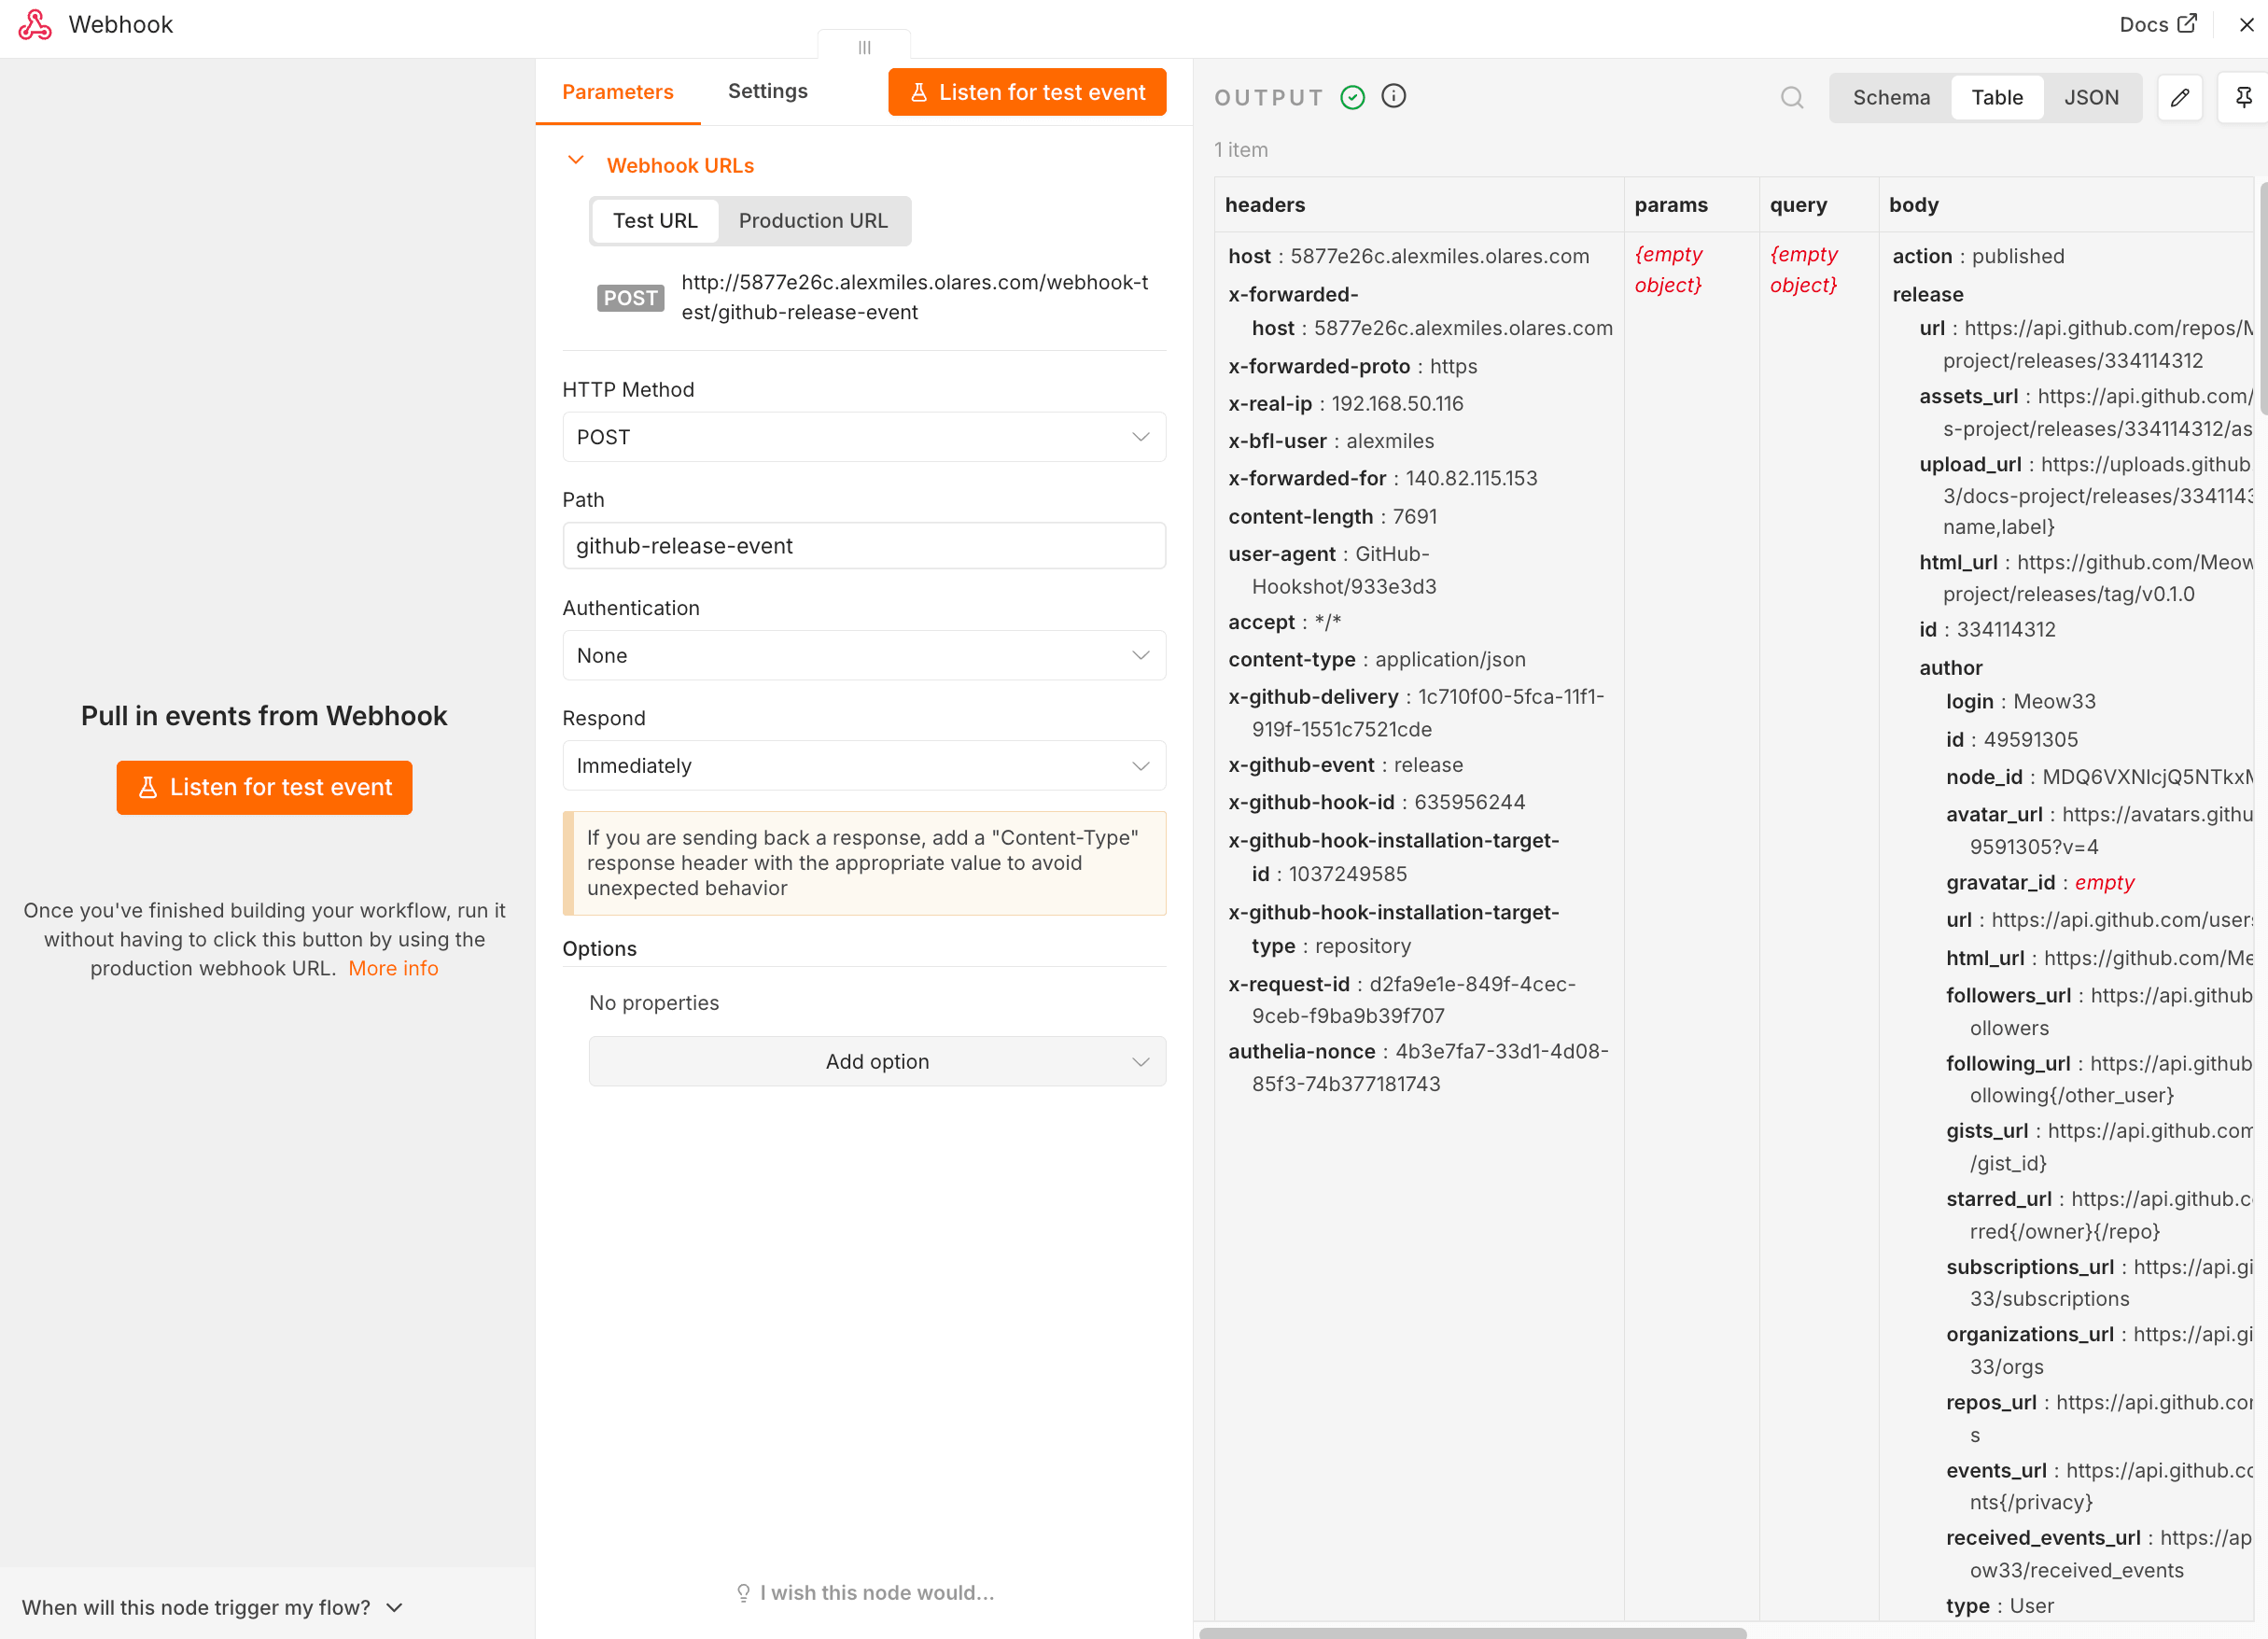
Setting Value HTTP Method POSTPath github-release-eventAuthentication NoneRespond ImmediatelyClick Listen for test event, then copy the Test URL from the Webhook node. Use
https://in GitHub. If n8n copies anhttp://URL, change it tohttps://.
Add the webhook in GitHub
In your browser, open GitHub and go to the repository you own or administer.
In that repository, go to Settings > Webhooks, then click Add webhook.
Configure the webhook:
Setting Value Payload URL Paste the HTTPS test webhook URL from n8n. Content type application/jsonSecret Leave empty for this first test. Which events would you like to trigger this webhook? Select Let me select individual events, then select Releases. 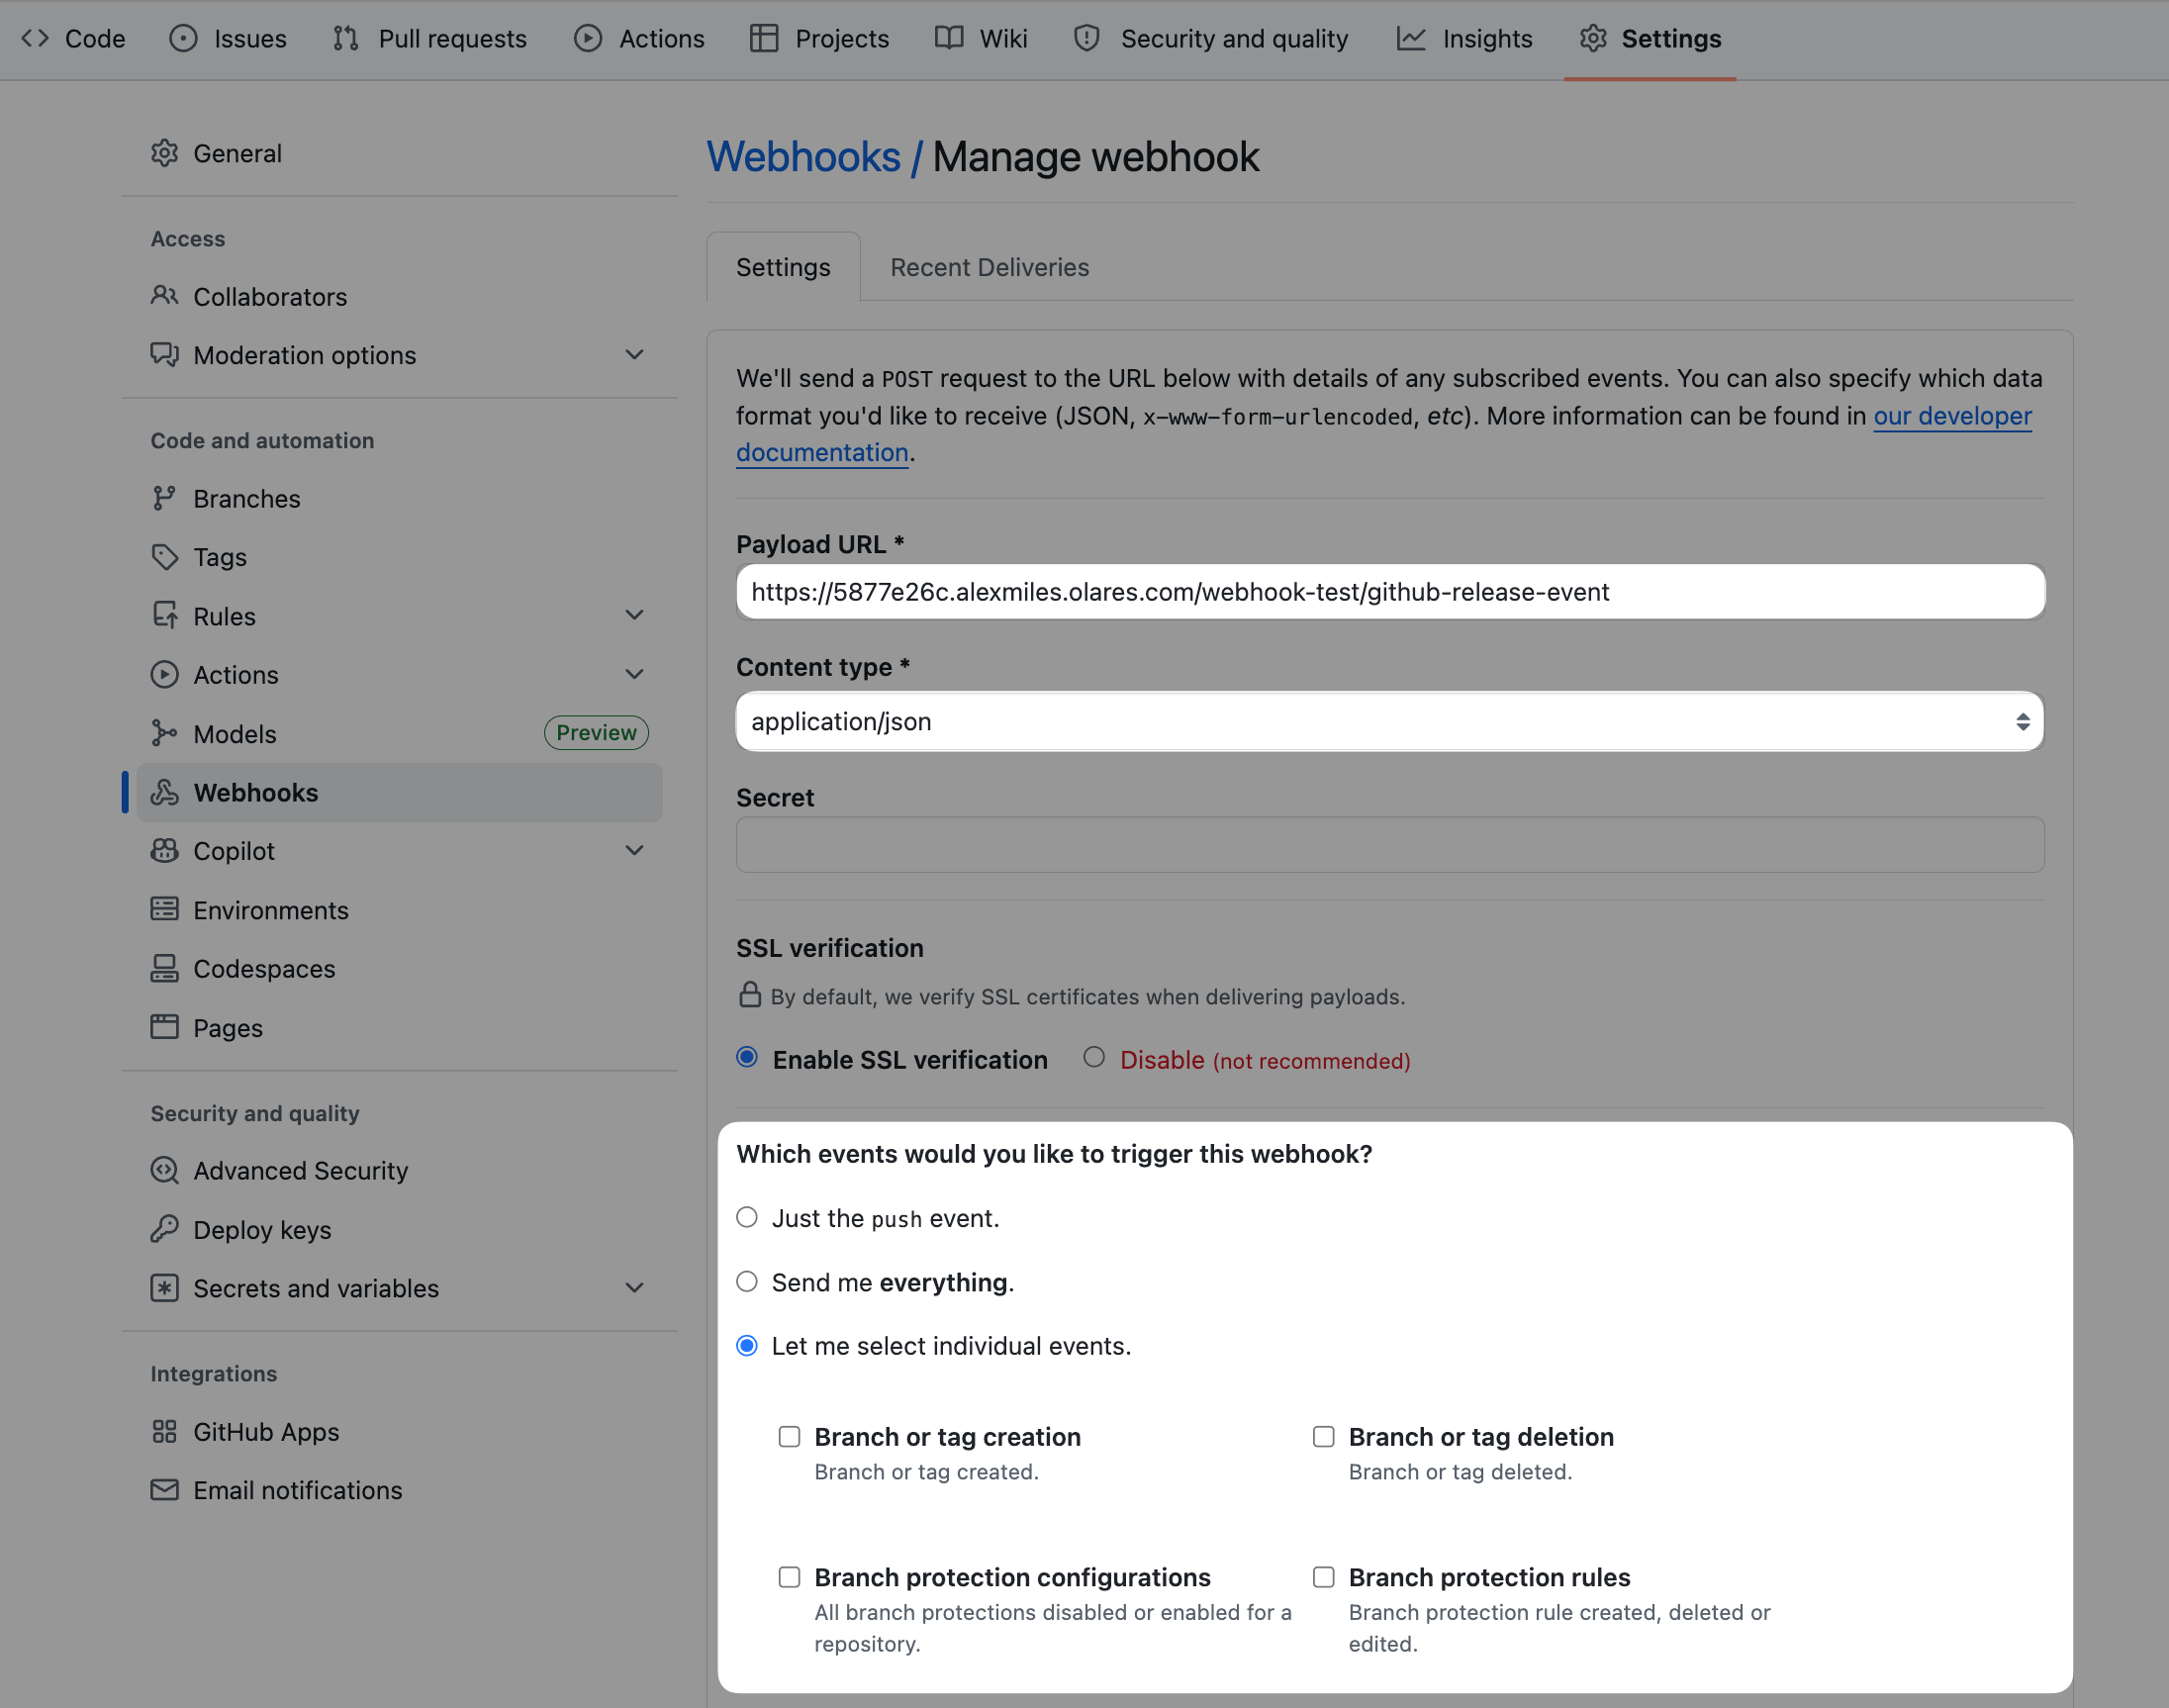
Keep Active enabled, then click Add webhook.
In n8n, wait for the test event. GitHub sends a
pingevent after you add the webhook.To test a full release payload, publish a test release in the repository, then return to n8n and check the Webhook node output.
Extract release fields
The initial GitHub ping event does not include a release object. After n8n receives a release event, add an Edit Fields node after the Webhook node to keep the payload readable.
Click add after the Webhook node, search for "Edit Fields", and add it.
Set Mode to Manual Mapping.
Click Add Field and add the following fields:
Field Type Value event_actionString {{ $json.body.action }}repositoryString {{ $json.body.repository.full_name }}release_tagString {{ $json.body.release.tag_name }}release_nameString {{ $json.body.release.name }}release_urlString {{ $json.body.release.html_url }}senderString {{ $json.body.sender.login }}Click Execute step to check the extracted fields.
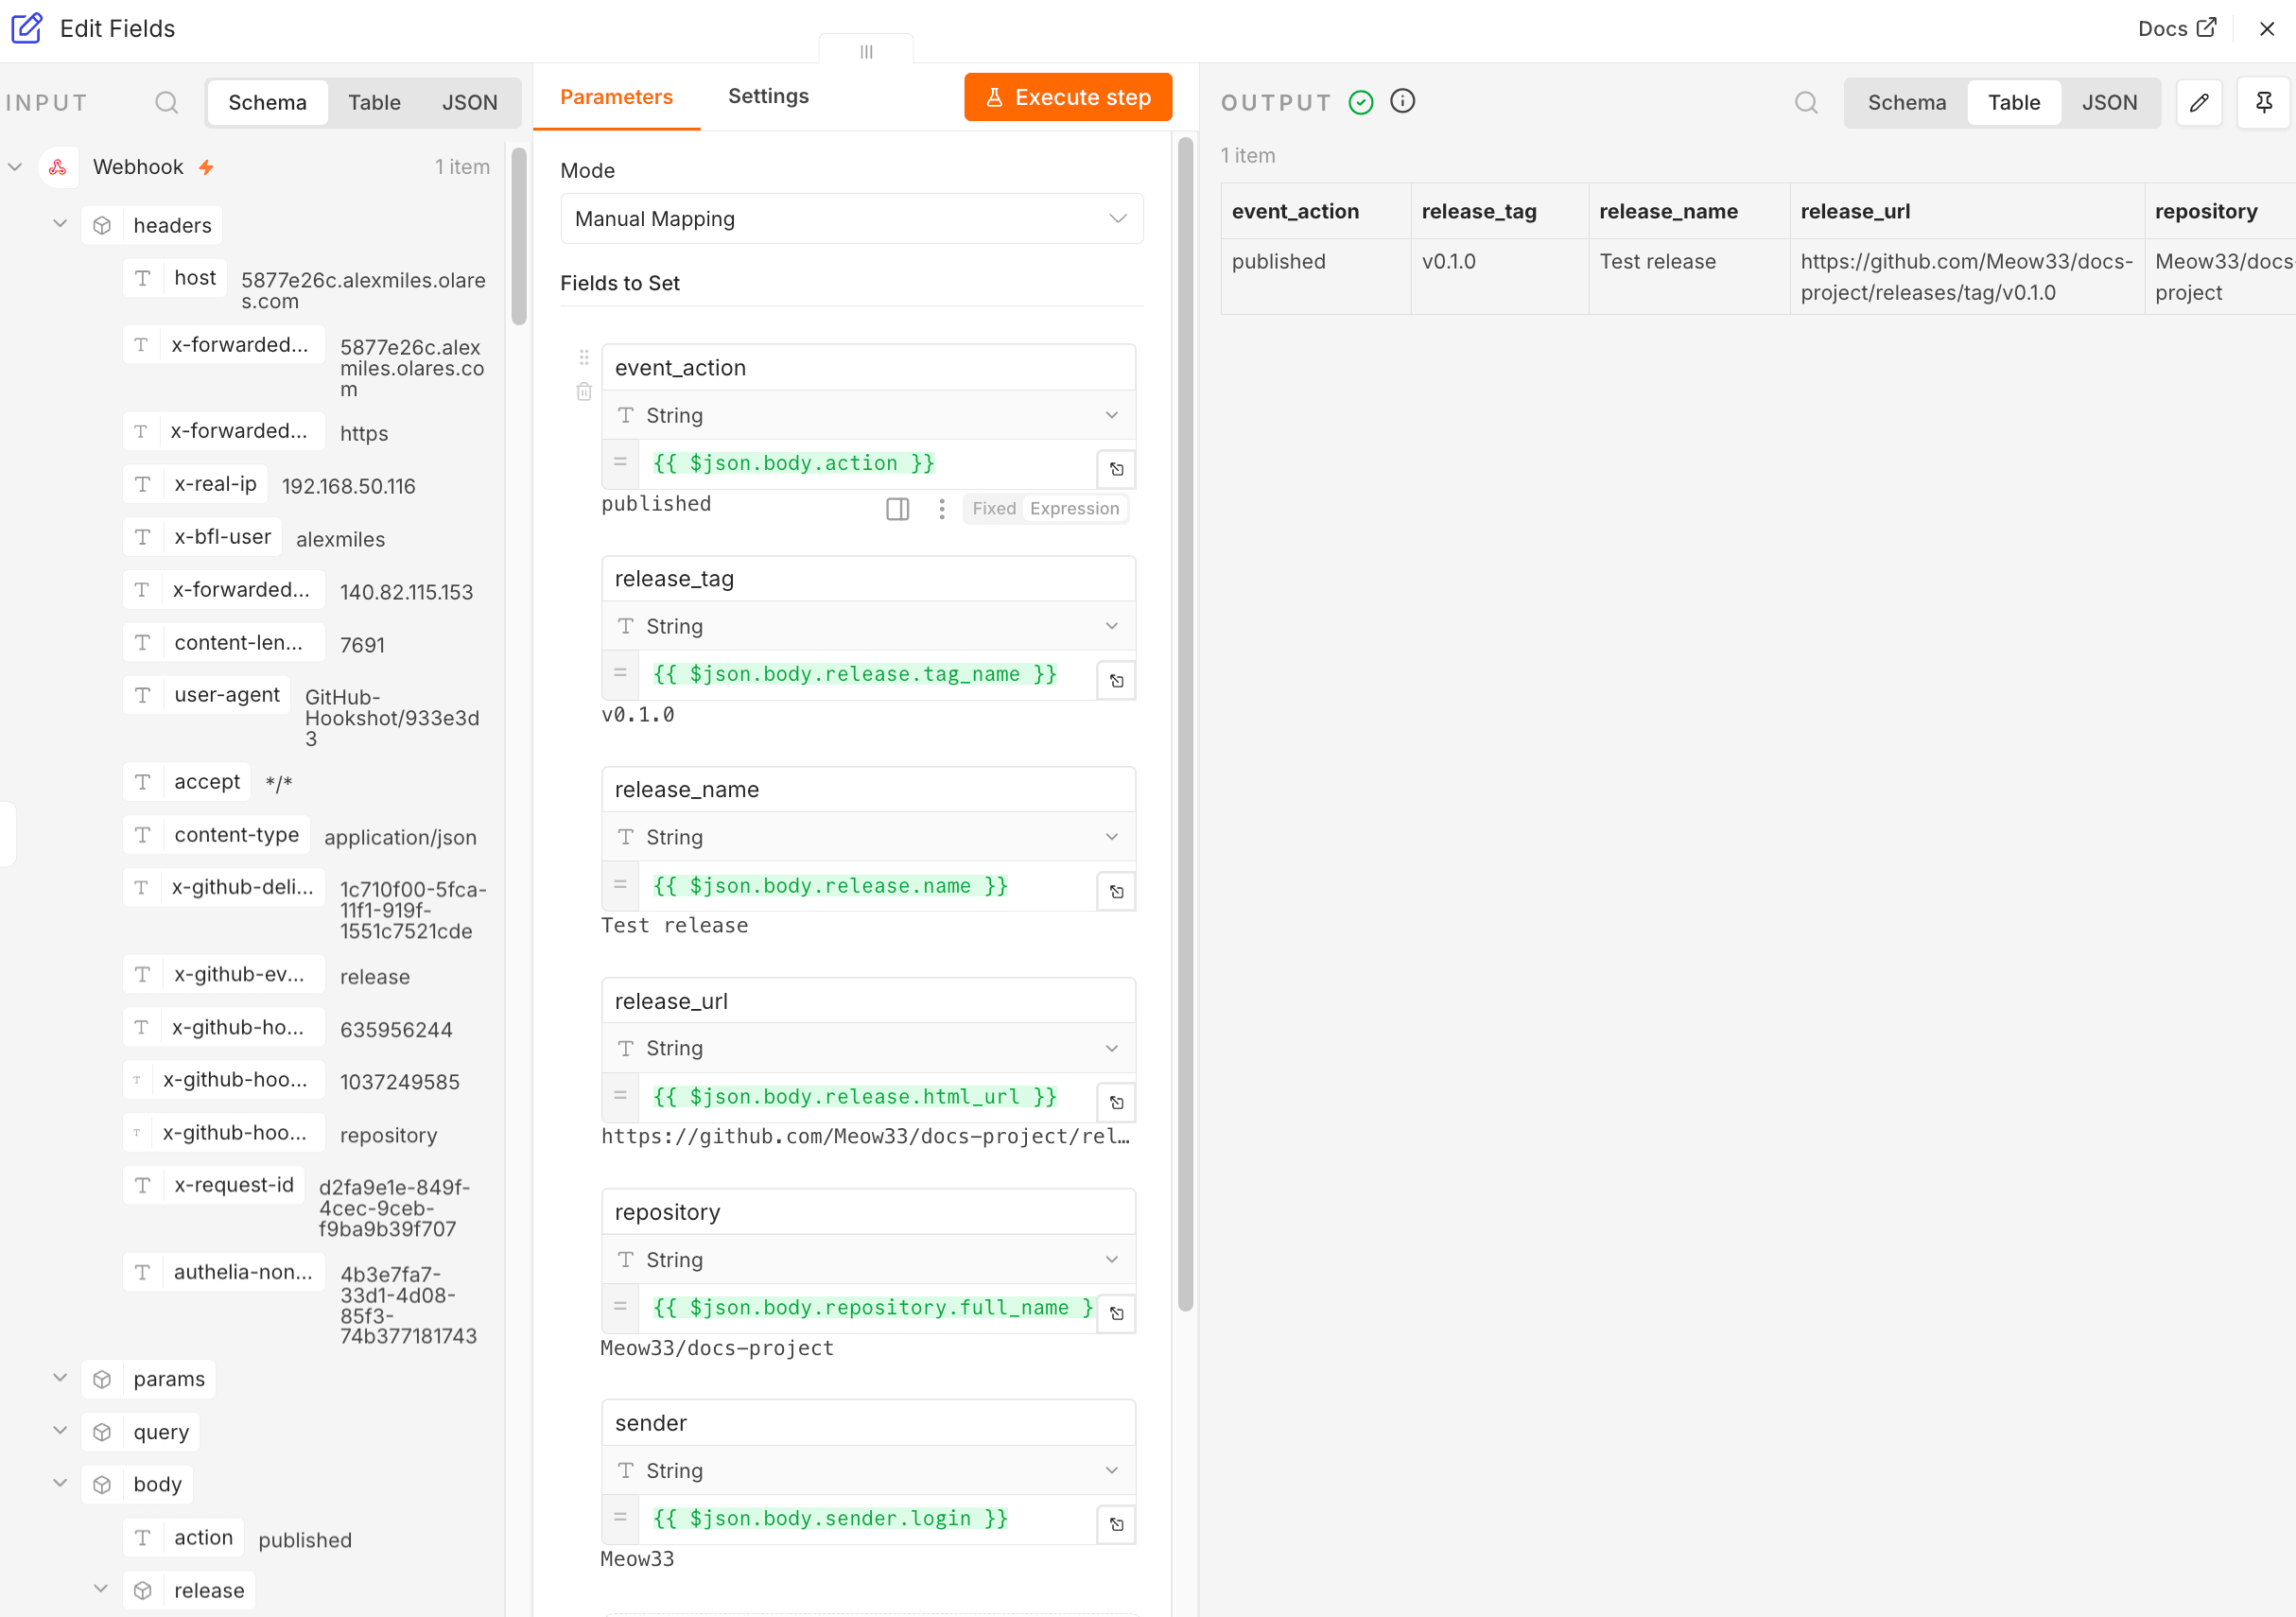
You can then connect the extracted fields to another node, such as NocoDB, Slack, or email.
Publish and switch to the production URL
After the test event works, publish the workflow and update GitHub to use the production URL.
In n8n, click Publish in the upper-right corner. The production webhook starts receiving events after the workflow is published.
Open the Webhook node and copy the Production URL.
If the production URL starts with
http://, change it tohttps://.Return to the GitHub webhook settings and replace the test URL with the HTTPS production URL.
Save the webhook settings in GitHub.
Manage workflows
n8n workflows can be downloaded as JSON and imported into another n8n instance. This is useful for backup, version review, and sharing workflow templates with teammates.
Download a workflow
Open the workflow.
Click more_horiz > Download.
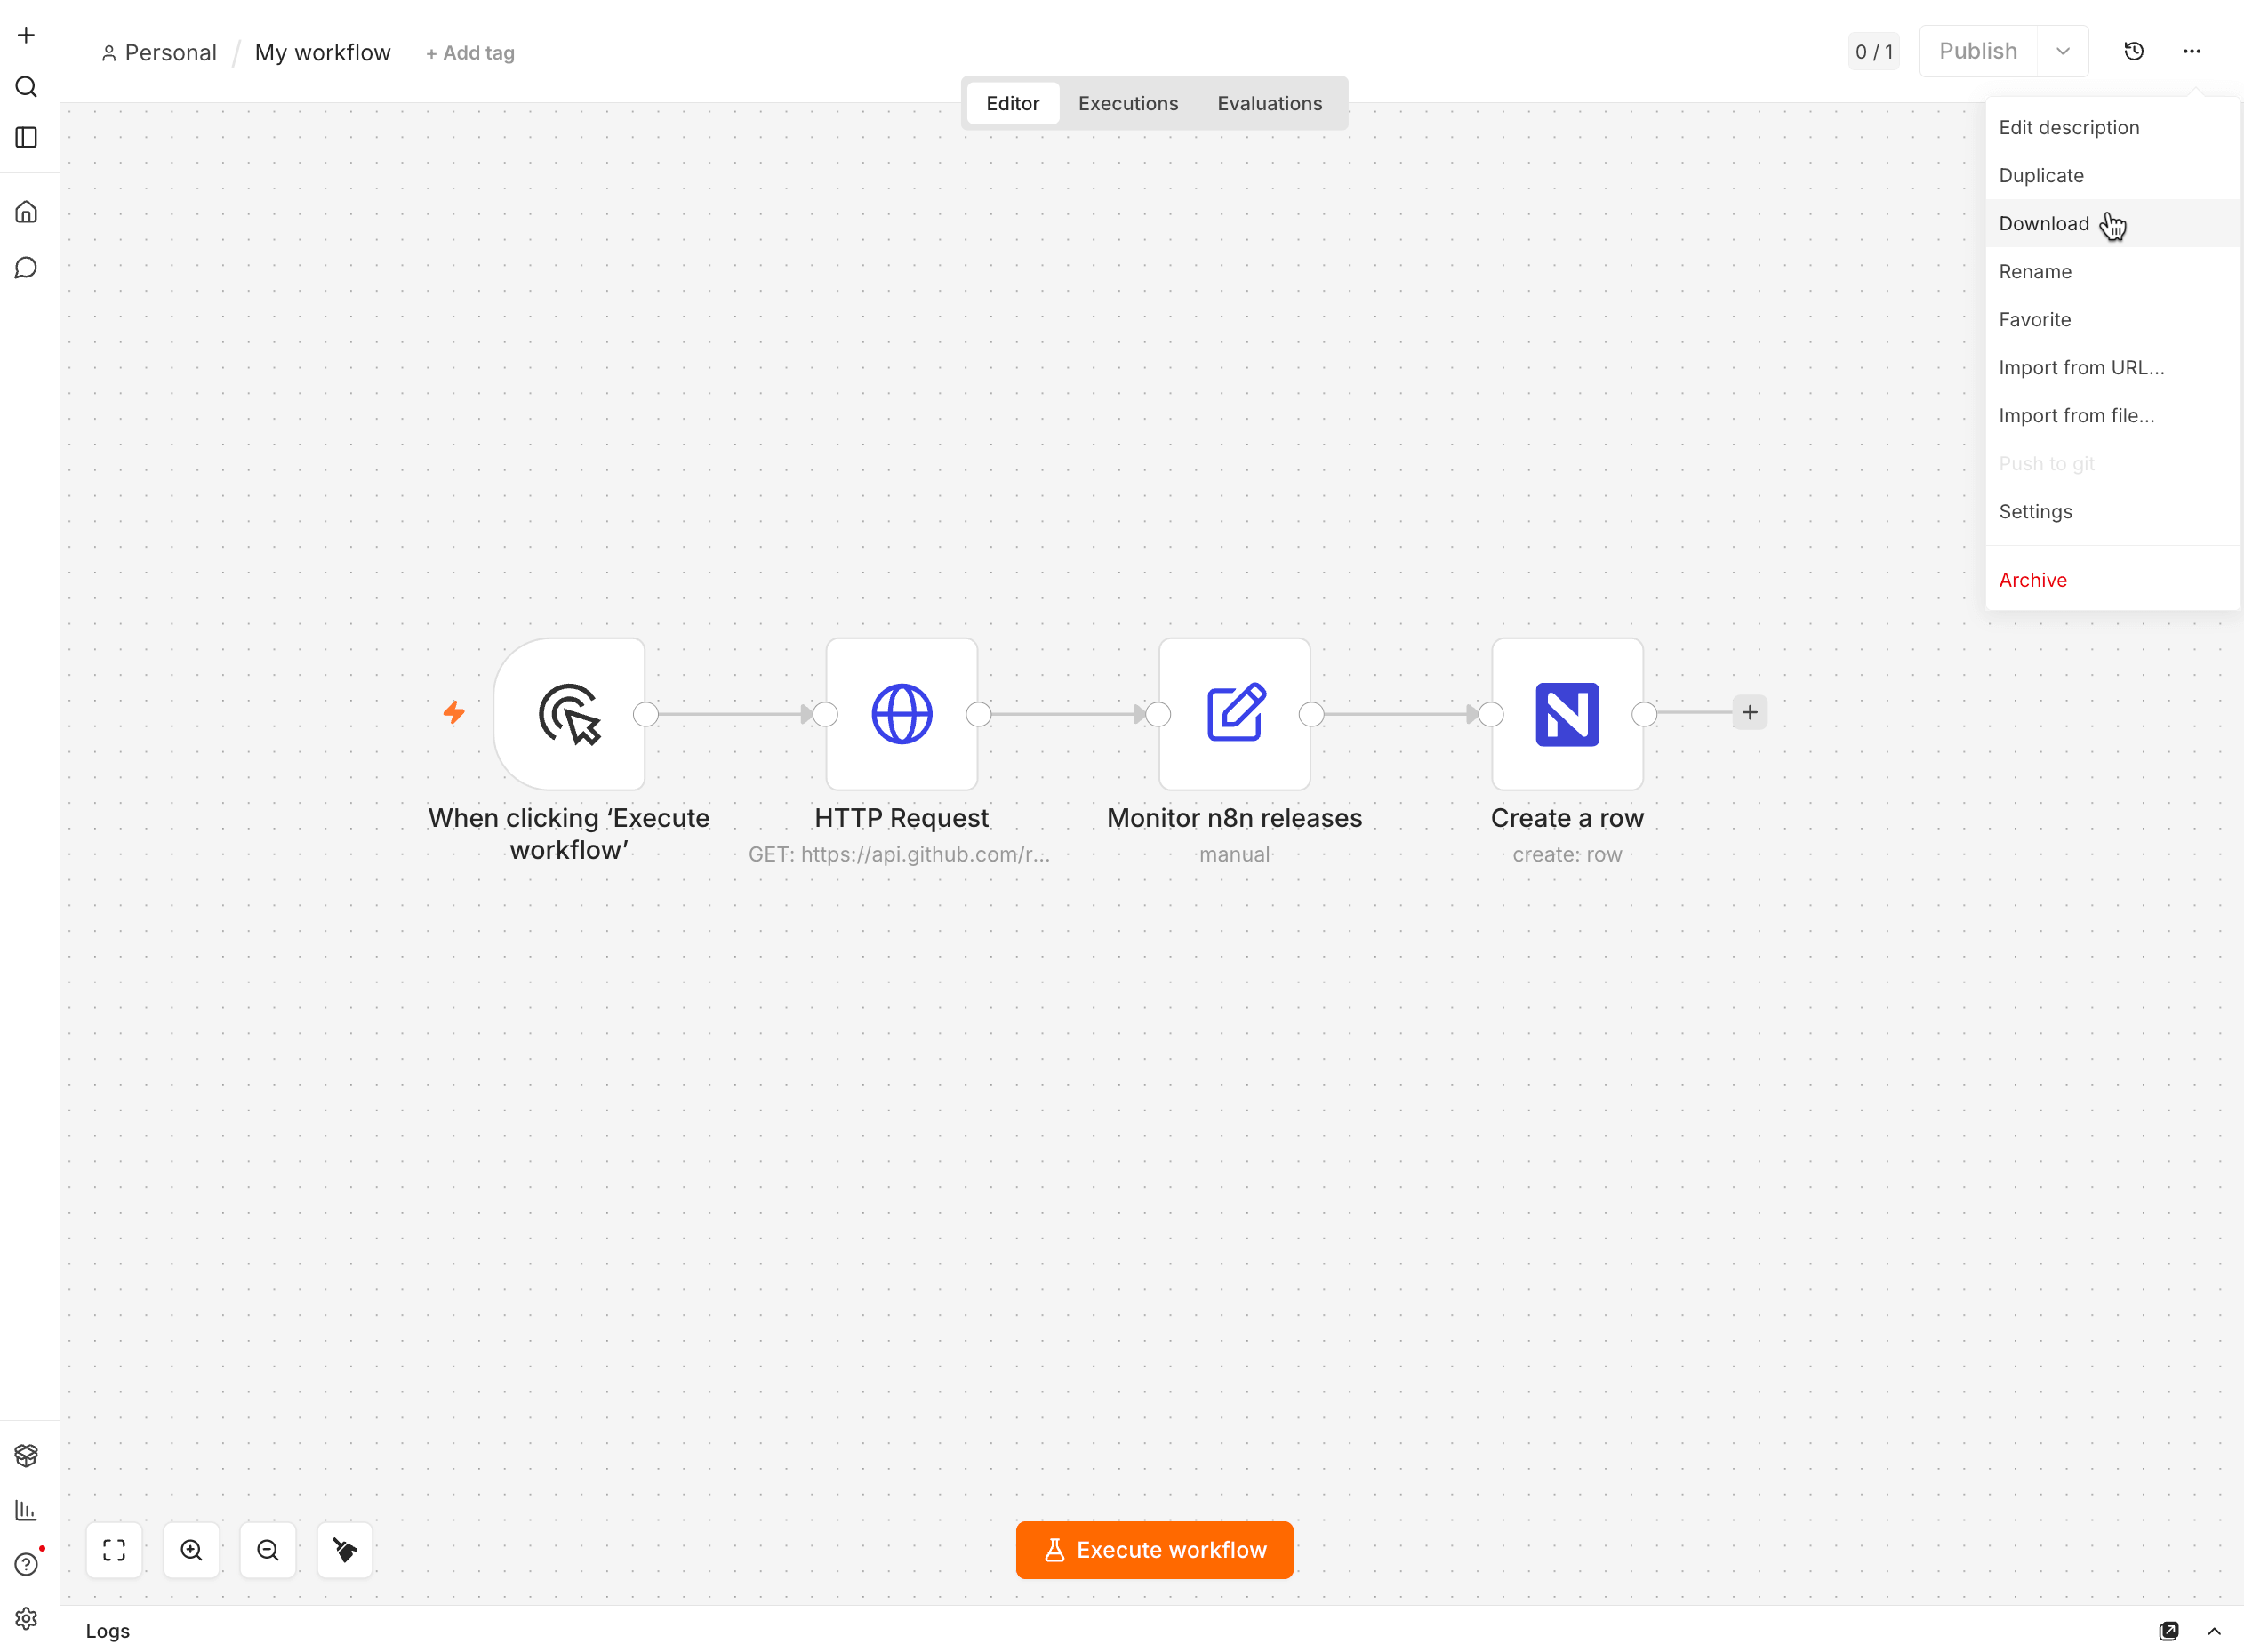
A JSON file is downloaded to your computer.
Import a workflow
Create a new workflow.
Click more_horiz > Import from File.
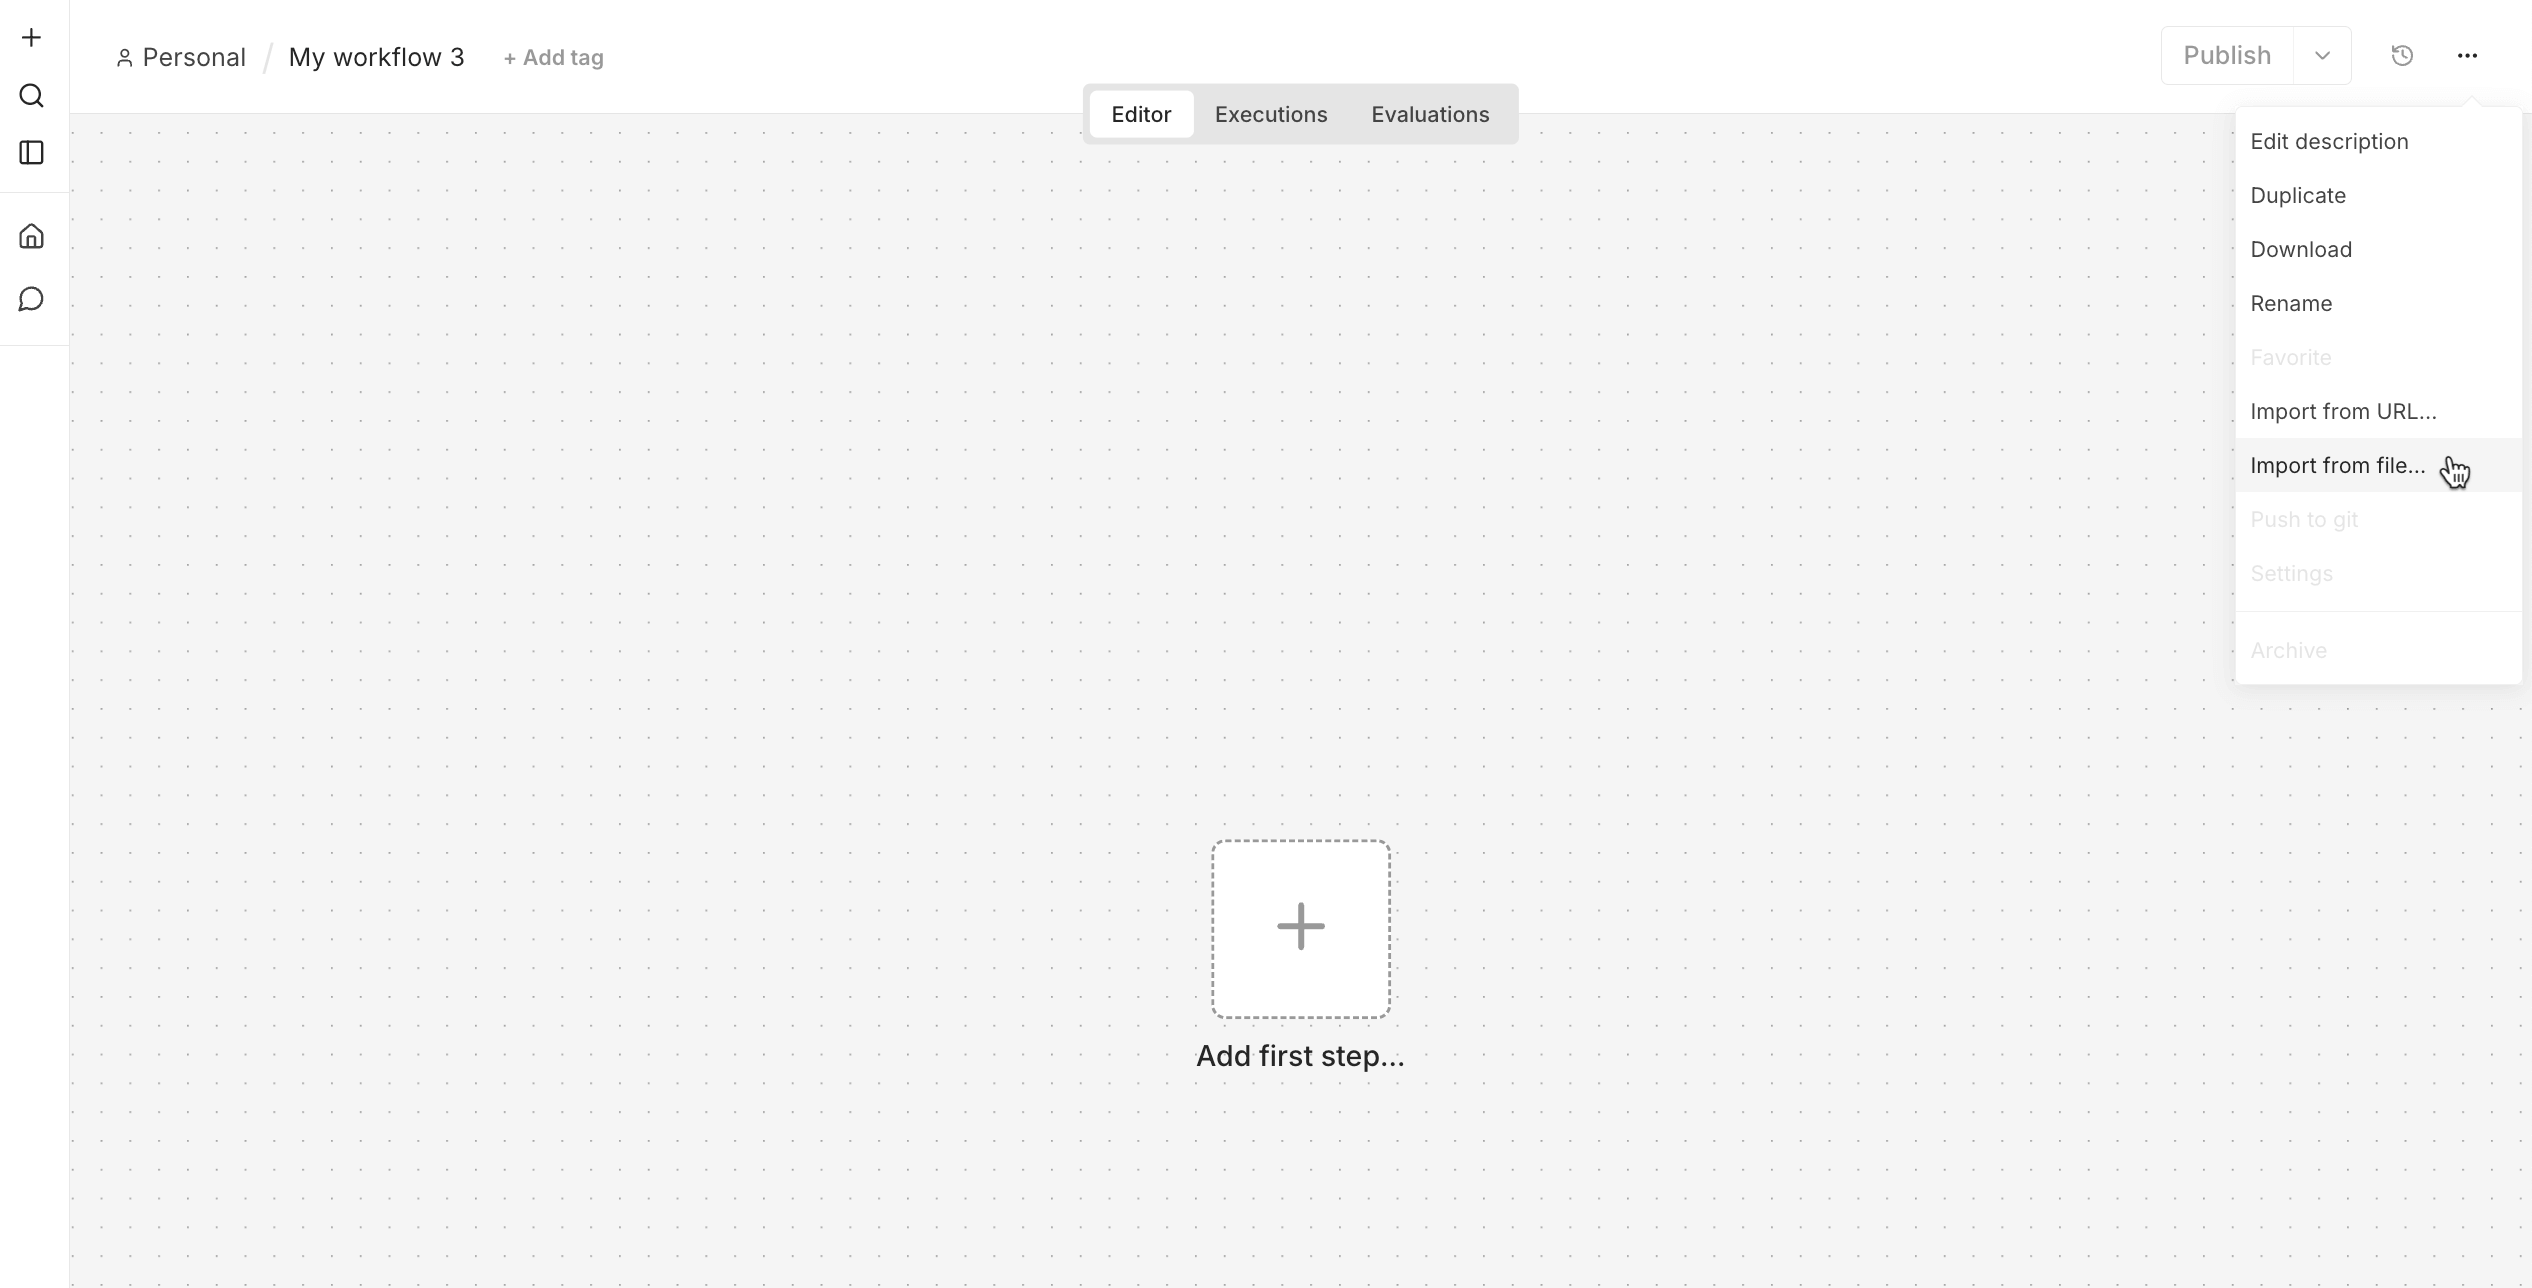
Choose the workflow JSON file.
Review each credential field and reconnect credentials before publishing the workflow.
Review imported workflows
Imported workflows can contain Code nodes, HTTP calls, and webhook paths. Review every node before running workflows from an untrusted source.
FAQs
Why is my webhook not receiving events from external services?
Check the following items:
- Make sure the webhook URL you added to the external service starts with
https://. - When testing, make sure n8n is still waiting after you click Listen for test event.
- After publishing, make sure the external service uses the Production URL, not the test URL.
- If the external service provides delivery logs, check the response status there.
- If the n8n entrance uses Internal, enable LarePass VPN on the computer where you are using n8n and keep it connected while testing.
- If the webhook still fails, you can set the entrance to Public. This exposes n8n to the internet, so use this option only if you accept the security risk.
Learn more
- n8n workflow documentation: Learn how workflows, nodes, templates, executions, and sharing work in n8n.
- n8n integrations documentation: Browse built-in nodes, community nodes, credential-only nodes, and generic API integration options.
- HTTP Request node: Configure REST API calls or import a
curlcommand into n8n. - NocoDB on Olares: Create tables, import data, configure email, and manage team access.