Use LiteLLM as a unified AI model gateway
LiteLLM is an AI gateway that unifies APIs from different model providers (such as OpenAI, Anthropic, Google, and local engines like Ollama) into a single OpenAI-compatible interface. It automatically converts request parameters to the format each provider expects and routes requests to the correct backend.
Running LiteLLM on Olares gives you a central place to manage all your model configurations, switch freely between remote and local providers, and expose a single API endpoint for other apps to consume.
Learning objectives
In this guide, you will learn how to:
- Install LiteLLM.
- Add and configure an OpenAI-compatible local model in LiteLLM.
- Test model connection using the built-in Playground.
- Generate virtual keys and connect LiteLLM to Open WebUI.
- Monitor API call logs and model usage statistics.
Understand the LiteLLM gateway
LiteLLM sits between your apps and model providers, acting as a proxy layer:
- Unified interface: LiteLLM normalizes the different API formats from providers like OpenAI, Anthropic, Google, and local engines (Ollama, vLLM) into a single OpenAI-compatible standard.
- Automatic format conversion: When you send a request using the standard parameters, LiteLLM translates them into the specific parameter names and data structures the target provider expects.
- Request routing: Based on the model name in your request, LiteLLM determines whether to forward it to a remote cloud provider or a local model server.
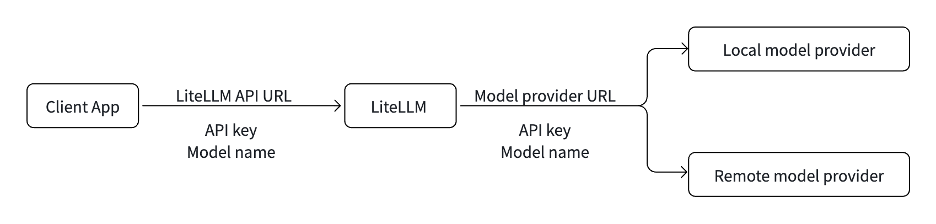
Because of this unified layer, your client apps only need one API endpoint to access all your configured models.
Prerequisites
Before you begin, you need:
Olares admin privileges.
The following model:
Model type Model How to get it Chat Qwen3.6-27B (llama.cpp) Install from Market
Install LiteLLM
Open Market and search for "LiteLLM".
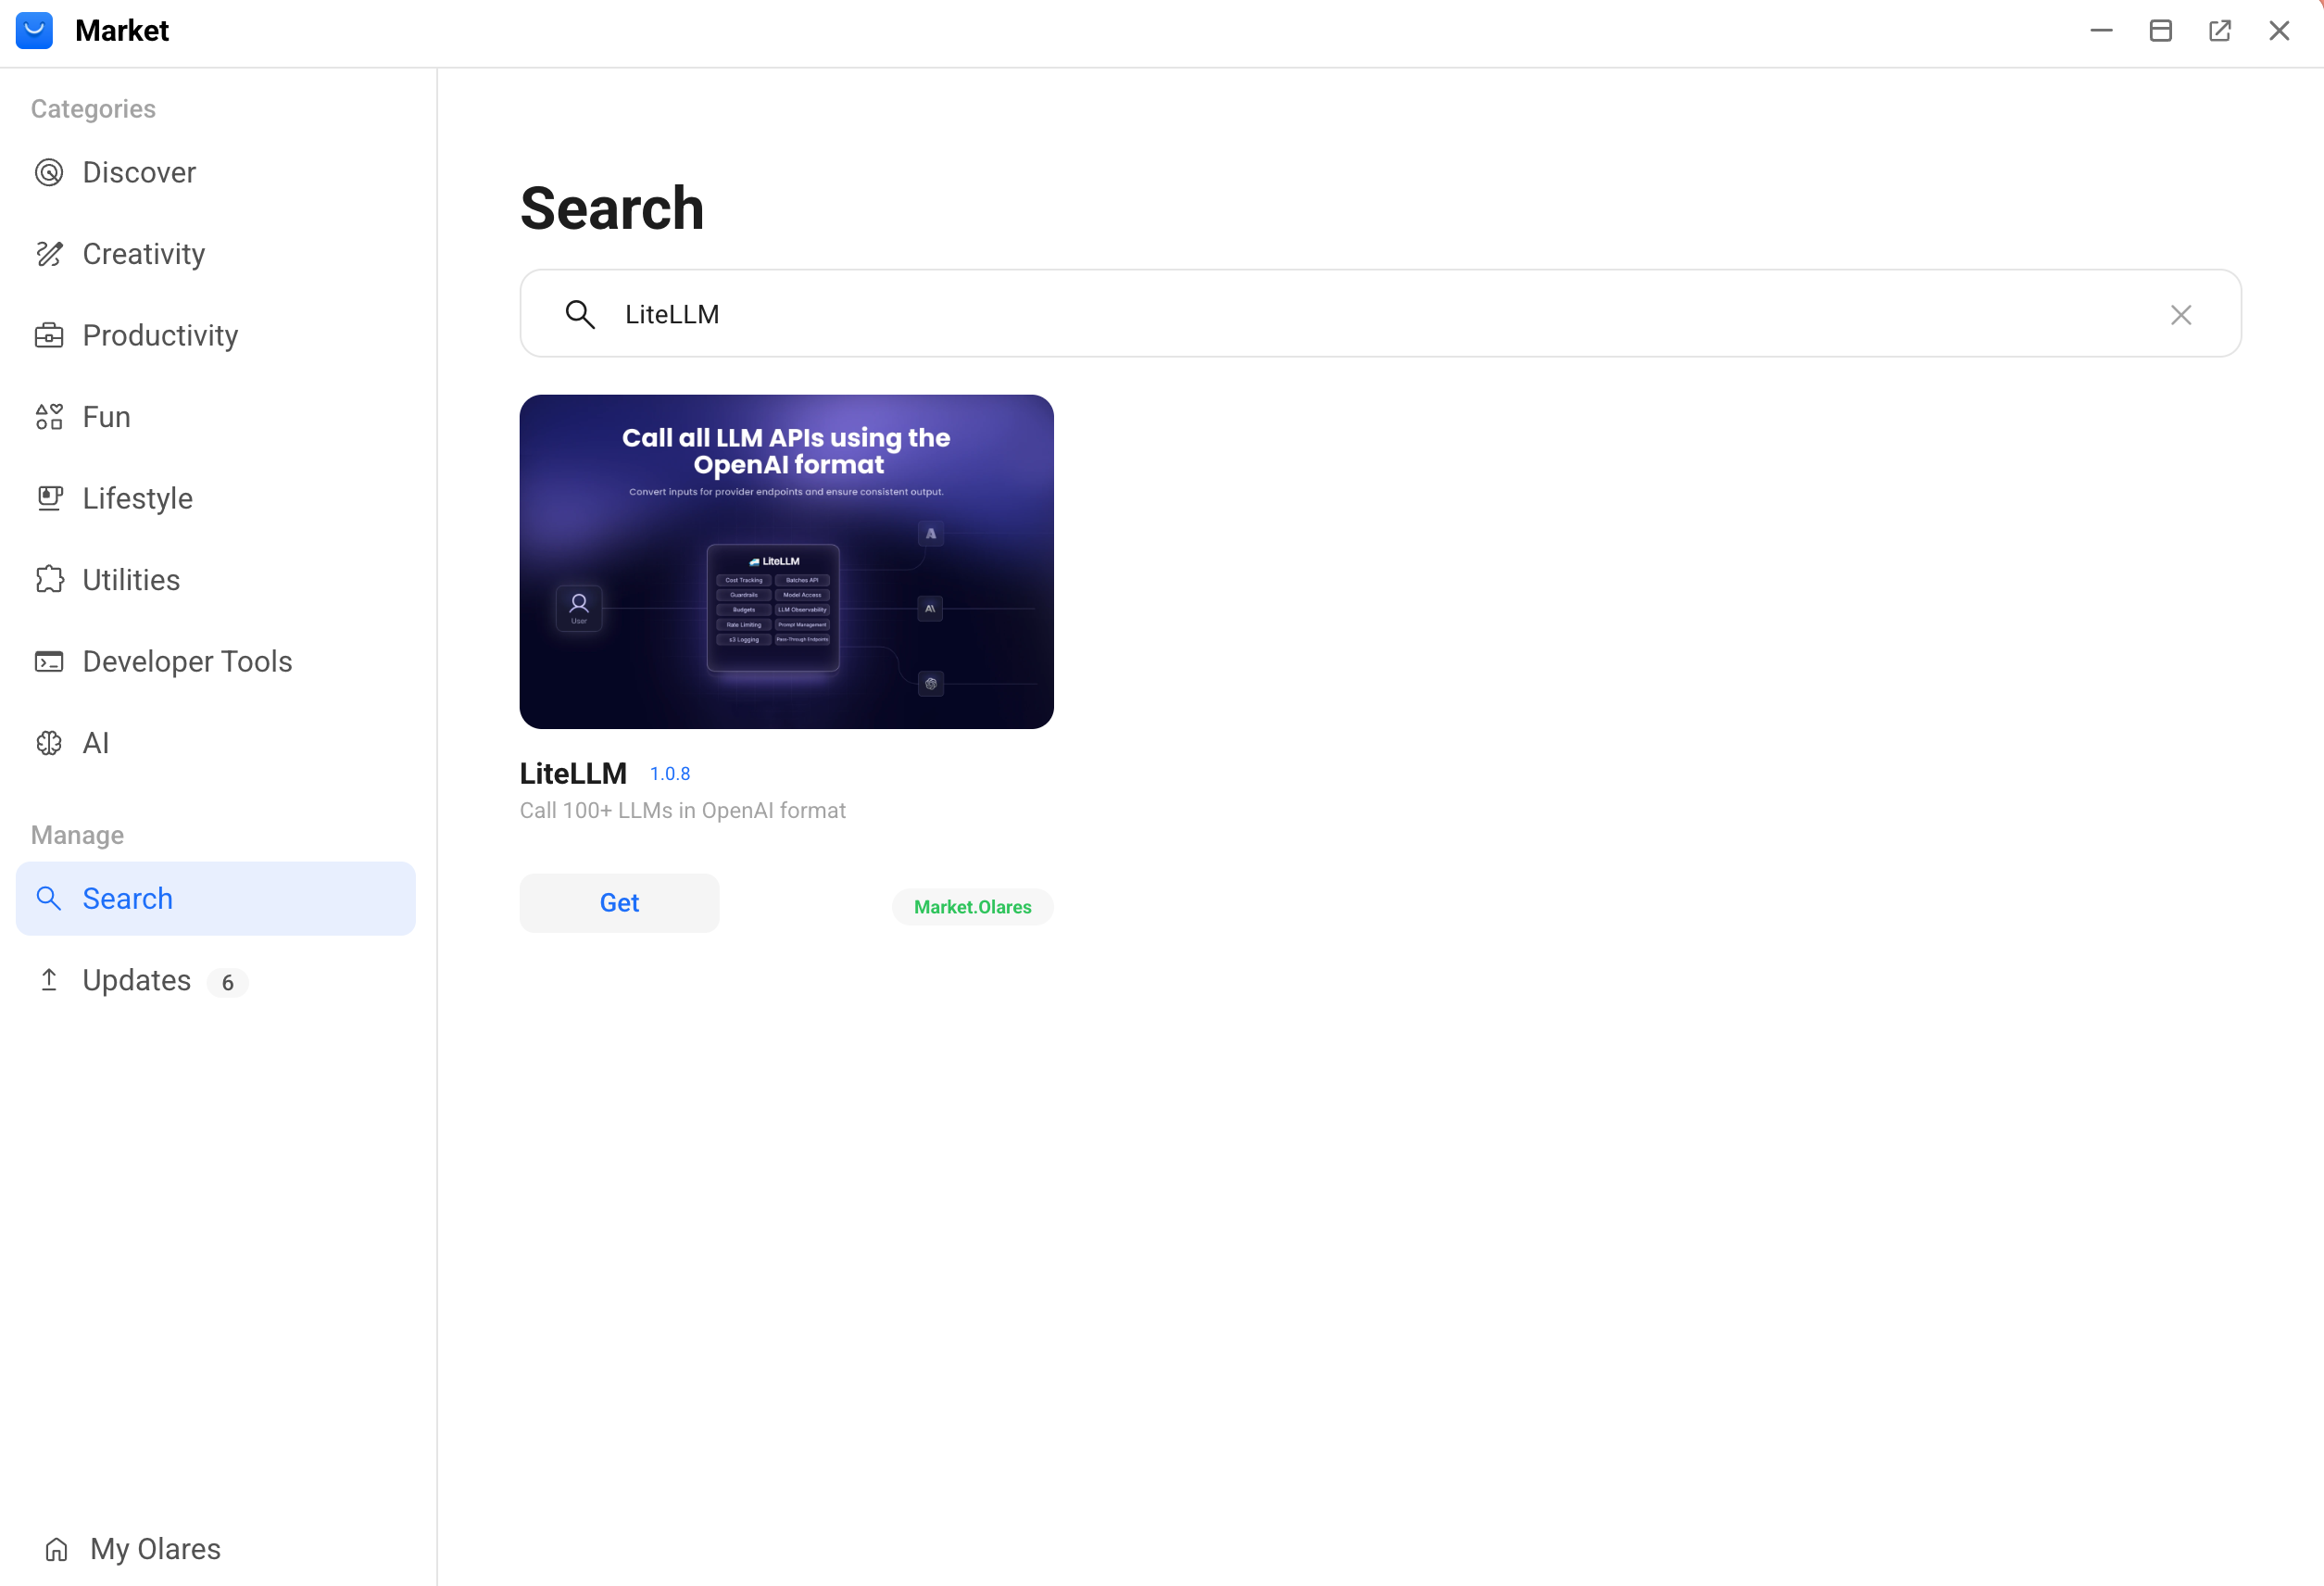
Click Get, and then click Install.
When prompted, set the environment variables:
- UI_USERNAME: Specify the username for admin account.
- UI_PASSWORD: Specify the password for admin account.
Click Confirm and wait for the installation to finish.
Add a model
Get model connection details
How model connections work
A standalone model on Olares runs as a separate service from the client app. To connect them, the client needs the exact Model name and a Base URL that matches the API format it expects.
You can get both values from the model's console. For more details, see Connect AI apps.
For Qwen3.6-27B (llama.cpp), LiteLLM uses the OpenAI-compatible API format. In the Model Console, select OpenAI-Compatible, then follow these steps:
Open the model app from Launchpad. Its Model Console opens automatically.
Wait until Model shows READY and Engine shows RUNNING.
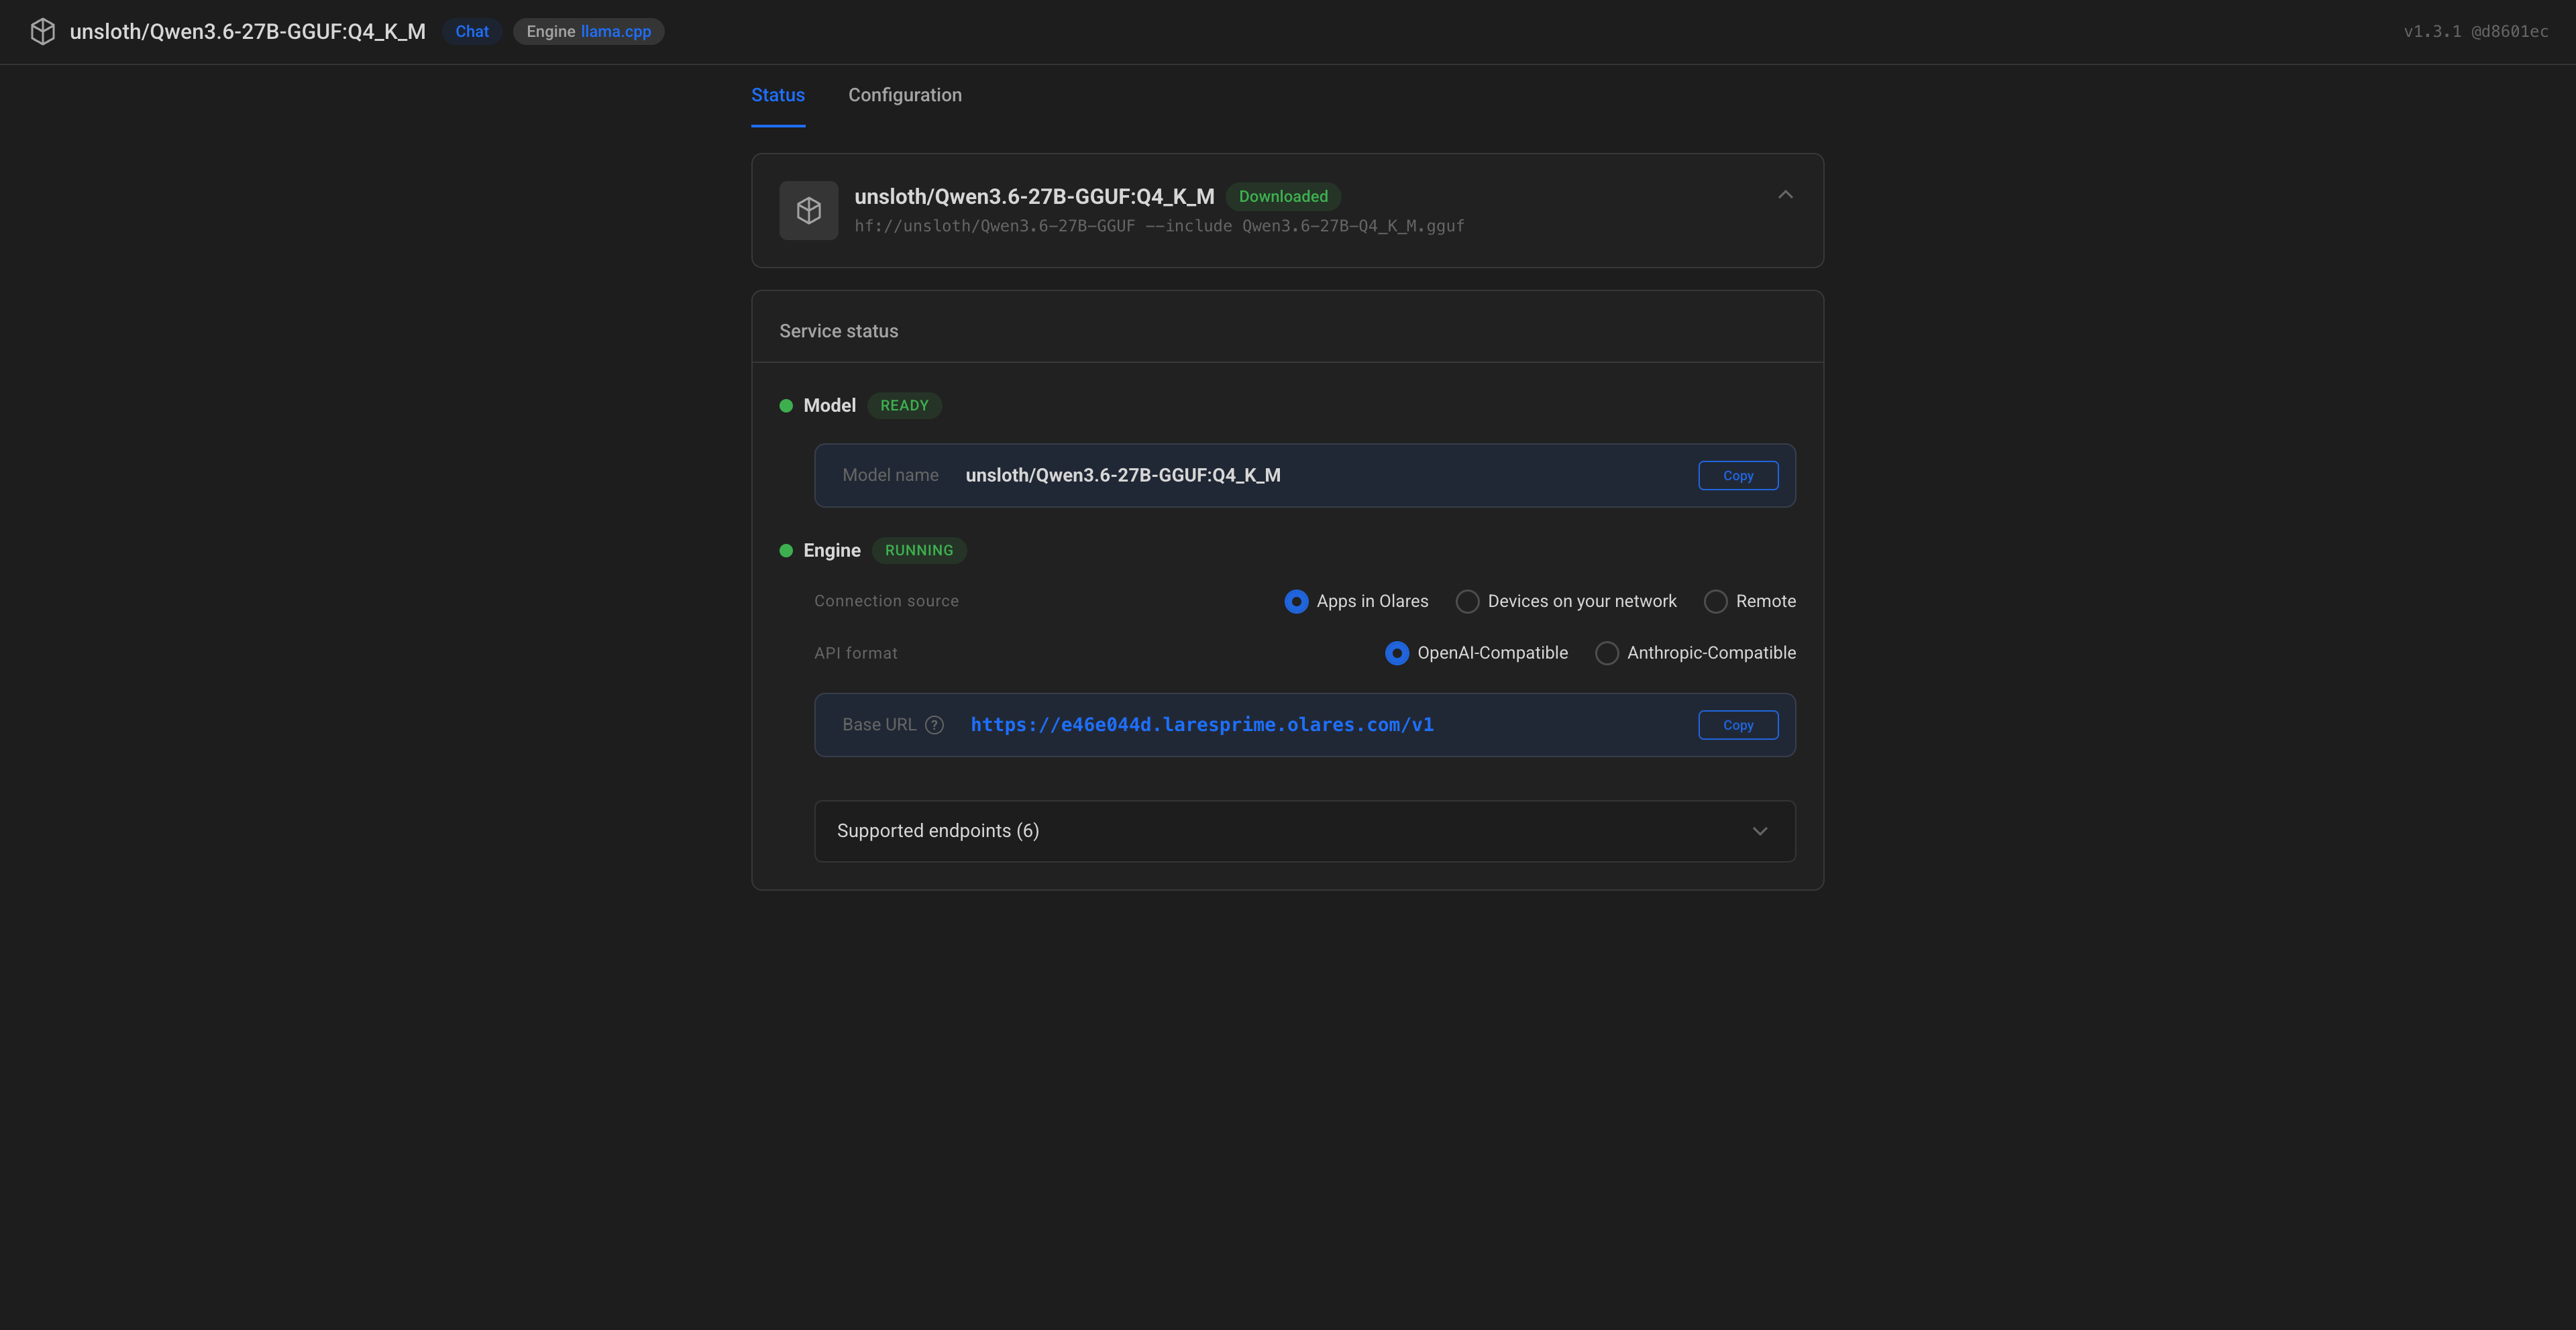
Under Model, copy the Model name exactly as shown.
Under Engine:
a. Connection source: Select Apps in Olares.
b. API format: Select OpenAI-Compatible.
c. Copy the provided Base URL exactly as shown.
Add the model to LiteLLM
Open LiteLLM from the Launchpad, and then log in with the admin credentials you set during installation.
Select Models + Endpoints from the left sidebar, and then click the Add Model tab.
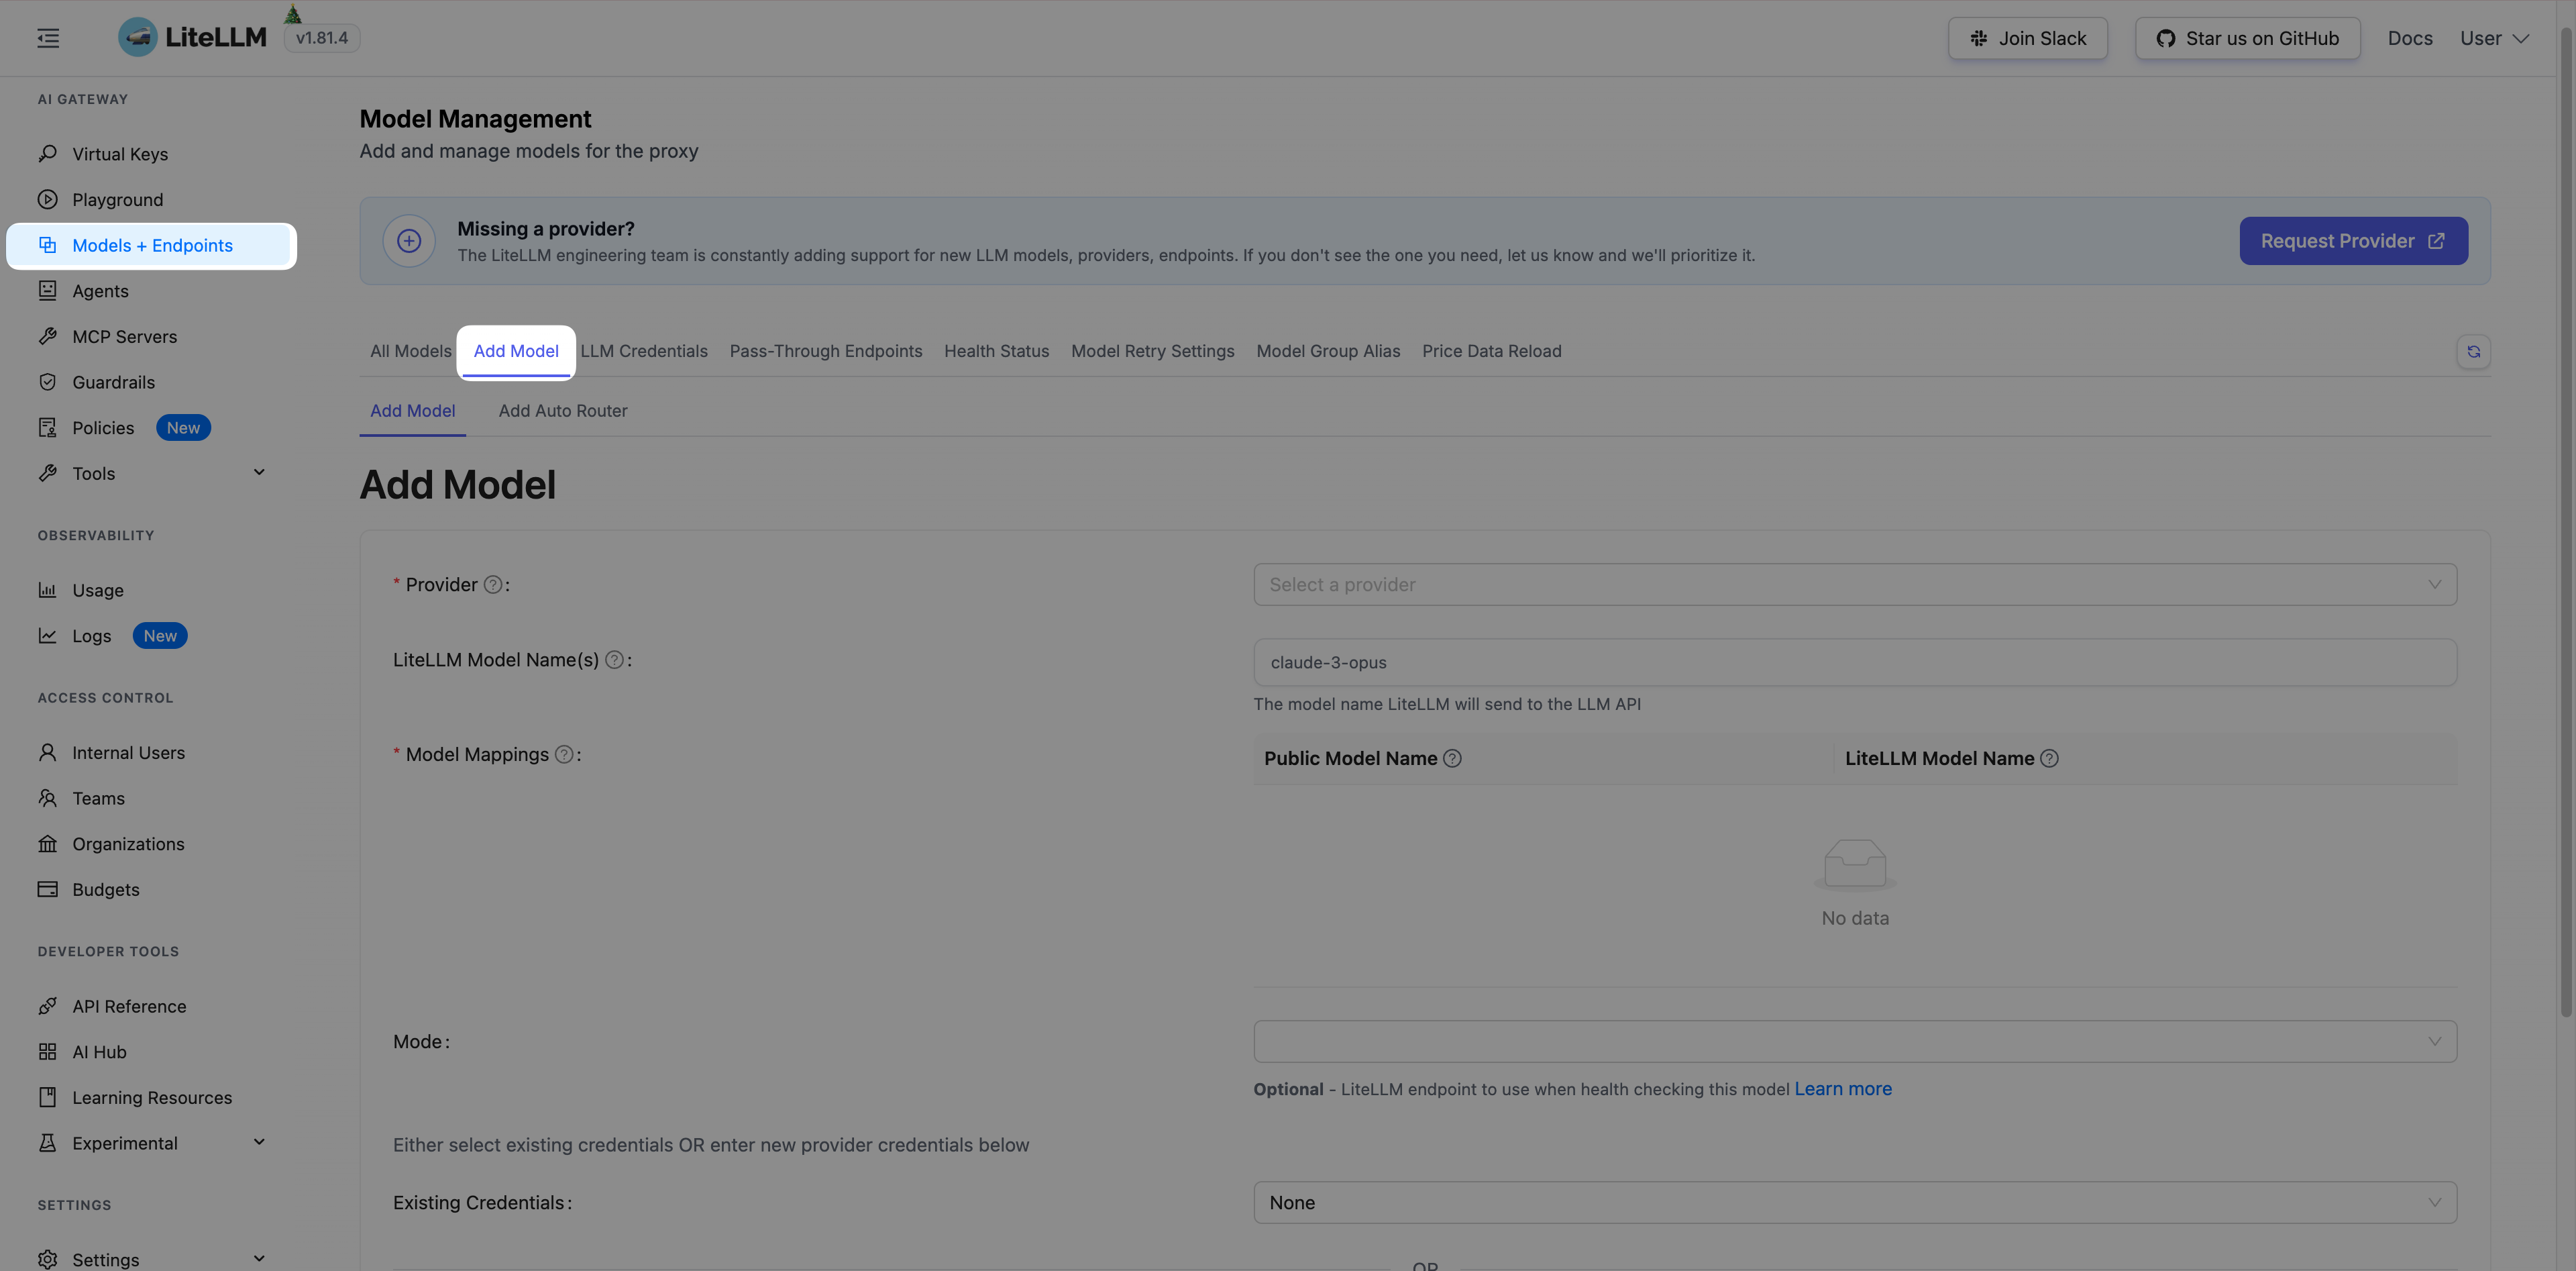
Configure the following settings:
- Provider: Select OpenAI.
- LiteLLM Model Name(s): Enter the exact Model name copied from the Model Console. In this example, it is
unsloth/Qwen3.6-27B-GGUF:Q4_K_M. - Public Model Name: Enter a recognizable alias, such as
qwen3.6-27b. - API Base: Paste the Base URL from the Qwen3.6-27B Model Console. Use it exactly as displayed.
- API Key: Enter a placeholder value, such as
local.
Click Test Connect at the bottom of the page.
When the Connection Test Results window shows a connection success message, close the window.
Click Add Model next to Test Connect. You can now view your newly added model on the All Models tab.
Test the model
Select Playground from the left sidebar.
On the Chat tab, configure the following settings:
- Virtual Key Source: Keep the default Current UI Session.
- Custom Proxy Base URL: Leave this empty. Filling it in will cause errors.
- Endpoint Type: Select the mode that matches your model. For chat models, select v1/chat/completions.
- Select Model: Select the model you just added. In this example, it is qwen3.6-27b.
On the Test Key panel, send a prompt in the chat to evaluate the model's performance.
For example:
textWrite a 3-paragraph sci-fi story about a robot discovering a forgotten libraryYou can review metrics such as Time to First Token (TTFT), total latency, and input/output token counts.
To check the model's supported features and parameters, select AI Hub from the left sidebar, and then click Details on the Model Hub tab.
You can see the details on the model overview page.
Use LiteLLM with Open WebUI
This section uses Open WebUI as an example. The same approach applies to any client app that supports OpenAI-compatible APIs.
Generate a virtual key
In LiteLLM, select Virtual Keys from the left sidebar, and then click Create New Key.
In the Key Ownership window, configure the following settings:
- Key Name: Enter a descriptive name for easy identification.
- Models: Select the models this key is allowed to access.
- Keep all other options as their defaults.
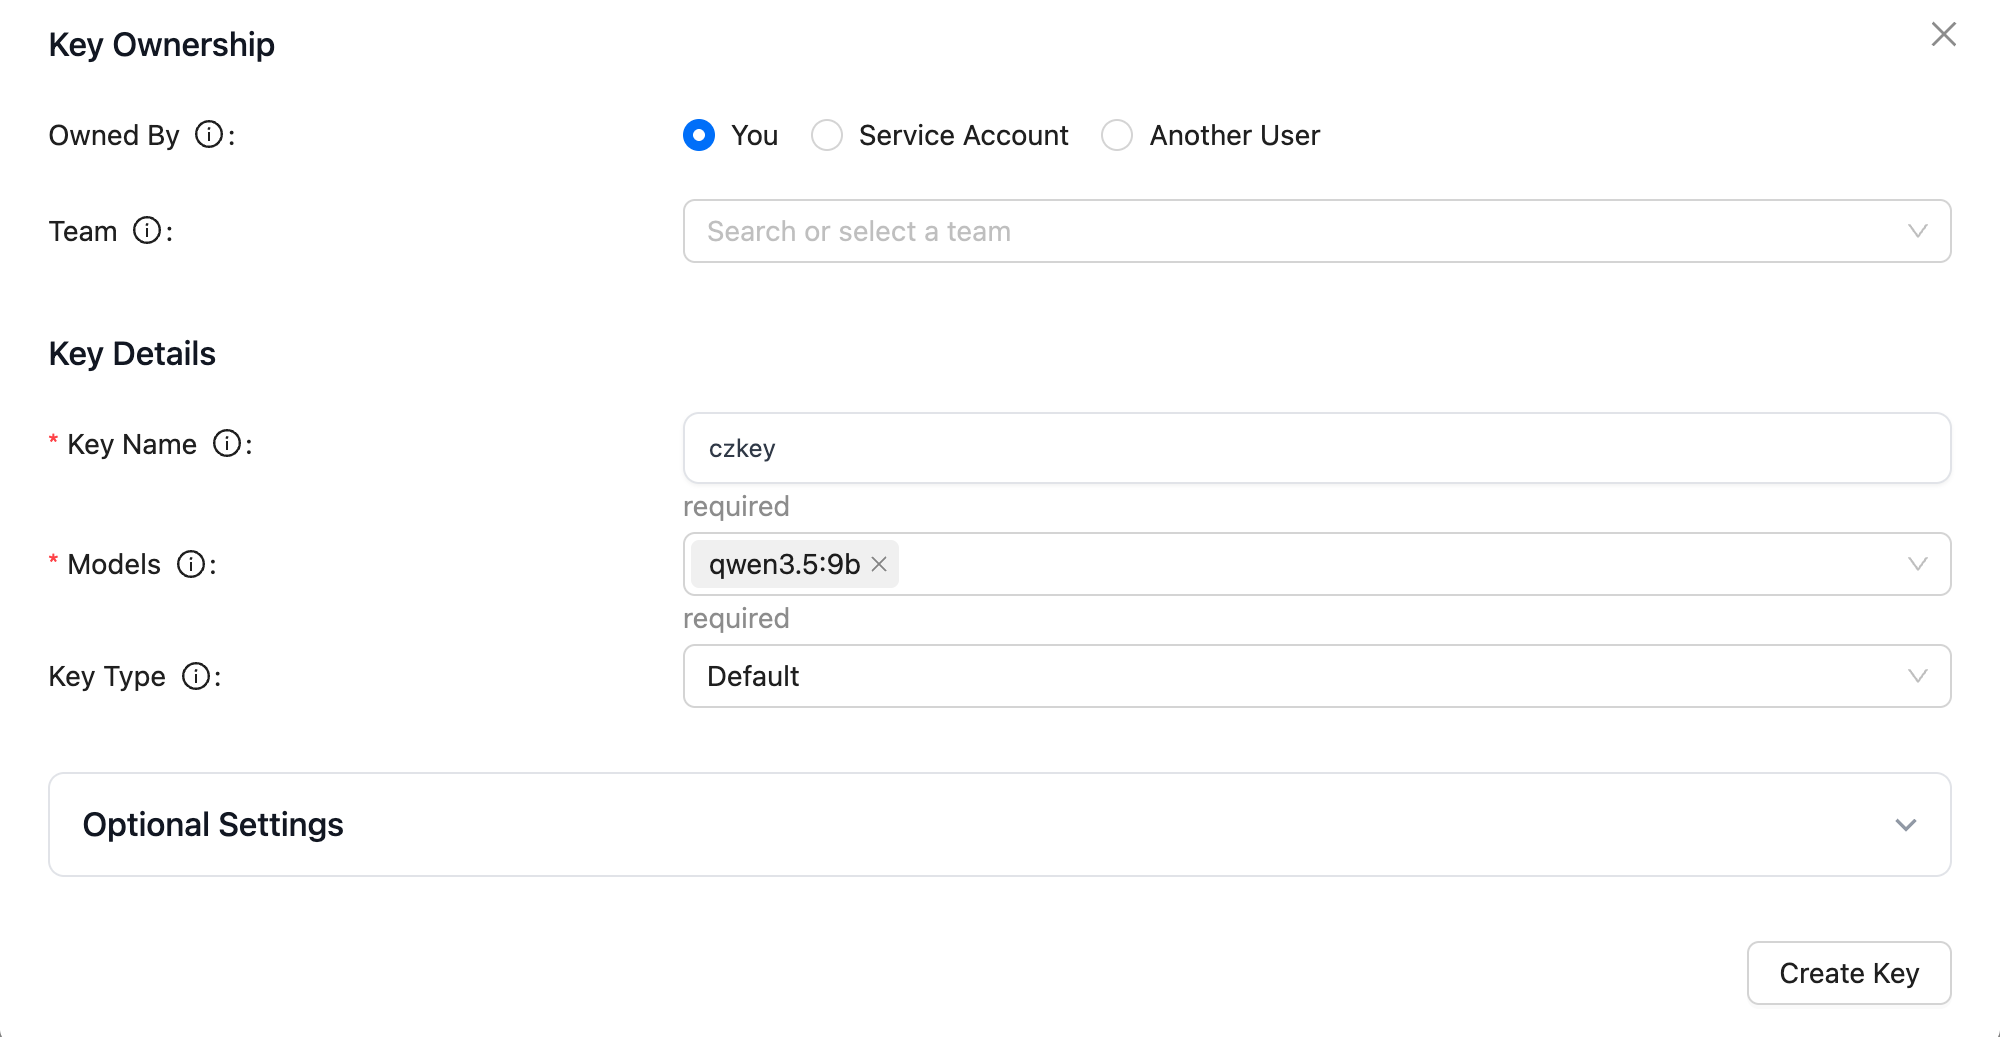
Click Create Key.
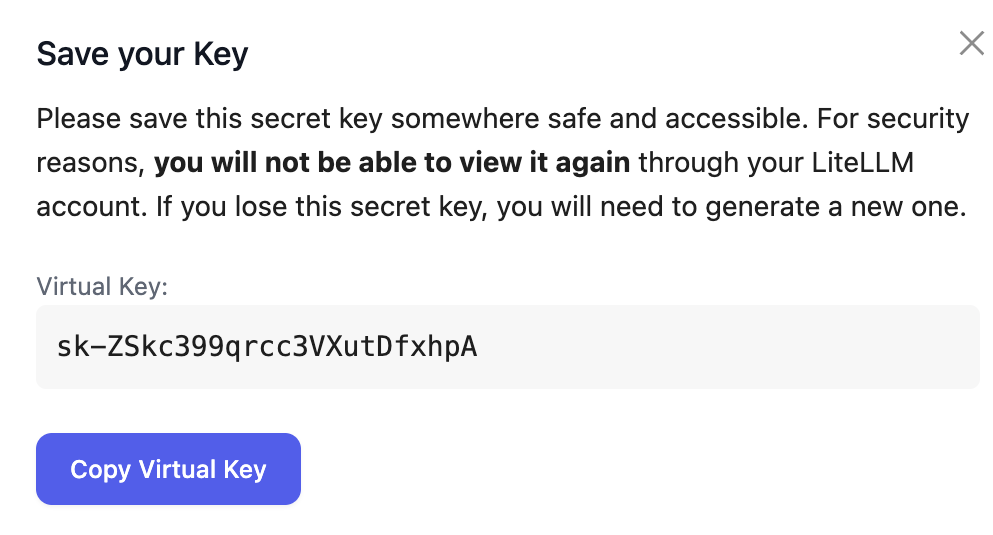
In the Save your Key window, copy the virtual key for later use.
Get the LiteLLM API endpoint
How app endpoints work
When a client connects to another Olares app, it uses that app's endpoint as the network address. If the app exposes multiple endpoints, choose the one that matches the feature or protocol the client needs.
For LiteLLM:
- Go to Olares Settings > Applications > LiteLLM > Entrances.
- Select LiteLLM API, then copy the Endpoint URL.
Use this Endpoint as the API Base URL in Open WebUI.
Connect Open WebUI to LiteLLM
Launch Open WebUI, click your user avatar in the lower-left corner, and then select Admin Panel.
Click the Settings tab, and then click Connections.
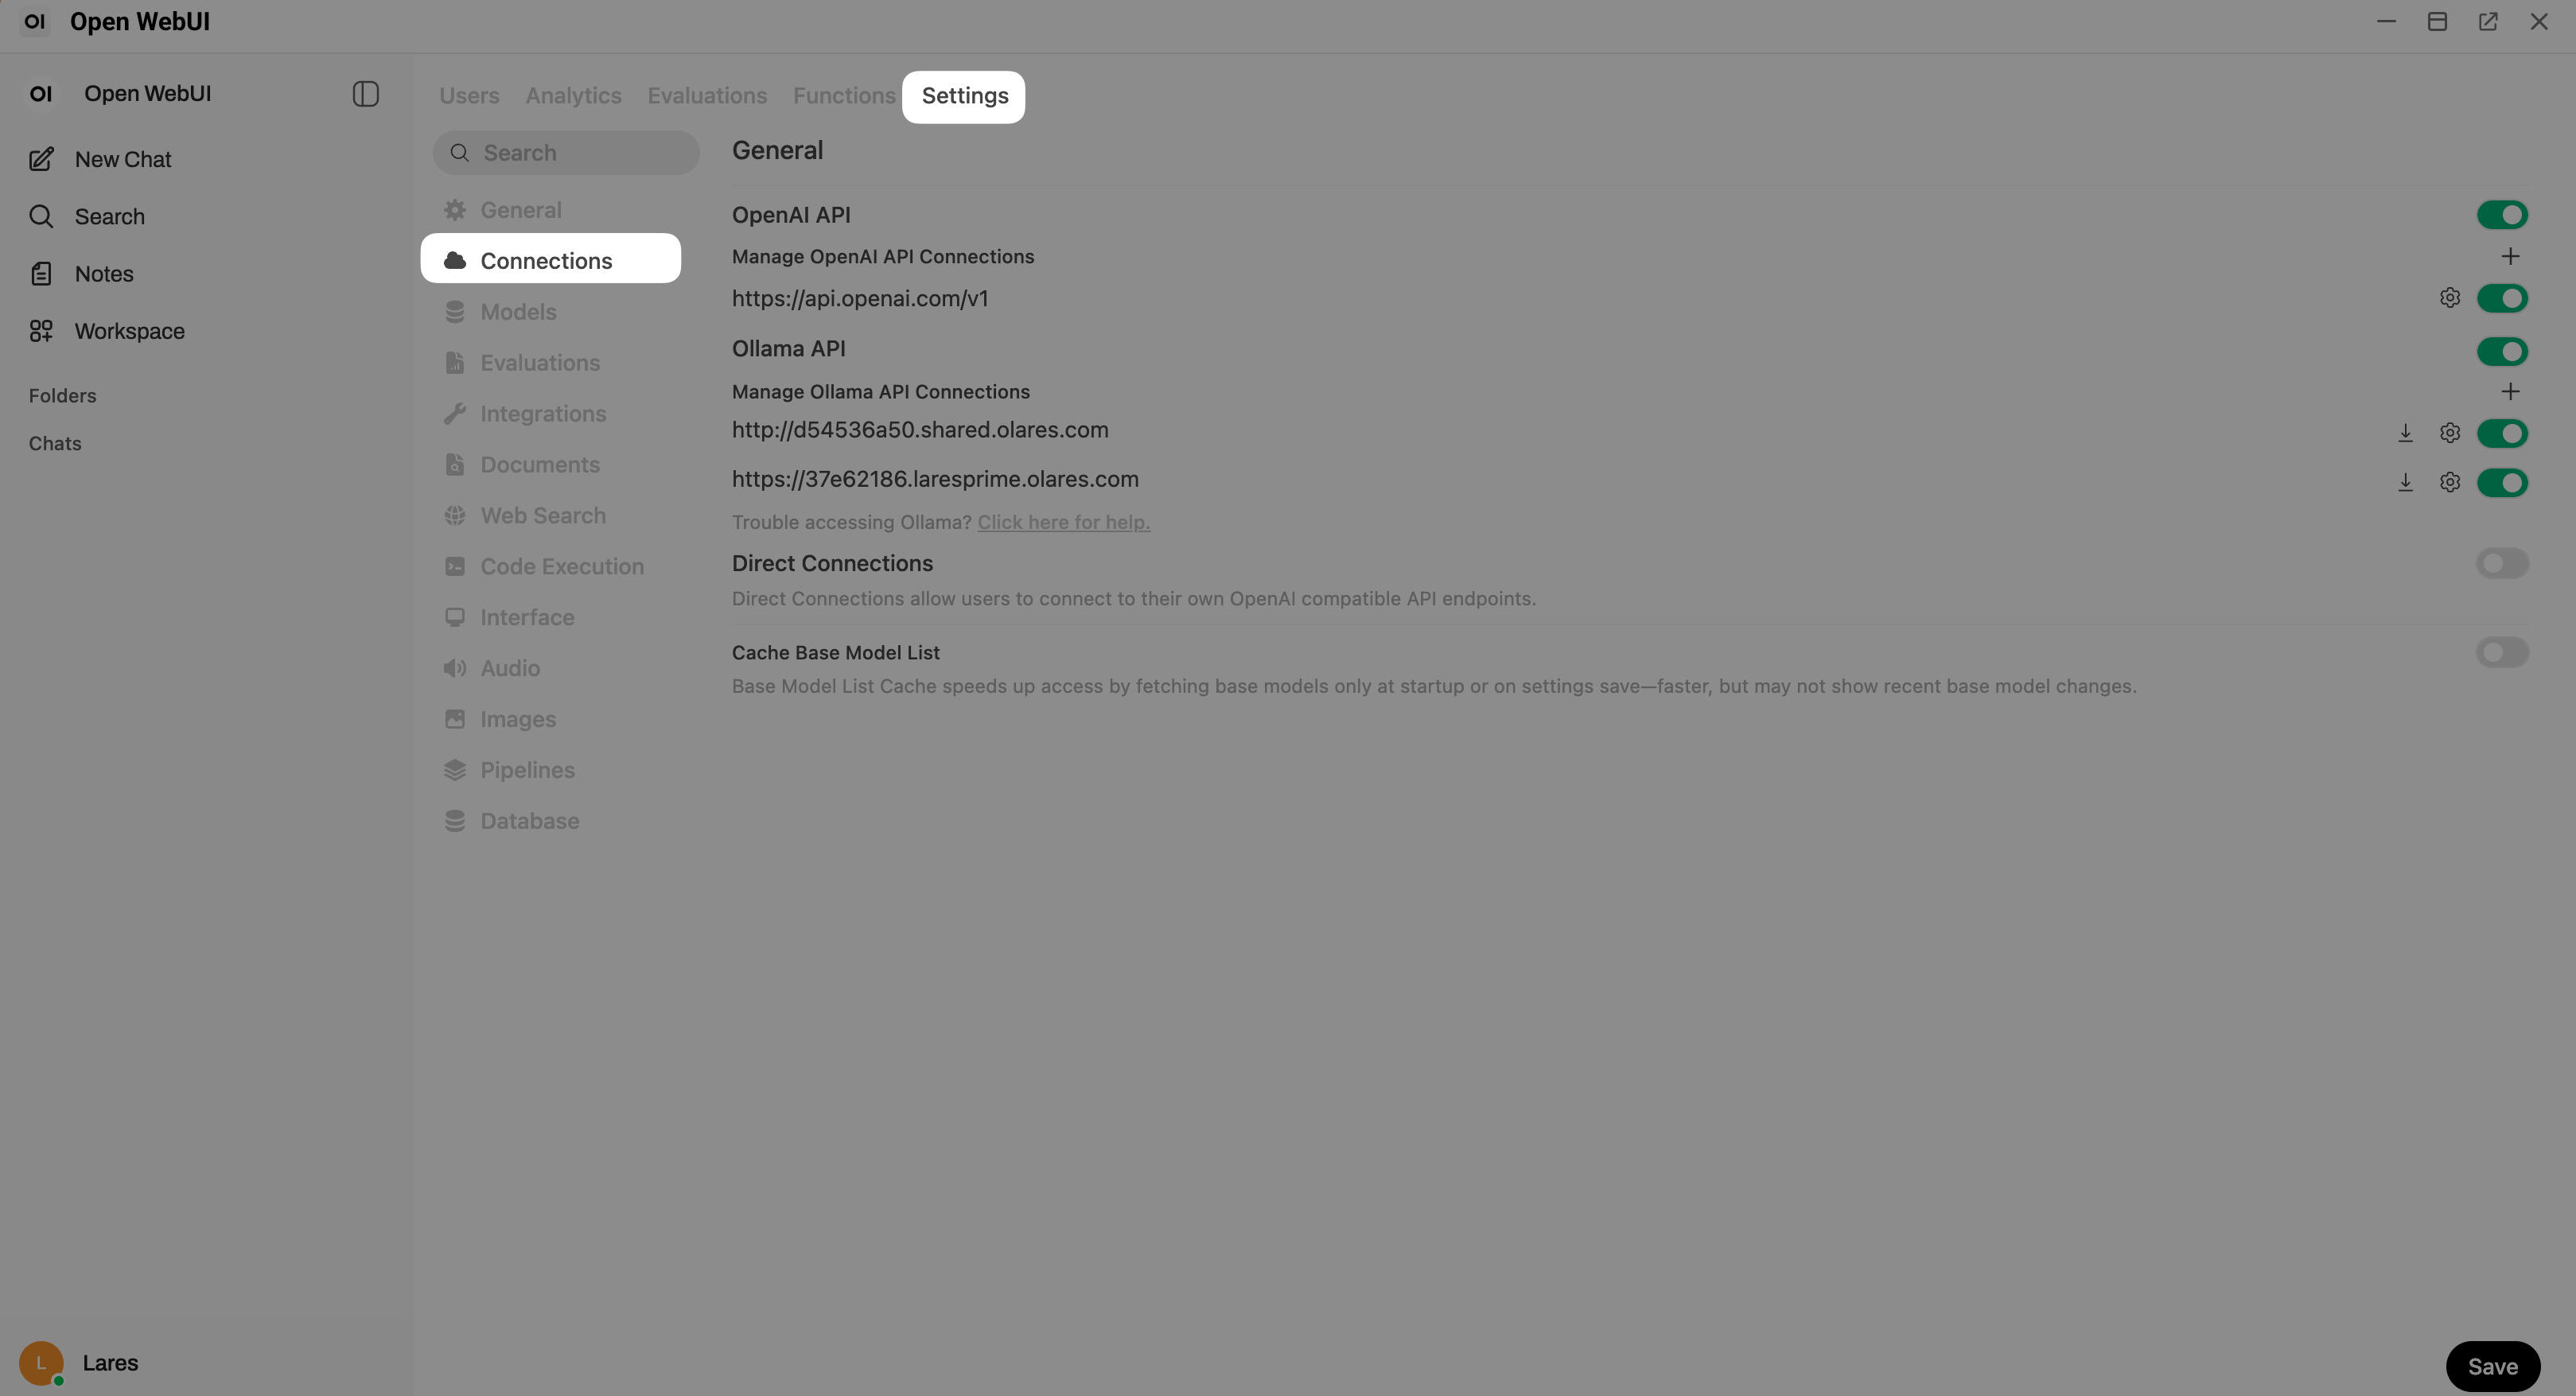
Under OpenAI API, click add to add a new connection.
In the Add Connection window, configure the following settings:
- Connection Type: Click External to switch it to Local.
- API Base URL: Enter the LiteLLM API URL that you noted down earlier.
- API Key: Enter the virtual key you copied earlier.
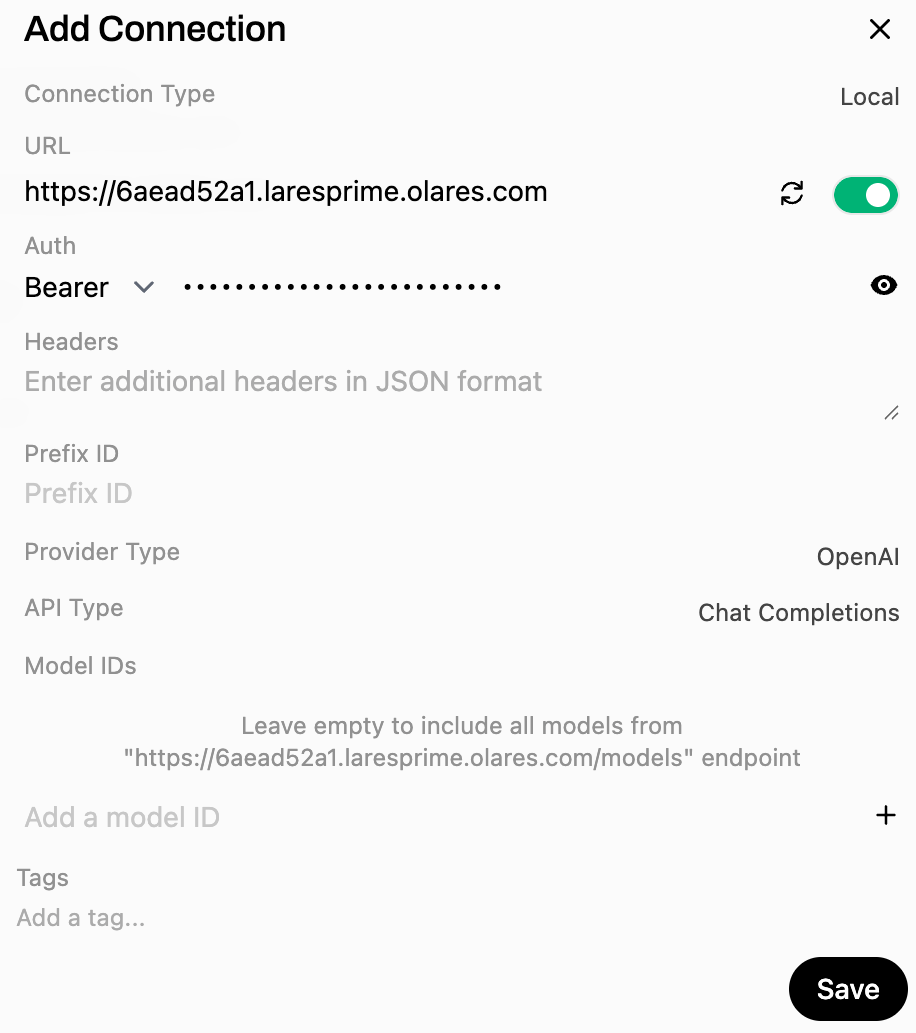
Click cached to verify the connection.
When you see the "Server connection verified" message, click Save.
Under Connections, select Models to confirm that the model configured in LiteLLM is now available, displayed with the public model name you set earlier.
Chat and monitor usage
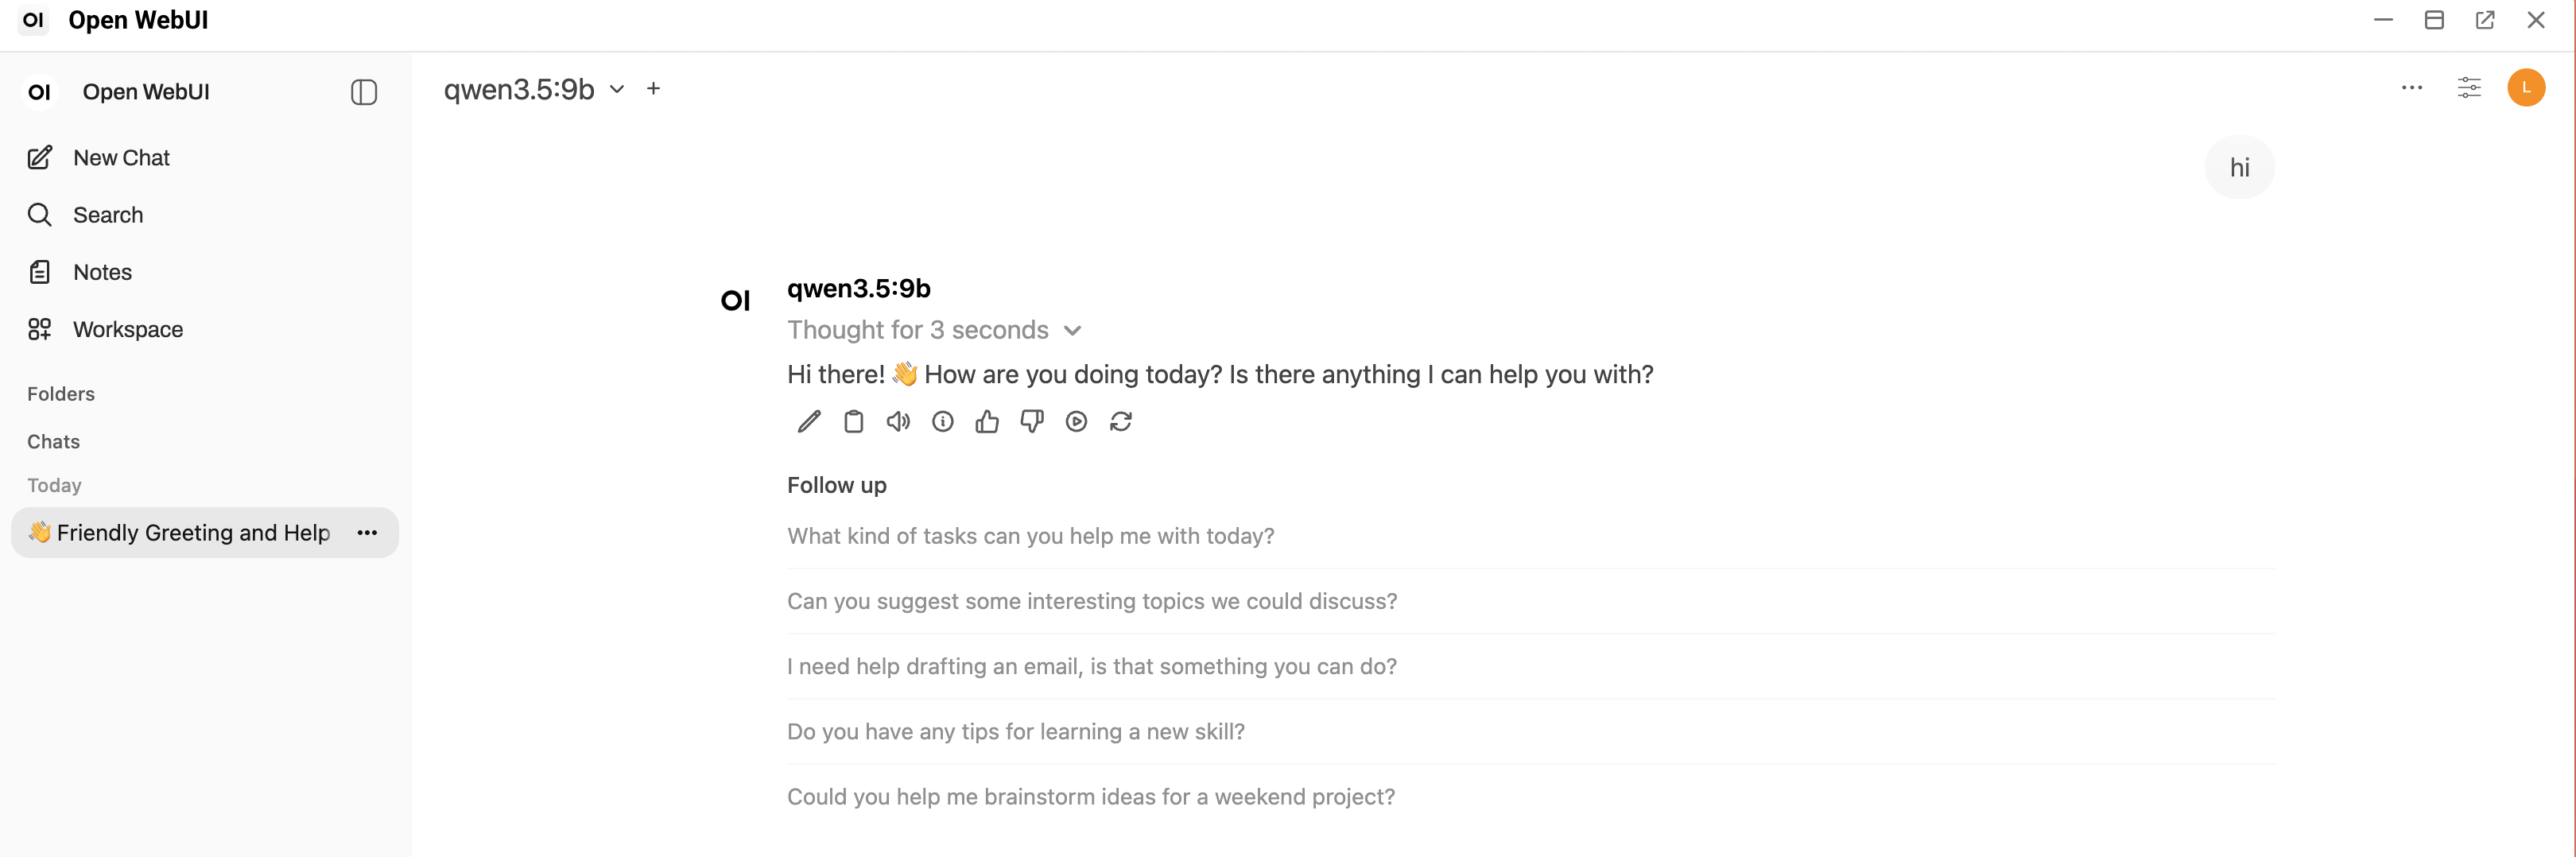
Start a new chat in Open WebUI and select your LiteLLM-managed model to verify that it responds correctly in the conversation.
Return to LiteLLM to monitor your usage data.
- To view graphical usage statistics, select Usage from the left sidebar.
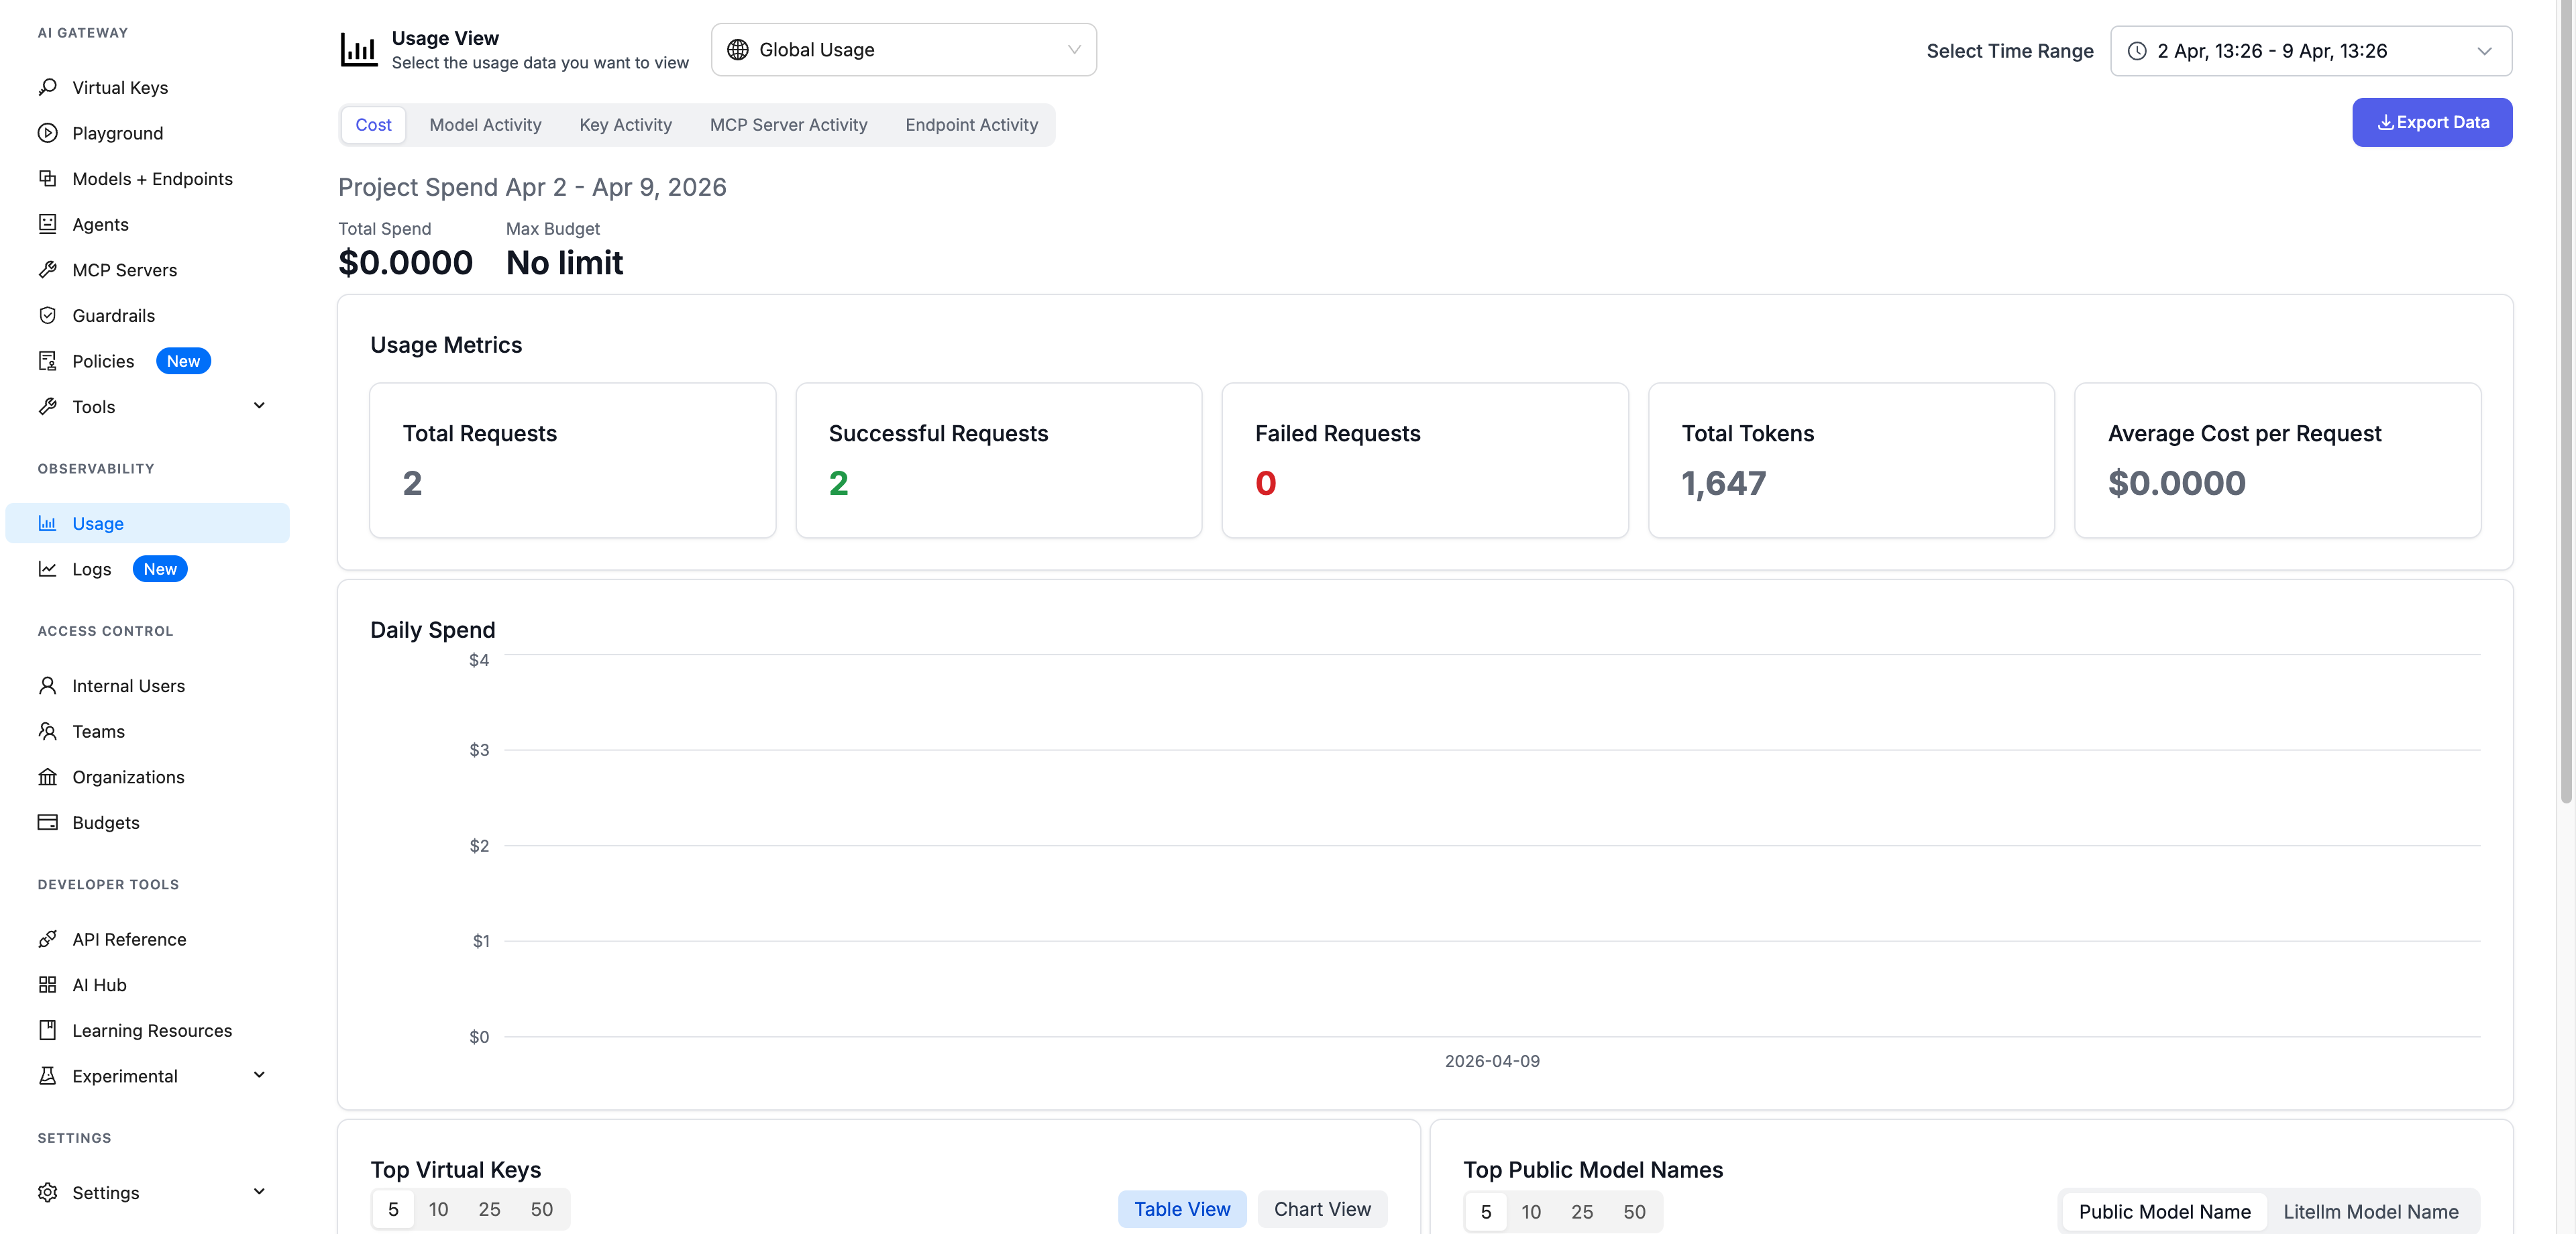
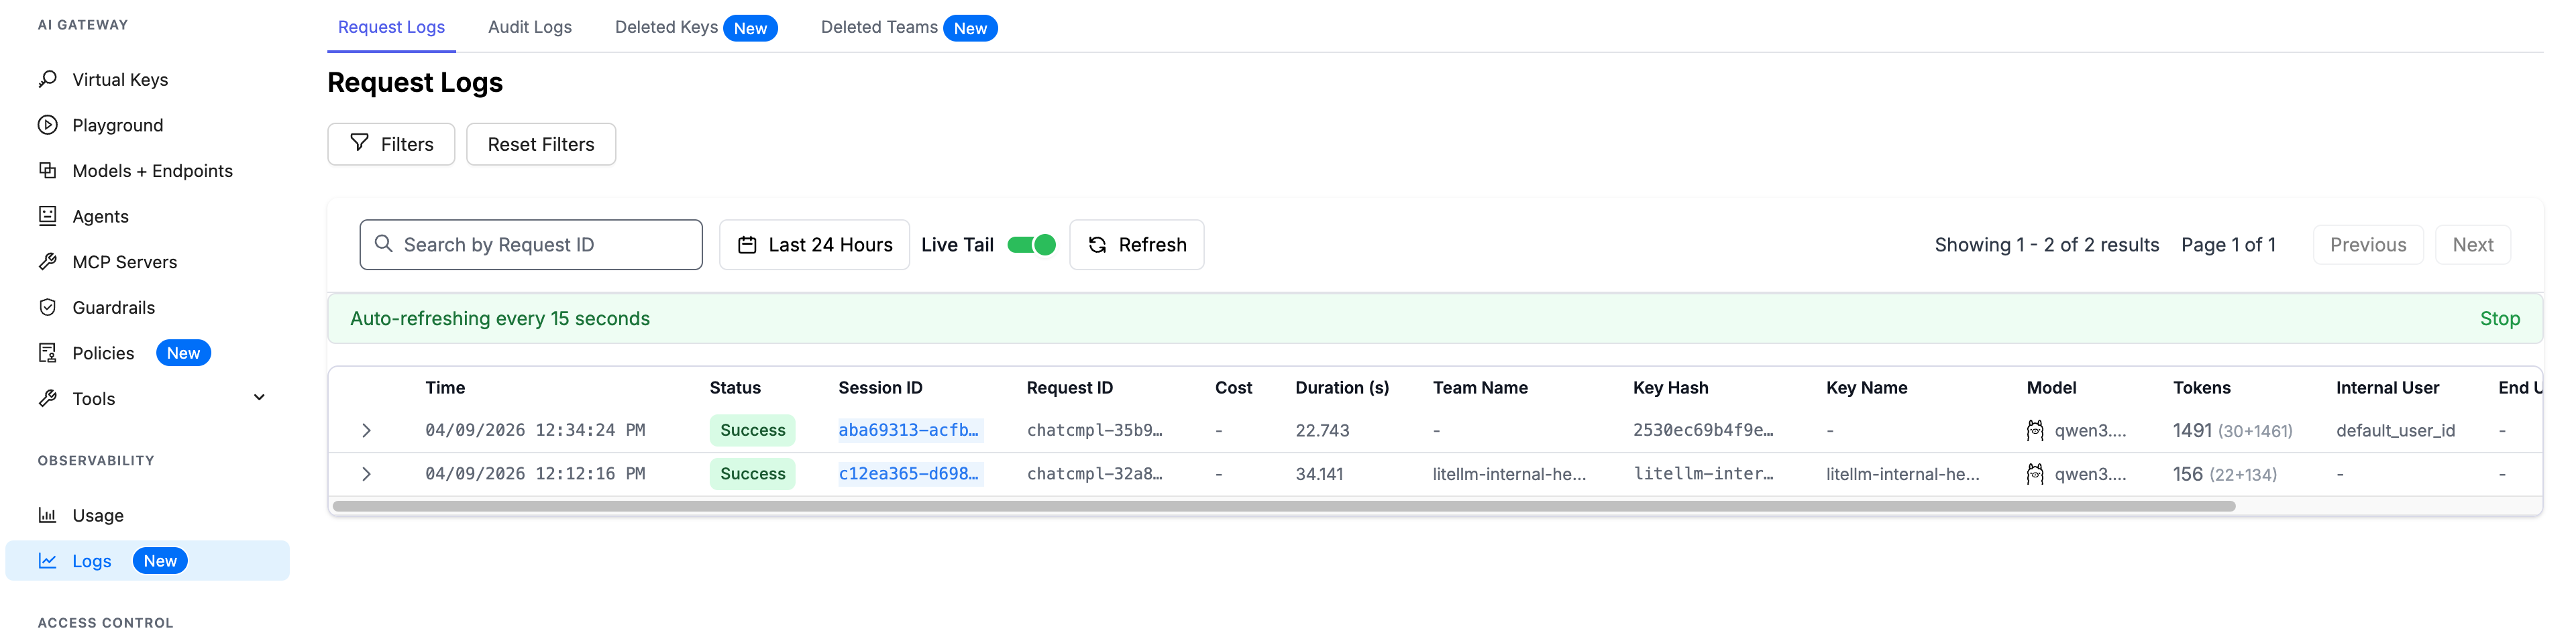
- To view detailed API request records, select Logs from the left sidebar.