Use Cursor to inspect and edit Penpot files with MCP
Penpot is an open-source, web-based design and prototyping tool for UI design, interactive prototypes, component systems, and developer handoff. It uses open standards such as CSS, SVG, and HTML, which makes it a practical bridge between design files and frontend implementation.
On Olares, you can run Penpot as a self-hosted design workspace and connect it to Cursor through Penpot MCP. This guide walks through a complete workflow: open a Penpot file, let Cursor read its structure, ask Cursor to add a card-style component, and check the result in Penpot.
MCP setup changed in the latest Penpot version
Penpot now provides a built-in MCP server, which replaces the previous plugin-based setup. If you configured Penpot MCP before this update, the old configuration no longer works. Reconnect Penpot and Cursor with the new flow.
The Penpot MCP endpoint now uses internal authentication by default. To connect from Cursor, your computer and Olares must be on the same local network, or you must enable LarePass VPN on your computer.
Learning objectives
In this guide, you will learn how to:
- Install Penpot from Market.
- Enable the built-in Penpot MCP server and get the connection URL.
- Configure Cursor to read your Penpot files through MCP.
- Use Cursor to inspect frames and add a new design element.
- Review the change in Penpot and refine it with follow-up prompts.
Prerequisites
- Cursor installed on your computer.
- Your computer and Olares are on the same local network, or LarePass VPN is enabled on your computer.
- A Penpot file created or imported in Penpot.
Install Penpot
Open Market and search for "Penpot".
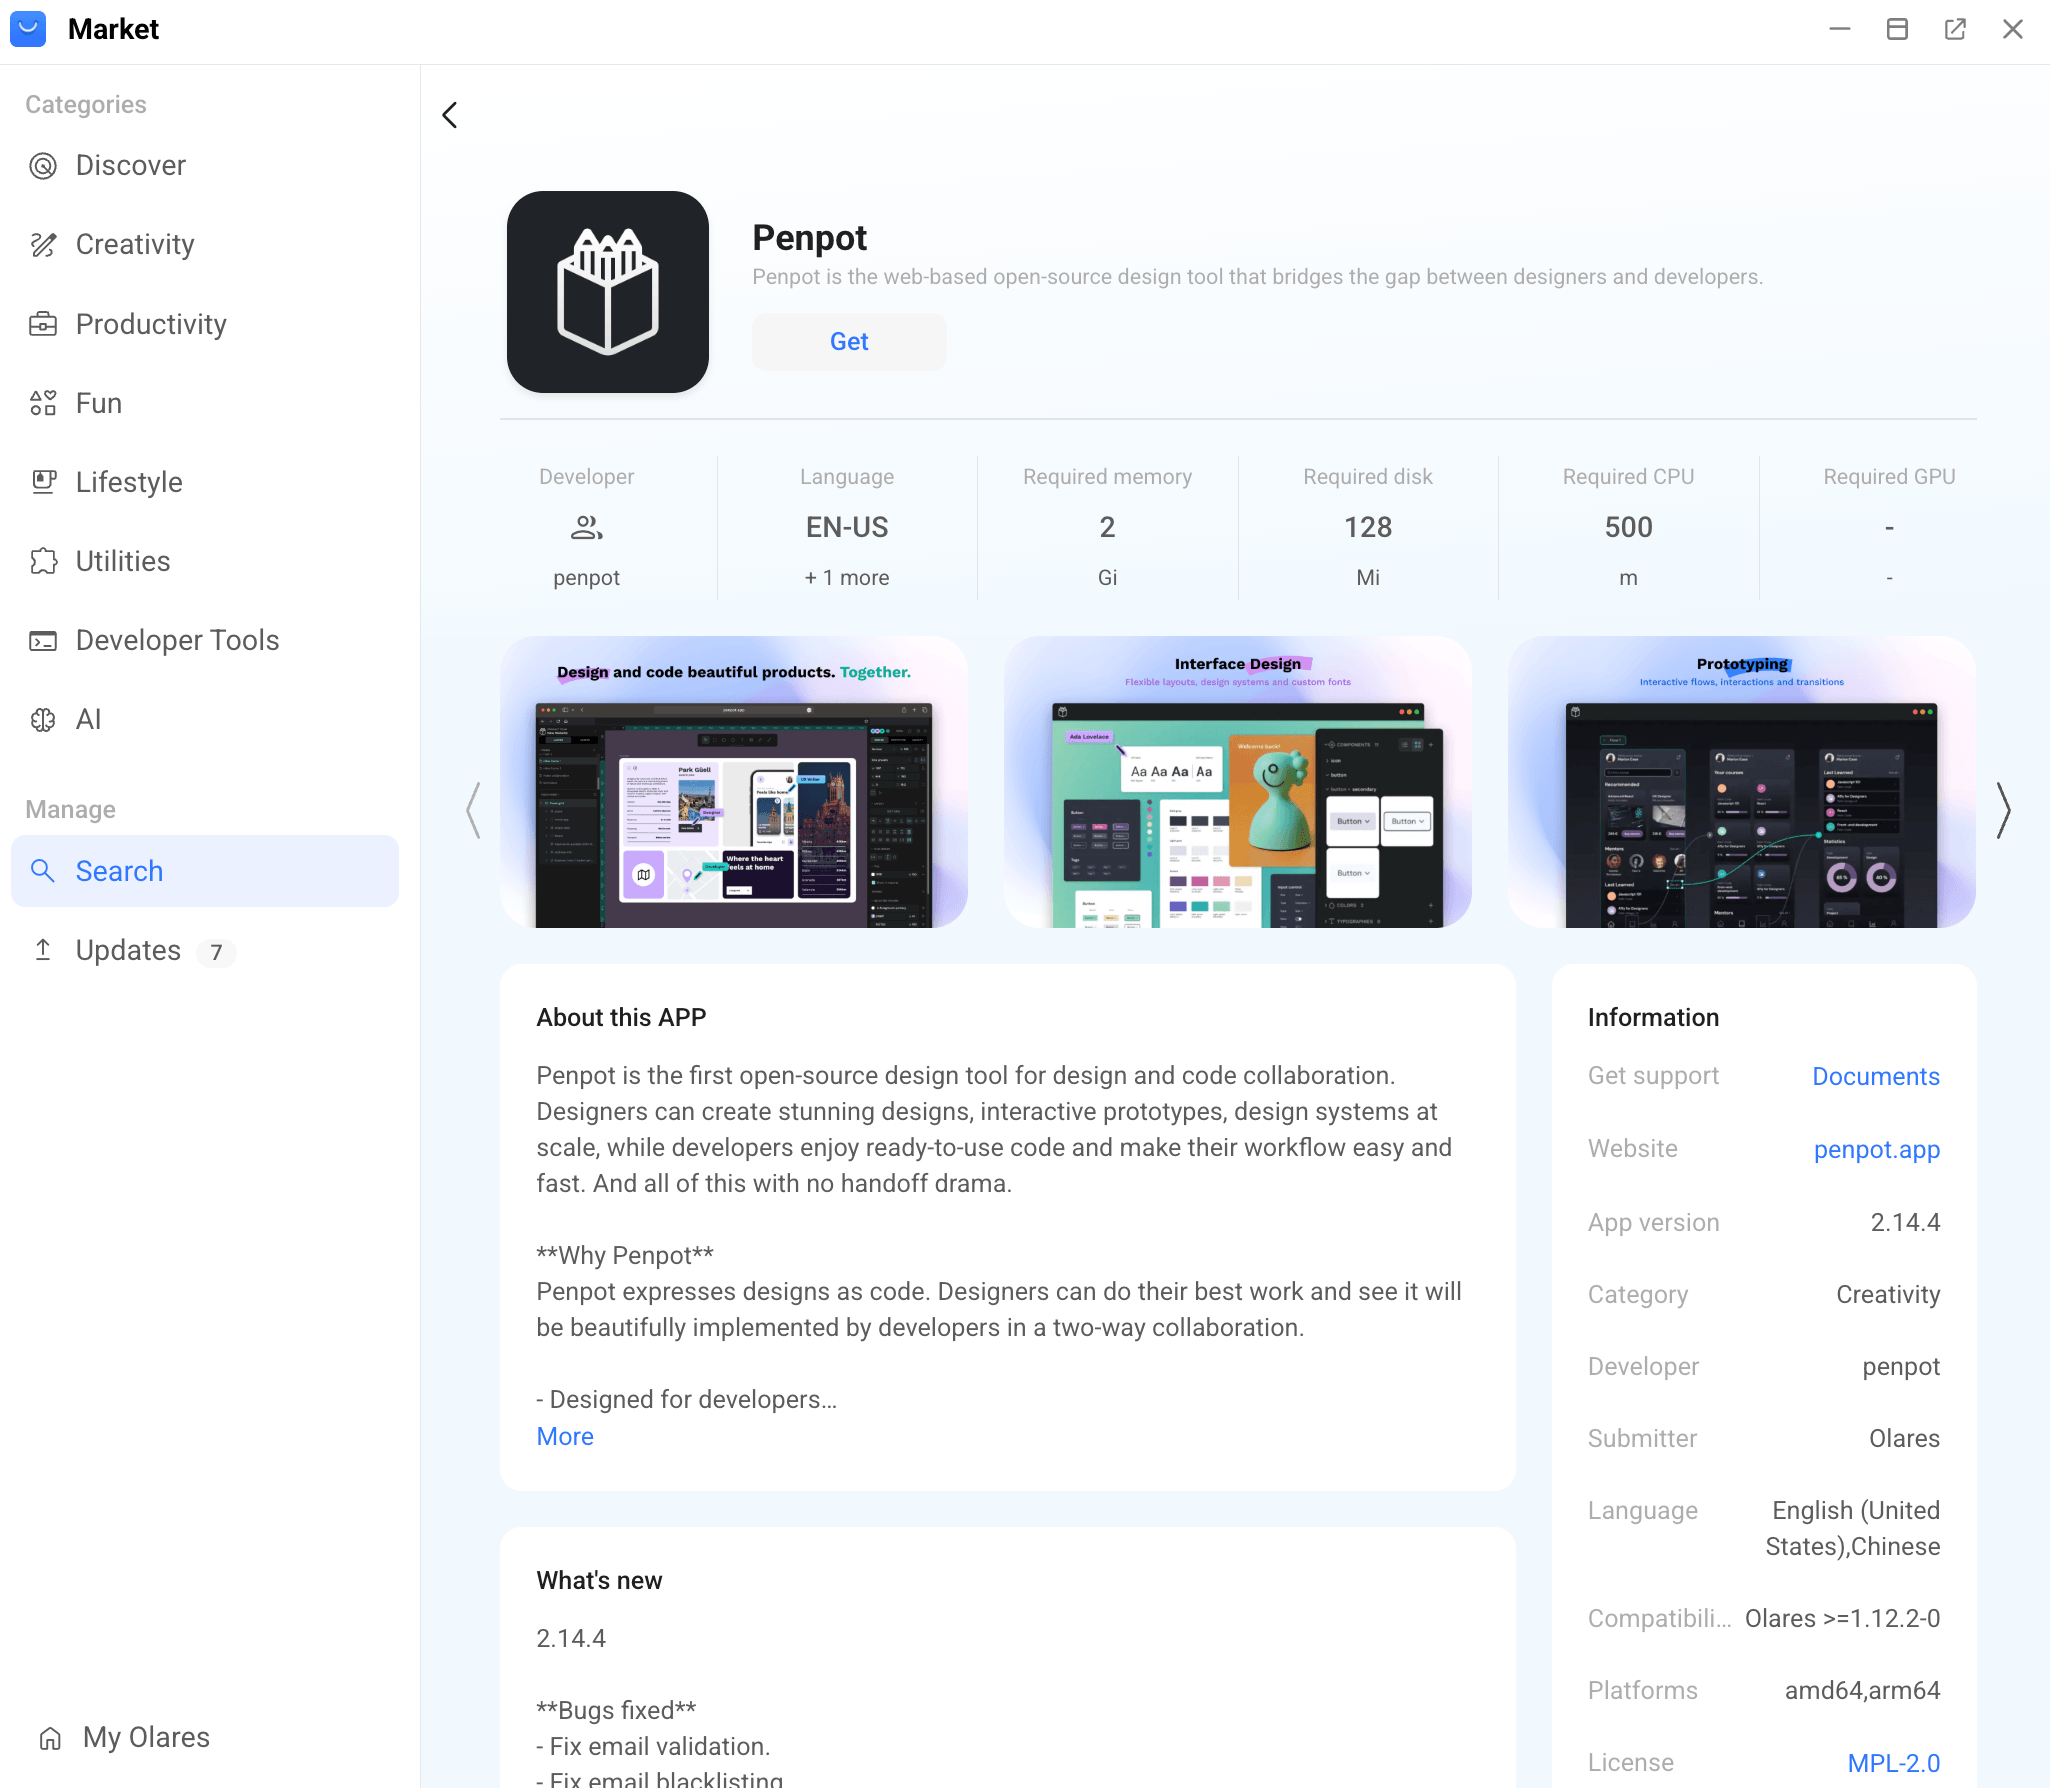
Click Get, then Install, and wait for installation to complete.
Prepare the Penpot workflow
This guide uses a simple task: ask Cursor to inspect a Penpot file and add a card-style component to one frame.
Open Penpot from Launchpad.
Create a new Penpot file or open an existing one.
Select the page and frame you want Cursor to work with.
Keep the file open
Keep the Penpot file open in a browser tab throughout the workflow so you can review Cursor's changes as they happen.
Connect Penpot and Cursor through MCP
The latest Penpot version includes a built-in MCP server. Enable it in your Penpot account, copy the generated connection URL, and add it to Cursor.
Enable the MCP server in Penpot
Open Penpot from Launchpad.
Click your profile icon in the top-right corner, and select Your account.
Go to Integrations > MCP Server, and turn on the toggle to enable the MCP server.
Generate an access token, and copy the MCP connection URL. The URL contains your access token and looks like this:
texthttps://2550d96f0.alice.olares.com/mcp/stream?userToken=<your-access-token>
Keep the connection URL private
The connection URL includes your access token. Anyone with this URL can access your Penpot files through MCP. Do not share it or commit it to a public repository.
Configure Cursor as an MCP client
Open Cursor on your computer.
Go to Cursor > Settings > Tools & MCPs, then click Add Custom MCP.
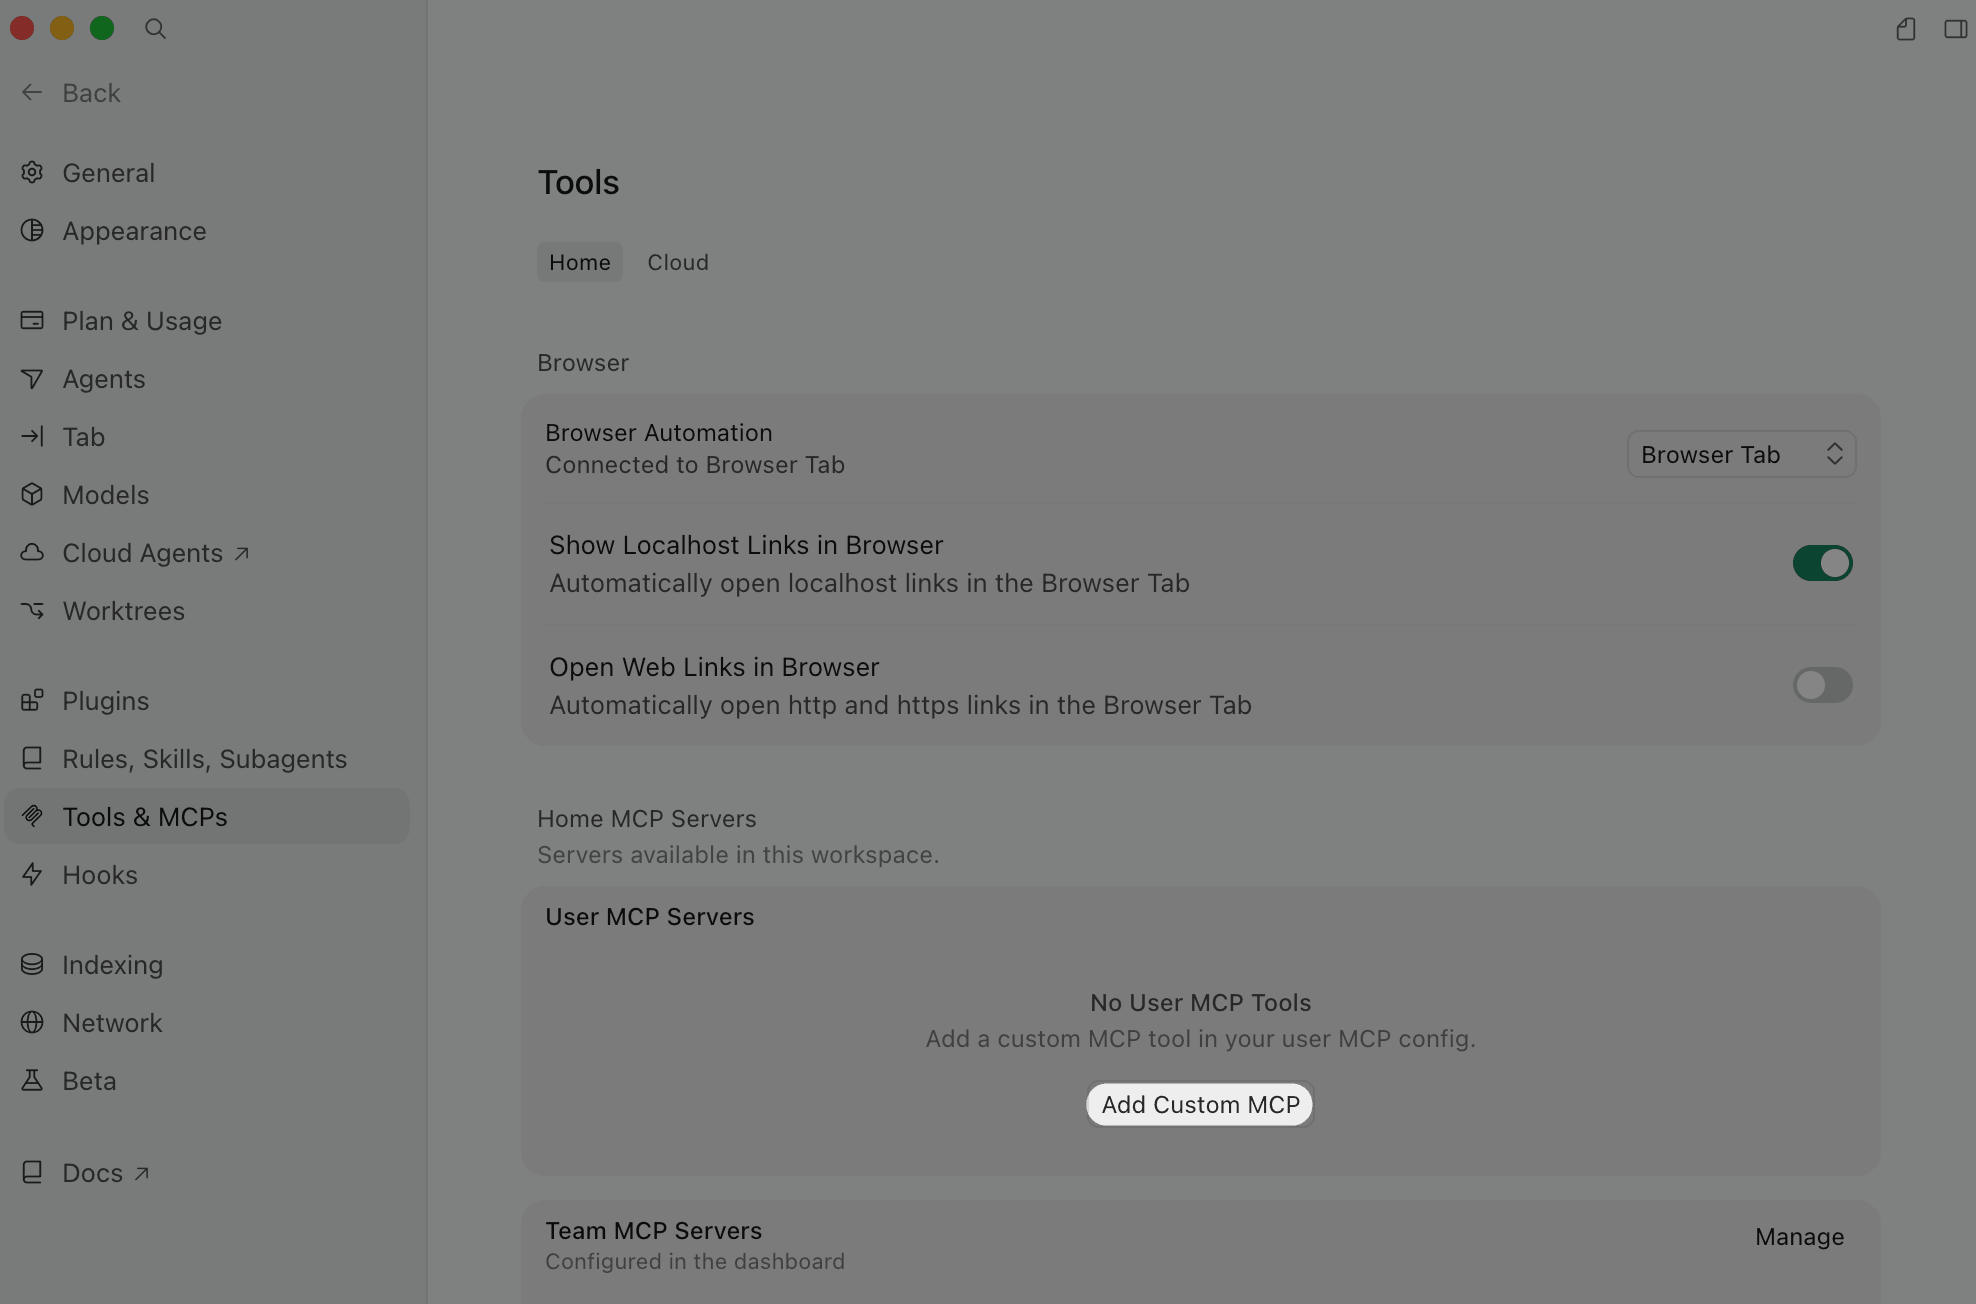
In
~/.cursor/mcp.json, add the Penpot MCP server with the connection URL you copied:json{ "mcpServers": { "penpot": { "url": "<your-penpot-mcp-connection-url>" } } }Check your JSON syntax
Ensure you copy the exact format above, including all quotation marks
"and braces{}. Invalid JSON will cause Cursor to fail to load the MCP server.Save the file. On macOS, press
Cmd + S. On Windows, pressCtrl + S.Restart Cursor, then go back to Tools & MCPs and check that penpot is enabled and connected.
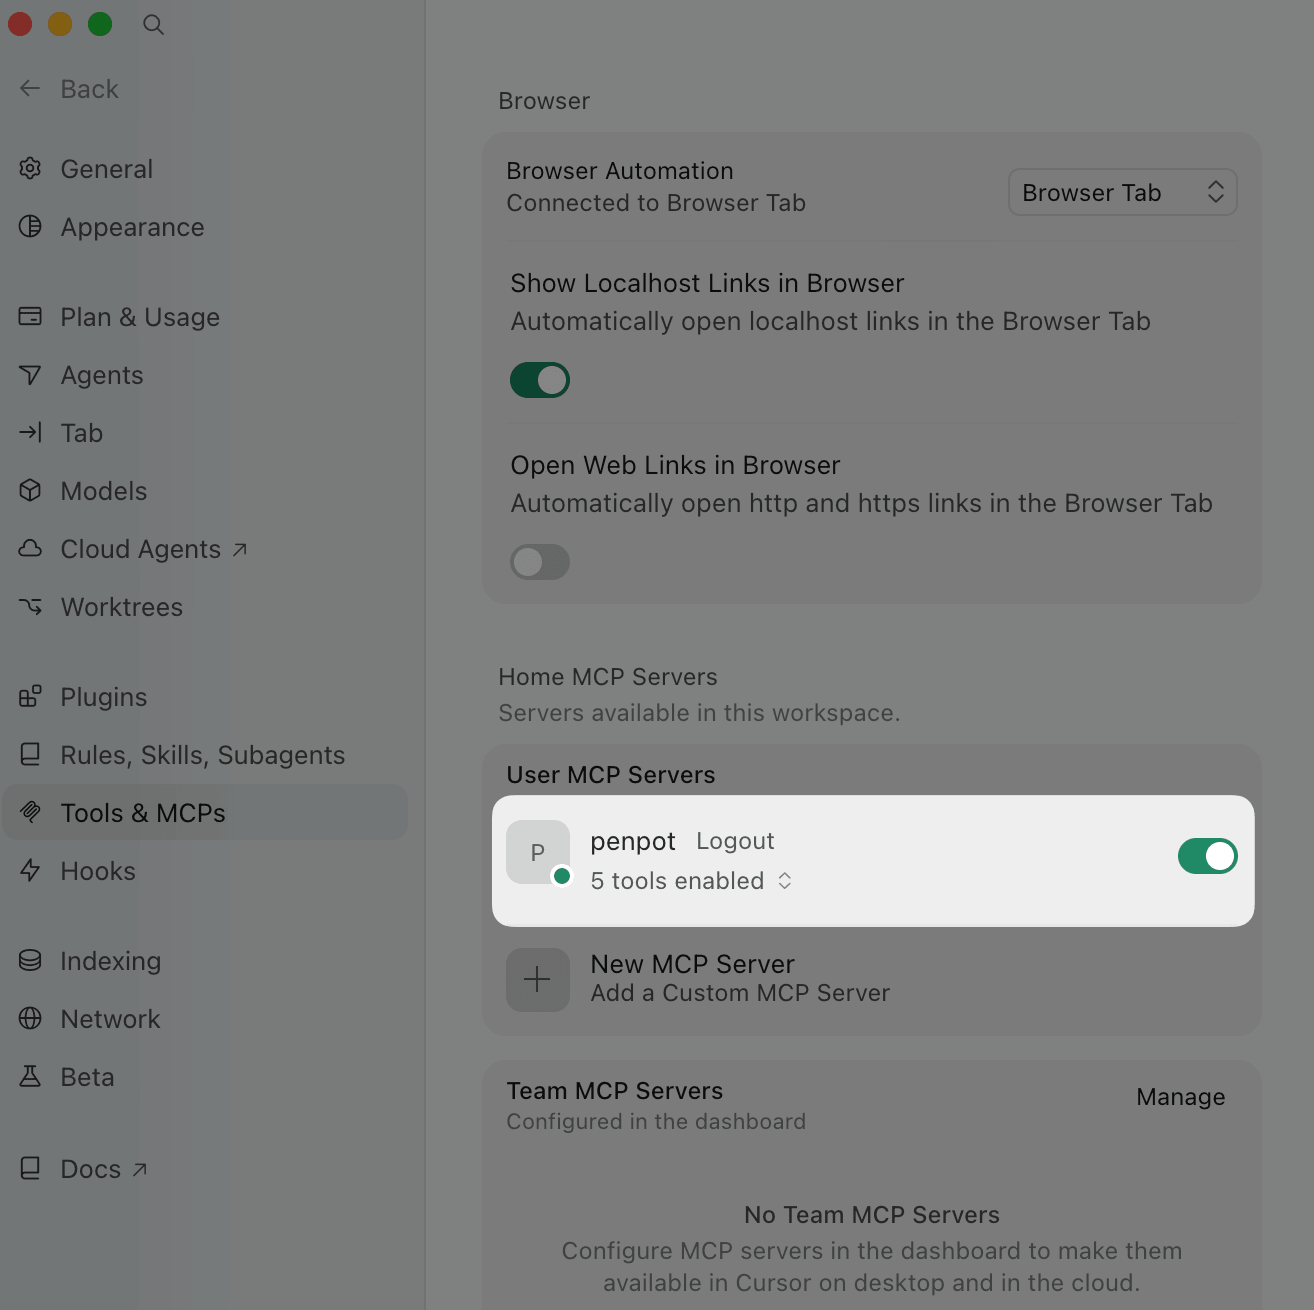
If penpot fails to connect, make sure your computer and Olares are on the same local network, or enable LarePass VPN on your computer, then restart Cursor again.
Use Cursor to edit the Penpot file
Inspect the file structure
Start by asking Cursor to read the design structure.
In Penpot, open the file you want Cursor to work with.
In Cursor, start a new chat and ask:
textList all frames in the current Penpot file.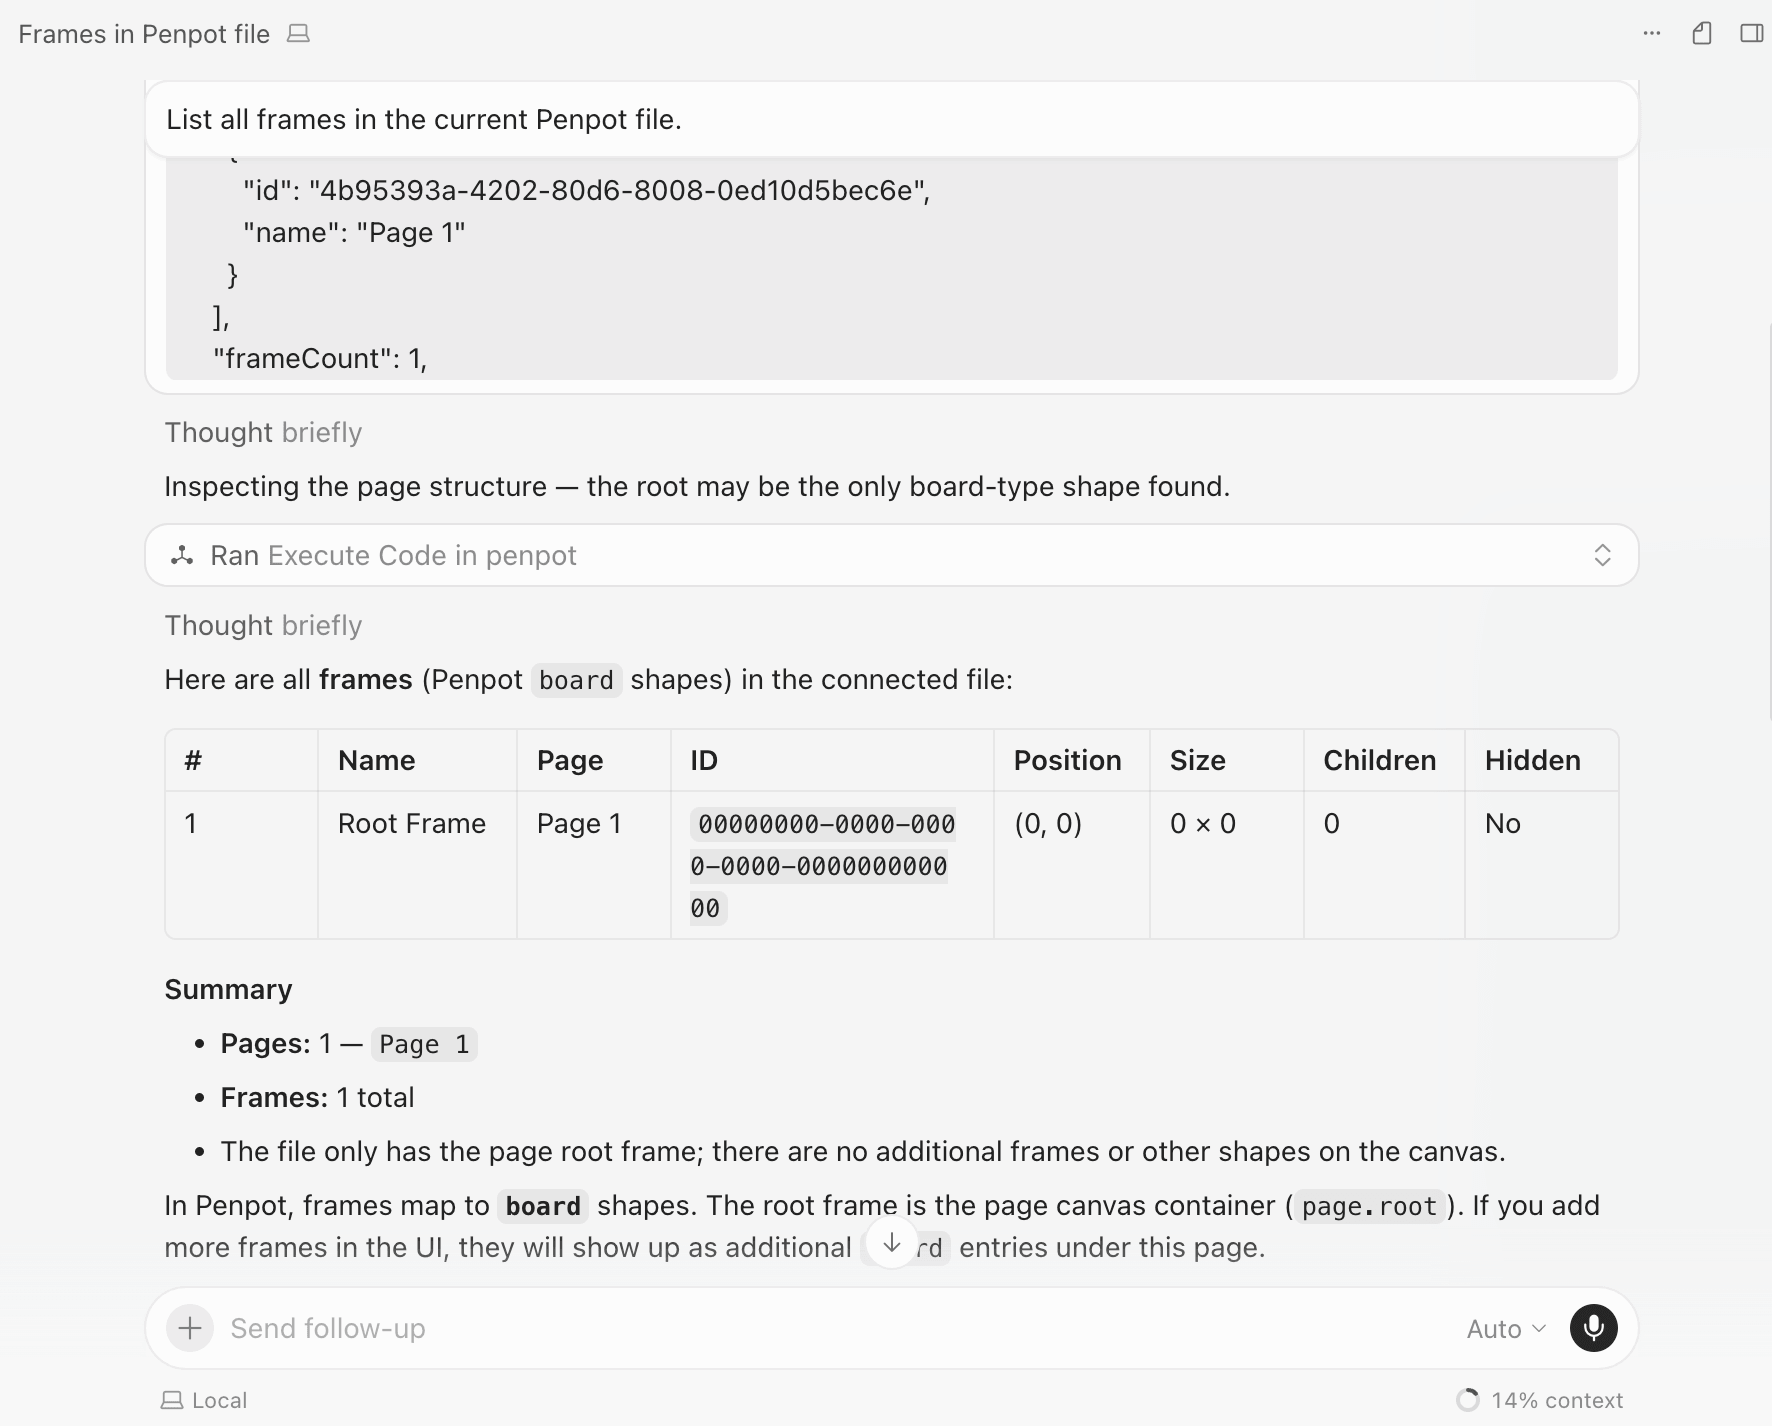
Work one frame at a time
If the file has several frames, name the target frame in your next prompt. This keeps the change focused and makes it easier to review in Penpot.
Add a card-style component
After Cursor reads the file, ask it to make a concrete design change. The following example adds a reusable card-style component to the selected frame.
In Cursor, send a prompt like this. Replace
Homewith the frame you want to modify:textIn the current Penpot file, add a card-style component to the Home frame. The card should include a title, a short description, and one primary button. Match the existing spacing, colors, and typography as closely as possible. Name the main group "Feature card" and explain what you changed.If Cursor asks you to choose from several options, choose the option that best matches your layout.
Wait for Cursor to finish the tool calls.
Return to Penpot and check the active page. The new design element should appear in the target frame.
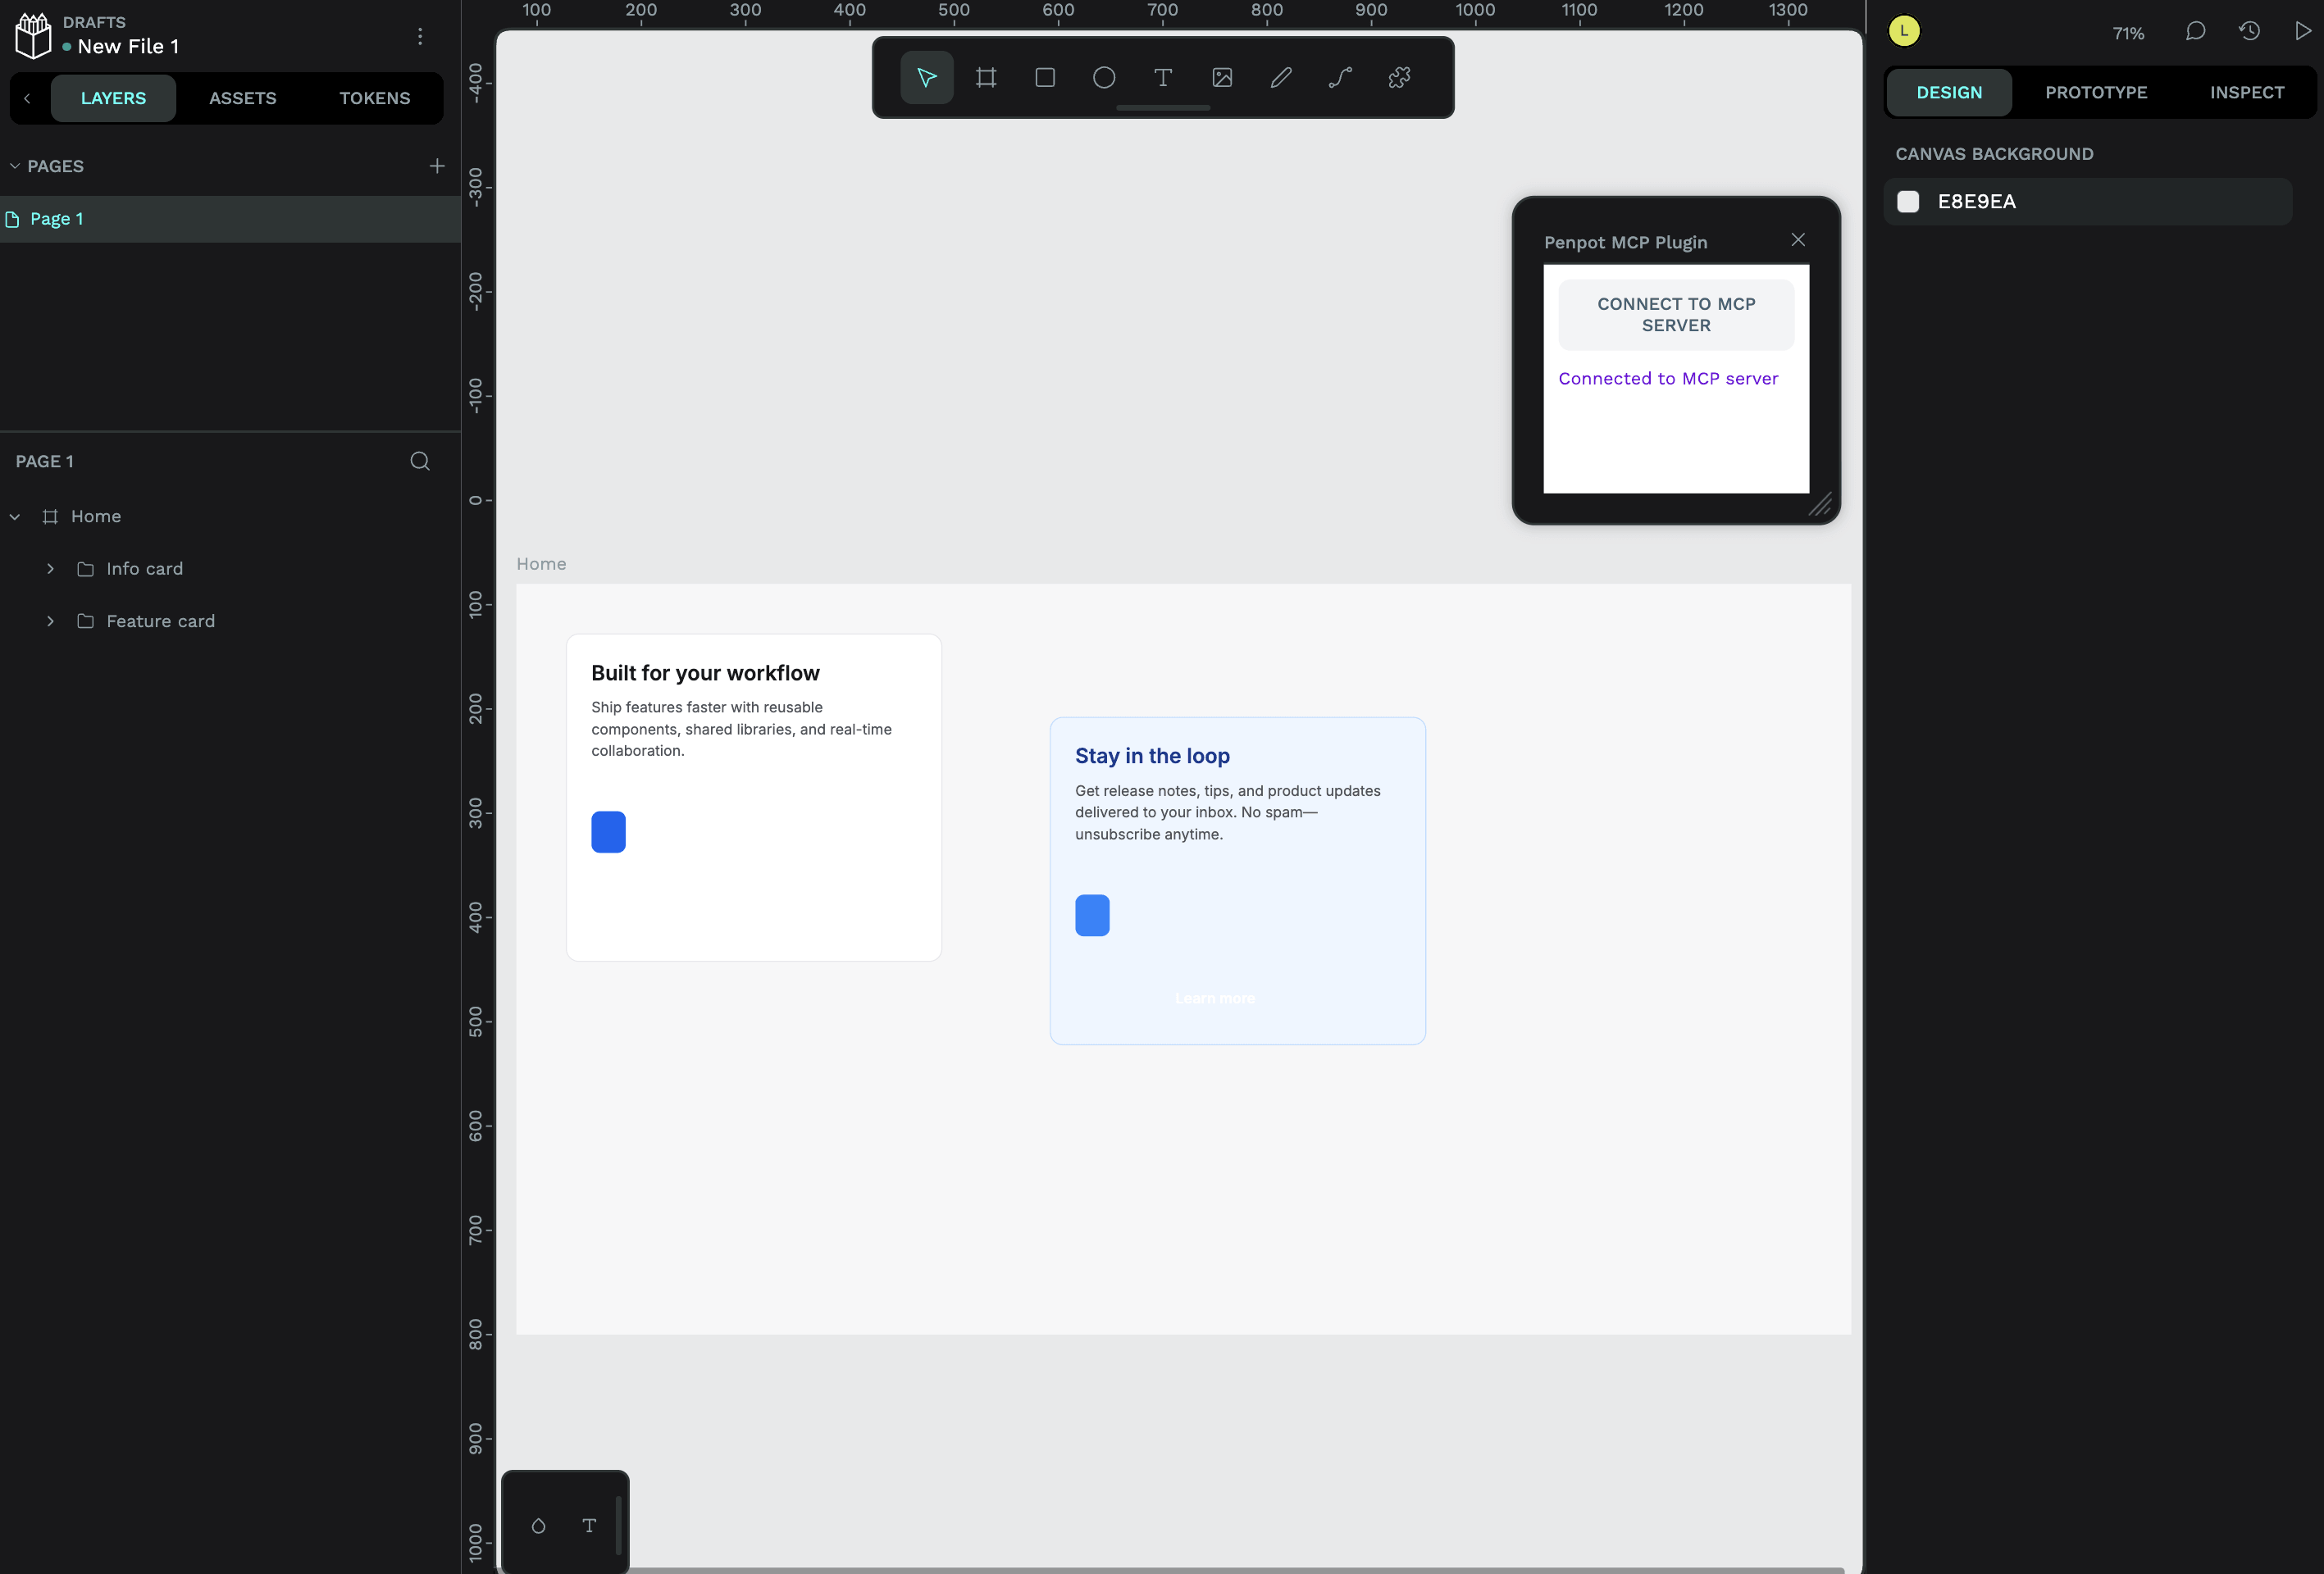
Select the new element in Penpot and check its layer name, position, text, and visual style.
Review and refine the result
Treat Cursor's first edit as a draft. Review the result in Penpot, then ask Cursor for specific adjustments.
Use prompts like:
Move the Feature card 24 px below the hero heading and align it with the left edge of the content column.Make the button label shorter and adjust the card width so it matches the other content blocks.Rename the card layers so they are easy for developers to inspect.The workflow is complete when:
- Cursor can list the frames in the connected Penpot file.
- Cursor can explain which frame or layer it changed.
- The new card appears in the selected Penpot frame.
- The card uses clear layer names and fits the surrounding design.
FAQs
Cursor cannot see my Penpot file
Cause
The MCP server is not enabled in your Penpot account, the connection URL in ~/.cursor/mcp.json is missing or expired, or Cursor cannot reach Olares over the network.
Solution
- In Penpot, go to Your account > Integrations > MCP Server and make sure the MCP server is enabled.
- If you regenerated the access token, copy the new connection URL and update
~/.cursor/mcp.json. - Make sure your computer and Olares are on the same local network, or enable LarePass VPN on your computer.
- Restart Cursor and retry your prompt.
Learn more
- Penpot Help Center: Official Penpot guides and product documentation.
- Model Context Protocol: Learn how MCP connects AI clients to external tools and data sources.