Upgrade OpenClaw
Before upgrading an existing OpenClaw installation, review the version-specific changes and troubleshooting steps on this page to ensure a smooth transition.
Upgrade to v2026.9.1
The OpenClaw 2026.09.01 update might cause some plugins to become incompatible, preventing the gateway from starting (the app shows a startup failure). The update also introduces stricter proxy attribution checks that can block the Control UI after the upgrade.
Gateway fails to start after upgrade
Follow these steps to resolve the issue.
Open Control Hub on the Launchpad, find the clawdbot container, and then click the terminal icon next to its name.
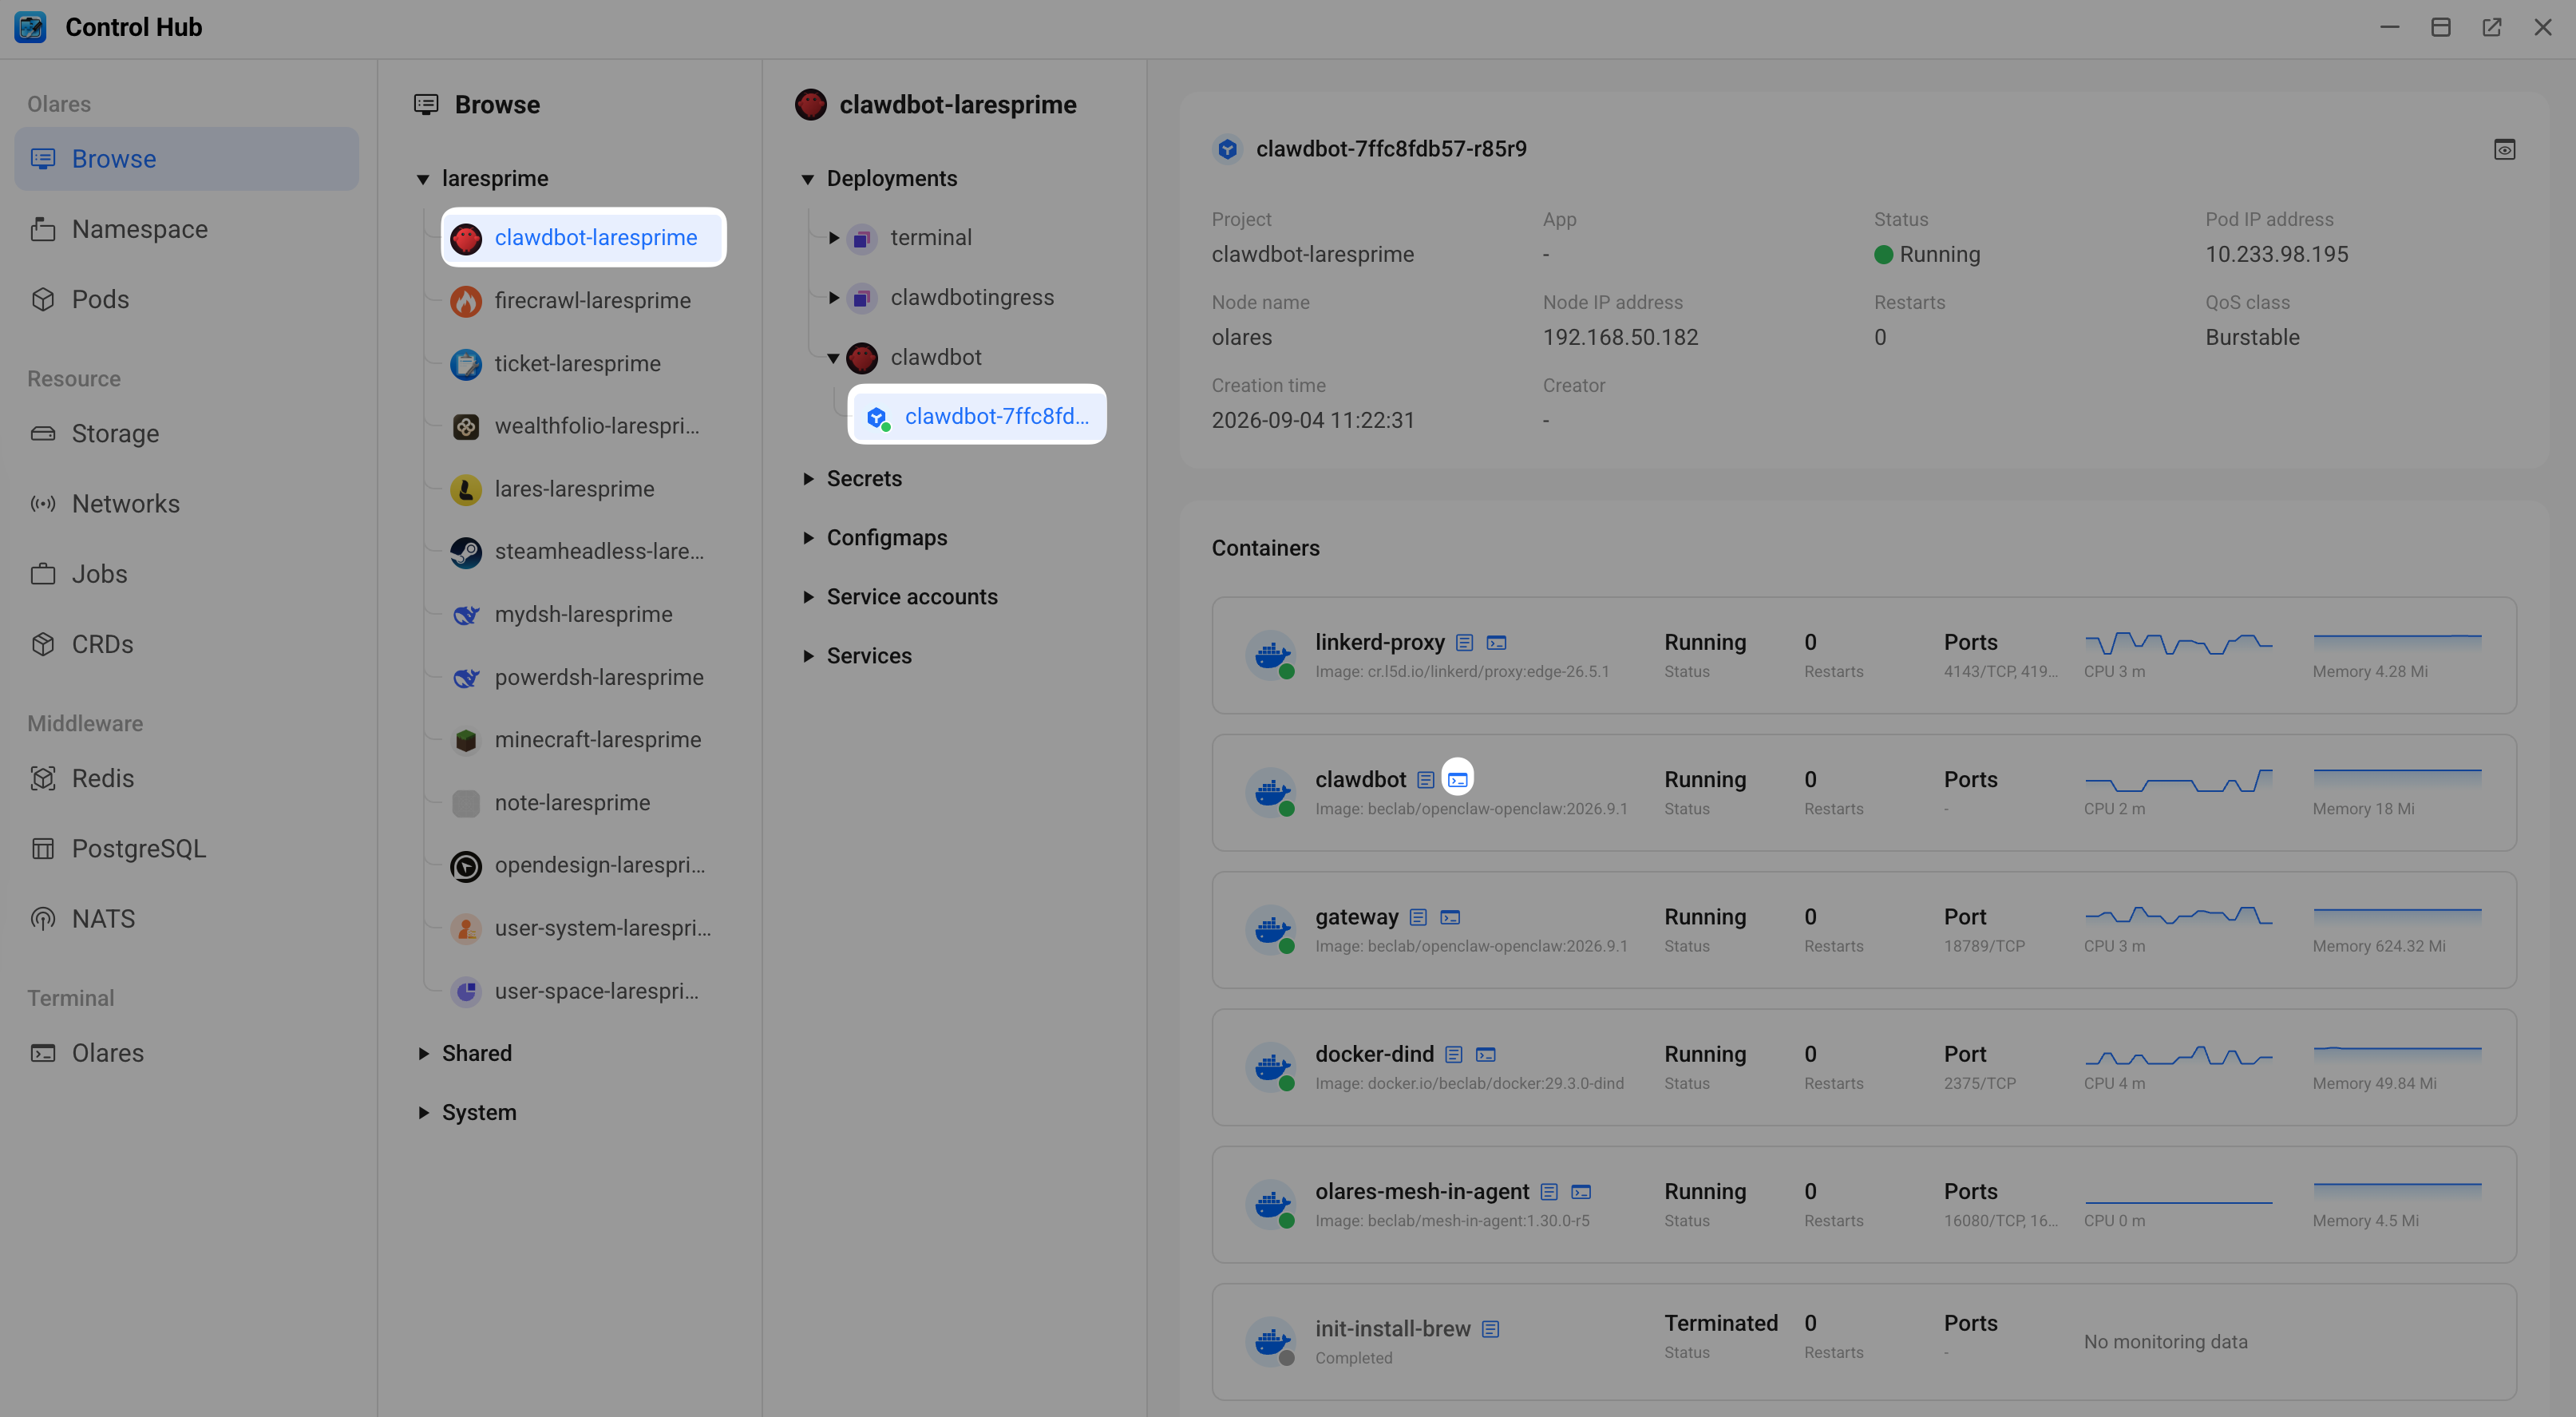
In the container terminal, run the repair command and follow the on-screen prompts:
bashopenclaw update repairIf the gateway still fails to start after the repair, update the incompatible plugins to their latest versions one by one:
bashopenclaw plugins update <plugin-name>Once all incompatible plugins are updated, the gateway should start normally.
Control UI shows a proxy attribution error
After the upgrade, the Control UI might display the following error:
Proxy client attribution is required. Configure gateway.trustedProxies narrowly and make the proxy overwrite or safely rebuild forwarded client headers.Follow these steps to resolve the issue.
Open the Files app, go to Data > clawdbot > config, and then open the
openclaw.jsonfile.Click the edit icon in the upper-right corner to enter the edit mode.
Find the
gatewaysection, and then add atrustedProxiesarray:json"trustedProxies": [ "10.233.0.0/16", "10.244.0.0/16", "10.42.0.0/16", "127.0.0.1", "::1" ],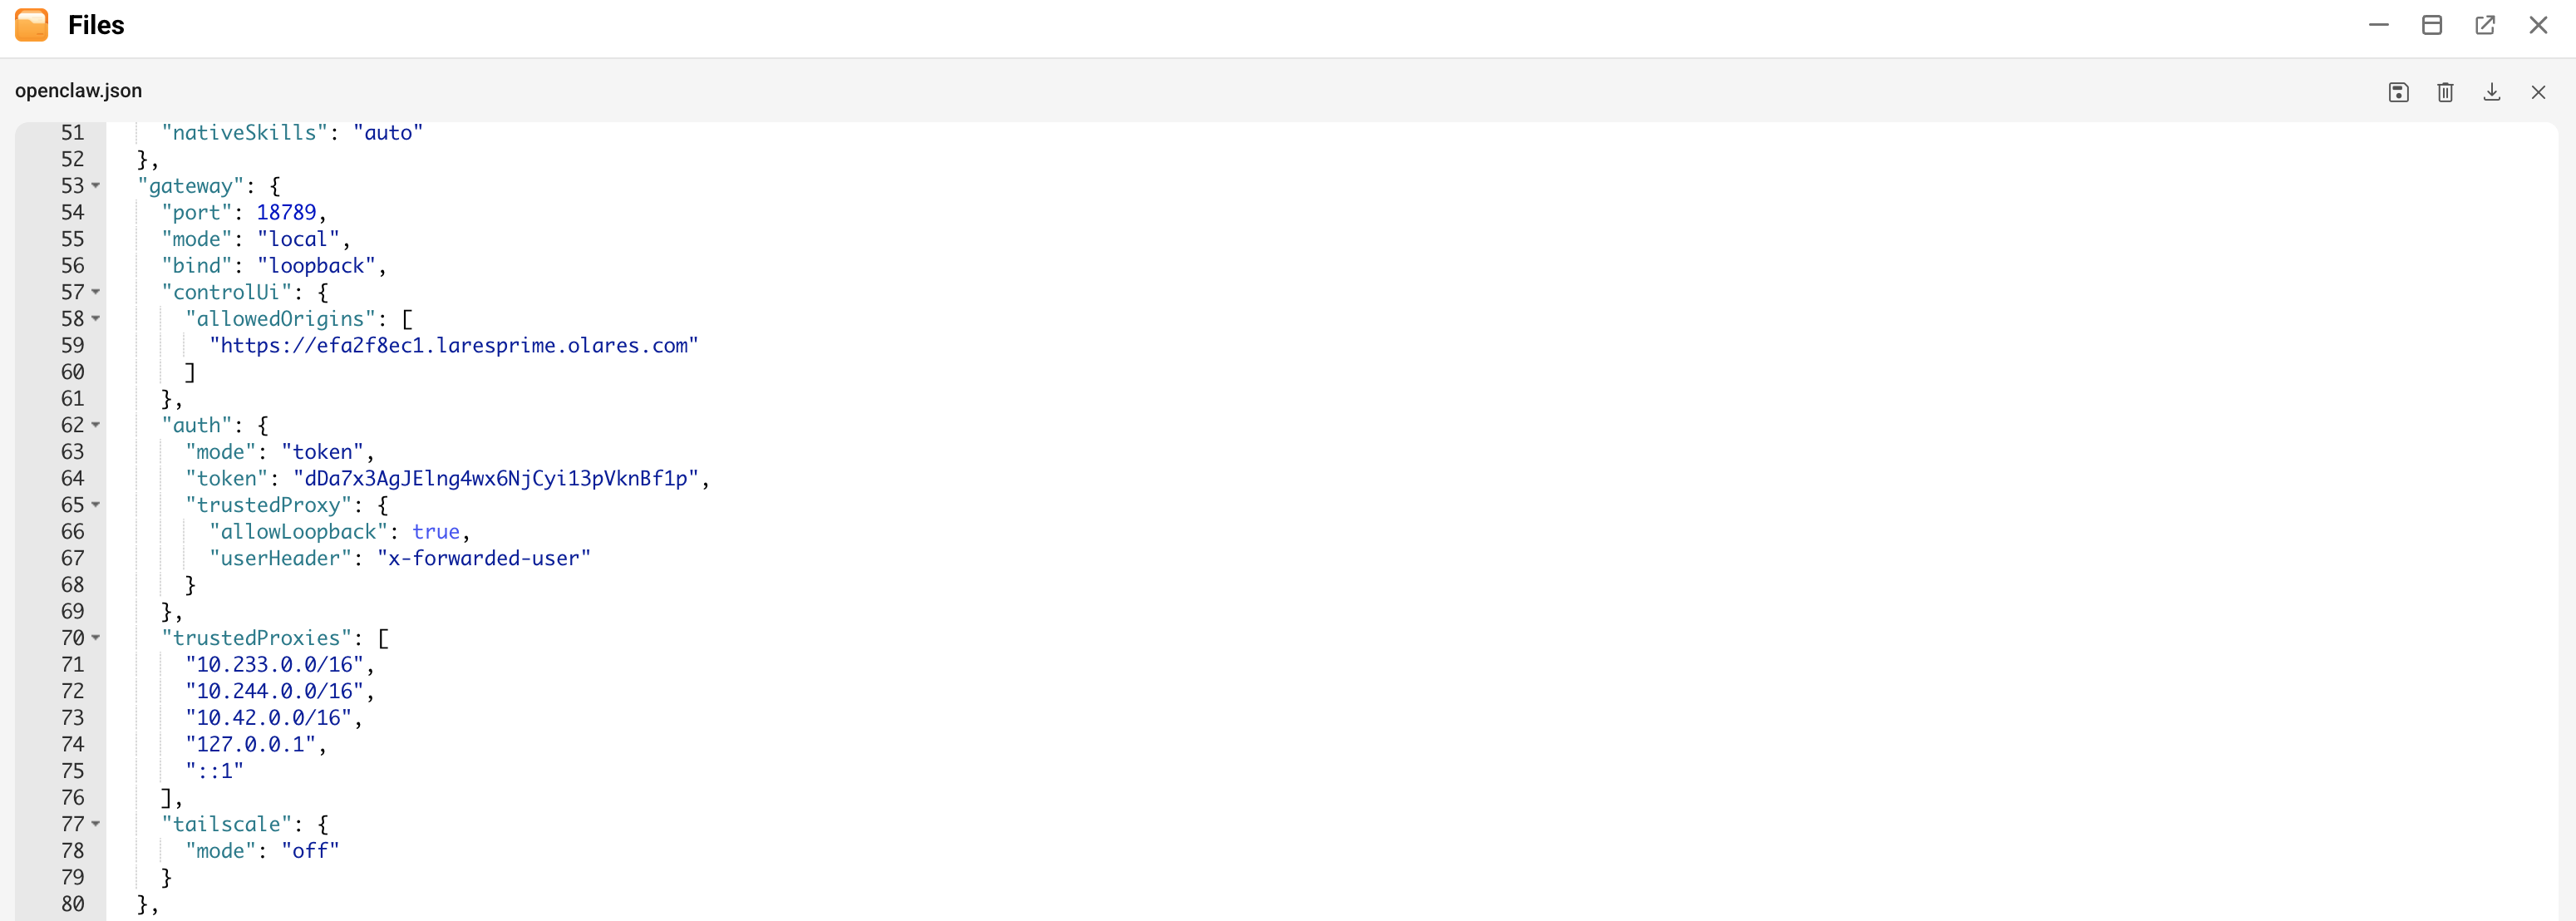
Save the changes.
Return to Control Hub, click clawdbot under Deployments, and then click Restart in the upper-right corner.
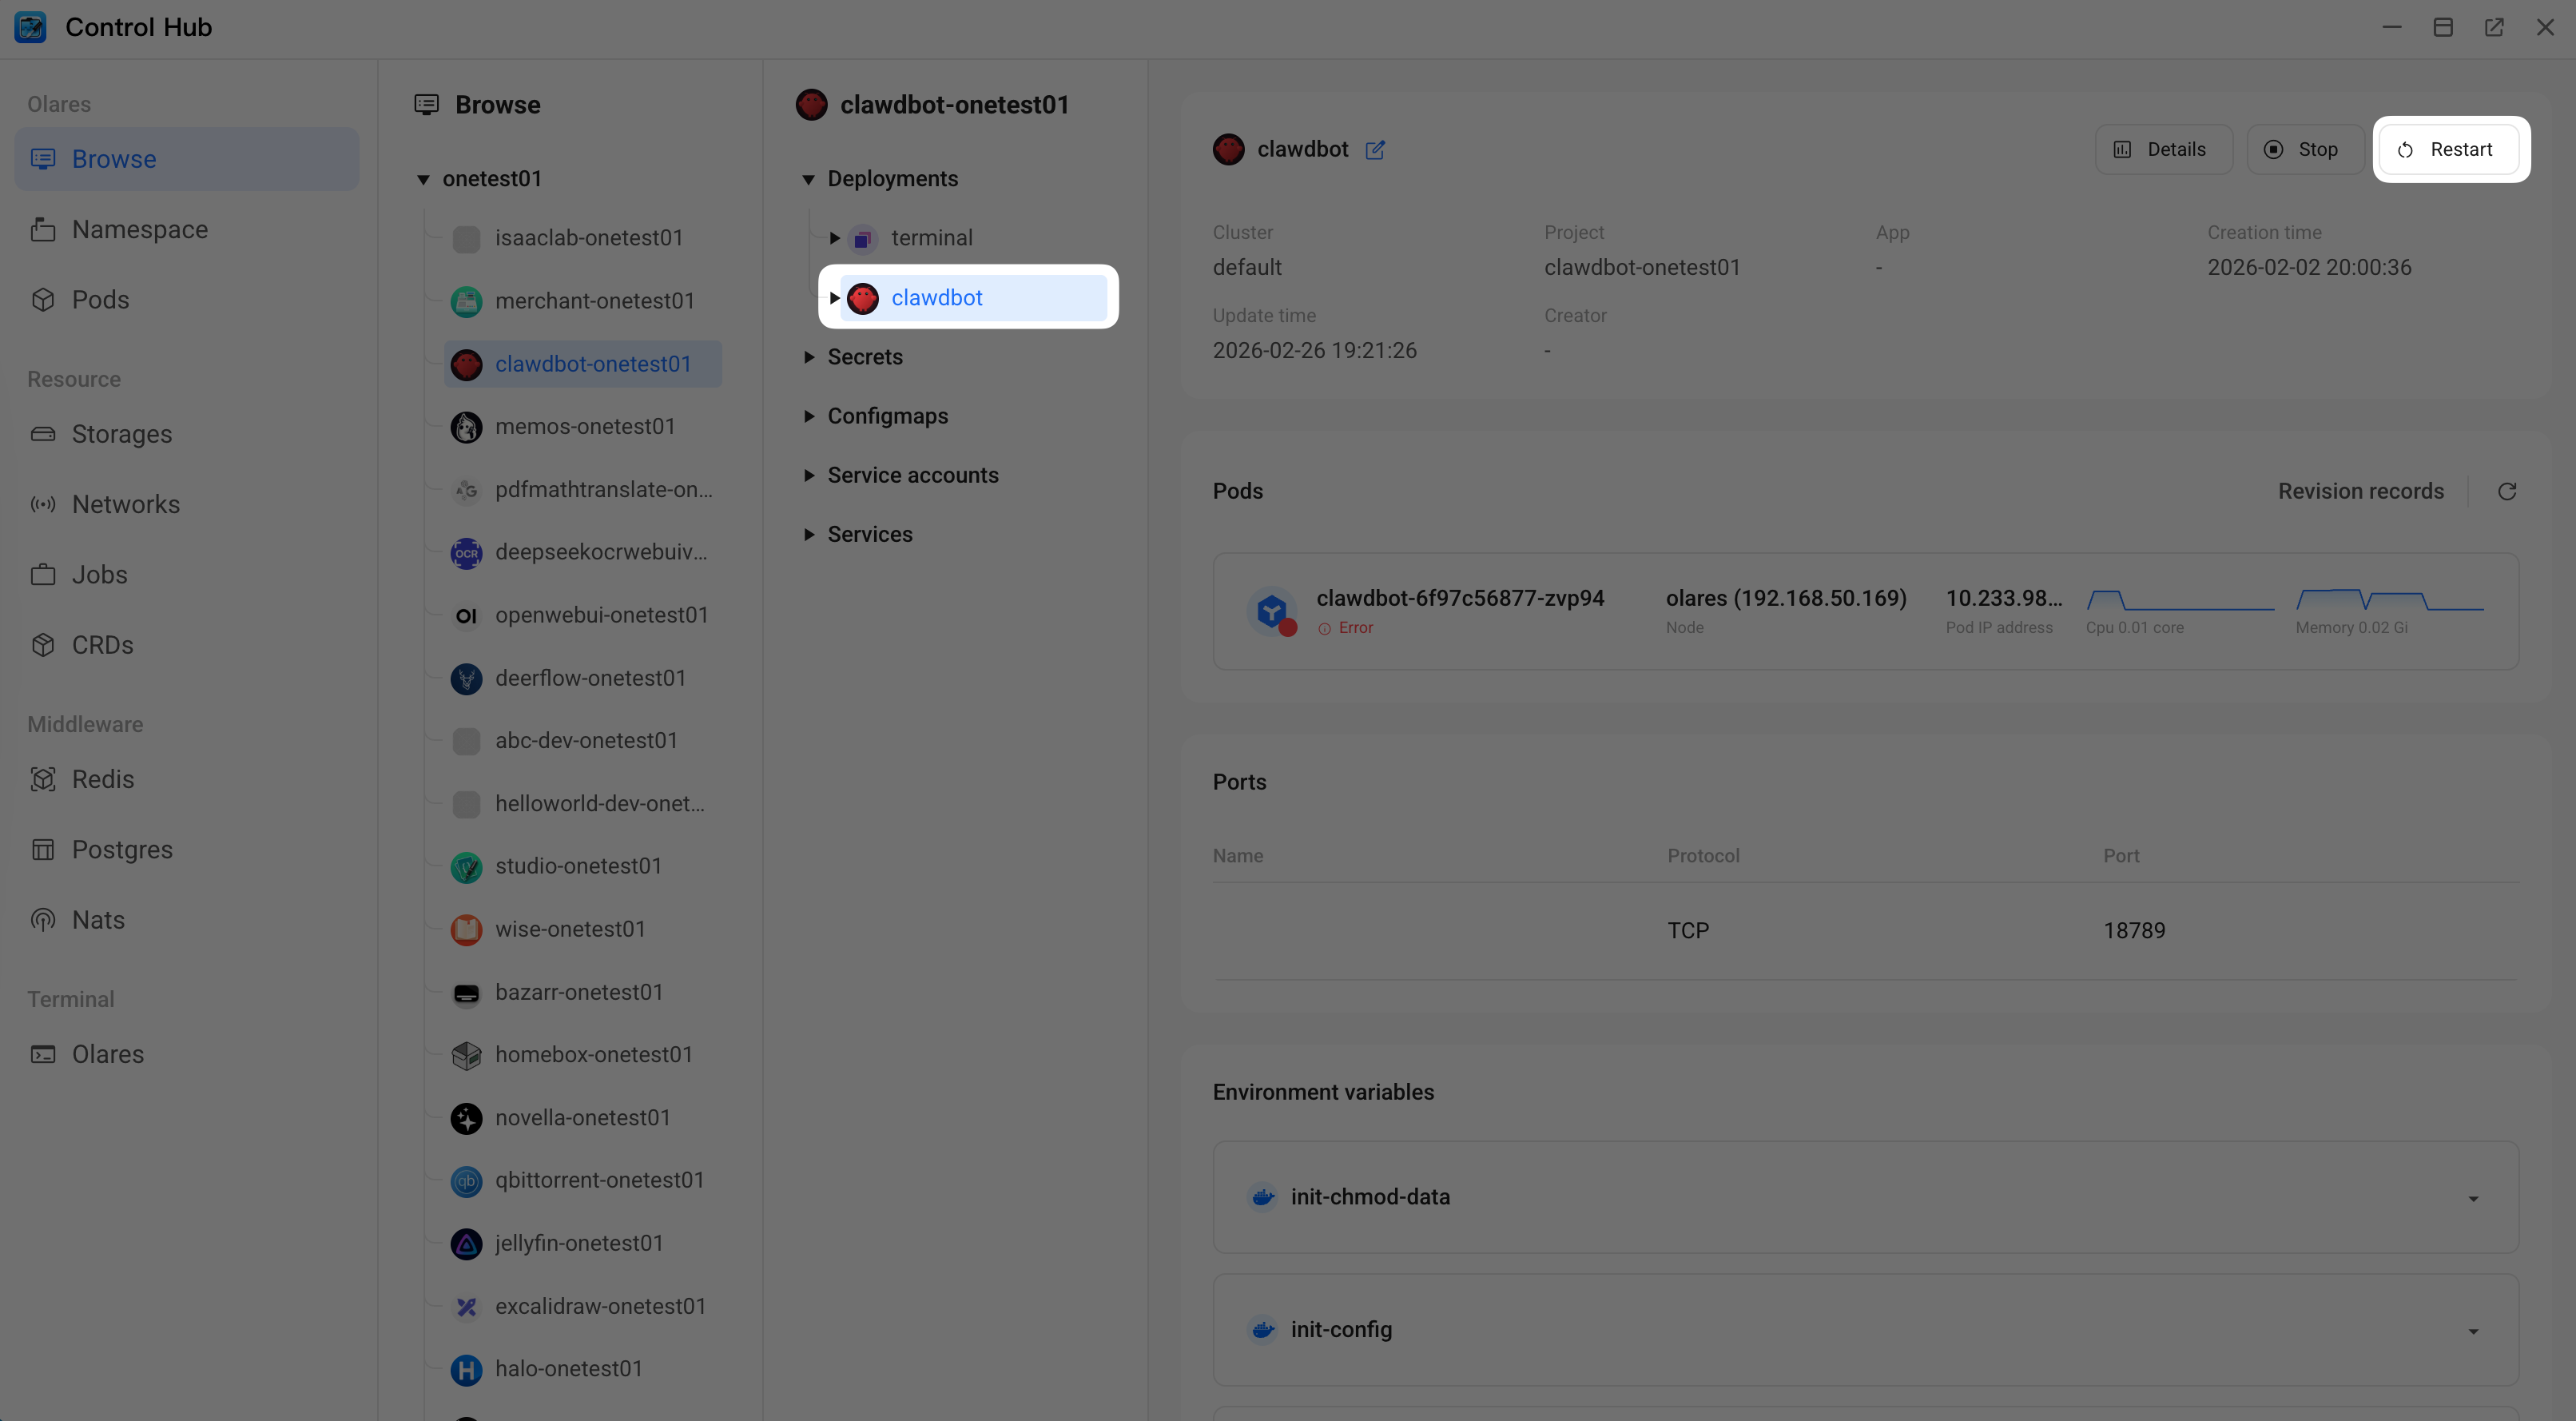
Reopen the Control UI and verify it loads normally.
For more information, see the OpenClaw release notes.
Upgrade to v2026.6.5
The OpenClaw 2026.06.05 update migrates auth profiles, auth state, and cron jobs from legacy JSON files into an internal SQLite database. The gateway now reads these configurations from SQLite instead of raw JSON.
Mandatory data migration
Following the upgrade, you must run the automated repair utility to migrate your data. If you use cloud-hosted model providers, your agent might fail to communicate with external APIs and report the following error until this migration is completed:
Missing API key for the selected provider on the gateway. Configure provider
auth, then try again.
When the upgrade is completed, perform the following steps to migrate your data and restore full gateway functionality:
Open the OpenClaw CLI from the Launchpad.
Run the automated repair command:
bashopenclaw doctor --fixVerify the output logs in your terminal. A successful migration will show confirmation lines matching the following structures:
text| Migrated auth profile JSON for ~/.openclaw/agents/main/agent/auth-profiles.json into | | SQLite (backups: | | ~/.openclaw/agents/main/agent/auth-profiles.json.sqlite-import.1781088154476.bak, | | ~/.openclaw/agents/main/agent/auth-state.json.sqlite-import.1781088154484.bak). |
For more information, see the OpenClaw release notes.
Upgrade to v2026.5.26
The OpenClaw 2026.05.26 update introduces significant architectural changes. After upgrading to this version, your agent might temporarily lose some functionality until you update your installed plugins and skills to their latest compatible versions.
To restore your agent's functionality, open the OpenClaw CLI and use one of the following methods:
Run the automated diagnostic tool (Recommended): Run the following command to let the system automatically detect and repair compatibility issues:
bashopenclaw doctor --fixUpdate all plugins: Run the following command to batch update all your installed plugins at once:
bashopenclaw plugins update --allAlternatively, you can update plugins individually if you prefer.
Manually update custom plugins: If you installed plugins manually (for example, using
npxor by directly uploading files), the automated CLI commands cannot update them. You must refer to the original plugin developer's official documentation for specific upgrade instructions.
For more information, see the OpenClaw release notes
Upgrade to v2026.3.22
Prerequisite
You must upgrade your Olares OS to V1.12.5 before updating OpenClaw to 2026.03.22.
The OpenClaw 2026.03.22 update introduced several changes that restrict plugin permissions. Because of this security enhancement, older plugins might no longer be compatible. For more information, see the OpenClaw release notes.
If you find that a previously working plugin is unavailable after upgrading to this version, try the following solutions:
- Update the plugin: Check if a newer version is available that complies with the updated permission restrictions.
- Verify configuration methods: Check with the plugin provider to see if new configurations are required for OpenClaw 2026.03.22 and later.
Upgrade to v2026.2.25
The OpenClaw 2026.02.25 update introduced a security enhancement that requires existing users to explicitly declare the allowed Control UI access address. Therefore, if your Control UI fails to start after the upgrade, follow these steps to resolve the issue.
Open Control Hub on the Launchpad to check the container logs for clawdbot.
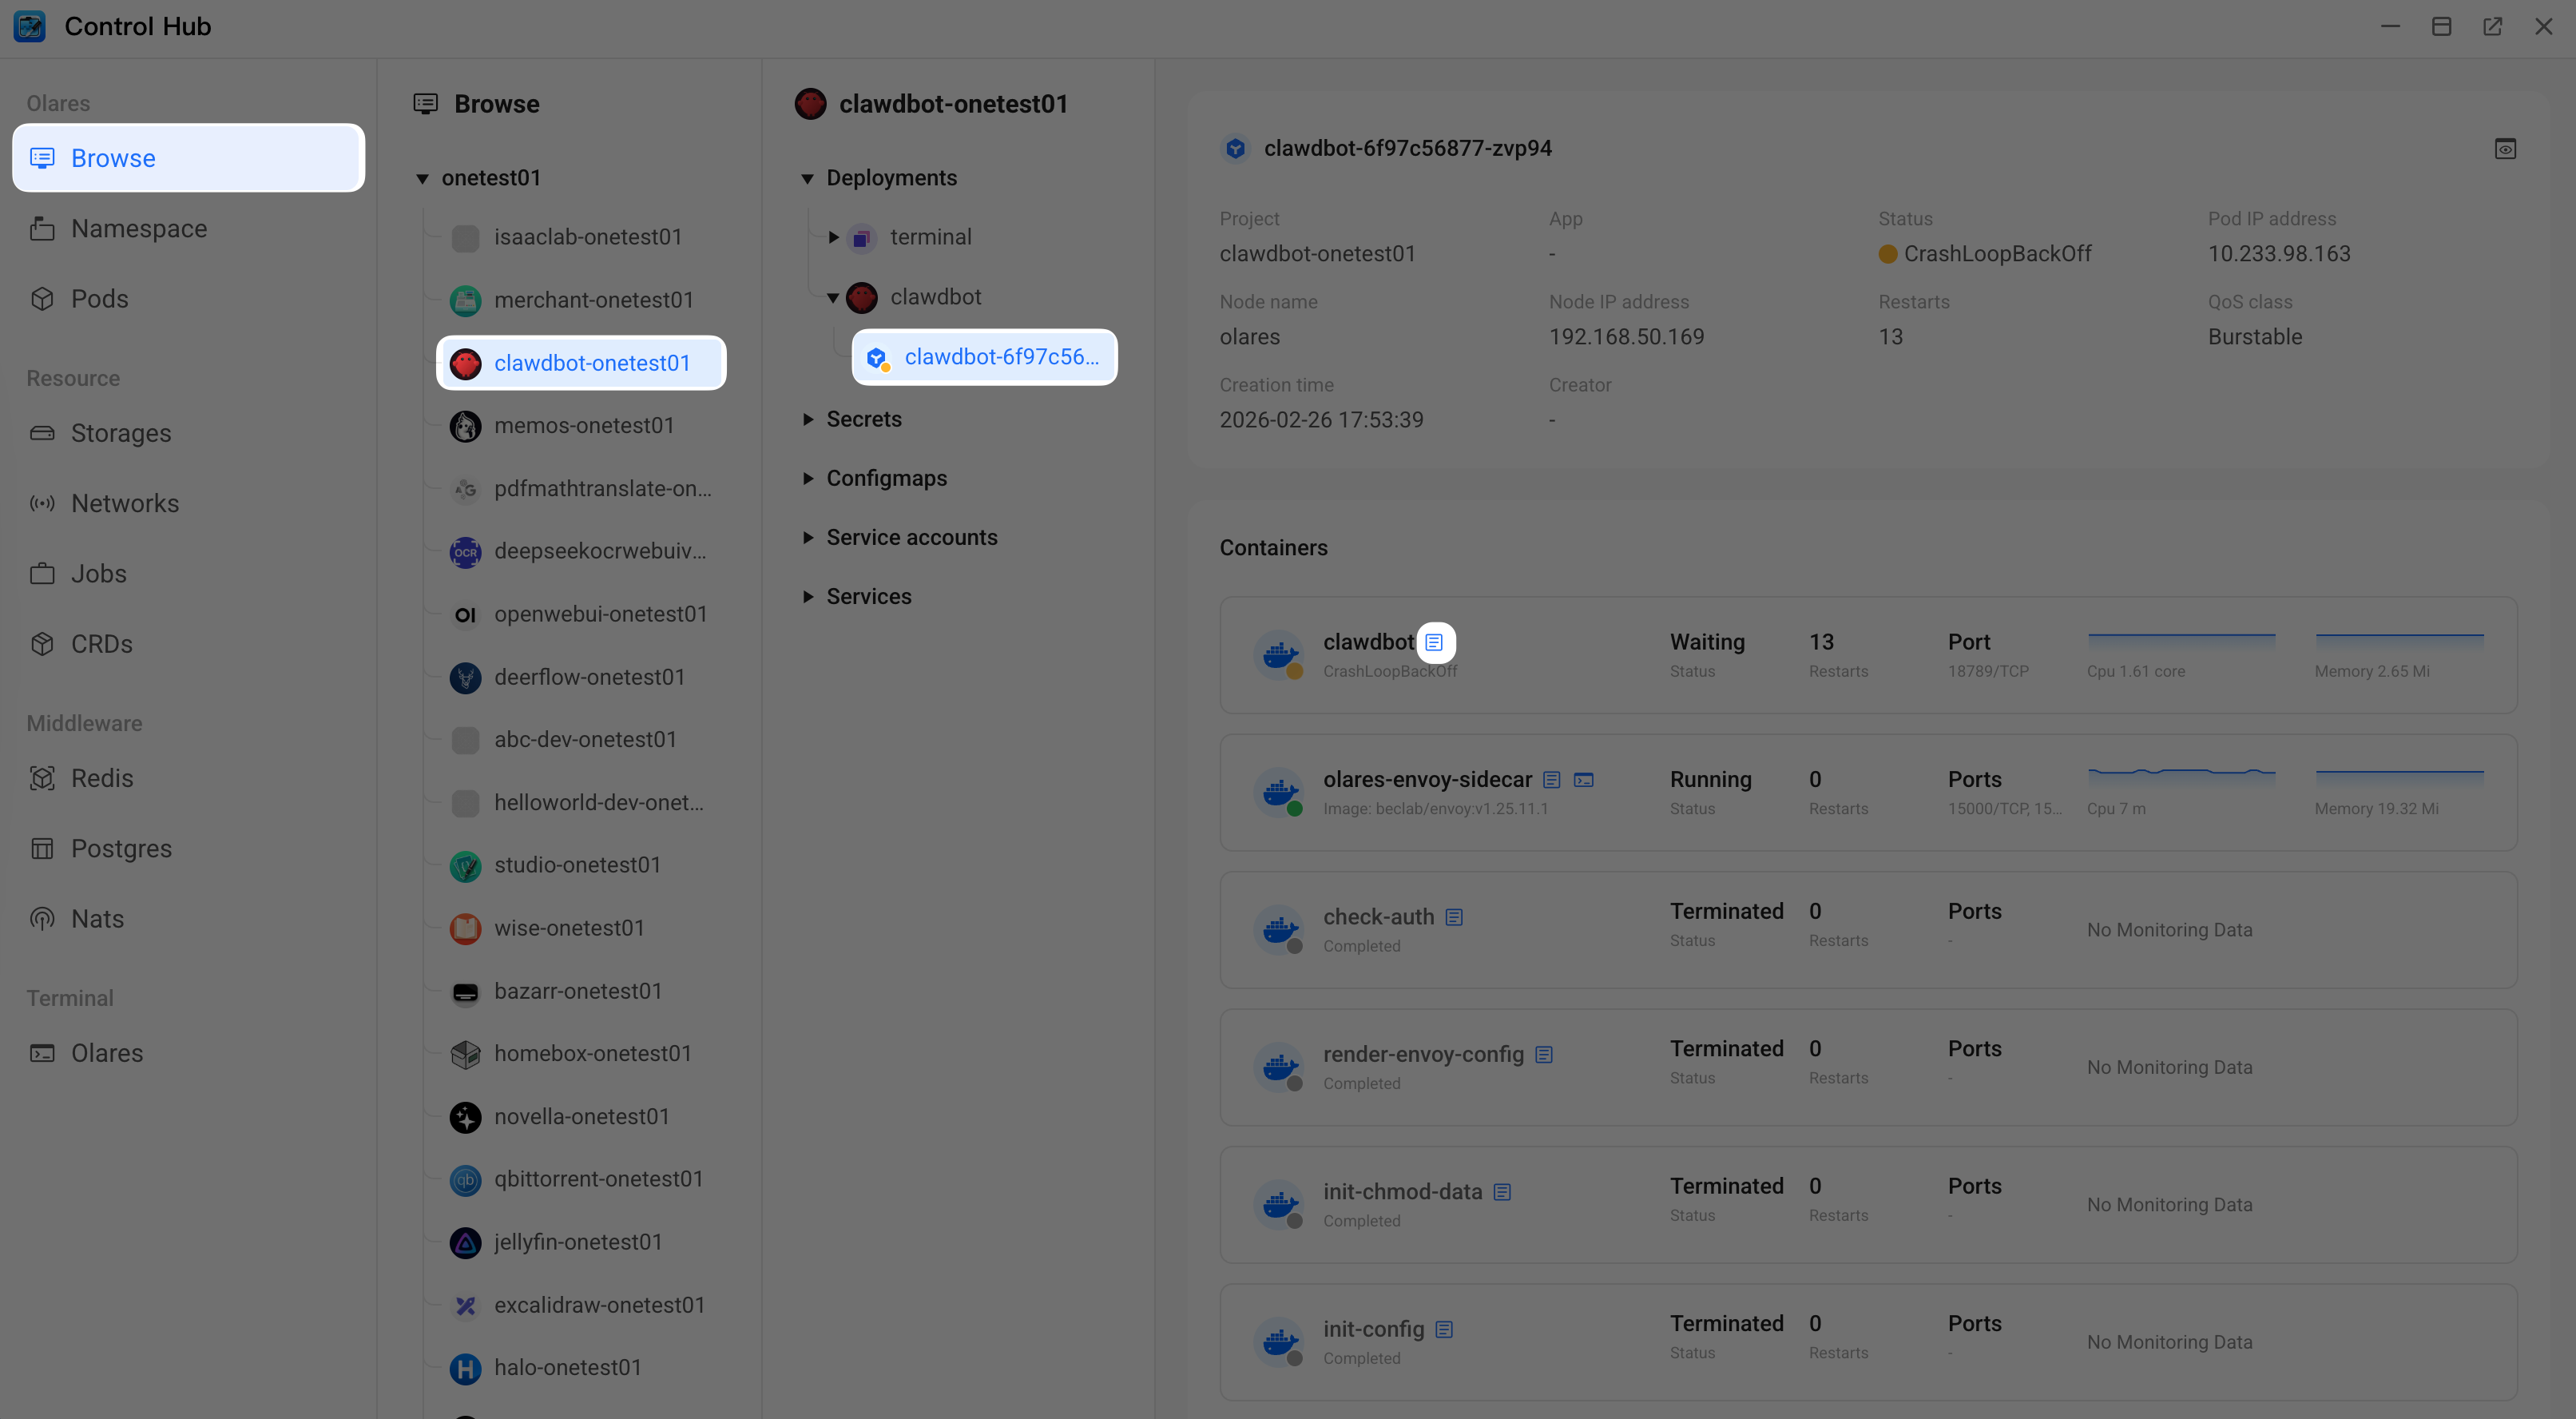
Look for the following error message. If it appears, proceed to the next step.
textGateway failed to start: Error: non-loopback Control UI requires gateway.controlUi.allowedOrigins (set explicit origins), or set gateway.controlUi.dangerouslyAllowHostHeaderOriginFallback=true to use Host-header origin fallback mode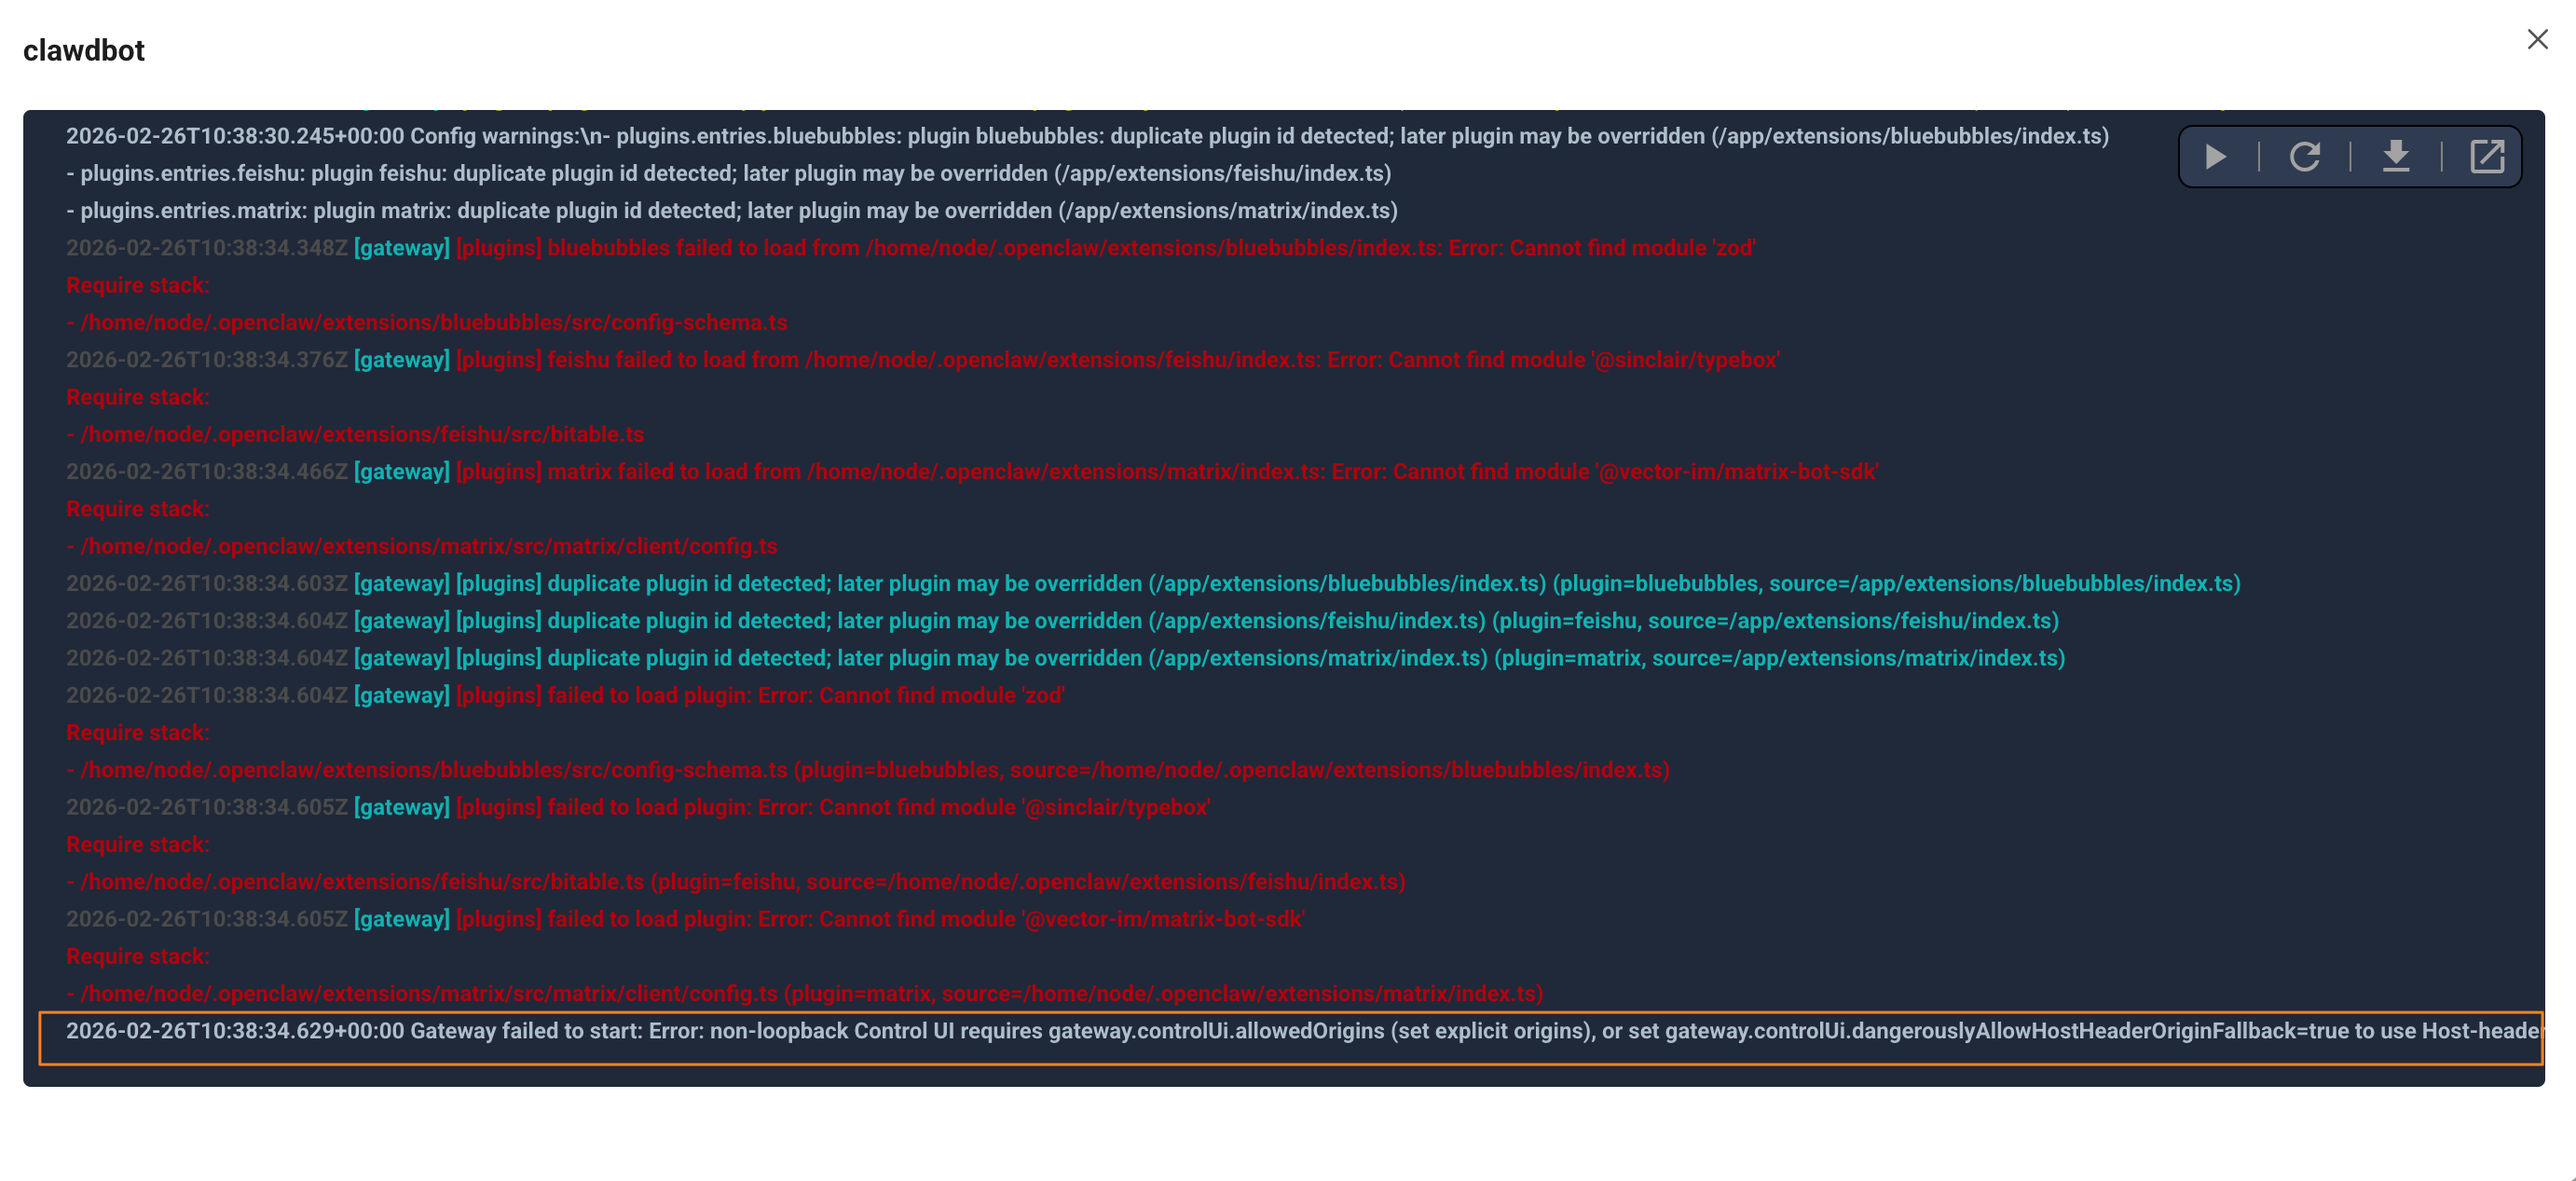
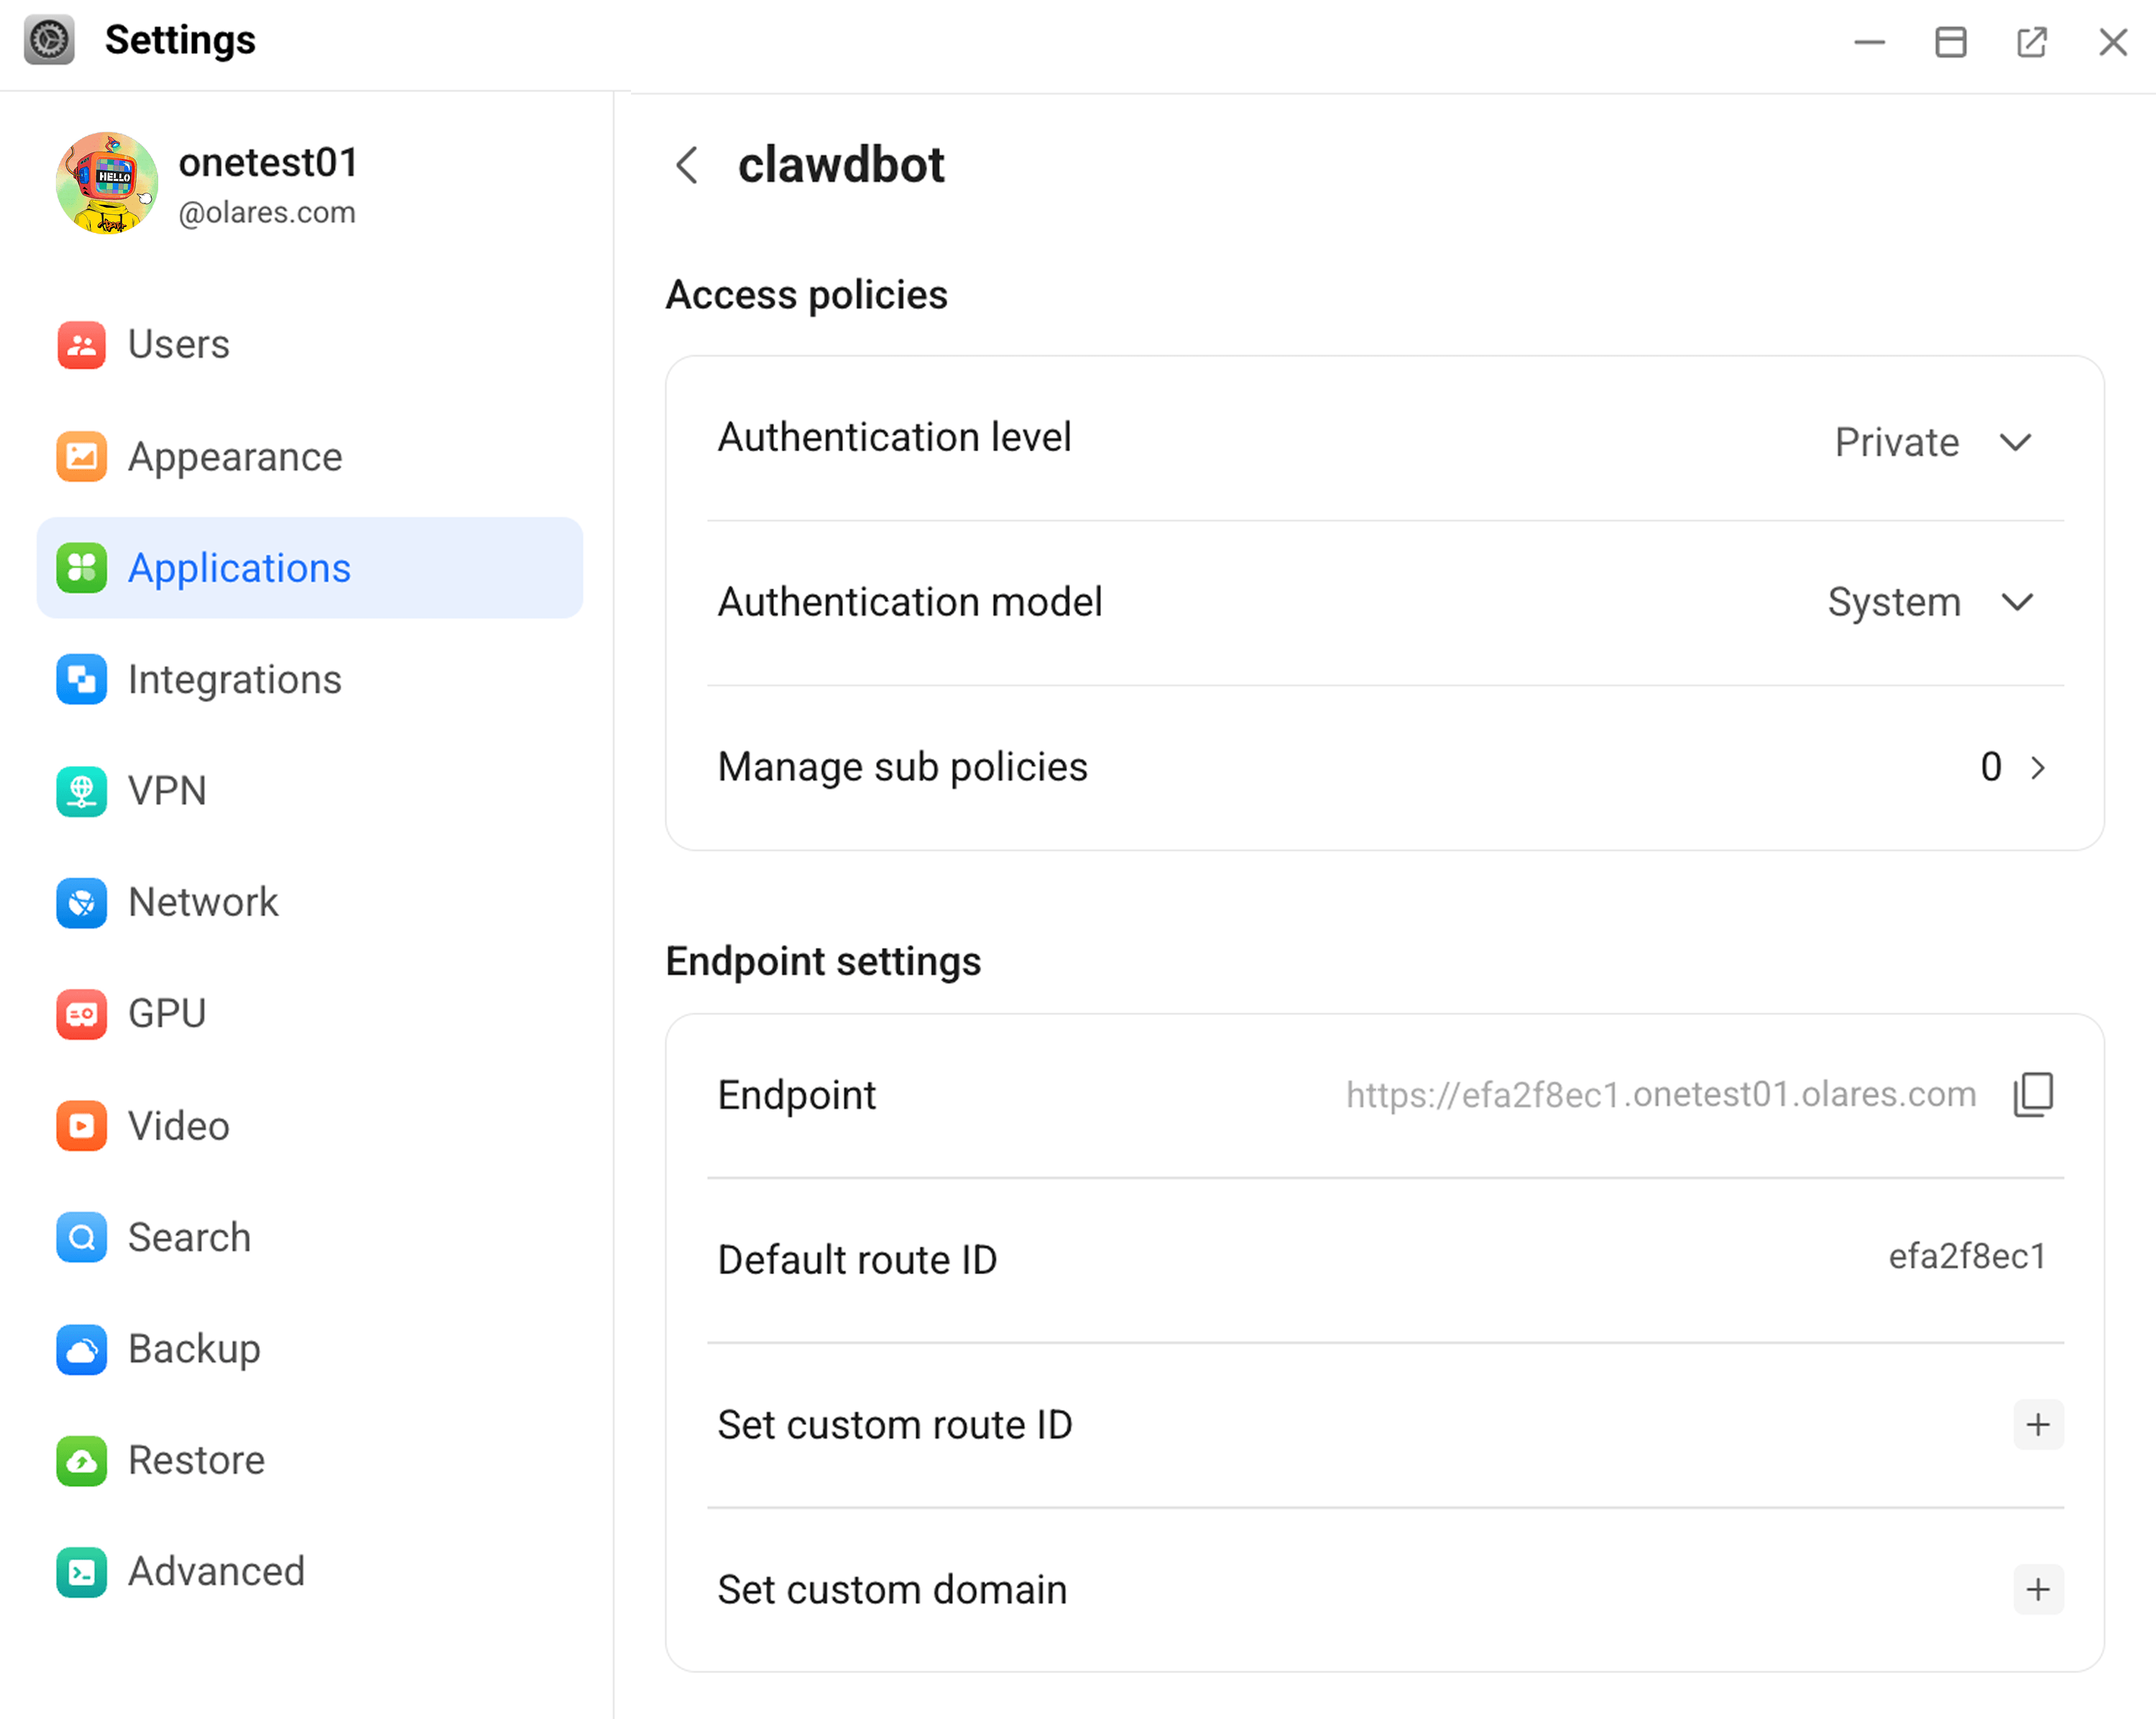
Open Settings, go to Application > OpenClaw > Control UI >. Under Endpoint settings, copy the endpoint address.
Open Files, go to Application > Data > clawdbot > config, right-click the
openclaw.jsonfile, and then download it.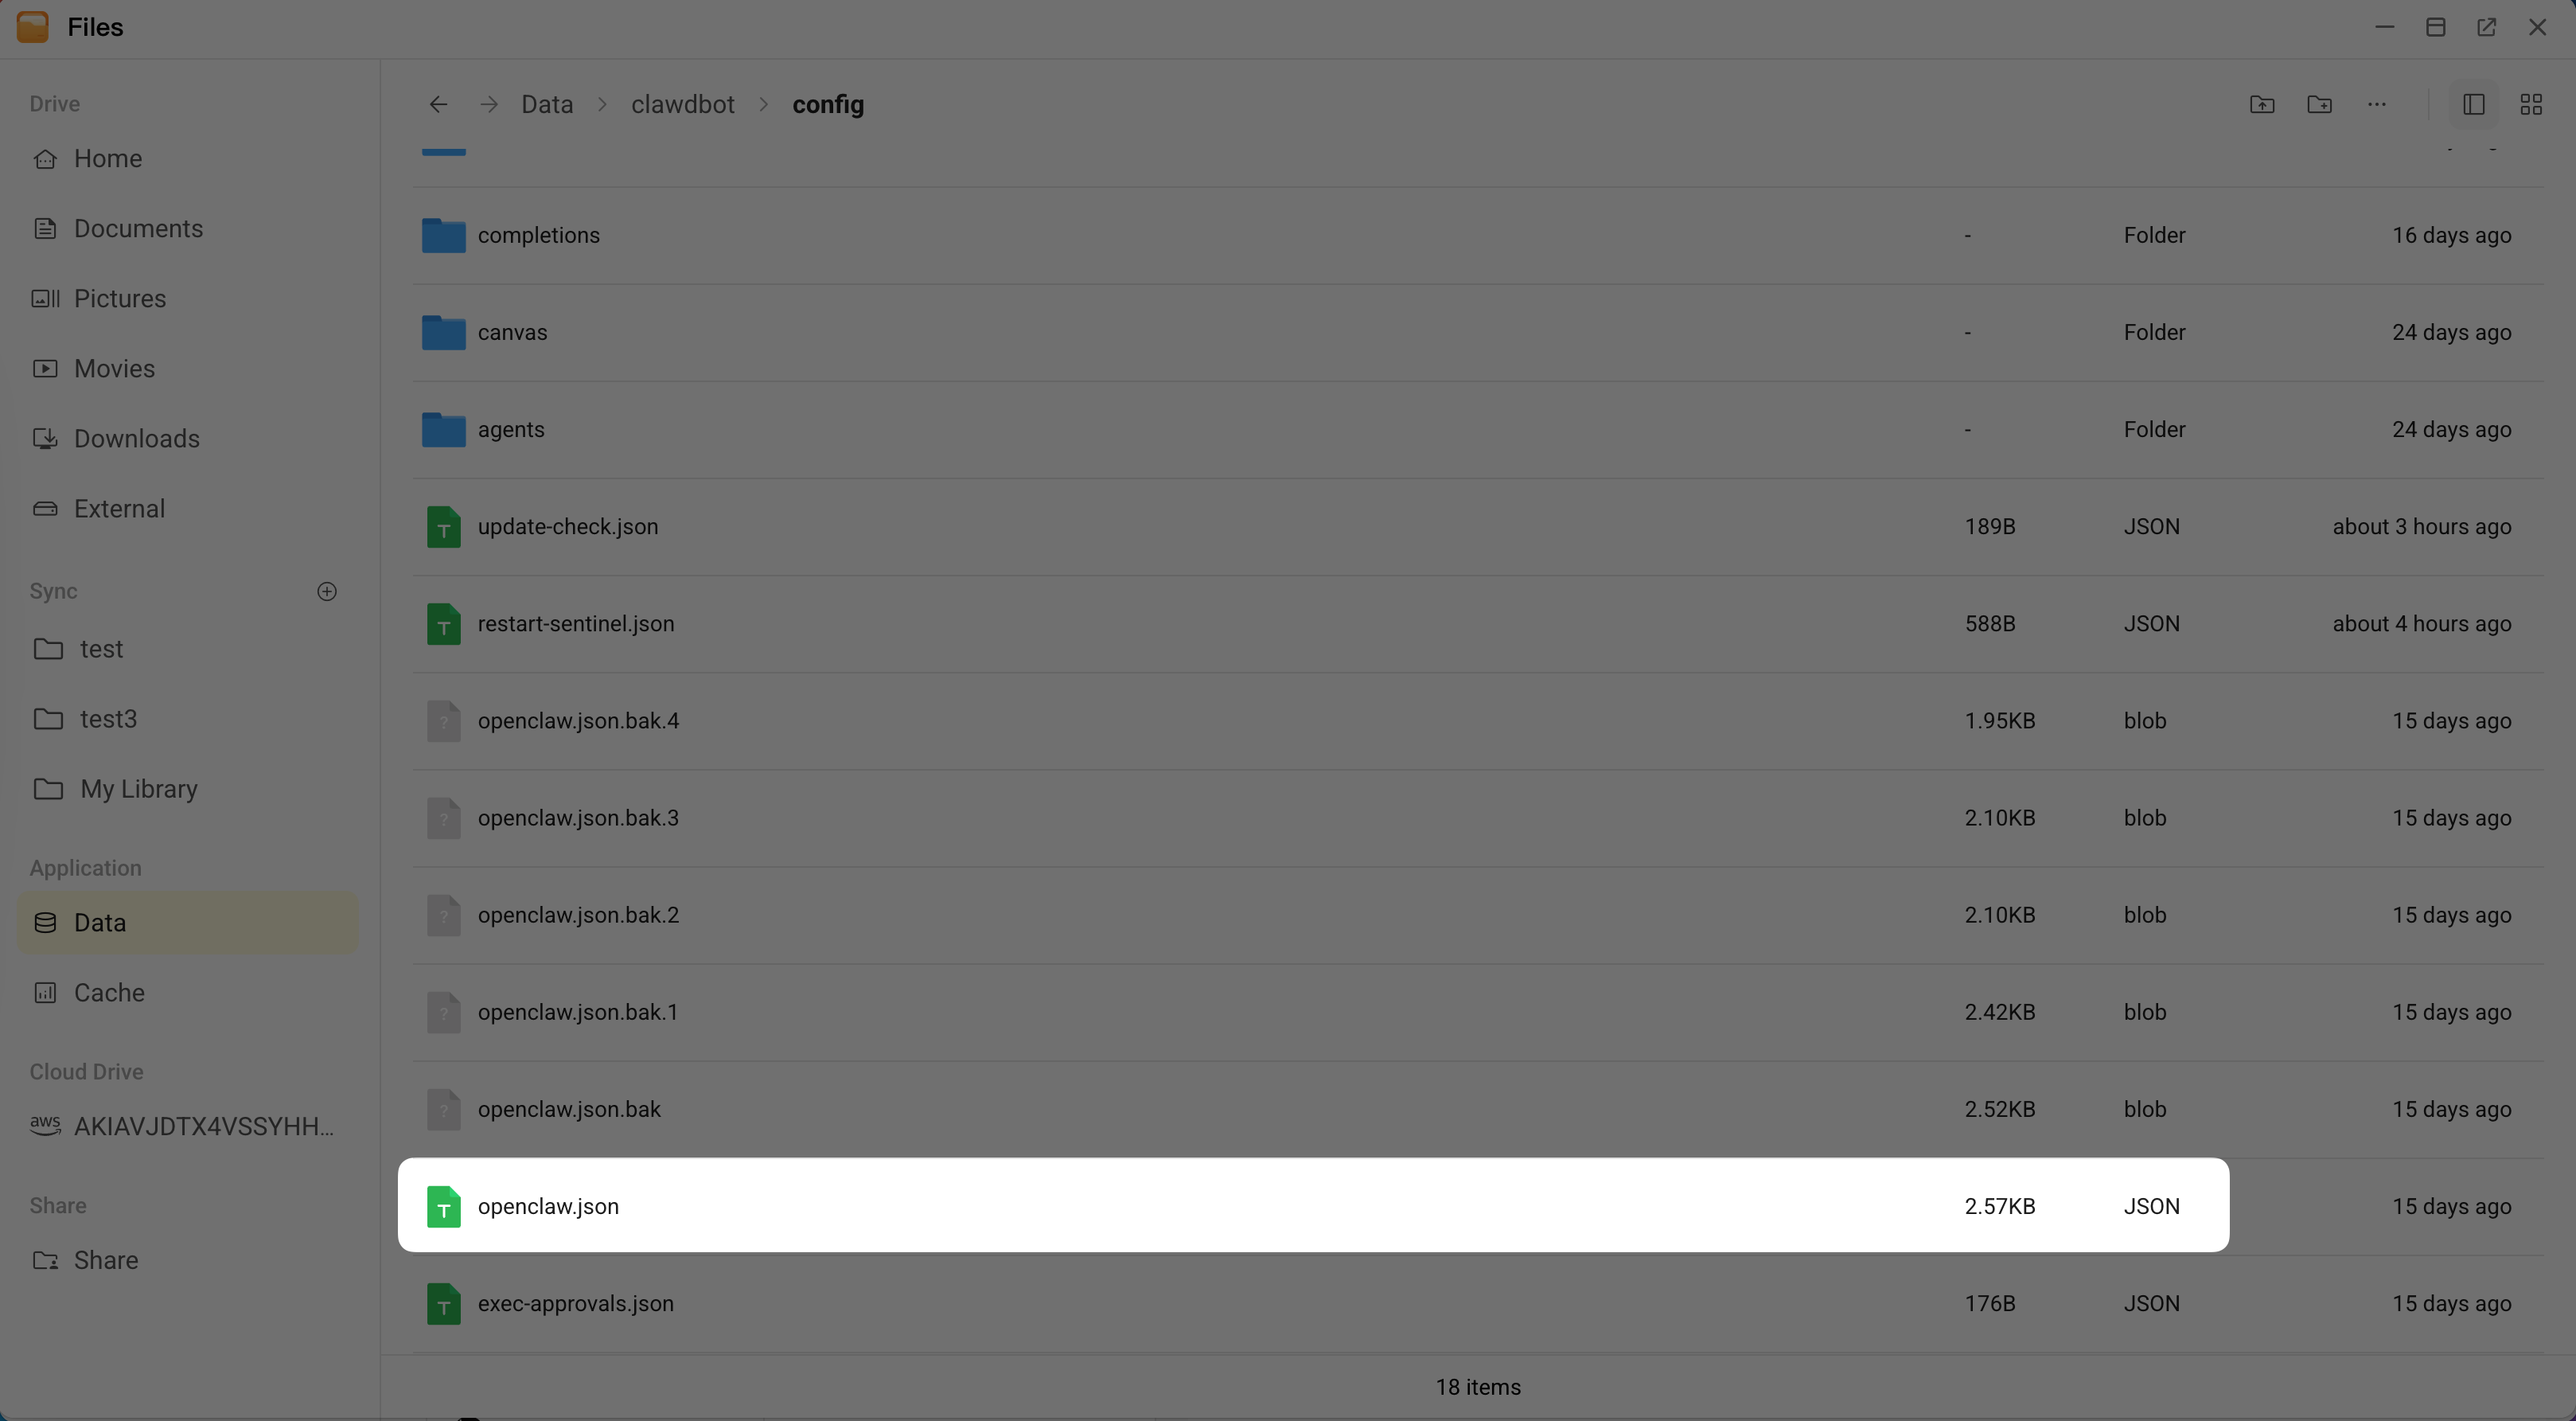
Open the downloaded file in a text editor, find the
gatewaysection, and then add acontrolUiblock with your endpoint address.json"controlUi": { "allowedOrigins": ["Endpoint-Address"] },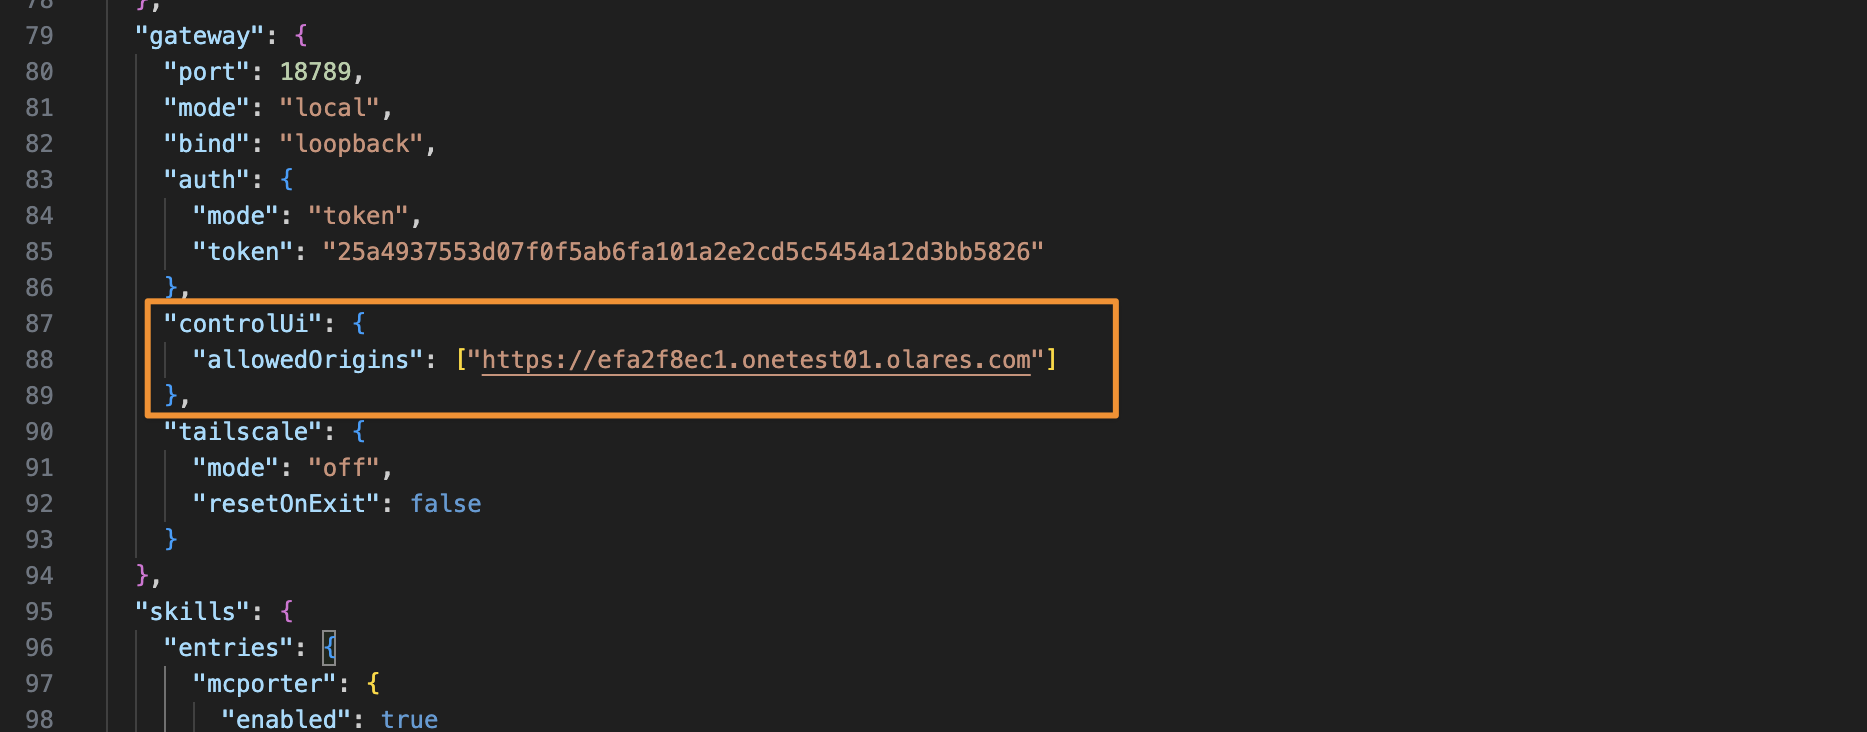
INFO
If you access the Control UI using multiple addresses such as local URLs or custom domains, add them to the
allowedOriginsarray separated by commas. For example,["https://url-one.com", "https://url-two.com"].Return to Files, rename the original
openclaw.jsonfile to keep it as a backup, and then upload your modifiedopenclaw.jsonfile.Return to Control Hub, click clawdbot under Deployments, and then click Restart in the upper-right corner.
In the Restart clawdbot window, type
clawdbotexactly as shown, and then click Confirm. Wait for the program status to show as Running, which is indicated by a green dot.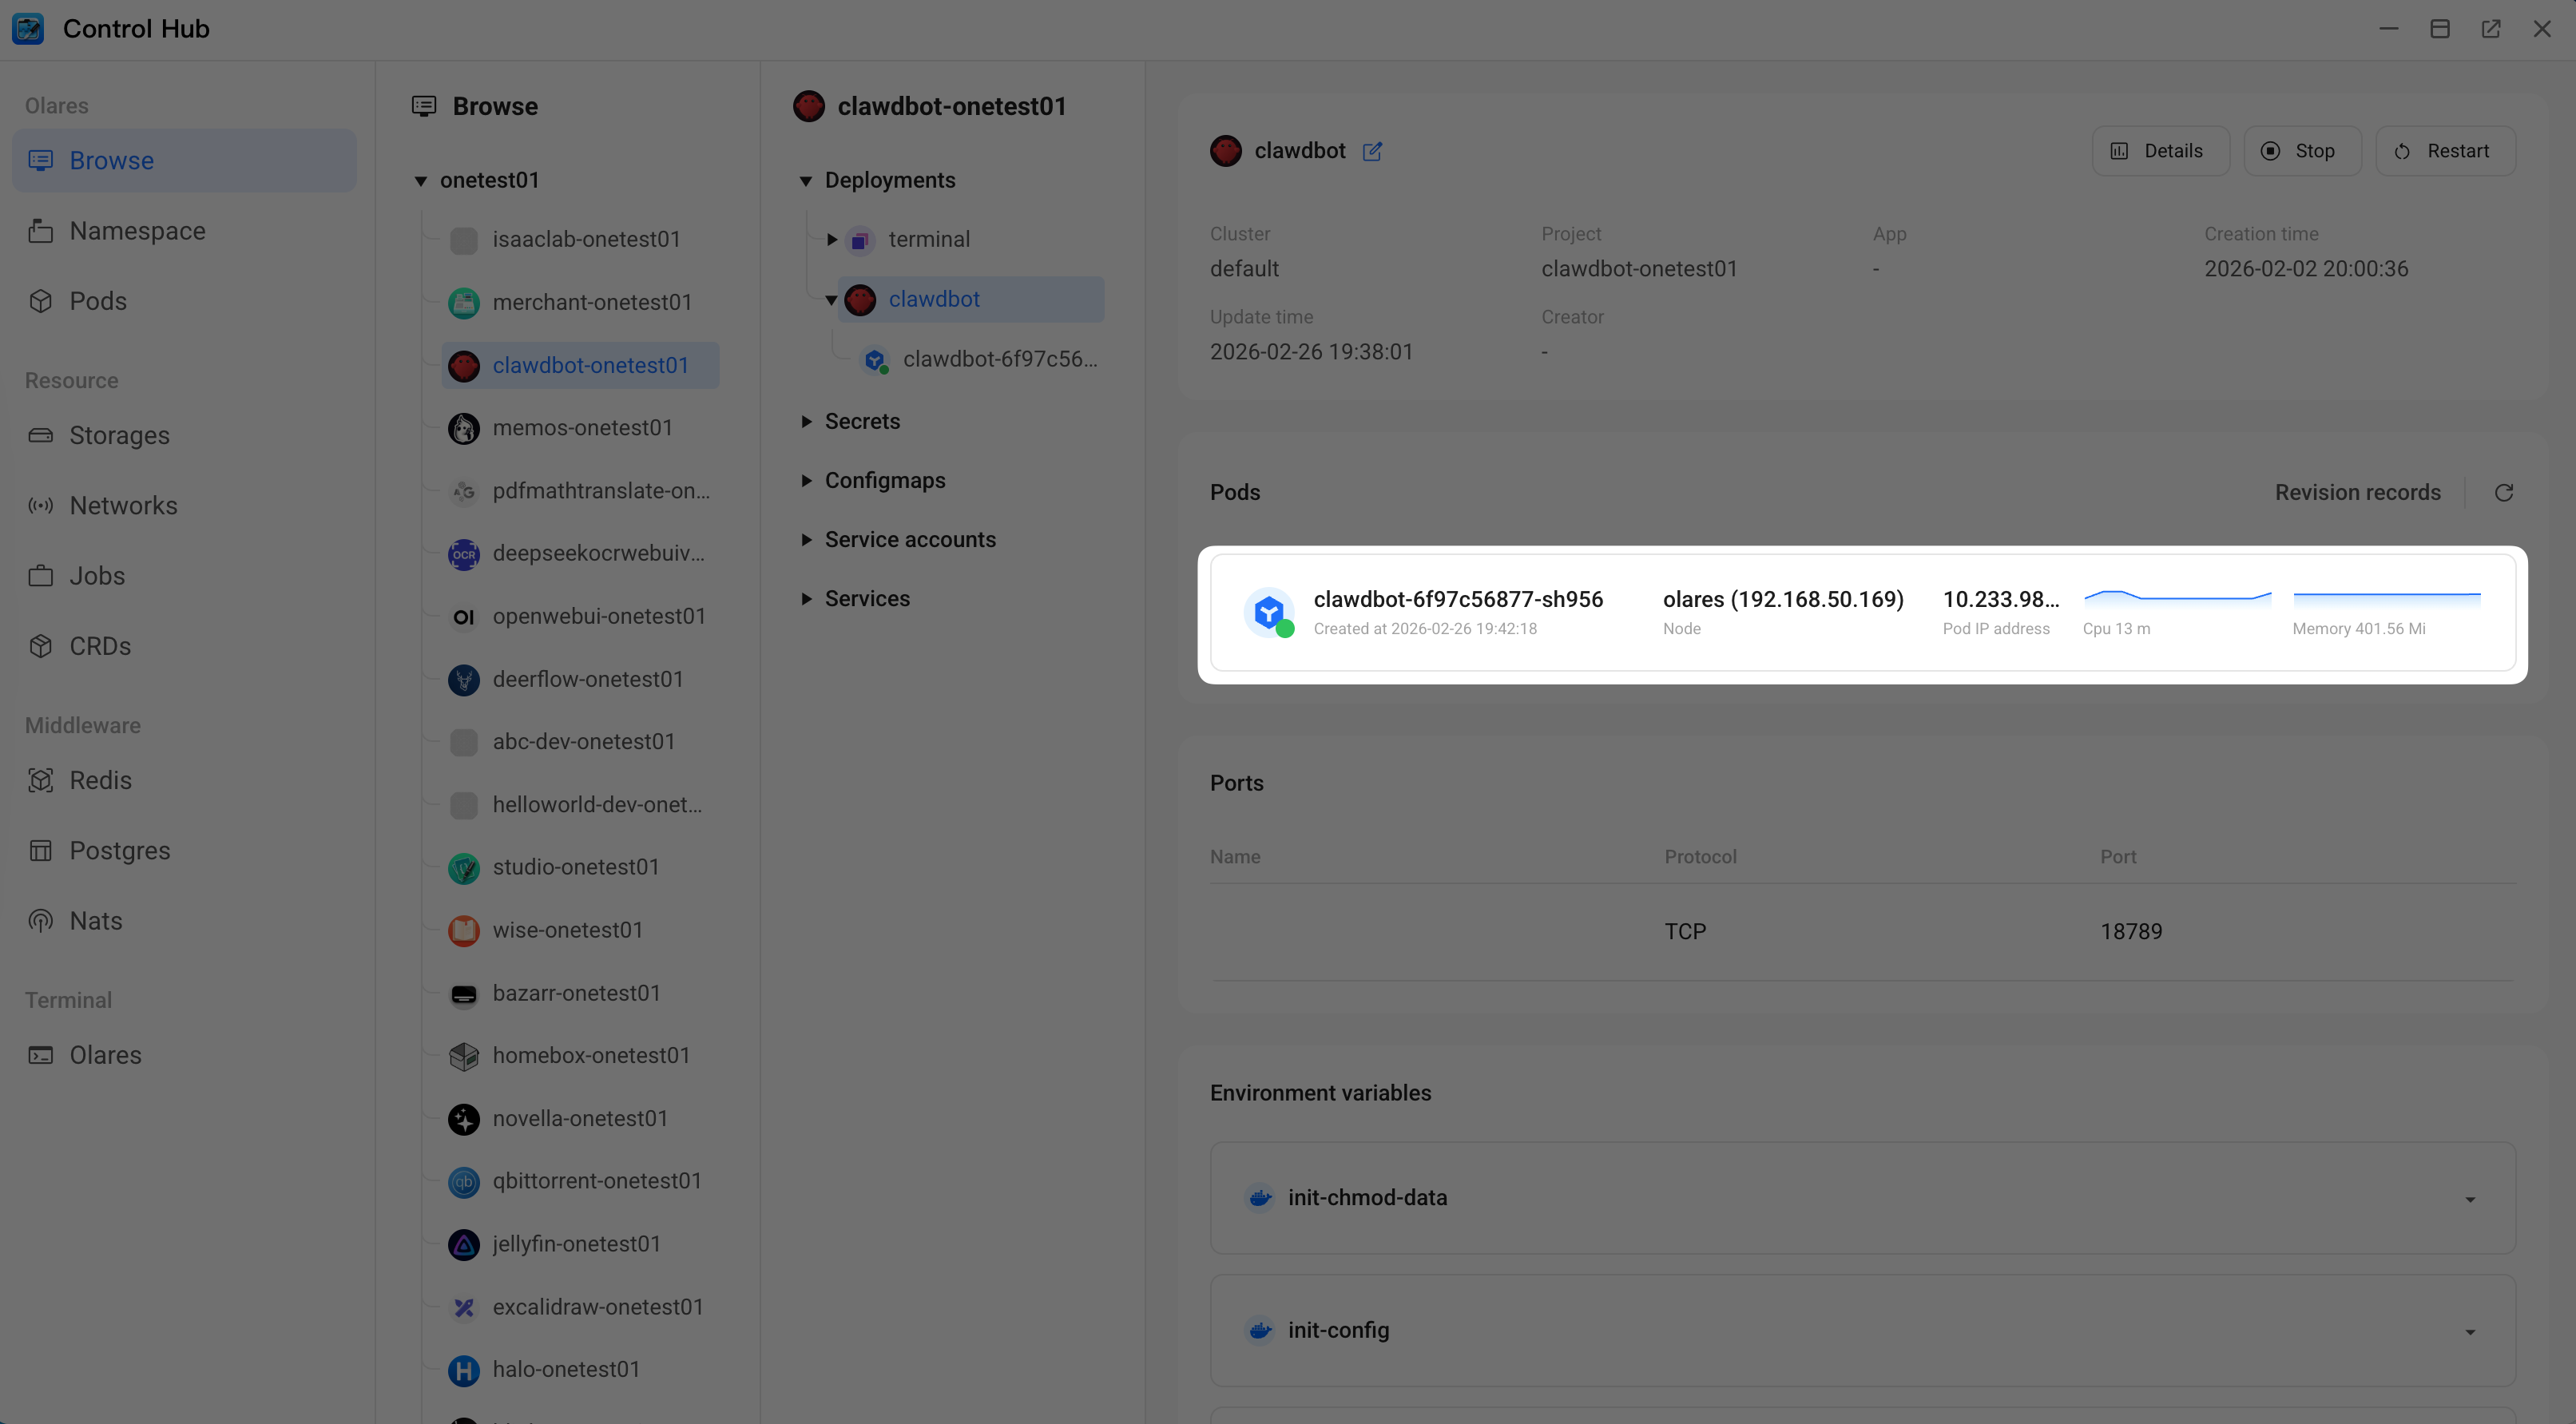
Check the container logs again to verify the gateway has started successfully.

Open the Control UI. Refresh the browser page if an error still displays.