Sync Obsidian notes with Obsidian LiveSync
Obsidian is a flexible Markdown note-taking app for private notes, linked knowledge bases, journals, and project work. Obsidian LiveSync on Olares provides a self-hosted CouchDB backend for the Self-hosted LiveSync community plugin, so your vault can sync across devices without relying on Obsidian Sync or another cloud service.
This guide uses a computer as the primary device and a phone as the second device.
Learning objectives
In this guide, you will learn how to:
- Install Obsidian LiveSync on Olares.
- Create a CouchDB database for your Obsidian vault.
- Connect the Self-hosted LiveSync plugin on your primary Obsidian device.
- Import the same sync setup on another device.
- Enable LiveSync mode and check cross-device sync.
Prerequisites
- Obsidian installed on your computer and phone. Download it from the official website.
- A local folder where you want to store the primary Obsidian vault.
- LarePass installed on your computer and phone.
Install Obsidian LiveSync
Open Market and search for "Obsidian LiveSync".
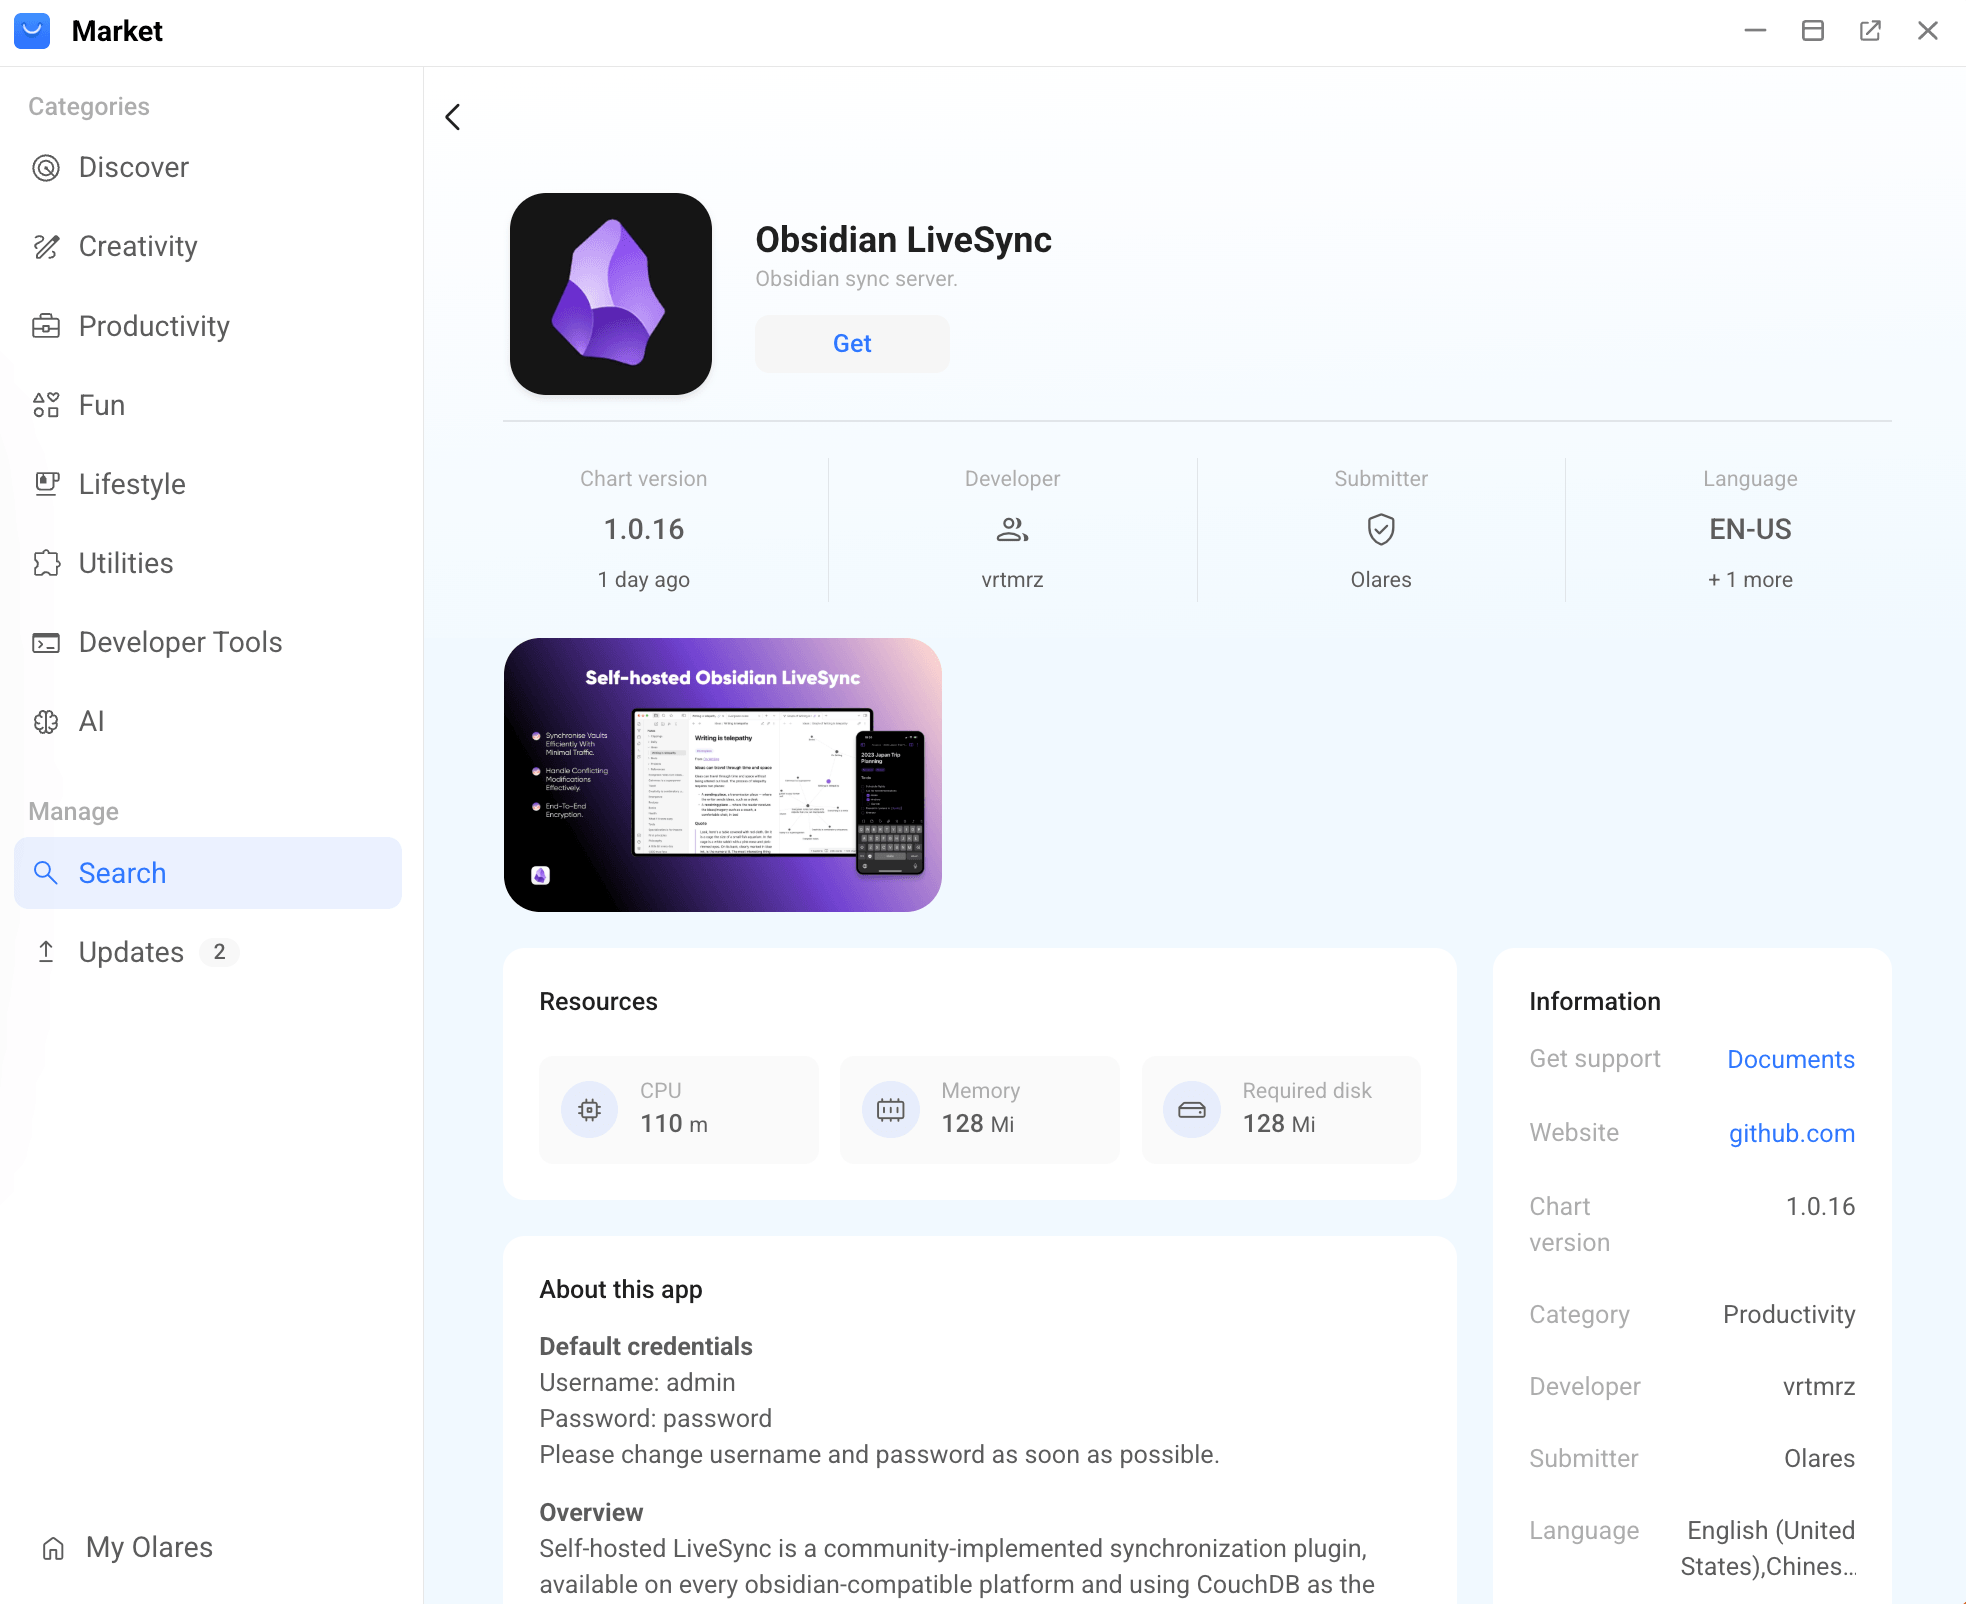
Click Get, then Install, and wait for installation to complete.
Configure Obsidian LiveSync on Olares
Before configuring your Obsidian clients, create a database in Obsidian LiveSync and allow the Self-hosted LiveSync plugin to reach it.
Create a database
Open Obsidian LiveSync from Launchpad.
Sign in with the default credentials:
- Username:
admin - Password:
password
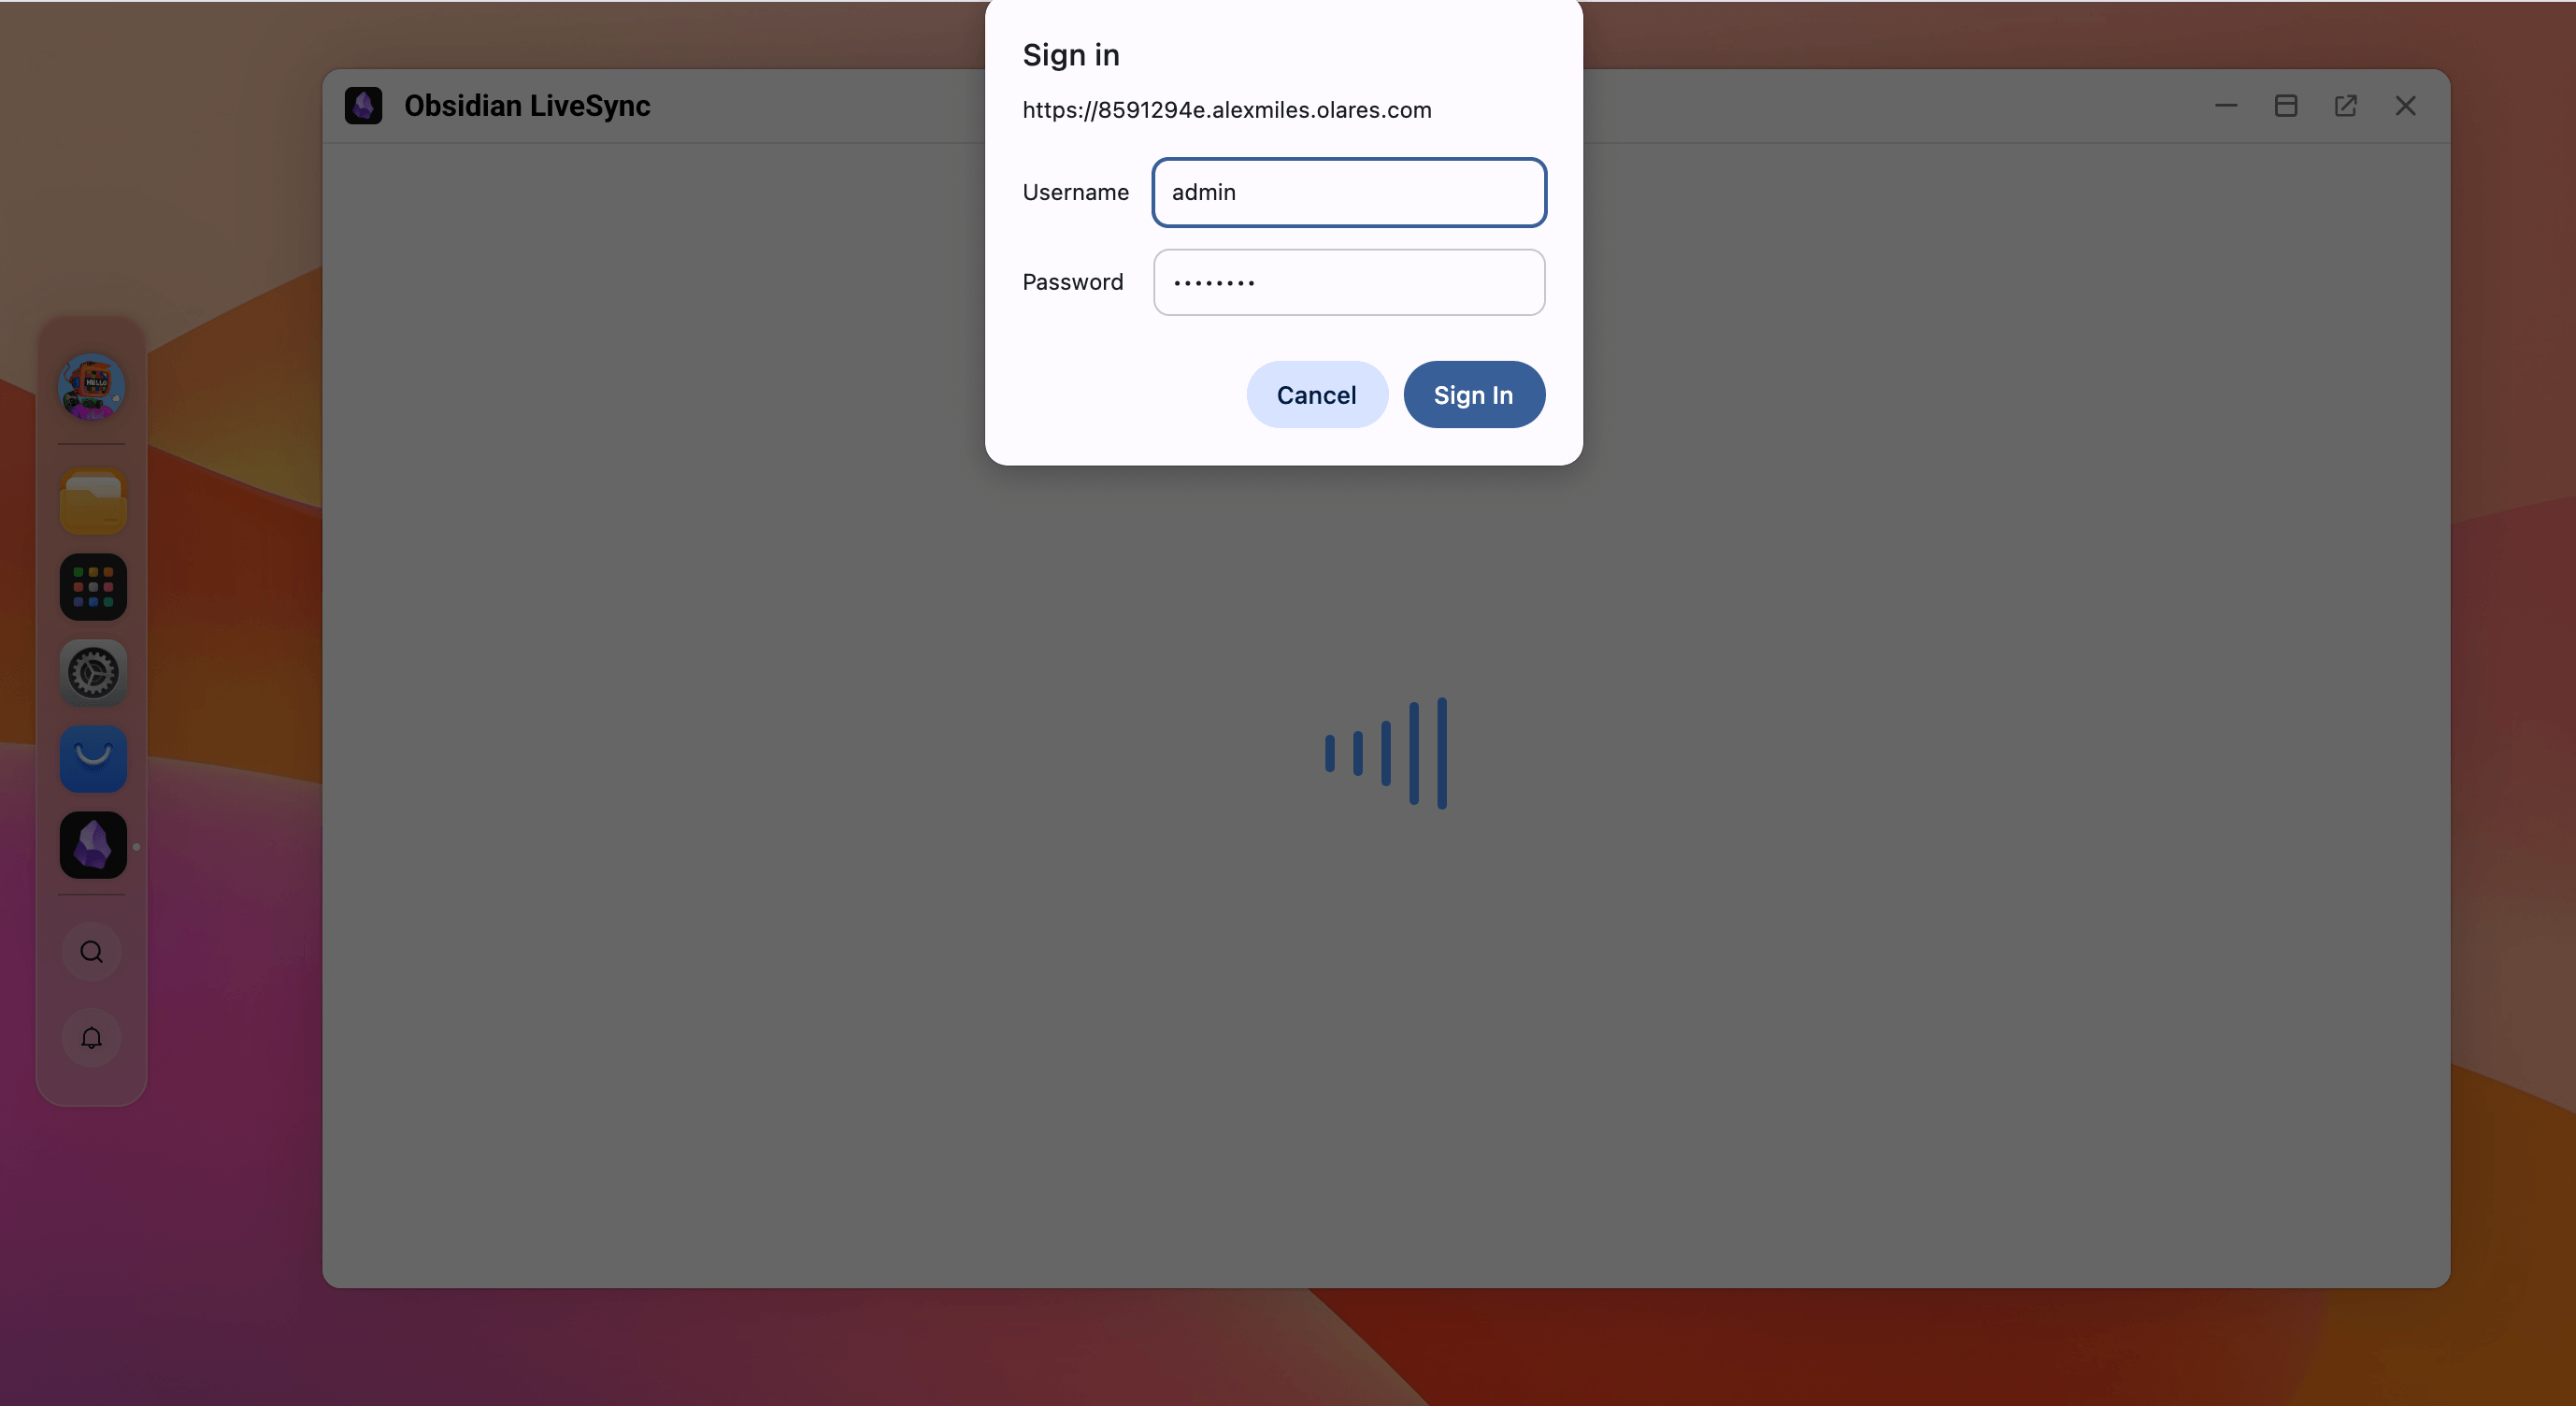
- Username:
(Optional) Change the default password:
a. In the left sidebar, click the user management icon at the bottom.
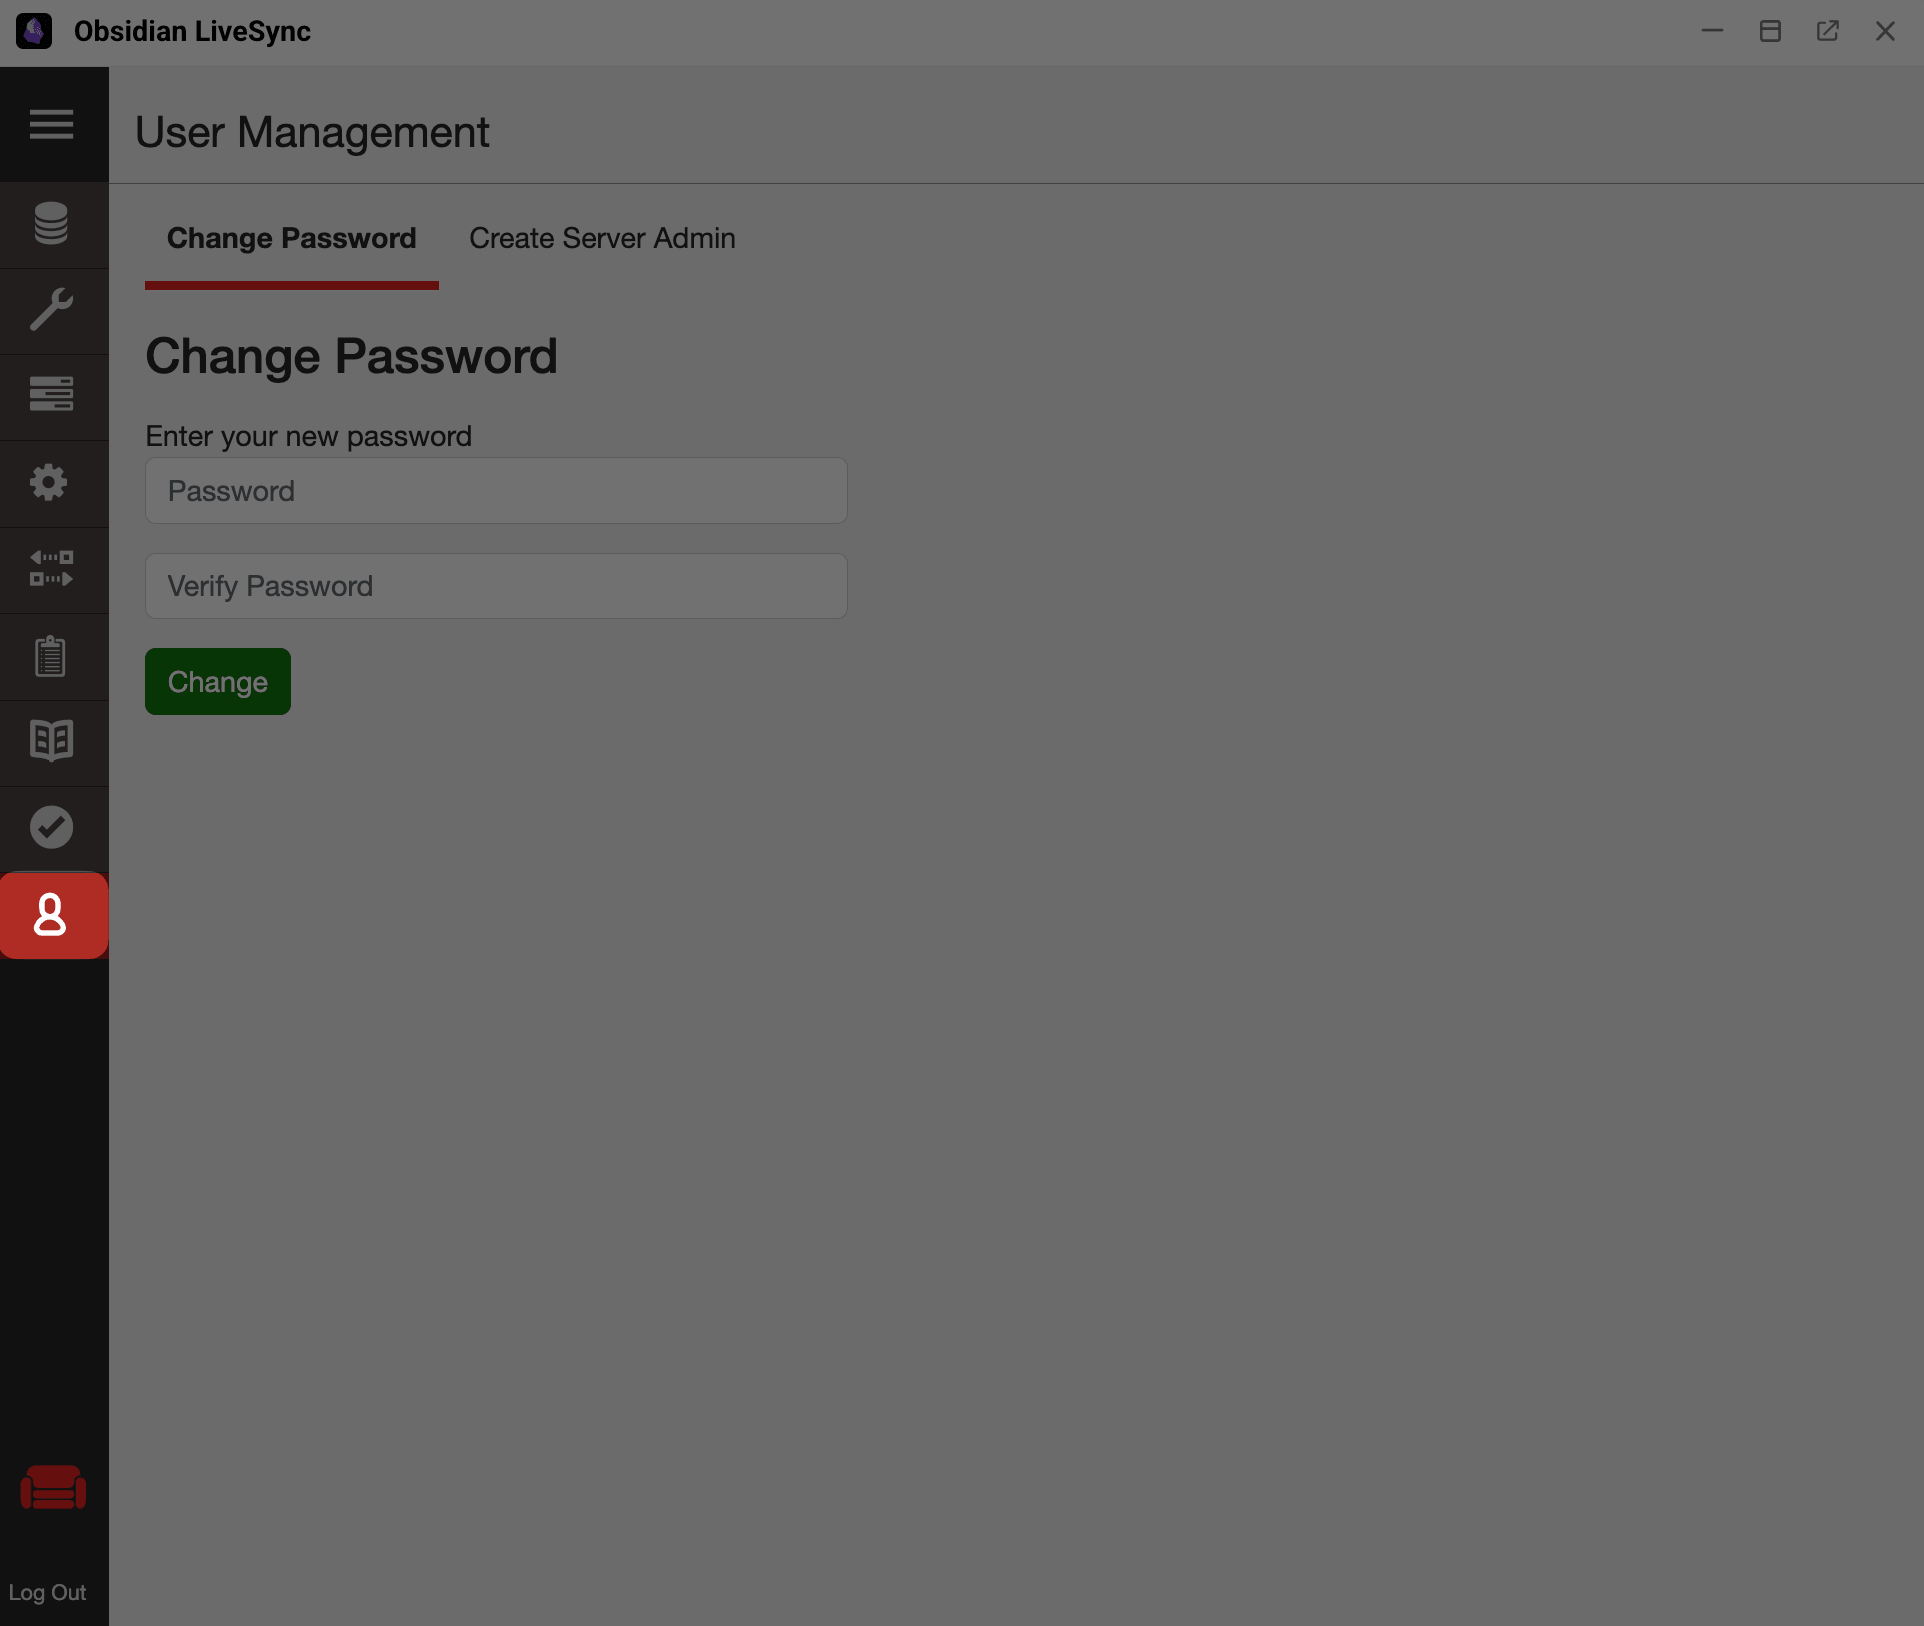
b. On the Change Password tab, enter and verify a new password, then click Change.
In the left sidebar, click database icon.
Click Create Database in the upper-right corner.
Enter a name to create the database.
Database naming rules
Use only lowercase letters, numbers, and hyphens. Self-hosted LiveSync relies on CouchDB, which strictly requires lowercase names. Using uppercase letters will cause the sync to fail silently later on.
In this example, we create a database named
olares.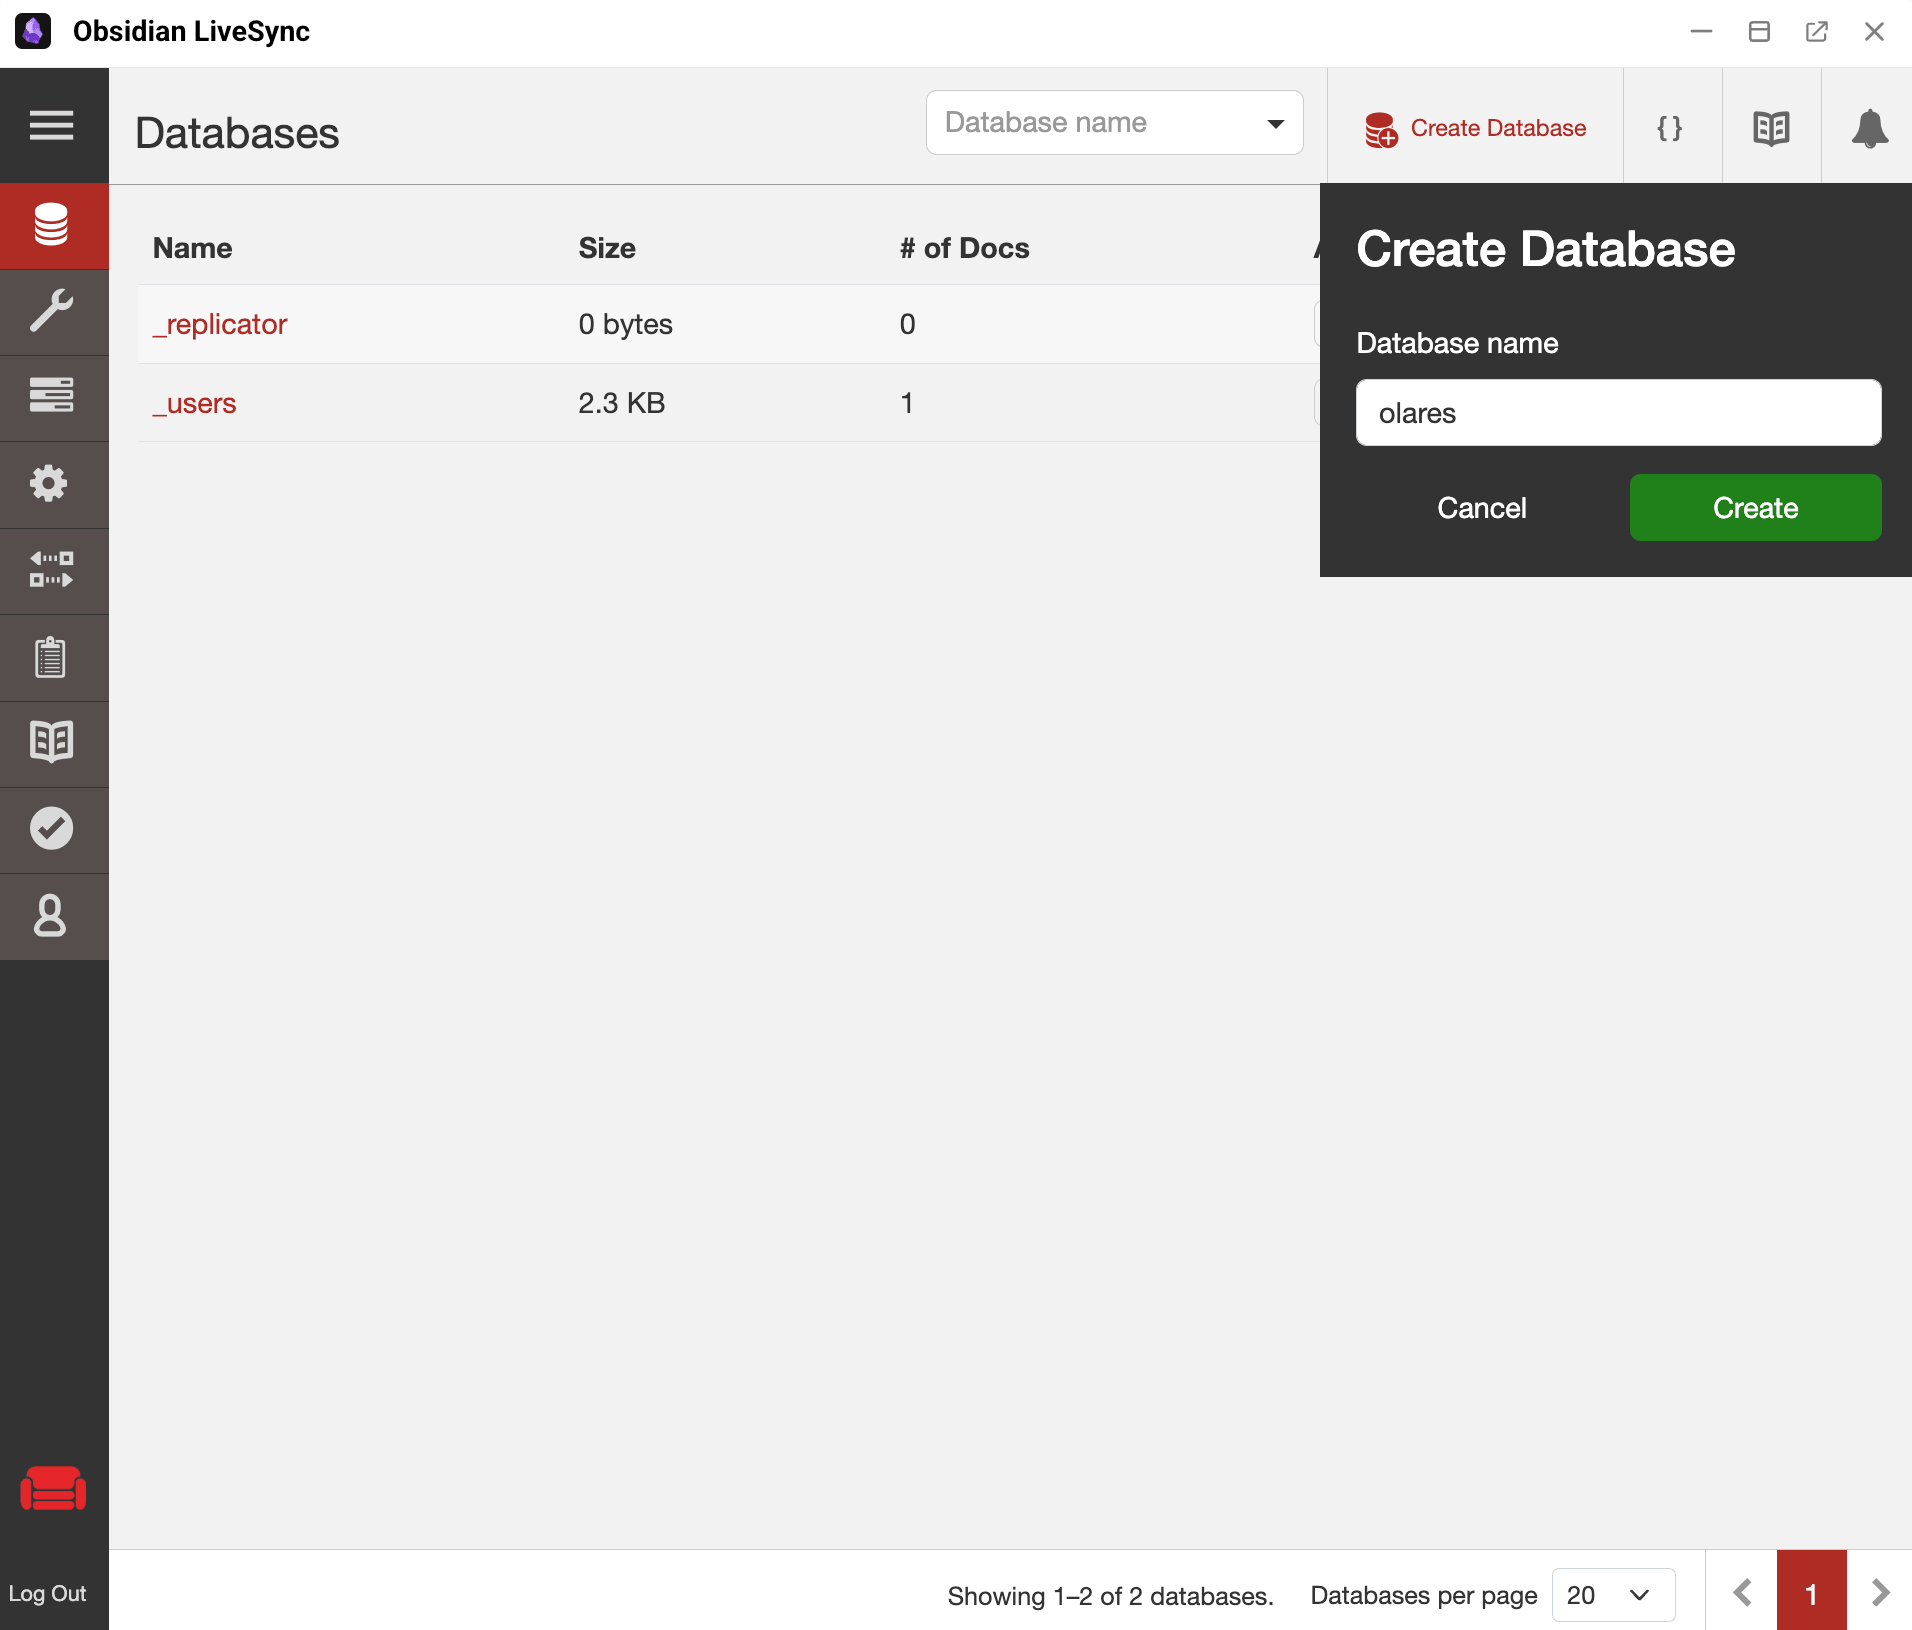
After the database is created, Obsidian LiveSync redirects you to the database configuration page.
Allow plugin access
The Self-hosted LiveSync plugin connects directly to the CouchDB endpoint hosted by Obsidian LiveSync. Update the app entrance so the plugin can connect through LarePass VPN.
Open Olares Settings, and then go to Applications > Obsidian LiveSync > Entrances.
Set Authentication level to Internal, and then click Submit.
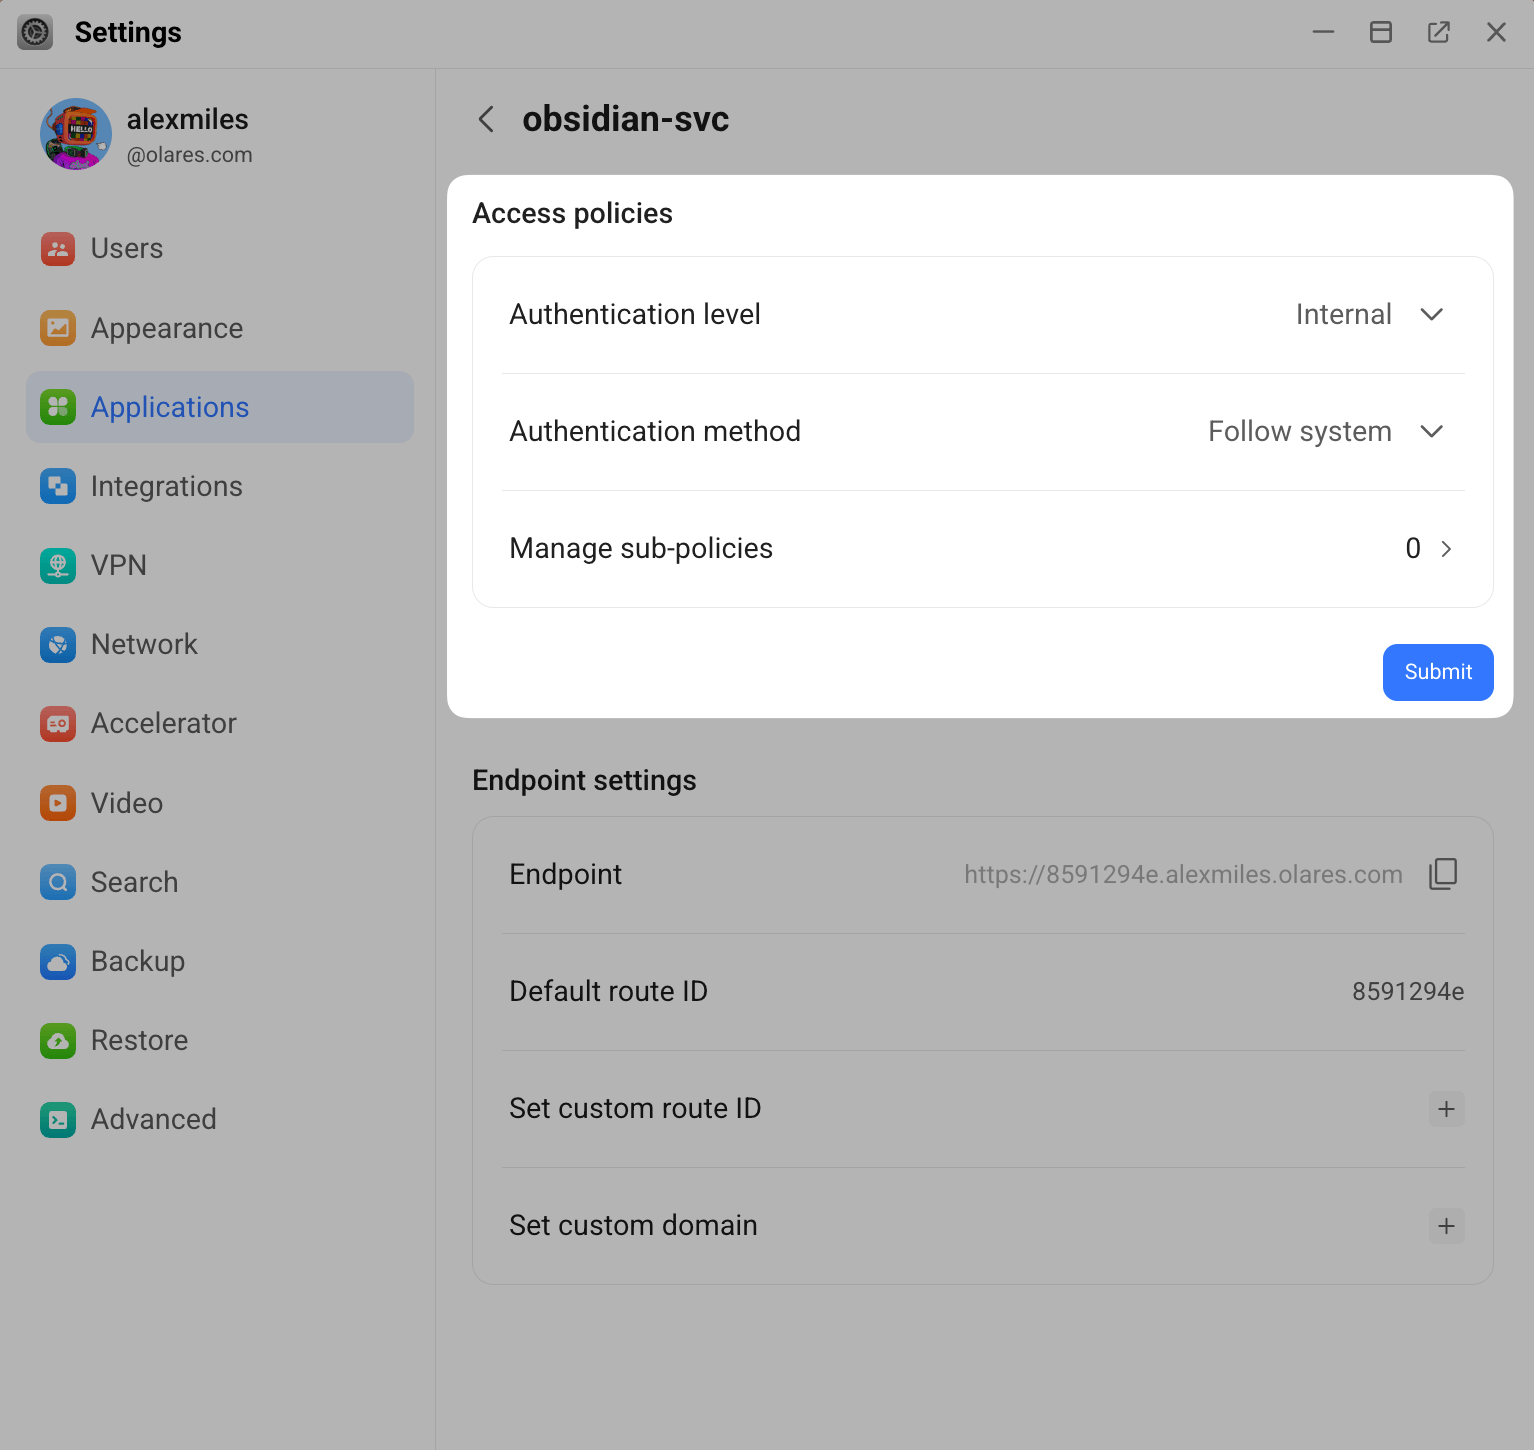
Public access risk
Setting Authentication level to Public can also make the connection work, but anyone who gets the endpoint can try to connect to CouchDB. Keep it set to Internal unless you have a specific reason to expose the endpoint.
Copy the Endpoint URL from the same entrance page. You will use it as the CouchDB URL in Obsidian.
The endpoint usually looks like this:
texthttps://8591294e.{username}.olares.com
Configure the primary device
Use your computer as the primary device. This device initializes the remote database, so start from the vault that you want to use as the source of truth.
Prepare Obsidian
LarePass VPN required
Before configuring desktop Obsidian, enable LarePass VPN in the LarePass desktop app.
Open Obsidian on your computer.
Create or open the vault you want to sync. This guide creates a new vault named
Olaresfrom the vault selection screen:a. Next to Create new vault, click Create.
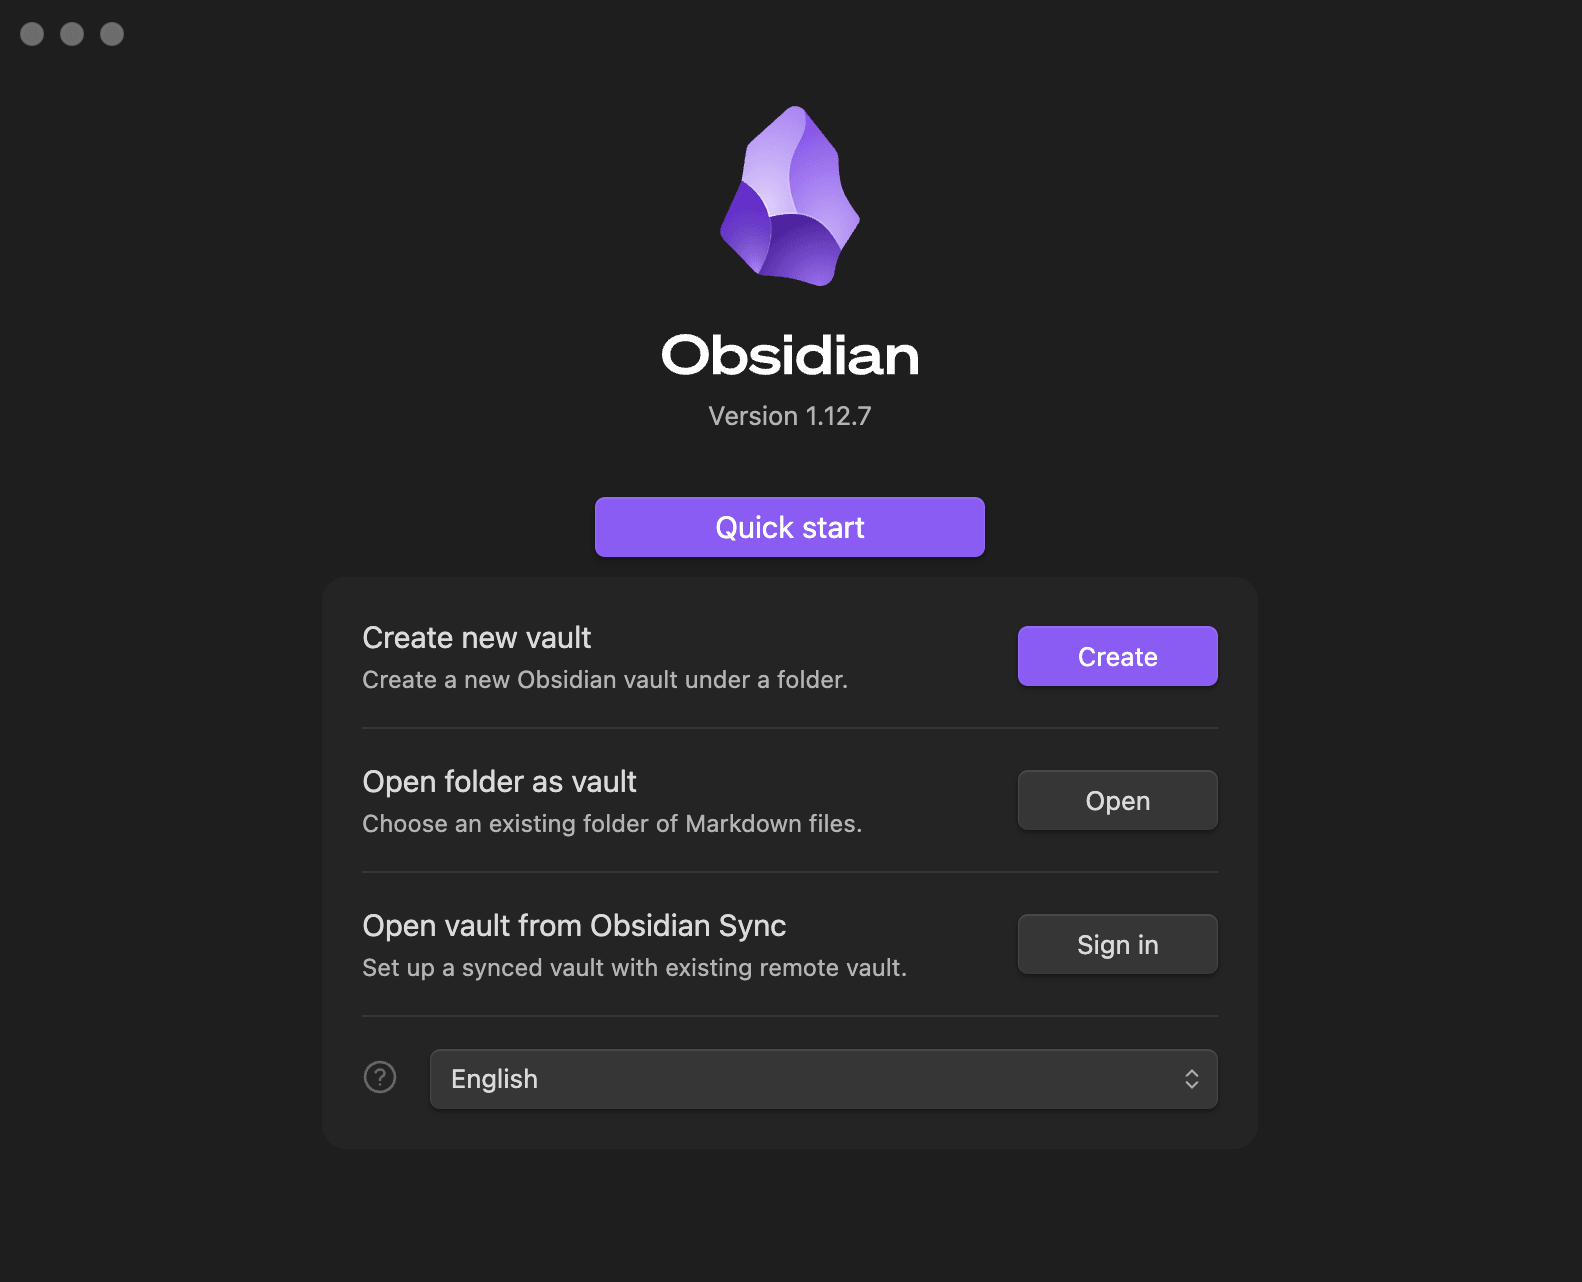
b. In Vault name, enter
Olares.c. Click Browse, and then choose the local folder where you want to store the vault.
d. Click Create.
In Obsidian, go to Settings > Community plugins, then click Browse.
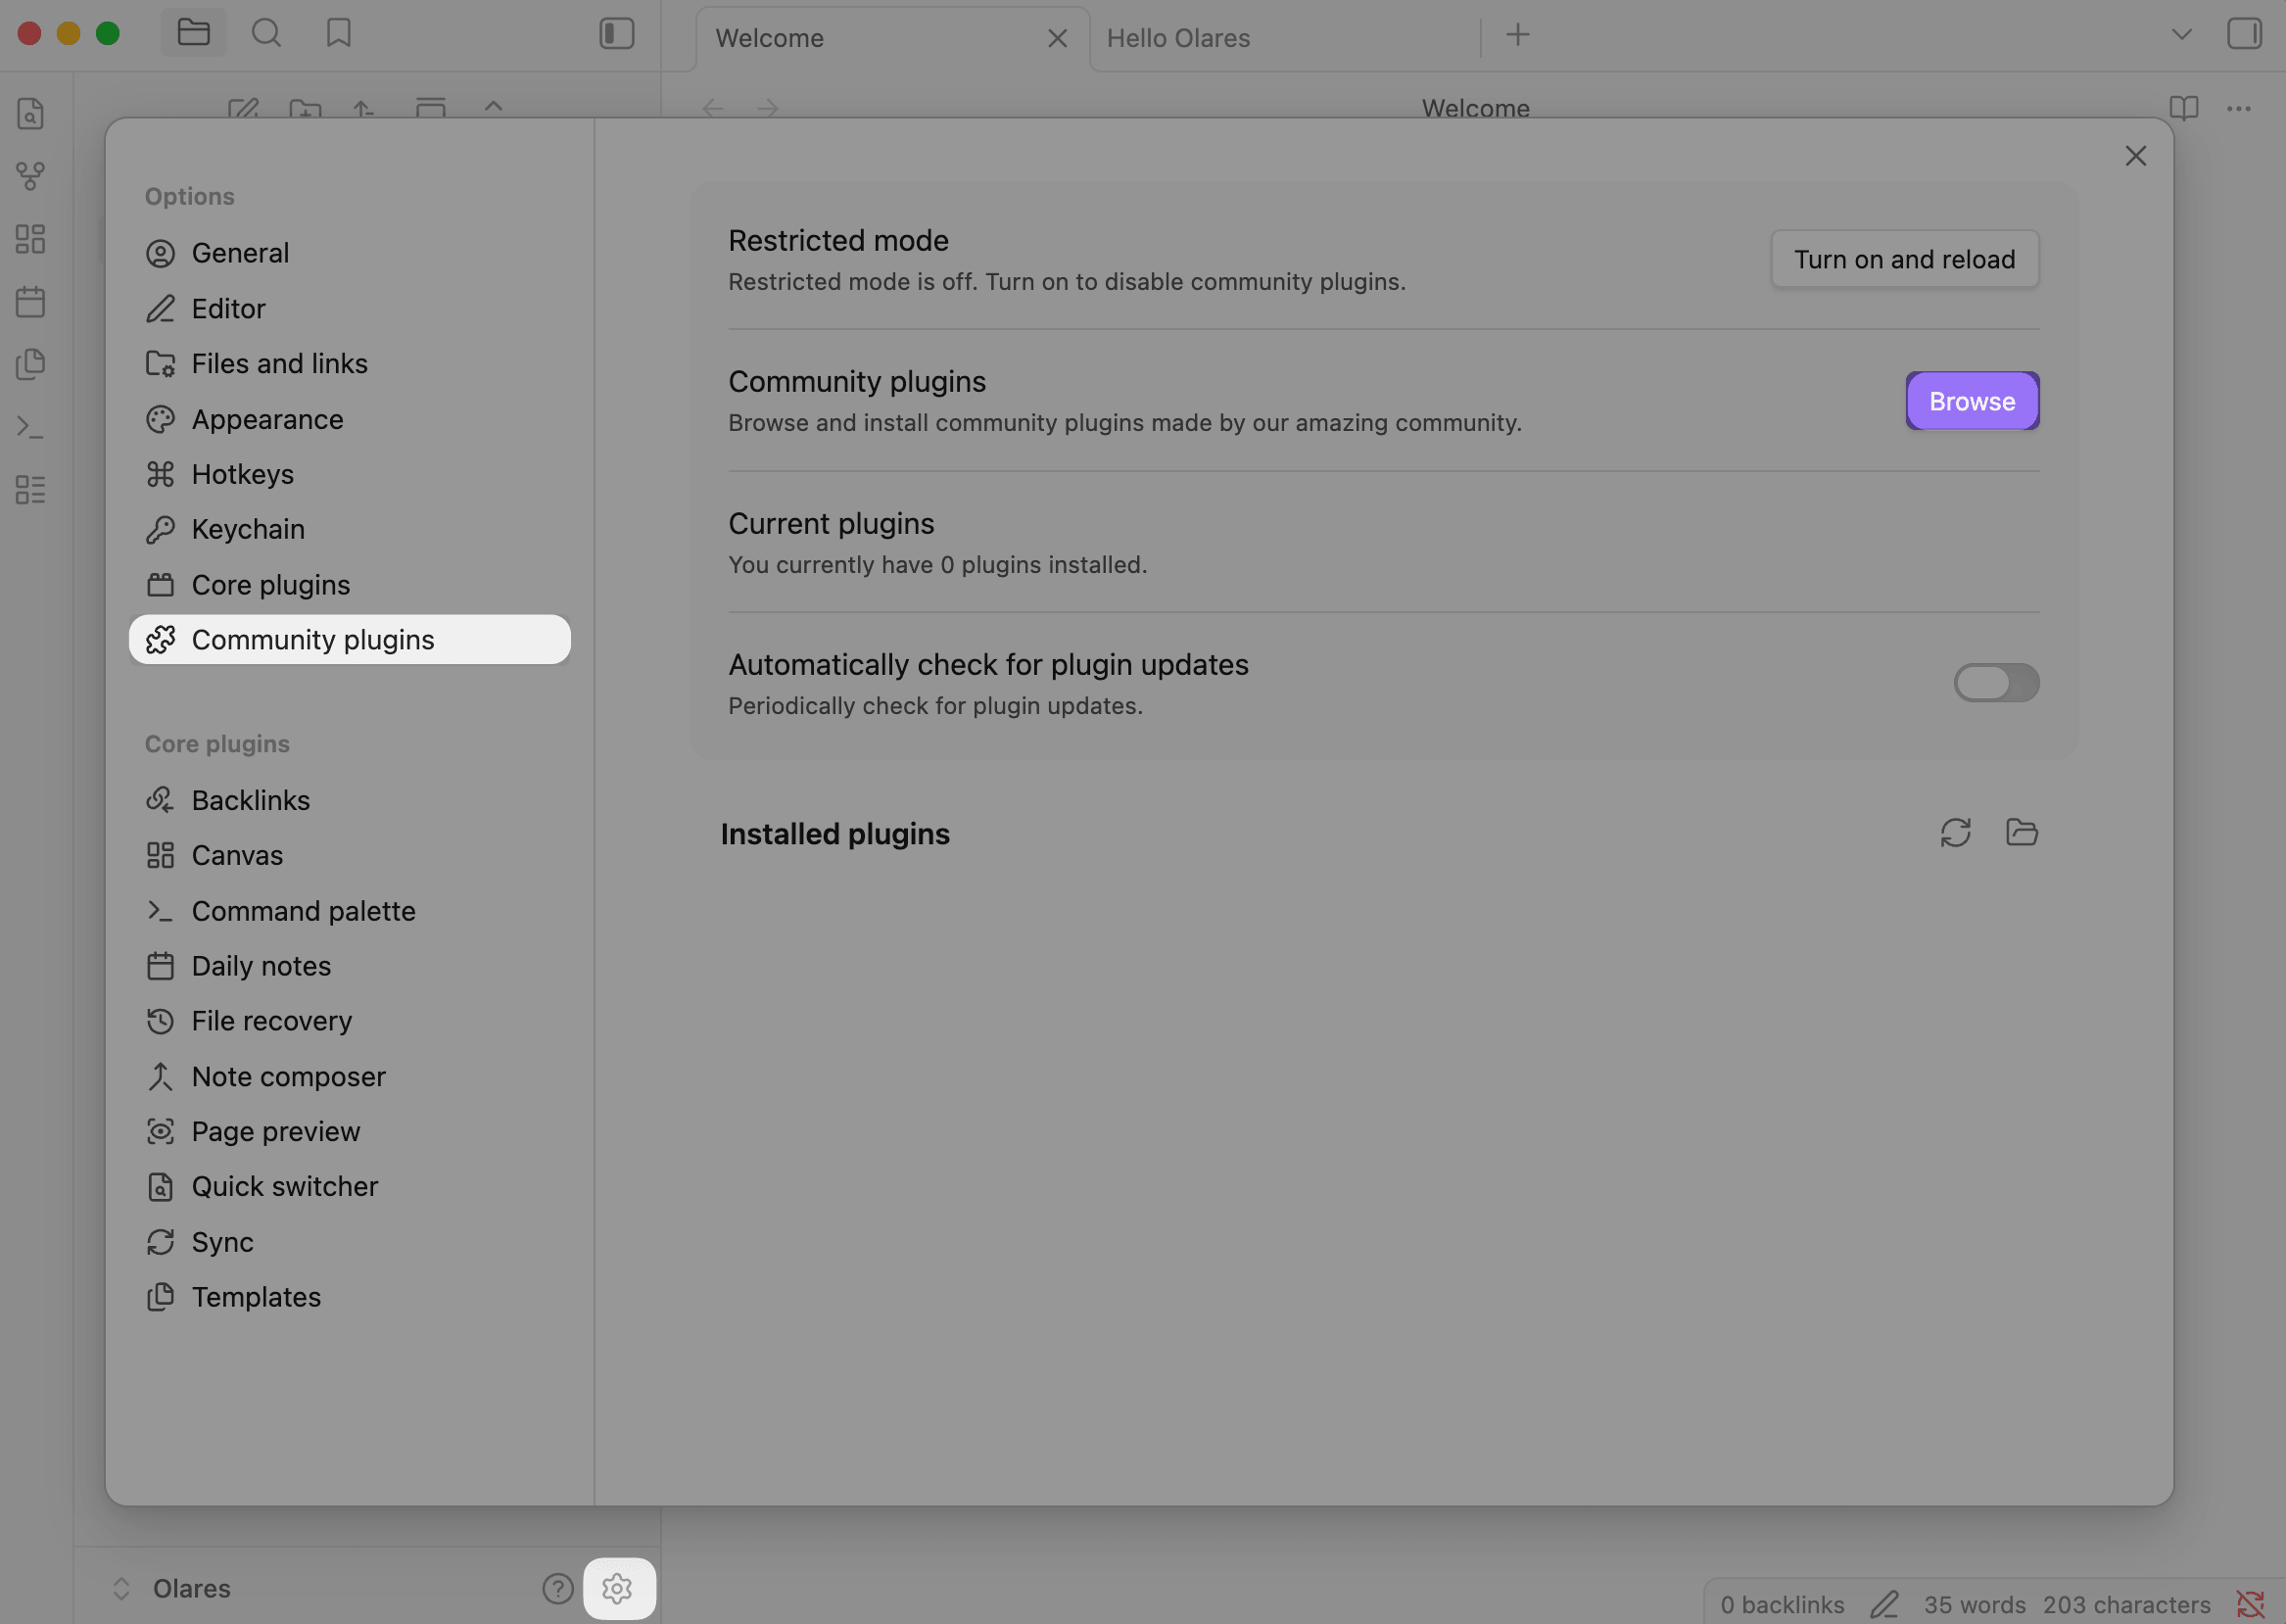
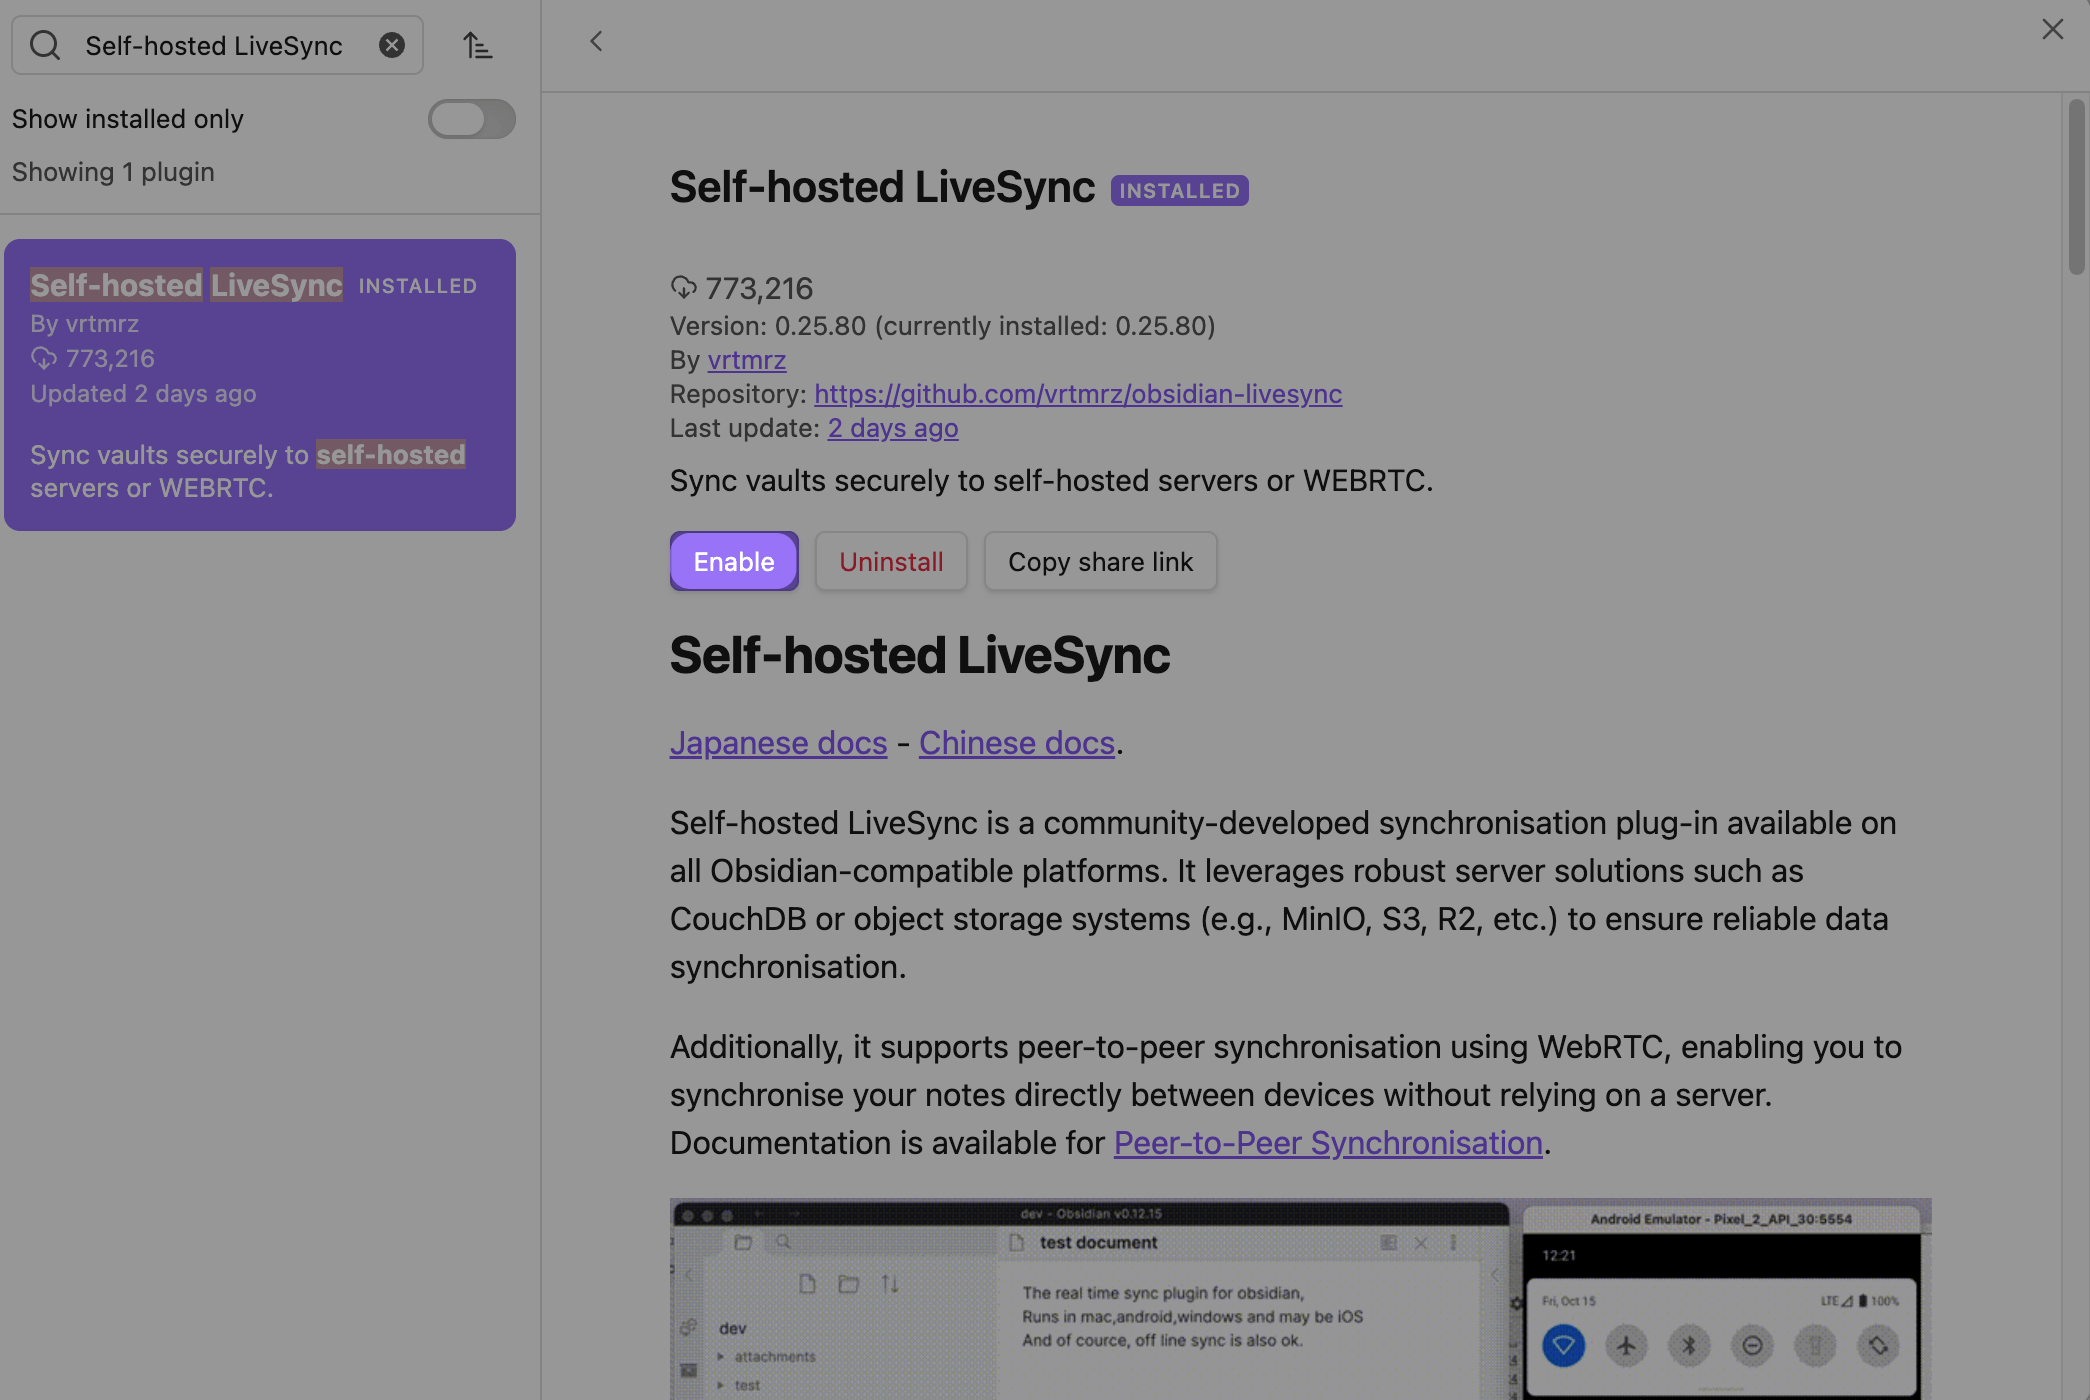
Search for "Self-hosted LiveSync", then click Install.
Click Enable to activate the plugin.
When prompted, click No, please take me back to leave the plugin setup guide.
Connect to CouchDB
Go to Settings > Self-hosted LiveSync.
Click the remote configuration icon. It is the fourth icon from the left at the top of the plugin settings page.
Under E2EE Configuration, click Configure And Change Remote.
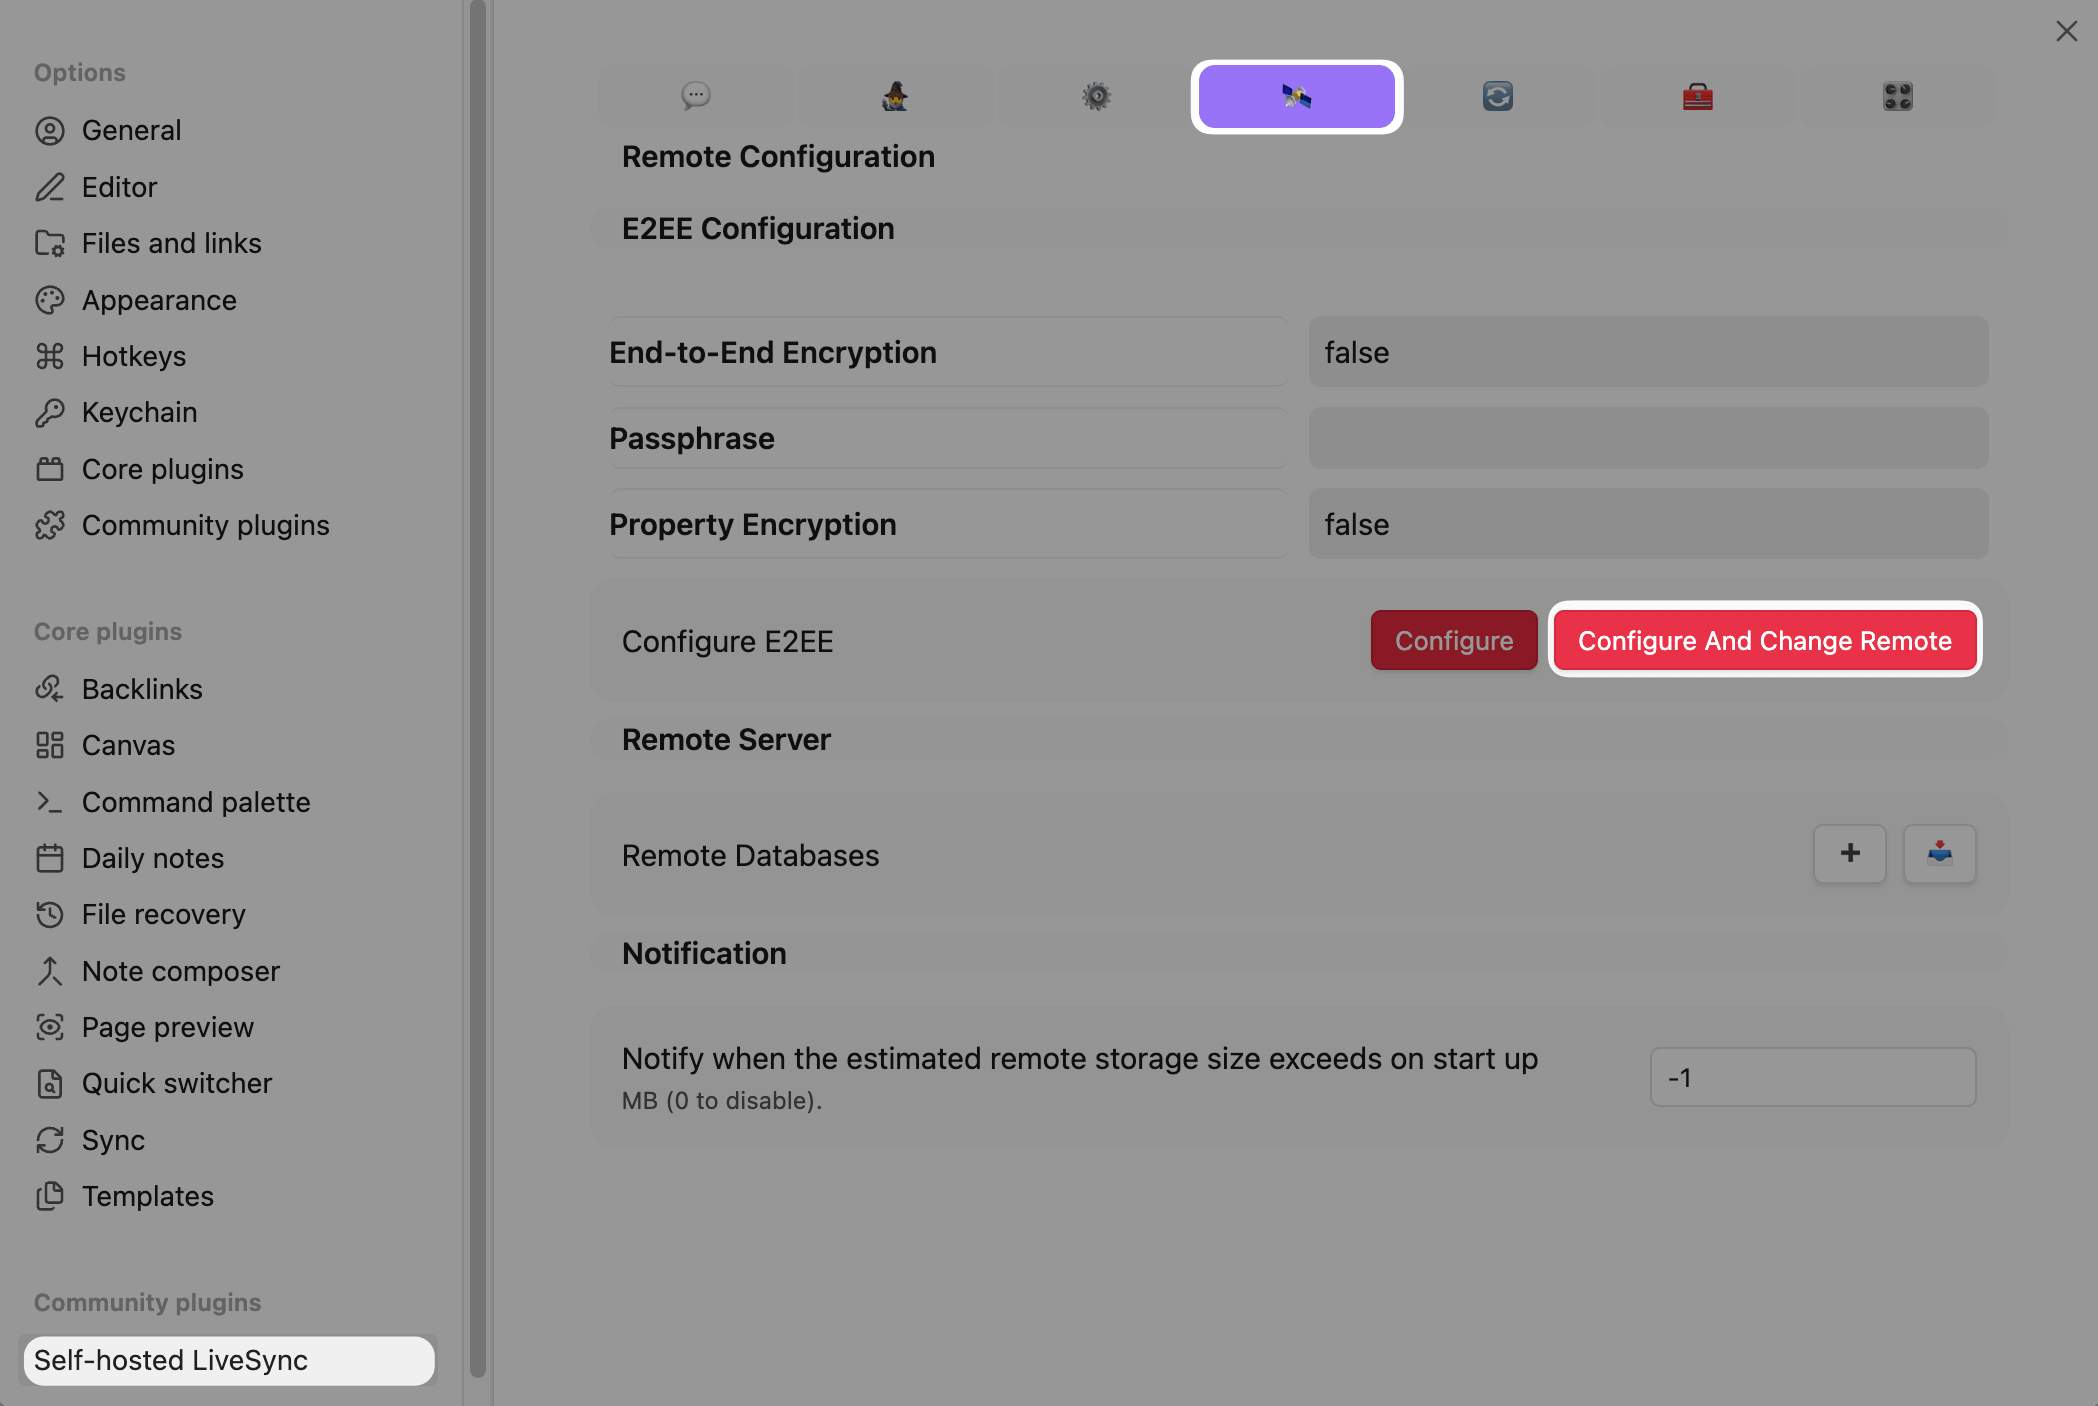
In End-to-End Encryption, choose whether to enable encryption:
- To enable it, select End-to-End Encryption, enter a passphrase, and keep the passphrase somewhere safe.
- To skip it, leave End-to-End Encryption cleared.
- Optional: Select Obfuscate Properties if you also want to hide file metadata, such as paths, sizes, and timestamps, from the remote server.
Click Proceed.
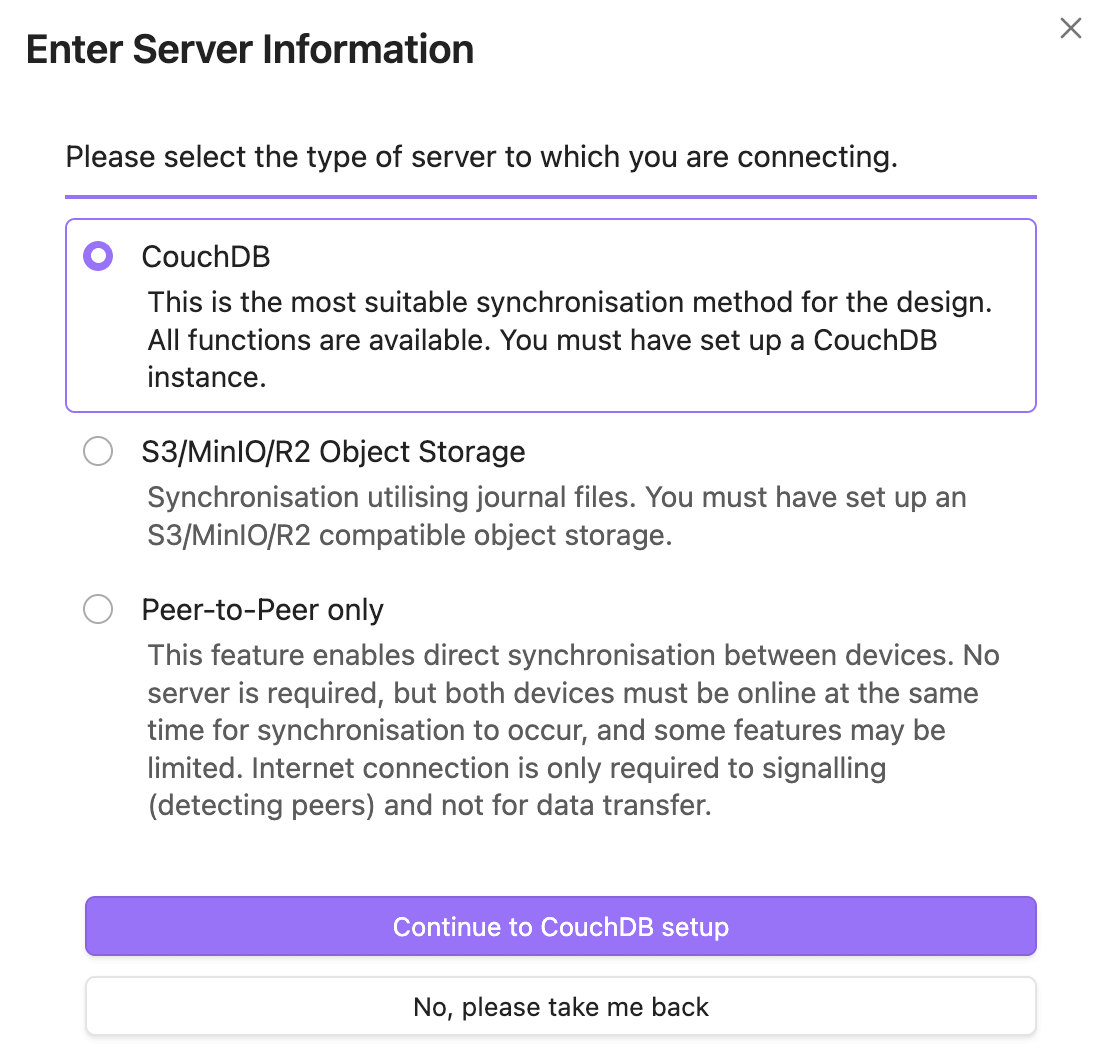
In Enter Server Information, select CouchDB, and then click Continue to CouchDB setup.
In CouchDB Configuration, enter the database connection details:
URL: Enter the Obsidian LiveSync endpoint URL from Settings > Applications > Obsidian LiveSync > Entrances. For example:
texthttps://8591294e.{username}.olares.comUsername: Enter the Obsidian LiveSync username. If you kept the default, enter
admin.Password: Enter the Obsidian LiveSync password.
Database Name: Enter the database name you created earlier. In this example, it's
olares.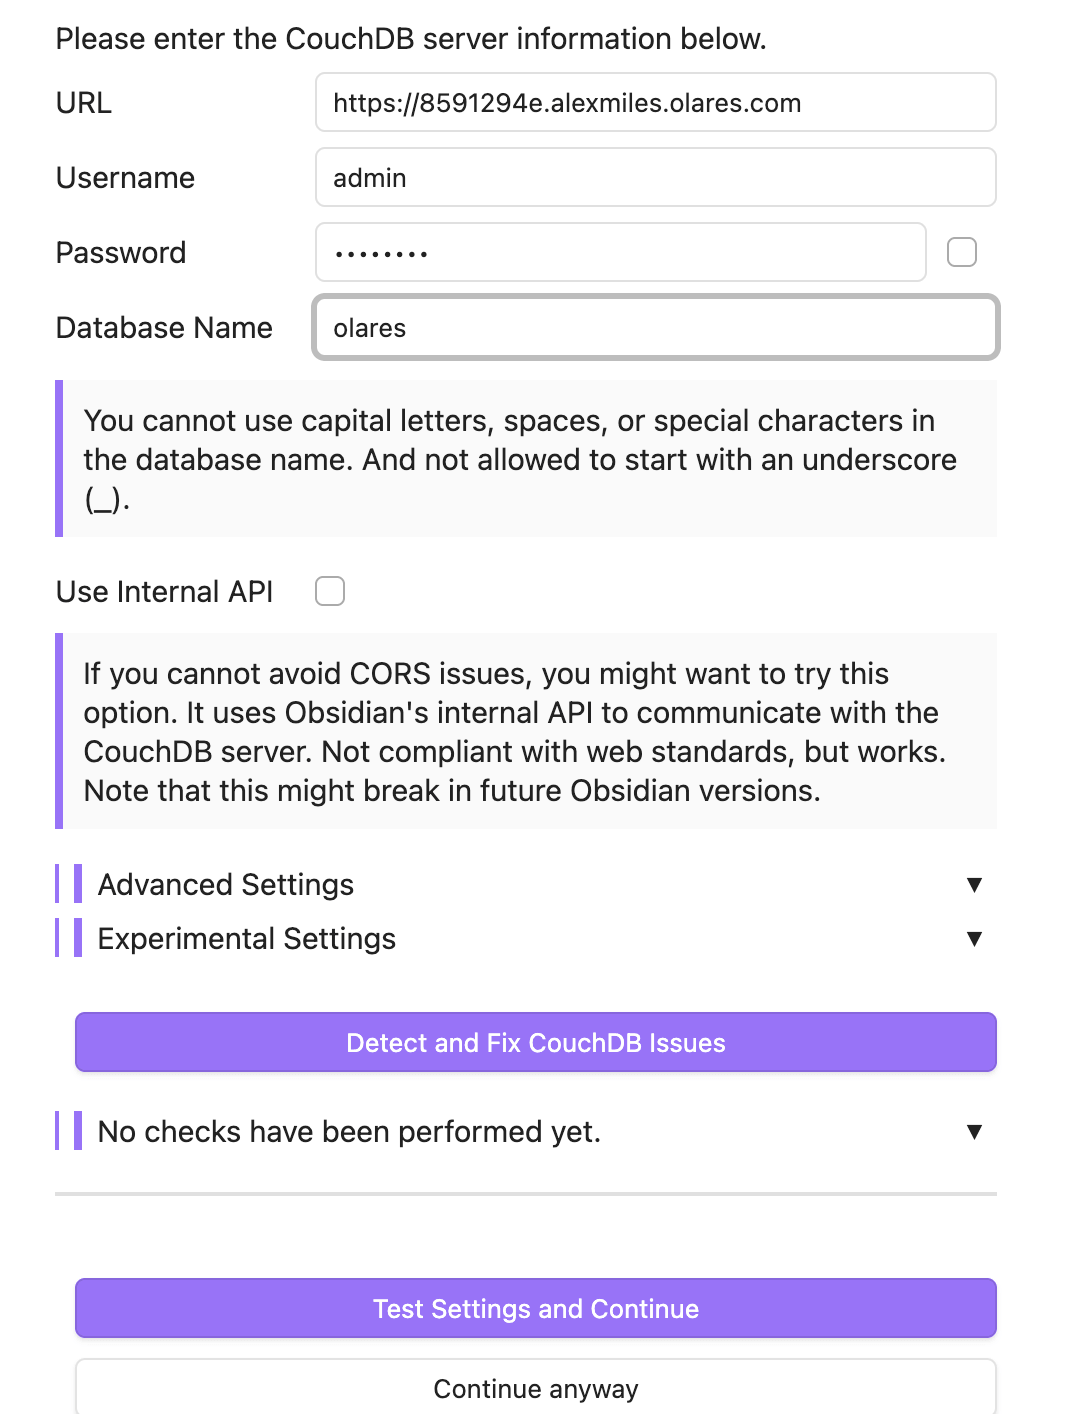
Click Test Settings and Continue. If the connection is configured correctly, Obsidian continues to the next setup step.
Configure encryption later
If you skipped end-to-end encryption during the remote setup wizard, you can configure it later. Open Settings > Self-hosted LiveSync, click the remote configuration icon, and then click Configure under E2EE Configuration.
In the End-to-End Encryption dialog, select End-to-End Encryption, enter a passphrase, optionally select Obfuscate Properties, and then save the configuration.
Use the same end-to-end encryption setting and passphrase on every device connected to the same sync target. A mismatched passphrase can make synced data unreadable.
Initialize the server
Data overwrite
The initialization steps overwrite existing data on the remote server and rebuild the server from the current device. Use them only for a new Obsidian LiveSync database or when you intentionally want the current device to become the source of truth. Before proceeding, copy your Obsidian vault folder to a safe location.
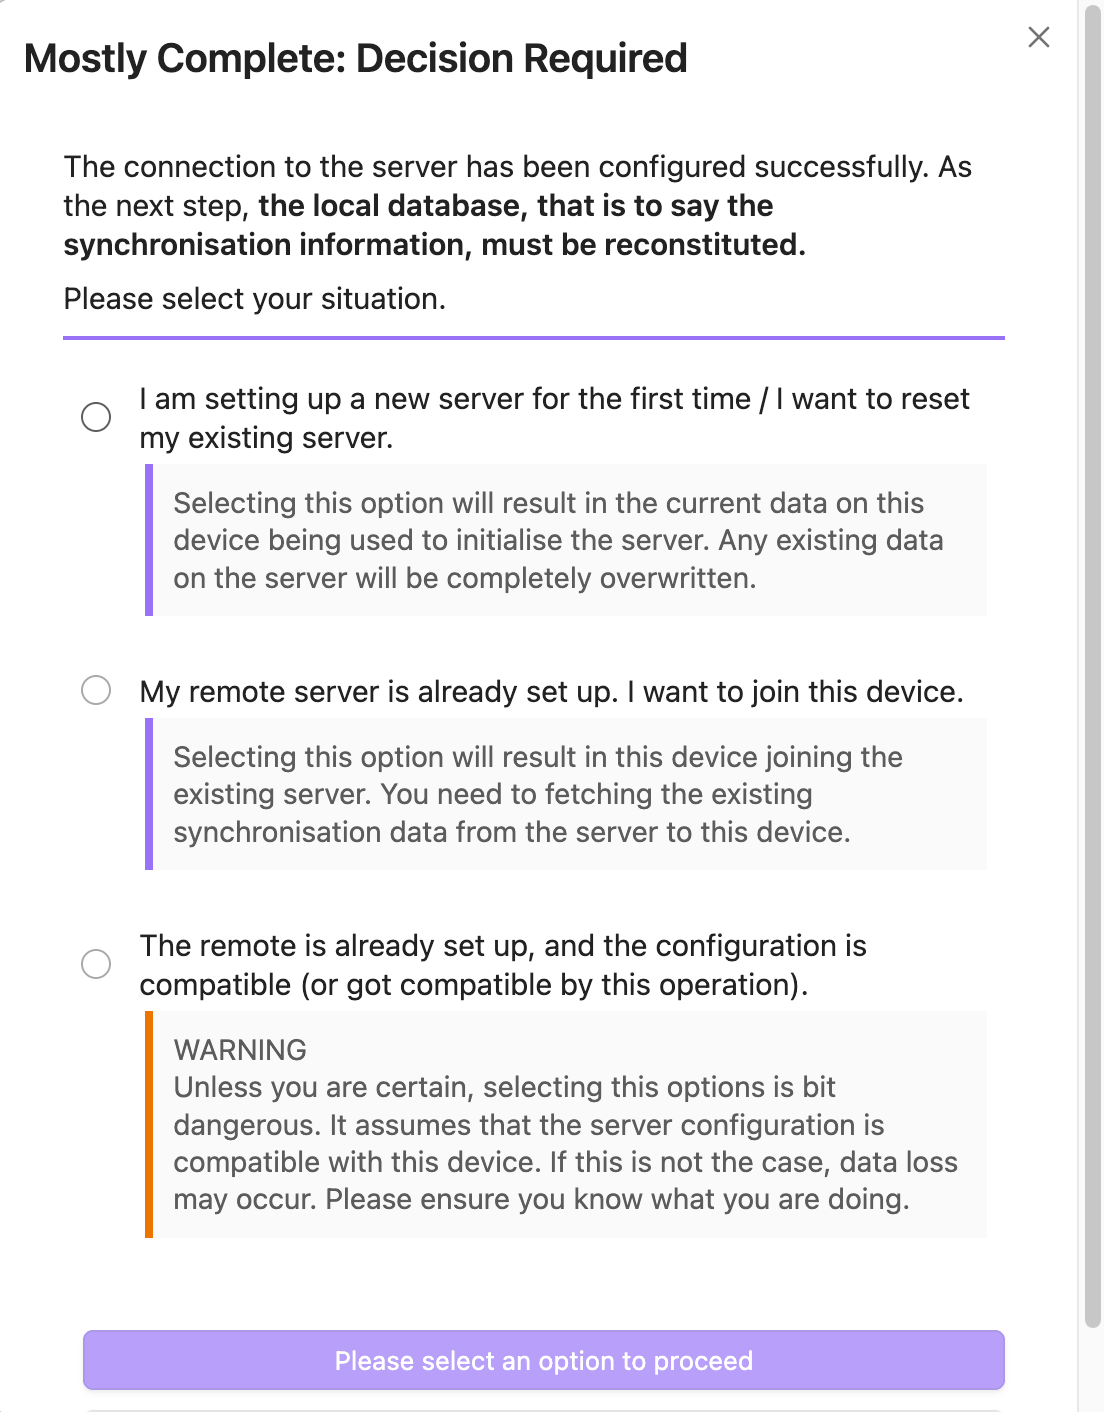
When Mostly Complete: Decision Required appears, select I am setting up a new server for the first time / I want to reset my existing server, and then click Proceed to the next step.
In this guide, the remote database is new, so the primary device should initialize the server with the current vault data.
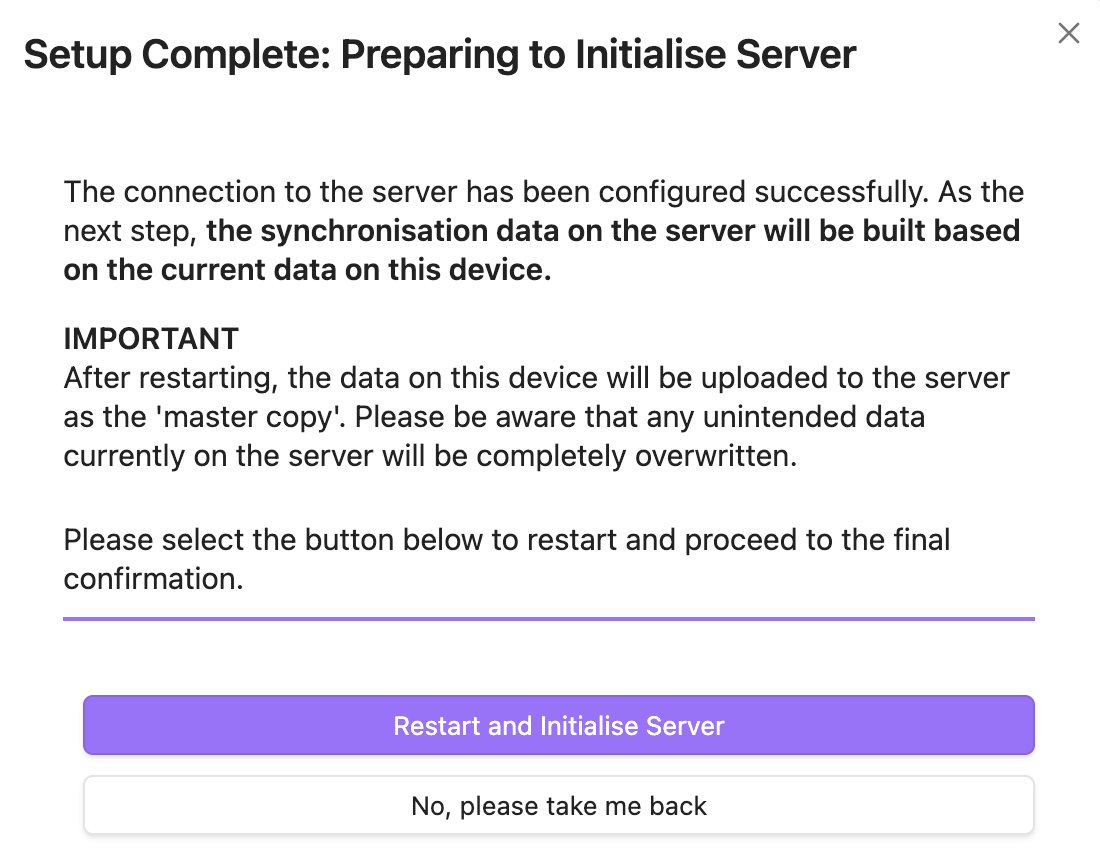
When Setup Complete: Preparing to Initialise Server appears, click Restart and Initialise Server.
Obsidian restarts and uploads the current vault data from this device to the server as the master copy.
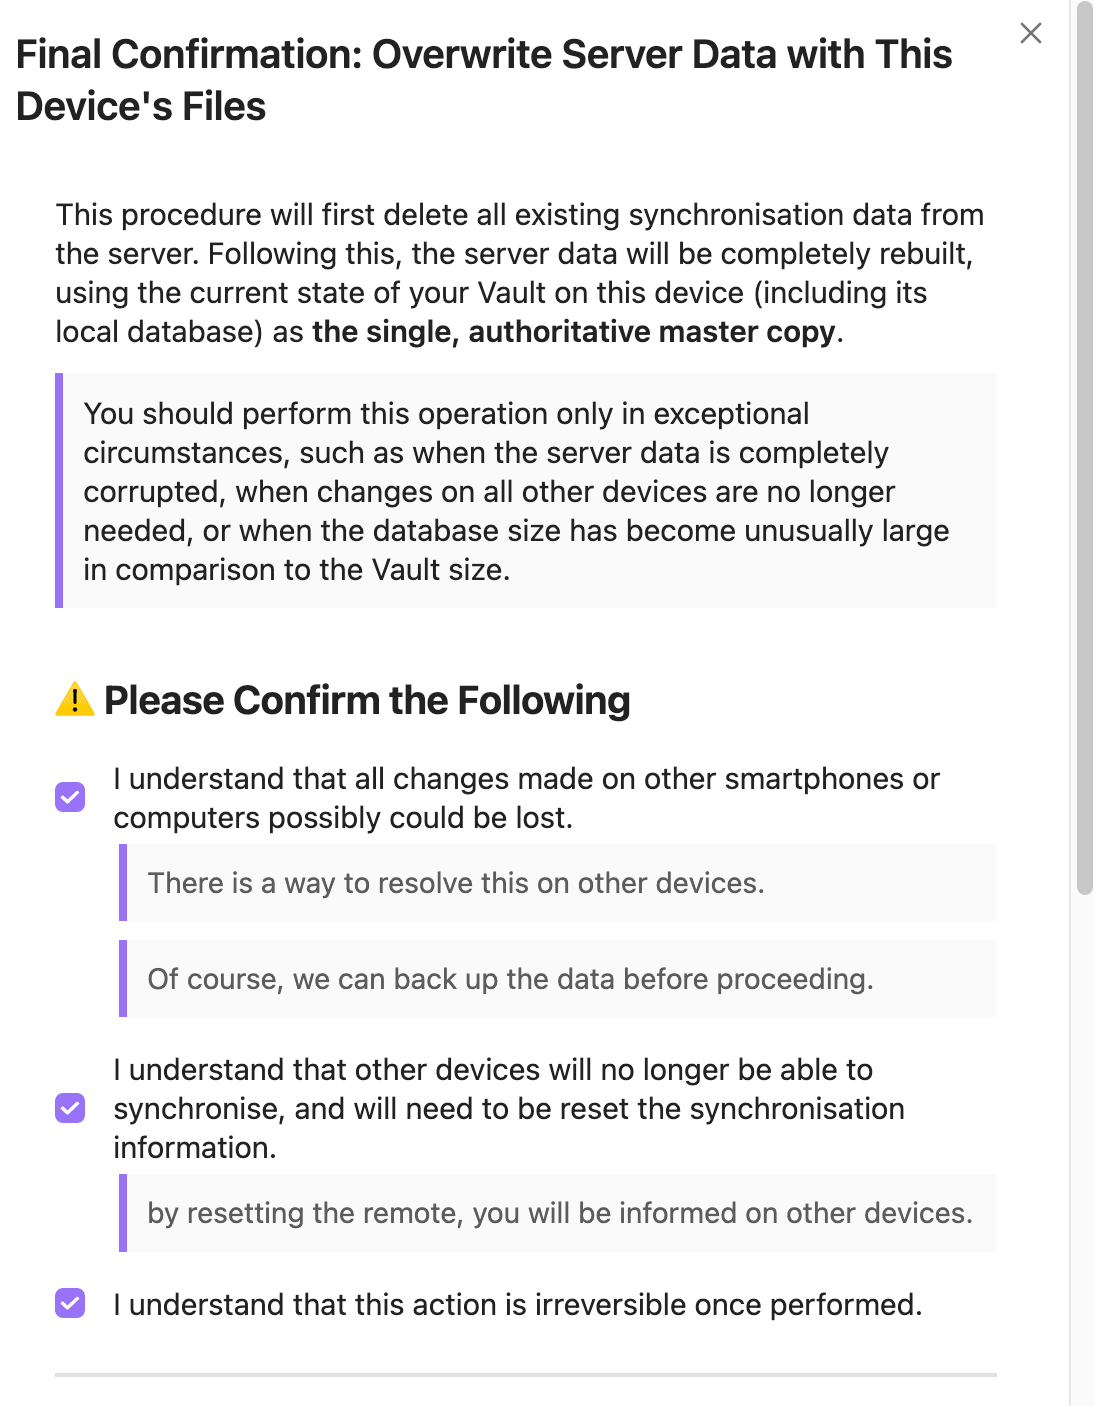
When Final Confirmation: Overwrite Server Data with This Device's Files appears, confirm that the current device should overwrite the server:
a. Read the warning carefully.
b. Select all three confirmation checkboxes.
c. Under Have you created a backup before proceeding?, select I have created a backup of my Vault.
d. Click I Understand, Overwrite Server.
Enable LiveSync mode
After Obsidian restarts and finishes the server initialization, return to the Self-hosted LiveSync settings page.
Open Settings > Self-hosted LiveSync.
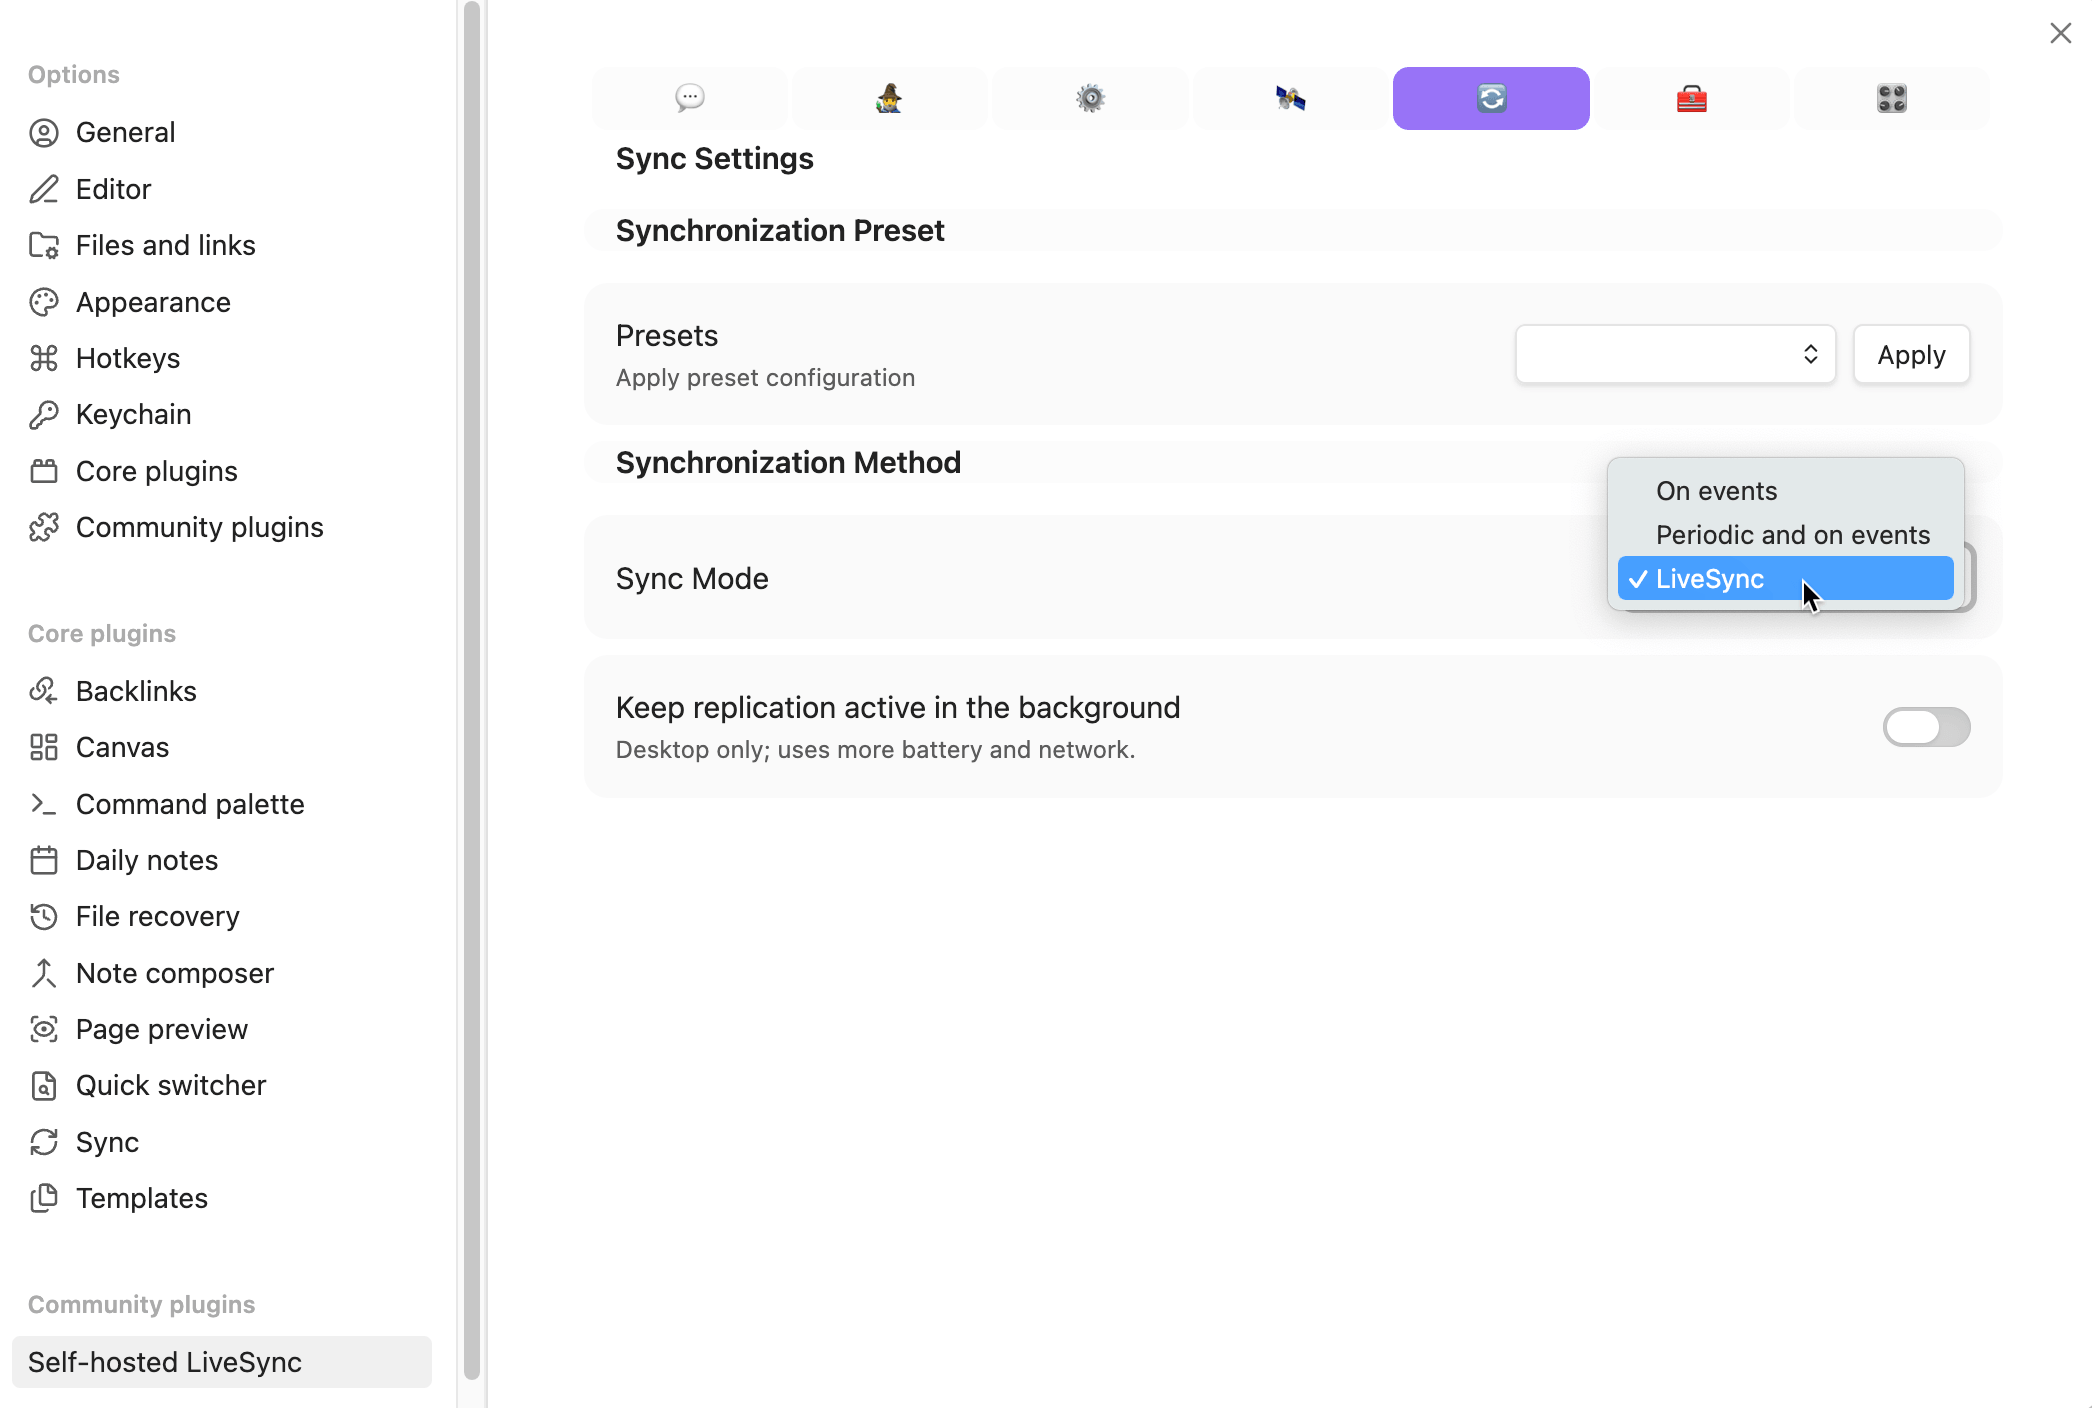
Click the sync configuration icon. It is the fifth icon from the left at the top of the plugin settings page.
Set Sync Mode to LiveSync.
Keep your encryption passphrase
If you enable end-to-end encryption, save the passphrase somewhere safe. You need the same passphrase when adding another device.
Configure another device
Use the setup URI from the primary device to import the same LiveSync configuration on your phone.
Prepare the phone
LarePass VPN required
Before configuring mobile Obsidian, enable LarePass VPN in the LarePass mobile app.
- Open Obsidian on your phone, and create a new local vault for synced notes.
- Install and enable Self-hosted LiveSync in Settings > Community plugins. The process is the same as on the primary device.
Copy the setup URI from the primary device
On your computer, open Settings > Self-hosted LiveSync.
Click the quick setup icon. It is the second icon from the left at the top of the plugin settings page.
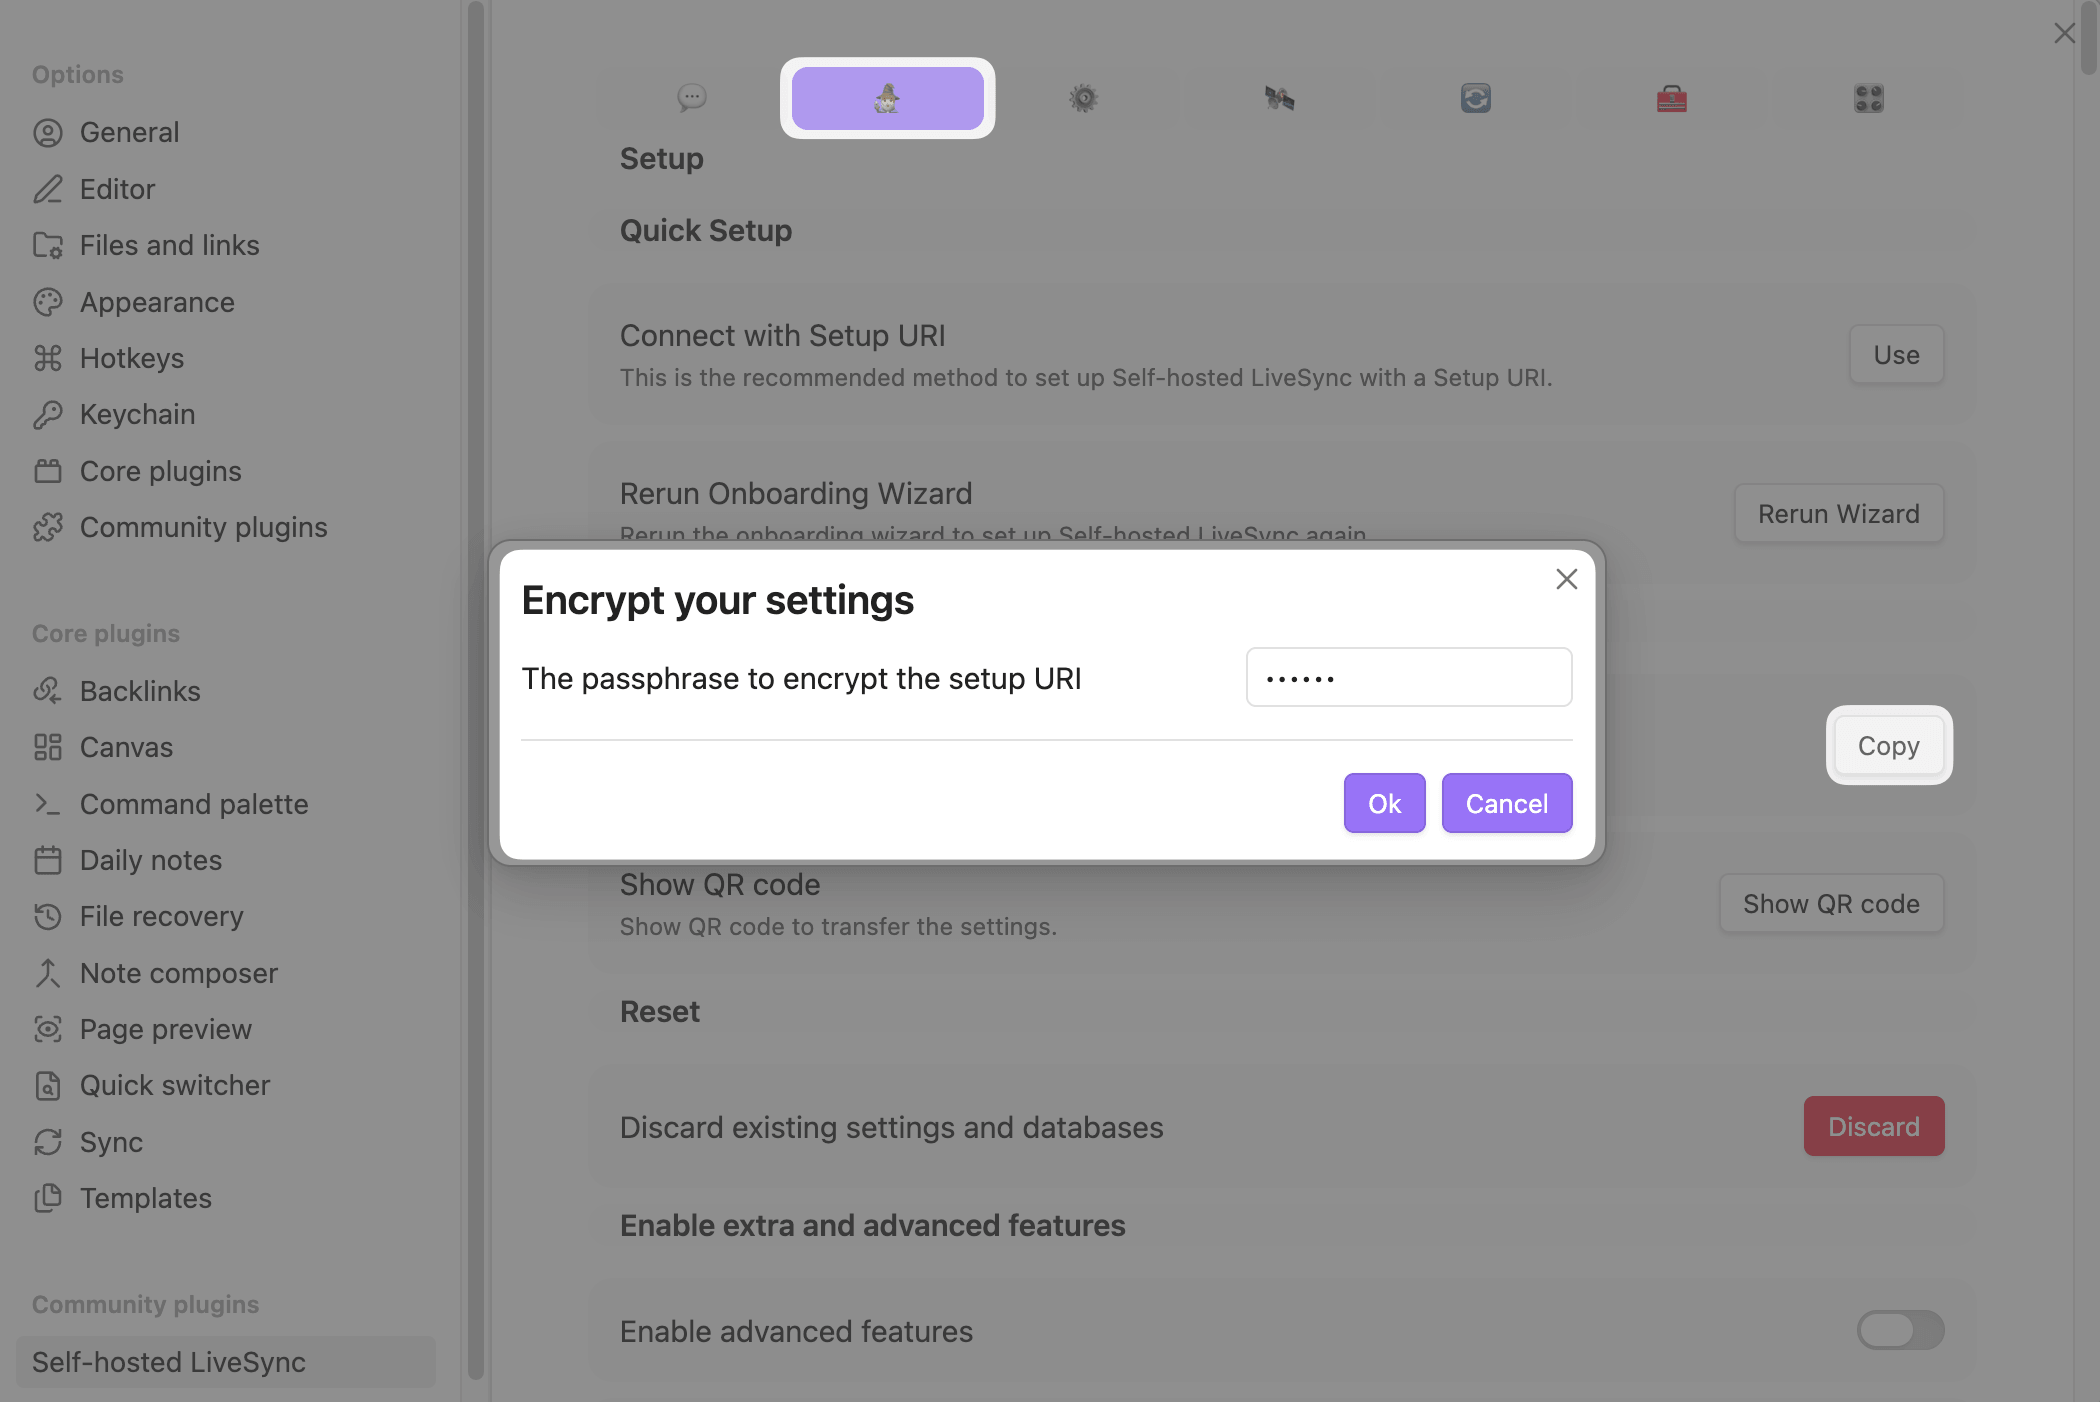
In To setup other devices, click Copy.
Enter a password to encrypt the setup URI, and then click Ok. Obsidian copies the setup URI to your clipboard.
Send the setup URI to your phone through a secure channel.
Join the existing server
On your phone, open Settings > Self-hosted LiveSync.
Click the quick setup icon.
Next to Connect with Setup URI, tap Use.
Paste the setup URI, enter the password you used to encrypt it, and then confirm.
If Obsidian asks how to handle the remote server, select My remote server is already set up. I want to join this device.
This lets the second device fetch the existing synchronization data from the server instead of overwriting it.
Open Settings > Self-hosted LiveSync.
Click the sync configuration icon.
Set Sync Mode to LiveSync.
When both devices use LiveSync mode, changes made in one vault sync to the other device in real time.
Check sync results
Create or edit a note on the primary device.
Wait a few moments.
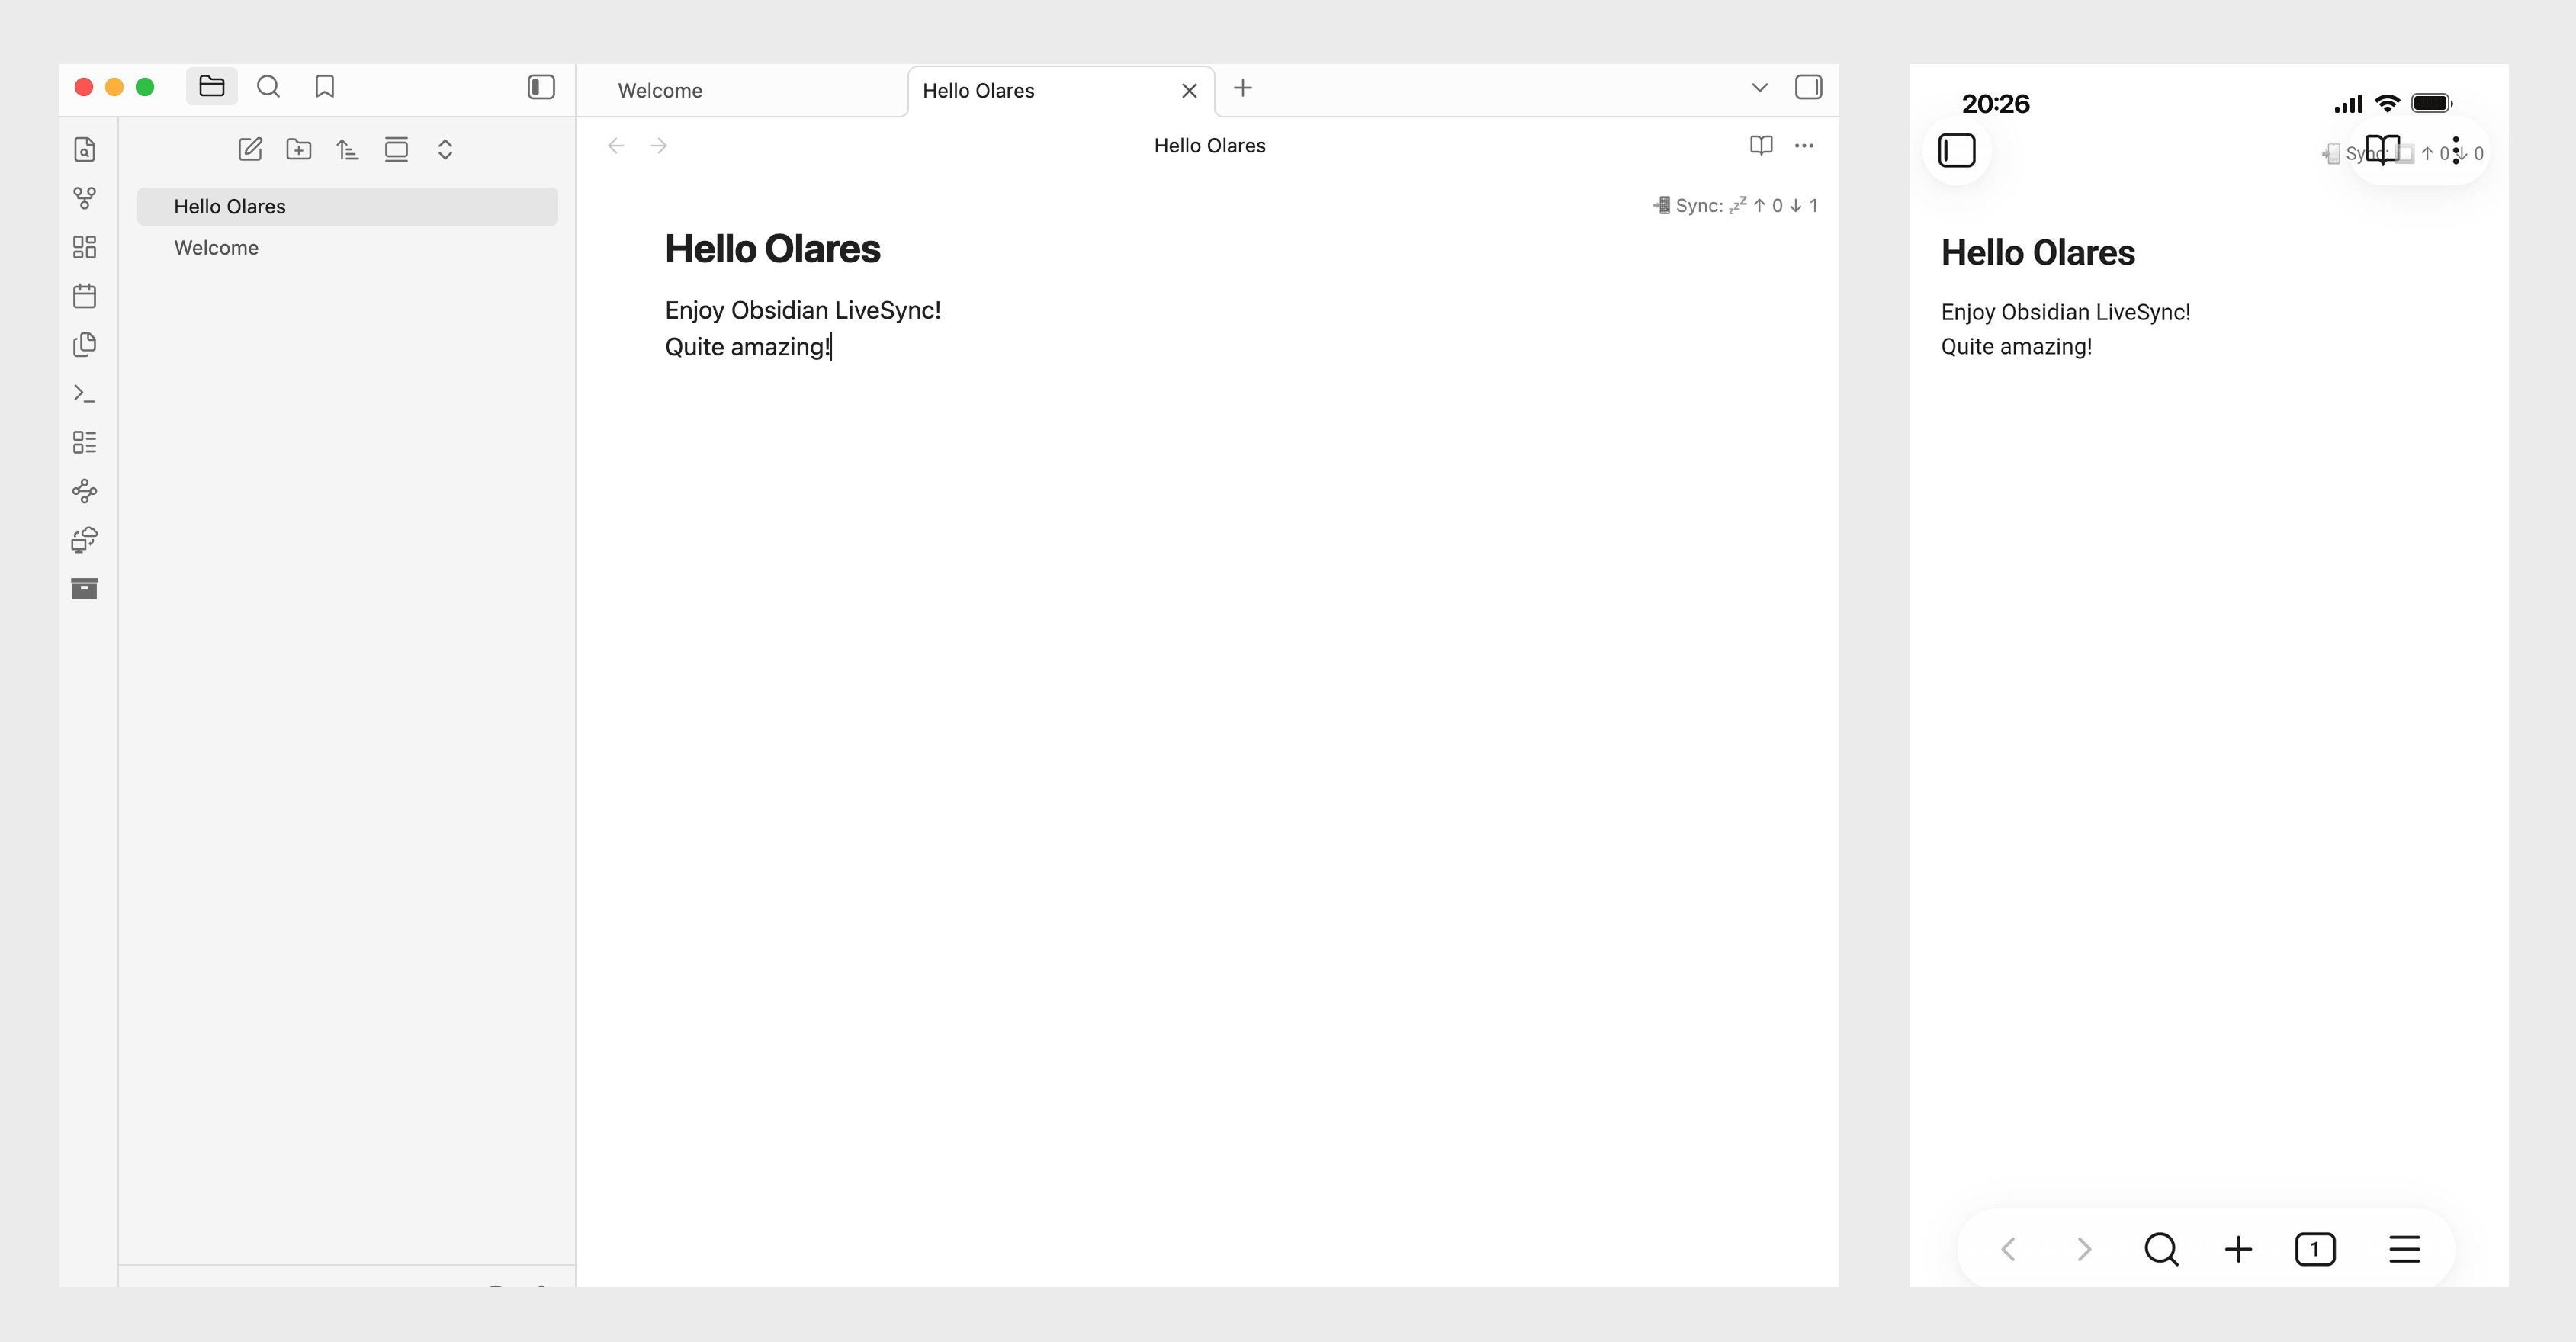
Open the same vault on your phone. The note should appear with the latest changes.
Edit the note on your phone, and then check that the change appears on your computer. You can view the sync status in the upper-right status bar.
First sync
The first sync can take longer if the vault contains many notes or attachments. Keep both devices online until the first sync finishes.
Learn more
- Obsidian Help: Official guides for Obsidian features and settings.
- Self-hosted LiveSync repository: Plugin documentation and troubleshooting notes.