Manage game servers with Pterodactyl Panel
Pterodactyl Panel is an open-source application for managing game servers from your browser. On Olares, you can use it to start and stop servers, manage files, give friends access, and back up your game worlds.
This guide uses Terraria, a sandbox adventure game where players explore, build, and fight together in a shared world. You will host that world on Olares and join it from Terraria on your computer.
Understand the components
You will encounter these names during setup:
| Name | What it does in this guide |
|---|---|
| Terraria | The game you and your friends play. Each player runs the game on their own computer and connects to the shared server on Olares. |
| TShock | Adds administration commands, player permissions, and plugin support to a Terraria server. This guide uses a server with TShock installed. |
| Pterodactyl Panel | The web interface you use to create and manage the server. |
| Wings | Pterodactyl's background service on Olares. It receives instructions from Panel and runs the game server. You manage it through Panel. |
| TShock Egg | A JSON template imported into Panel. It tells Panel how to install and start a Terraria server with TShock, including which runtime image and settings to use. |
You import the Egg and create the server in Panel. Wings then runs the server on Olares. Players join it through Terraria, while you use Panel for administration.
Already running Minecraft from Market?
Panel manages servers created through Wings. Continue managing a Minecraft application installed from Market through Olares. See Existing Minecraft applications for migration options.
Prerequisites
- MariaDB installed from Market.
- An Olares account with permission to install applications.
- Internet access to download the server software.
- Terraria 1.4.5.8 installed on a computer on the same local network as Olares. TShock 6.2.1 supports this game version.
Experimental integration
The local Wings integration is experimental. Use the Olares templates linked below, which include the settings and runtime images for this setup.
Install Pterodactyl Panel
Open Market and search for "Pterodactyl Panel".
Click Get, then Install. In the installation form, keep ENABLE_WINGS enabled, set ADMIN_USERNAME and ADMIN_PASSWORD, and wait for installation to complete. The password must contain at least eight characters.
Configure the local node
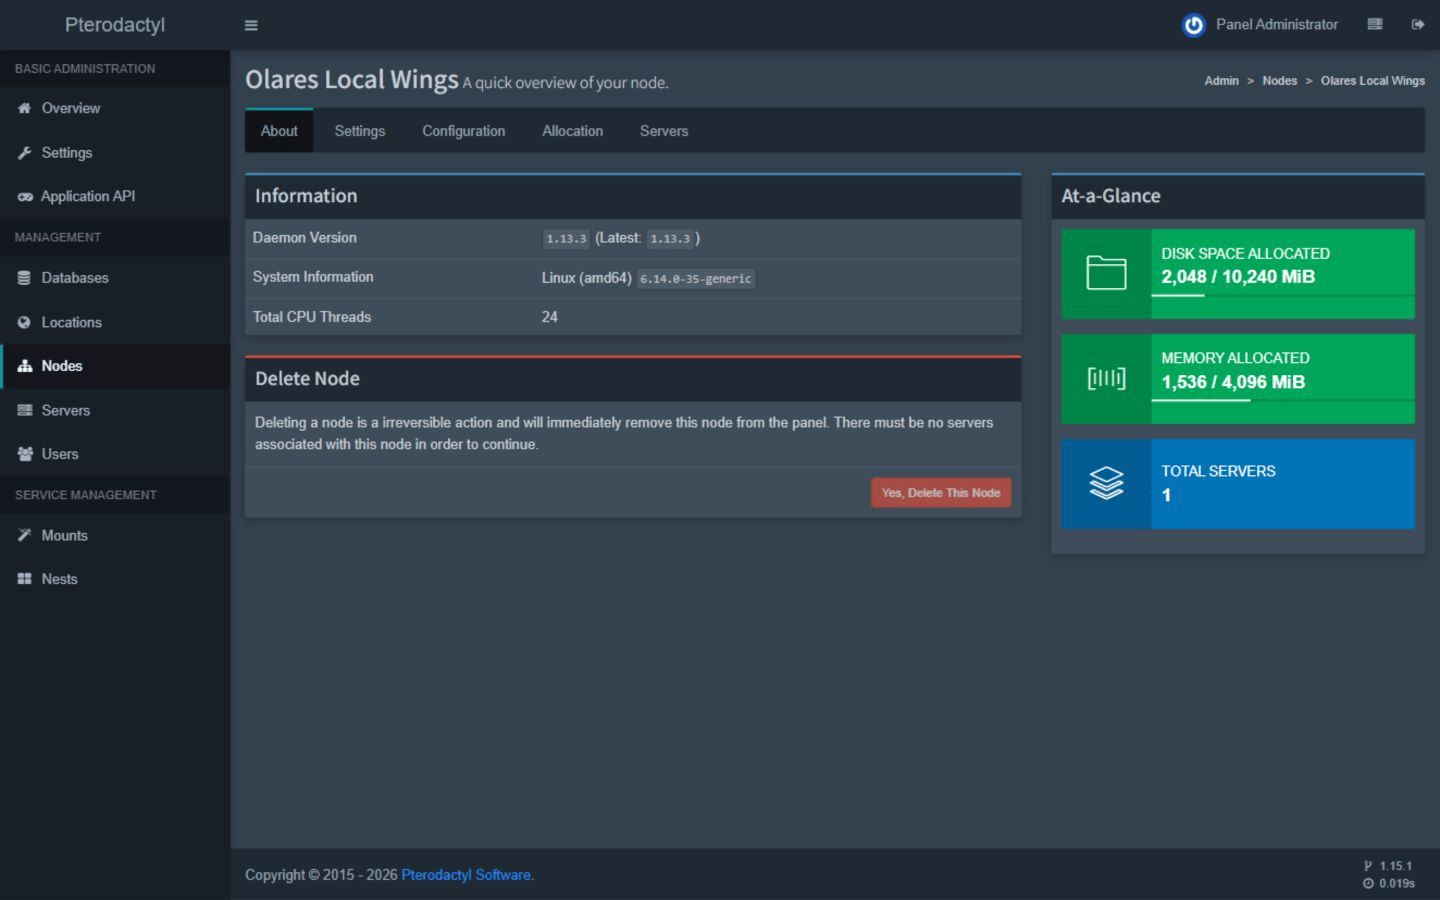
A node is a machine where Wings runs game servers. Here, the node is your Olares device, listed in Panel as Olares Local Wings.
Open Pterodactyl Panel from Launchpad. Log in with the username and password you set during installation.
Open the administrator area and go to Nodes > Olares Local Wings > About. Wait for Daemon Version and System Information to load before creating a server.
Open Allocation and create an allocation with IP address
0.0.0.0and port30000.
An allocation tells Wings which internal port a server can use. The application exposes this port as TCP 43000 on the Olares device.
Players use your Olares device's local IP address and port 43000 to join the game. Use the Panel browser address to manage the server.
Create your Terraria server
Download and import the Egg
Choose the Egg for your Olares device's CPU architecture. Intel and AMD x86-64 devices use amd64. Devices with an aarch64 processor use ARM64.
| Architecture | Download |
|---|---|
| amd64 | TShock 6.2.1 Egg |
| ARM64 | TShock 6.2.1 Egg |
ARM64 support
The ARM64 template is experimental. Start with a new world on your ARM64 Olares device.
Download the matching Egg JSON file from the table above.
In the administrator area, open Nests. A nest groups related templates. To add a Terraria nest, click Create New and name it
Terraria.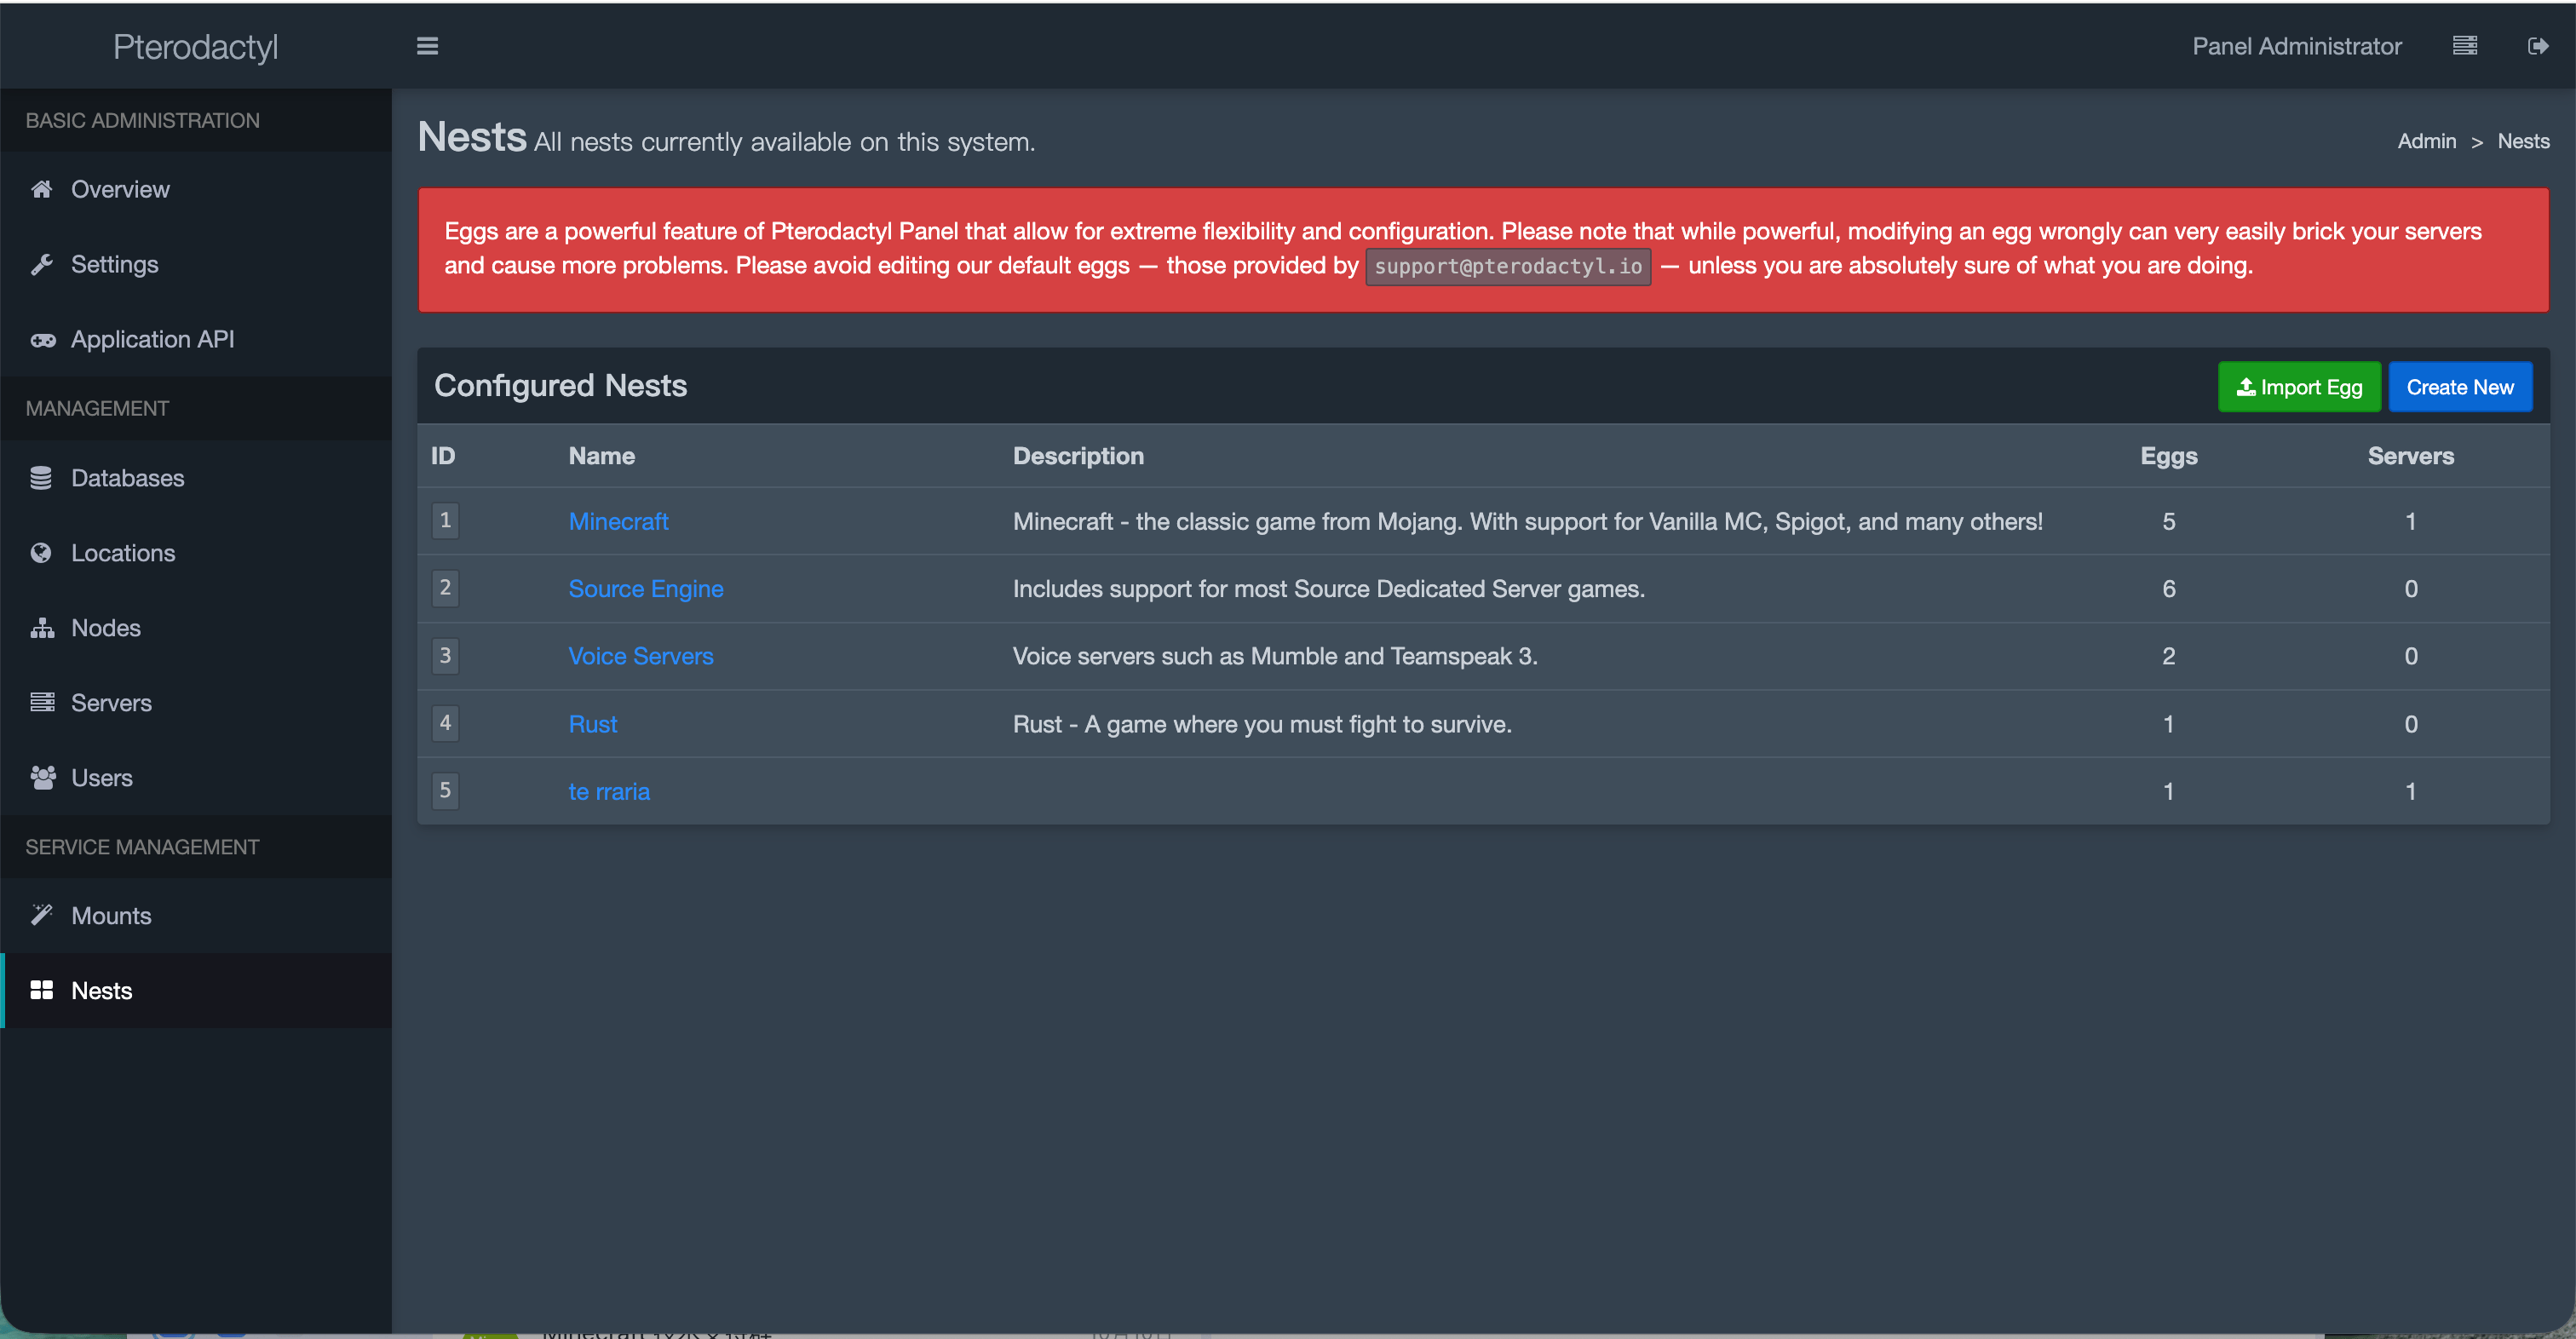
Click Import Egg, select the Terraria nest and the downloaded JSON file, and import it.
The Egg includes the image settings. When you create the server, Wings automatically downloads the images and installs TShock 6.2.1 for Terraria 1.4.5.8.
Set the server configuration
In the administrator sidebar, open Users. Find your Panel account by its username and copy the email address shown for that account.
Open Servers > Create New and enter a name such as
Terraria Friends.In Server Owner, enter the email address you copied, then select your account from the search results.
In Node, choose Olares Local Wings. In Default Allocation, select
0.0.0.0:30000. The game uses port30000from this allocation.Select the Egg you imported: TShock 6.2.1 (Olares) for amd64 or TShock 6.2.1 (Olares ARM64) for ARM64. Keep its listed .NET 9 runtime image. Use these resource settings for the example world:
Field Value CPU Limit 100percentMemory 1024MiBDisk Space 1024MiBBackup Limit 2Adjust server resources
For larger worlds, more players, or additional plugins, increase CPU, memory, and disk allocations to match your server's needs.
Keep these Egg startup settings to create a small world for two players:
Field Value Purpose Tshock Version v6.2.1Installs TShock 6.2.1. World Size 1Creates a small world. World Name OlaresFriendsNames the world and its save file. Max Players 2Allows up to two players. Leave Start Server when Installed disabled, create the server, and wait for installation to finish. Open Files to find the
worlds/,tshock/, andplugins/directories. The world file will be created on the first start.
Start and connect to the world
This guide covers local network play. Connecting from another network requires a route to the game port configured by your network administrator.
Open Console and click Start. Allow the first start to generate the world. Wait for the log to report
Server started.Enter
version, thenplayingin the console command field. Confirm the version and online-player response. Type the command names directly into the console.On a computer on the same local network, open Terraria 1.4.5.8 and choose Multiplayer > Join via IP. Select your character.
Enter your Olares device's local IP address, then enter
43000when prompted for a port. Once connected, your character appears in the shared world. Friends on the same network can join using the same IP address and port.
Operate the server
Use the console and files
Use Console to send game commands. The Start, Restart, and Stop buttons control the server. Use Stop for normal shutdown so the game can save its world.
Use Files to browse your worlds in worlds/ and TShock settings in tshock/. To change tshock/config.json, stop the server, edit and save the file, then start the server again. Keep the internal game port at 30000 so it matches the allocation.
To transfer files using an SFTP client:
Open the server's Settings > SFTP Details and copy the server-specific username.
In your SFTP client, choose SFTP and enter your Olares device's local IP address with port
42022.Enter the copied username and your Panel account password, then connect.
Additional TShock plugins go in plugins/. Choose plugins compatible with your TShock version and try them on a separate server before adding them to your shared world.
Save the world on a schedule
You can have Panel send TShock's save command every 30 minutes to save your world.
Open Schedules and click Create schedule.
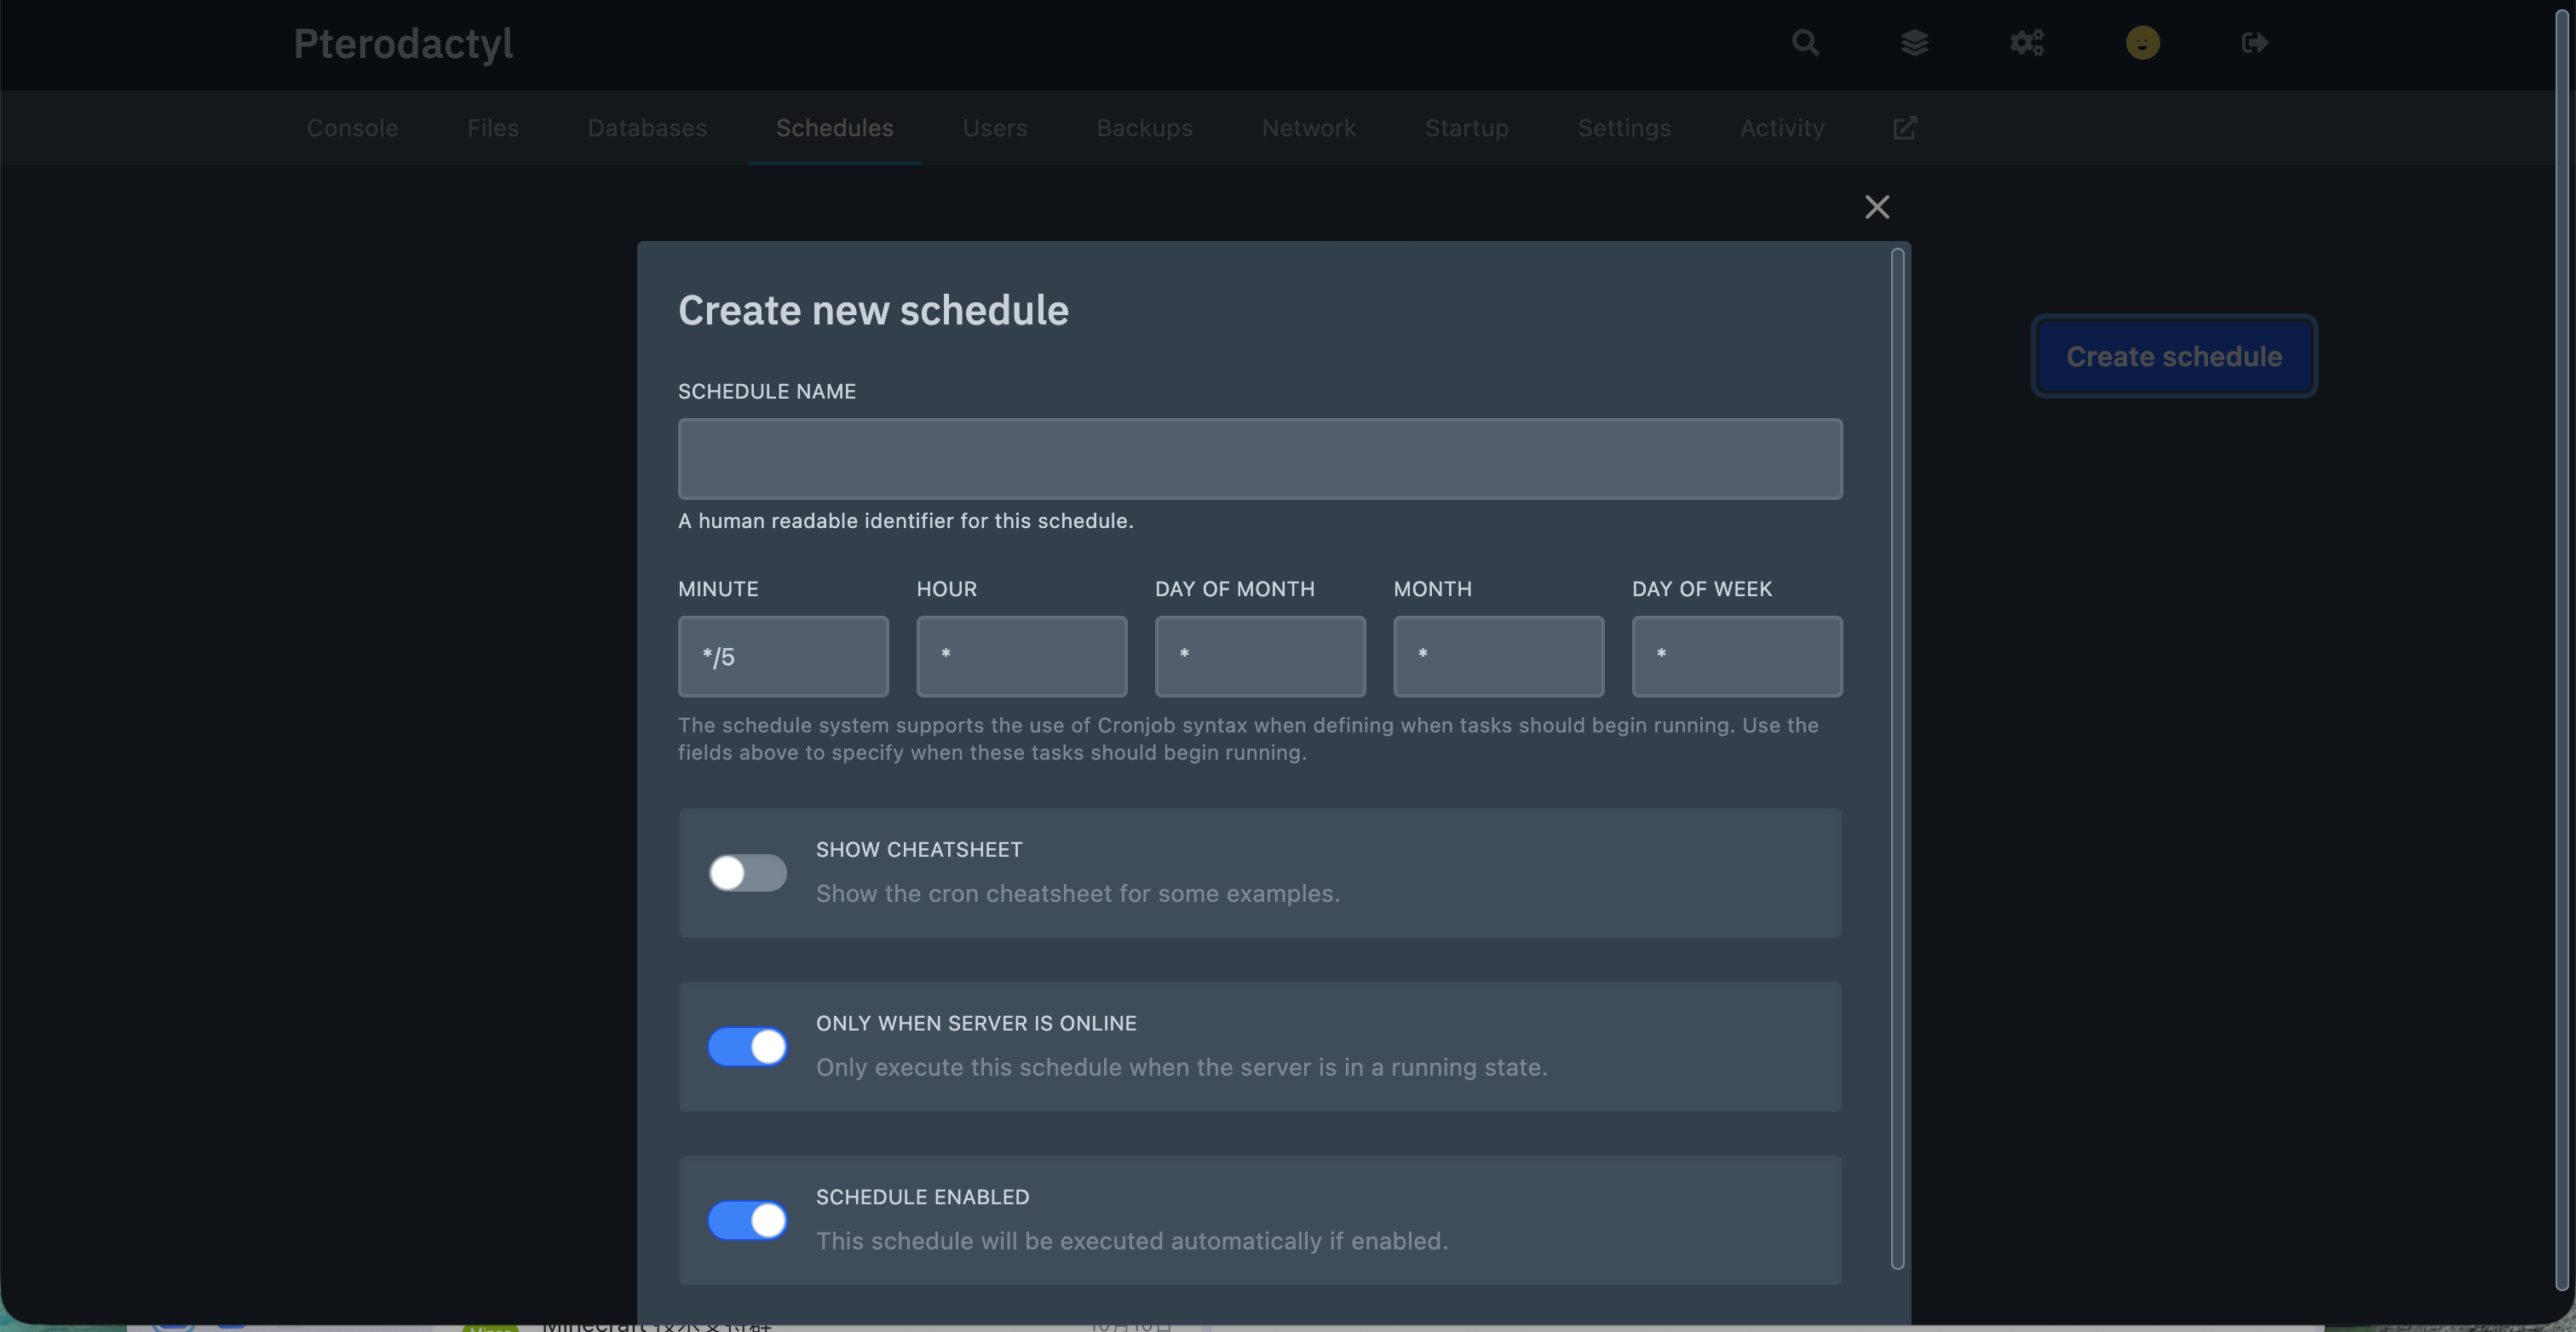
Enter
Save worldin Schedule Name. Set Minute to*/30and Hour, Day of Month, Month, and Day of Week to*.Enable Only When Server Is Online and Schedule Enabled, then save the schedule.
Add a command task with
saveas its command. Save the task and leave the schedule enabled.
This saves the current world files. To keep a separate copy that you can restore later, create a backup.
Grant limited access
To let a friend help manage the server, open Users and add them as a subuser. Select the permissions they need, such as viewing the console or working with files. Friends joining the game connect through Terraria.
Manage access to the server controls in Panel. Configure in-game player permissions in TShock.
Create and restore a backup
Stop the server and wait for its status to become offline.
Open Backups, click Create backup, and give the backup a name that includes its purpose or date. Include the
tshock/folder to preserve TShock settings, game accounts, and permission groups. Wait for the backup to finish before making changes to your server.To restore a backup, stop the server, choose Restore for the backup you want, review which files will be replaced, and confirm.
After restoration finishes, start the server and join through Terraria. Your world should reflect the saved backup.
Back up the correct scope
Restoring a backup can overwrite newer progress. Keep a separate copy of any world you want to preserve before restoring.
Game-server backups save the files for that server. To preserve Panel's users, nodes, and schedules before uninstalling Panel, also export its database and back up its application data, including the encryption key.
FAQs
Can Panel manage my existing Minecraft application?
Manage Minecraft installed from Market through Olares and the Minecraft application's own interface. Panel manages servers created through Wings.
To move to Panel, create a separate Minecraft server with a compatible Egg, match the game version and any mod/plugin runtime, stop the original server, and copy its world and configuration into the new server. Validate player access, world contents, and backups before retiring the original. Set up Panel access and game-account permissions separately on the new server.
Why is the displayed address different from the player address?
Panel can show the internal allocation 0.0.0.0:30000. Players use the Olares device's reachable LAN IP and exposed port 43000.
Why does an imported Egg fail to install or start?
Use the Egg that matches your Olares device's CPU architecture and keep its listed runtime image. For download or installation errors, check the installation log. For errors after clicking Start, check Console.
Can I use this Egg to reinstall or upgrade a server?
This Egg installs TShock 6.2.1 only. Its installer stops with Existing installation: back up and upgrade explicitly if it finds an existing TShock.Server file.
Keep a backup of your world and the tshock/ folder. Prepare a separate server with an Egg for the target version and check that it can load a copy of your saved world before moving players over.
Can I reset an existing administrator by changing installation values?
The installation values create the first administrator account. To reset an existing account, use Panel's account recovery procedure. Set up SMTP to enable email-based recovery.
Learn more
- TShock documentation: Game commands, startup parameters, and permissions.
- Pterodactyl documentation: Upstream administration and Egg configuration.