Set up OpenCode as your AI coding agent
OpenCode is an AI-powered coding agent that lets you write, test, and manage code through natural language. It supports multiple AI providers and can run shell commands, create files, and install development environments from a chat interface.
On Olares, you can use OpenCode in two ways:
- Browser: Install OpenCode as an app on Olares and access it through your browser.
- Local CLI: Install OpenCode on your computer and connect it to a model on Olares for a native terminal experience.
Learning objectives
By the end of this tutorial, you will learn how to:
- Install OpenCode on Olares and connect it to a local model or OpenAI.
- Create projects and run coding tasks through the chat interface or the terminal-based UI (TUI).
- Use OpenCode from your local computer over the LarePass VPN or from inside VS Code.
- Edit the OpenCode configuration file to manage providers, models, and tools.
Prerequisites
An Olares device with sufficient disk space and memory.
Admin privileges to install apps from Market.
Additional requirements depend on how you use OpenCode:
Usage Requirements Browser with a local model Qwen3.6-27B (llama.cpp) installed from Market Browser with OpenAI A ChatGPT Plus/Pro account or an OpenAI API key OpenCode CLI on your computer Ollama installed on Olares with at least one model downloaded, and LarePass VPN enabled on your computer.
Run OpenCode in the browser
This option installs OpenCode as an application on your Olares device. You access it through your browser.
Install OpenCode
Open Market and search for "OpenCode".
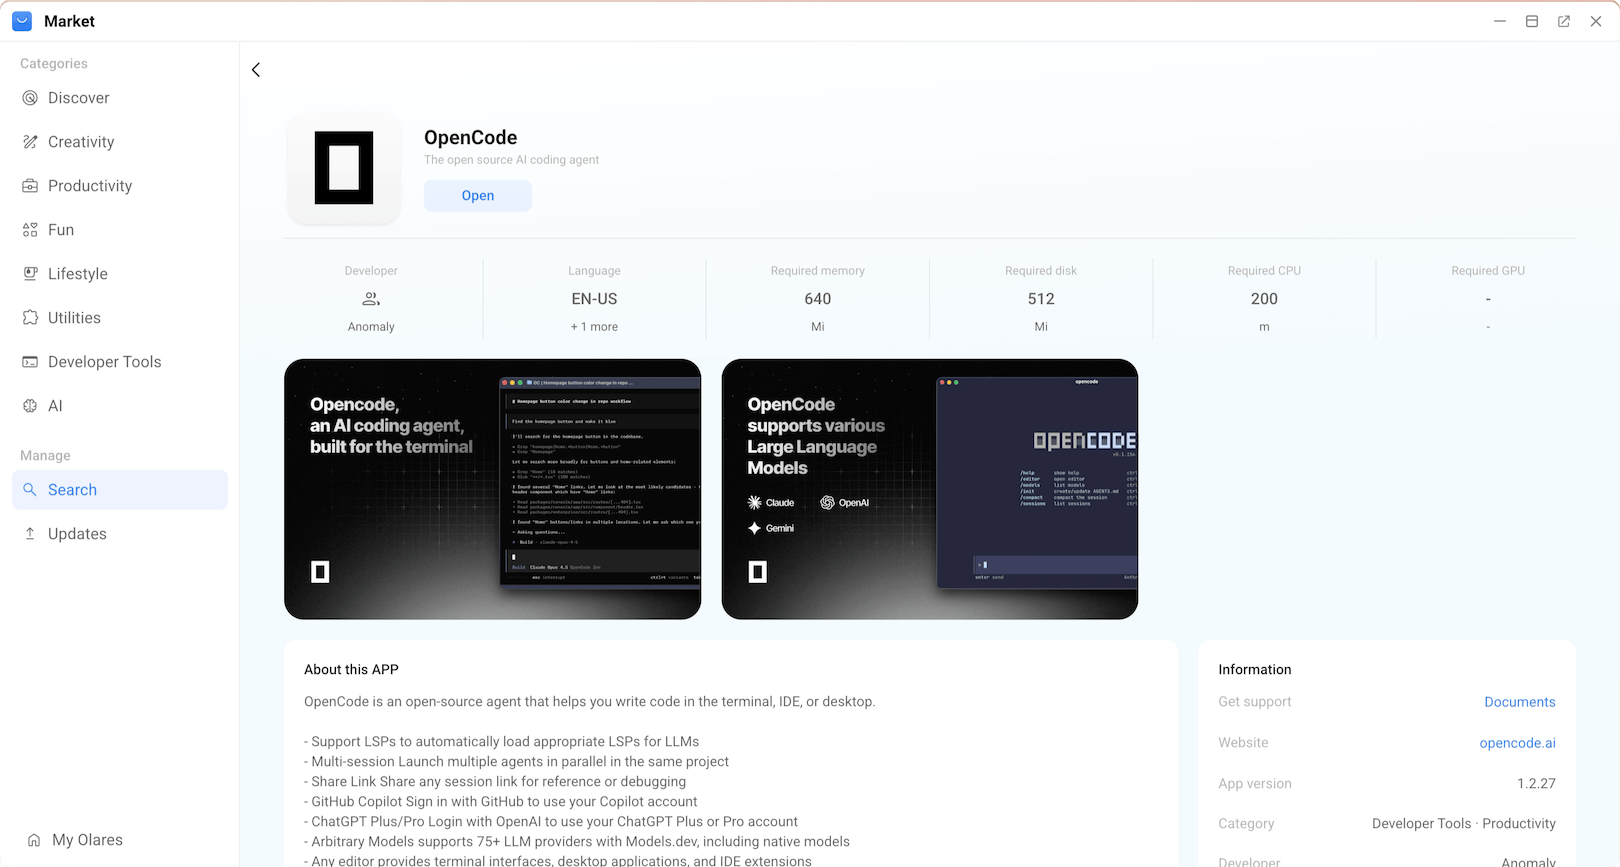
Click Get, then Install, and wait for installation to complete.
After installation, you will see two icons on Launchpad:
- OpenCode: The main interface for OpenCode.
- OpenCode Terminal: A command-line terminal for OpenCode. Use this if you prefer working in the TUI.
Get model connection details
Planning to use oh-my-openagent?
For multi-local-model setups under oh-my-openagent, use single-model apps. Each model gets its own endpoint, which lets you register it as a separate provider and tune per-model settings like concurrency limits.
How model connections work
A standalone model on Olares runs as a separate service from the client app. To connect them, the client needs the exact Model name and a Base URL that matches the API format it expects.
You can get both values from the model's console. For more details, see Connect AI apps.
In this example, OpenCode connects to Qwen3.6-27B using the OpenAI-compatible API format:
Open the model app from Launchpad. Its Model Console opens automatically.
Wait until Model shows READY and Engine shows RUNNING.
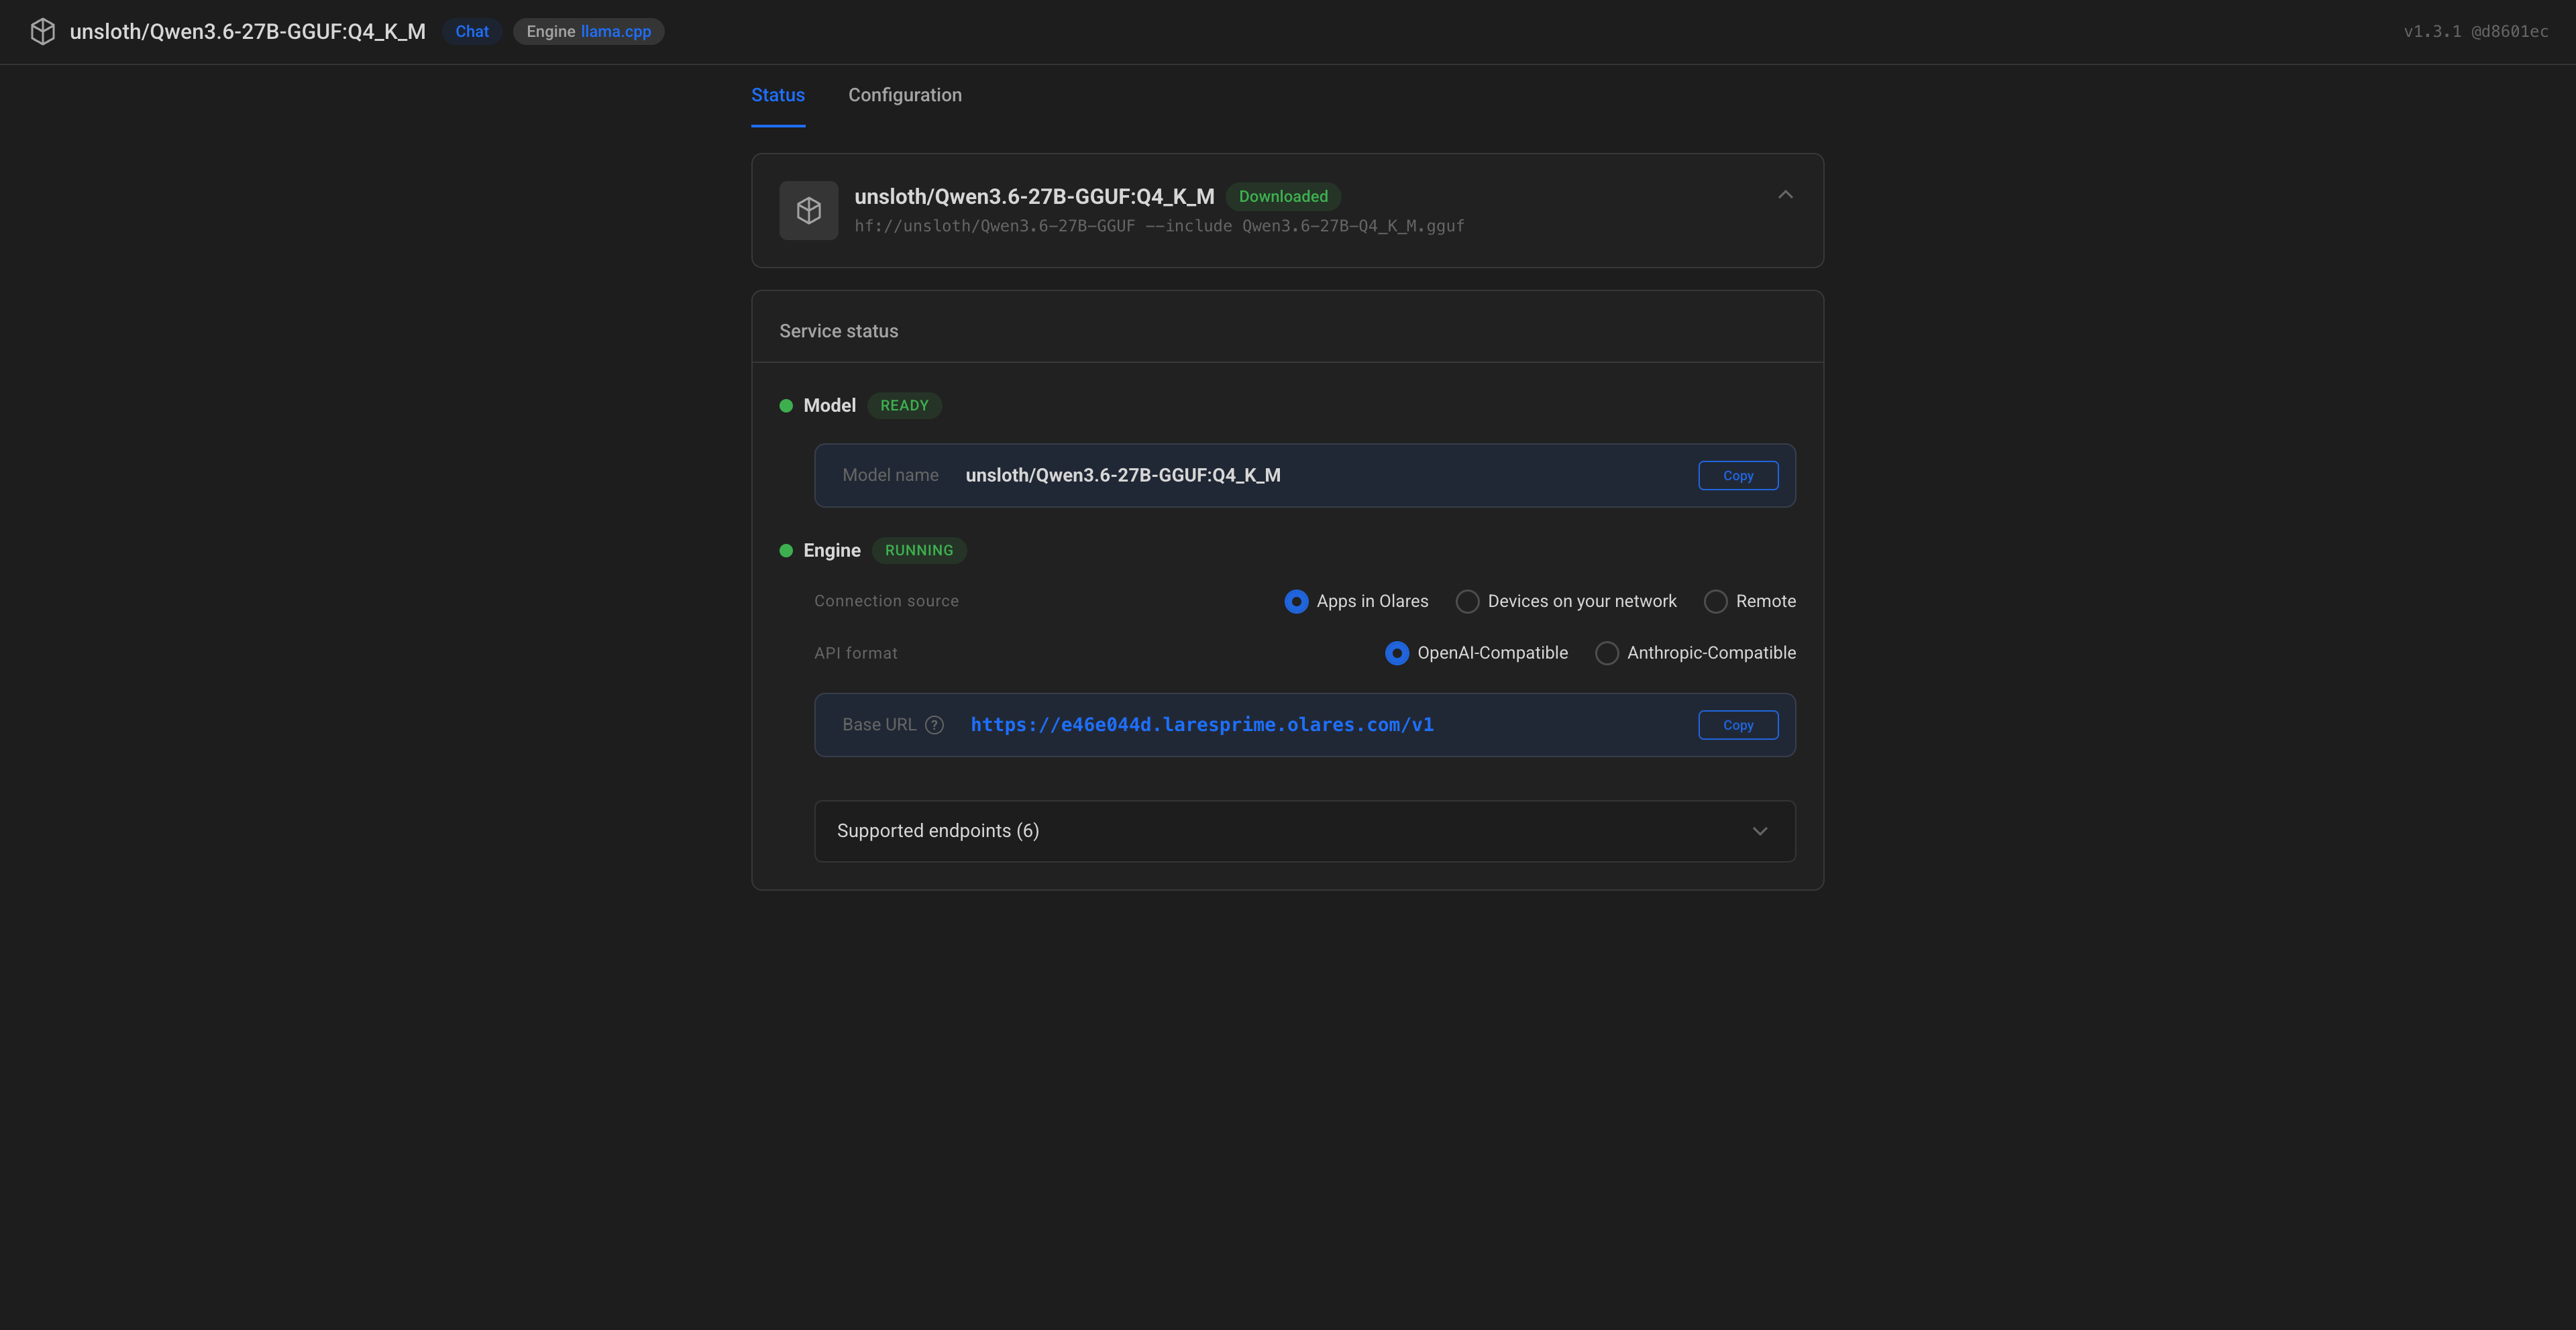
Under Model, copy the Model name exactly as shown.
Under Engine:
a. Connection source: Select Apps in Olares.
b. API format: Select OpenAI-Compatible.
c. Copy the provided Base URL exactly as shown.
Connect to a custom provider
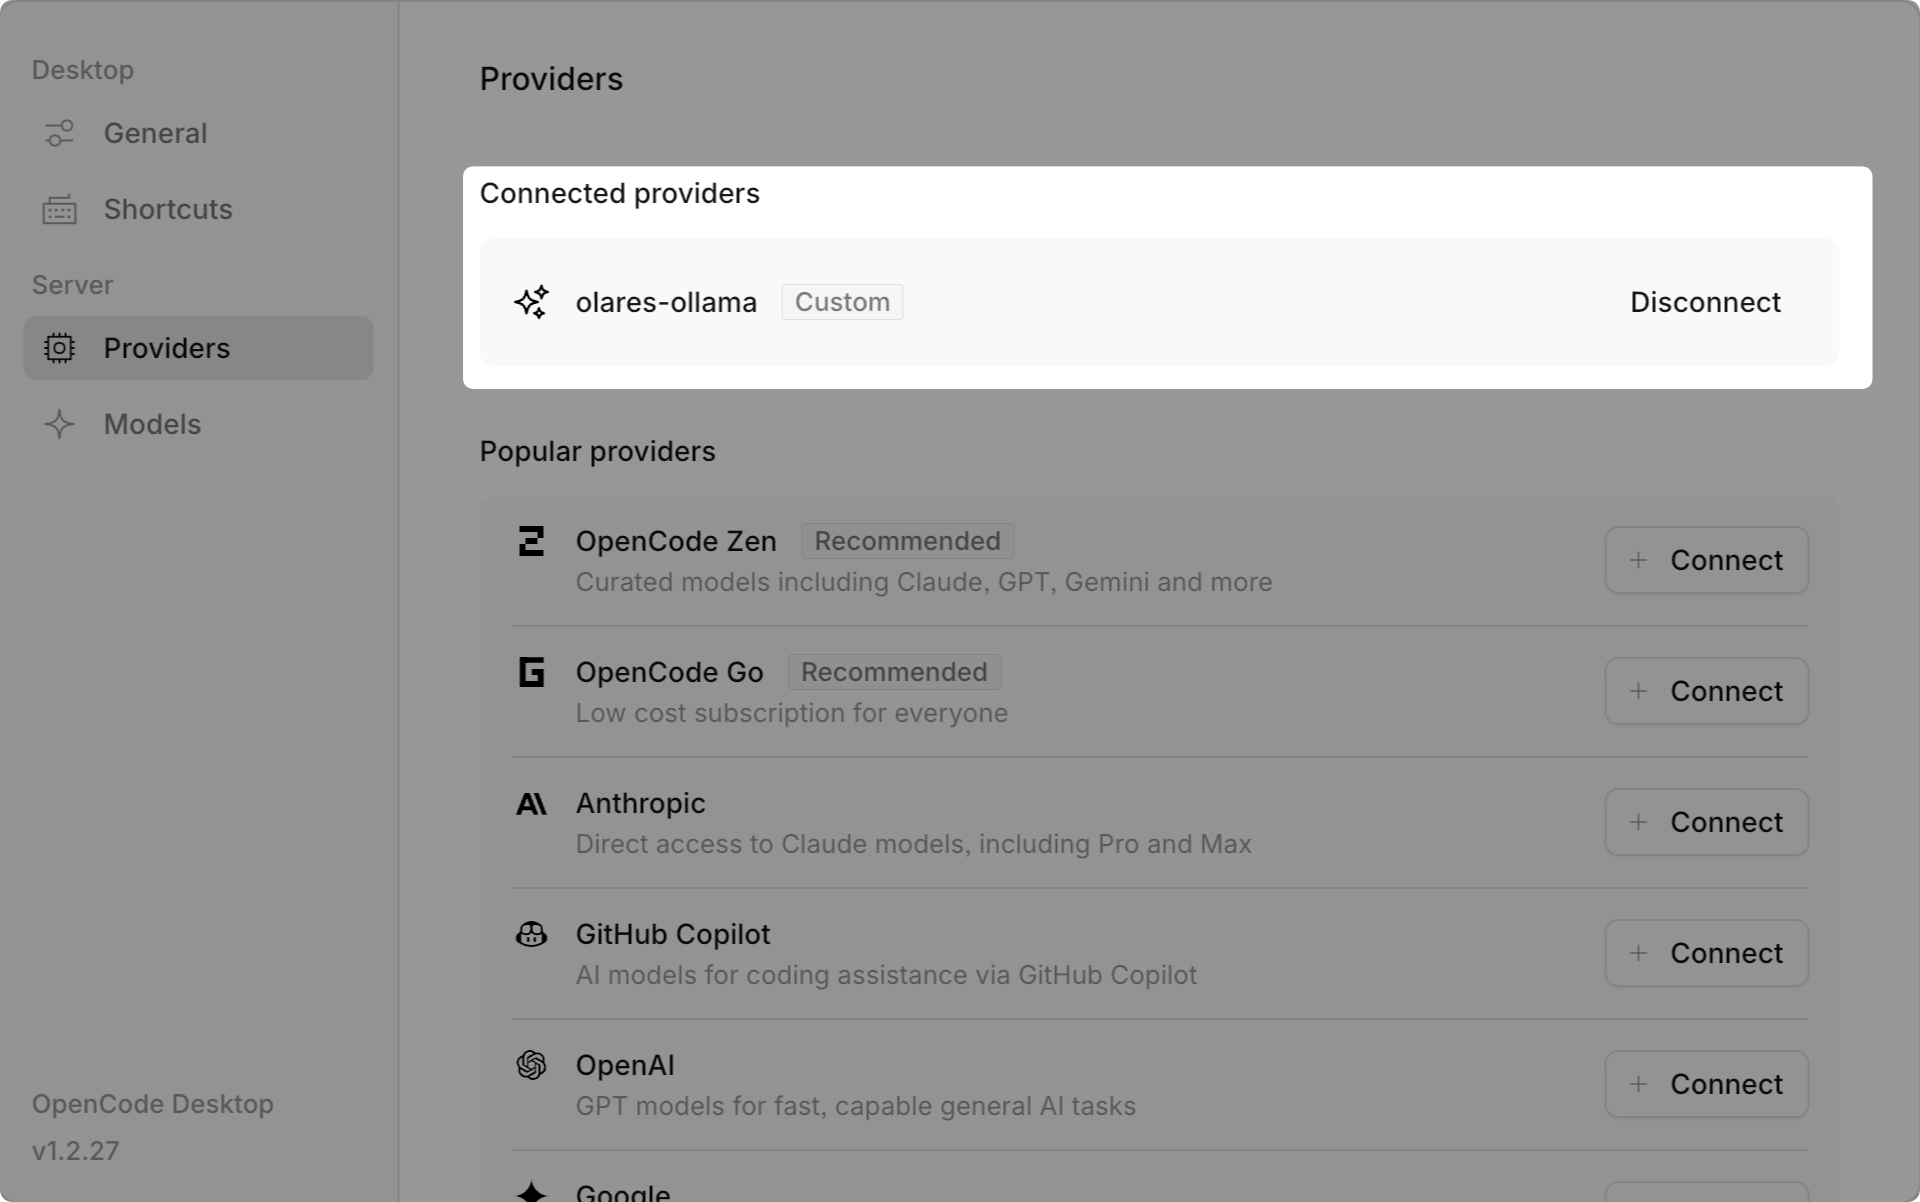
Add Qwen3.6-27B as a custom provider in OpenCode.
In OpenCode, click settings in the bottom-left corner.
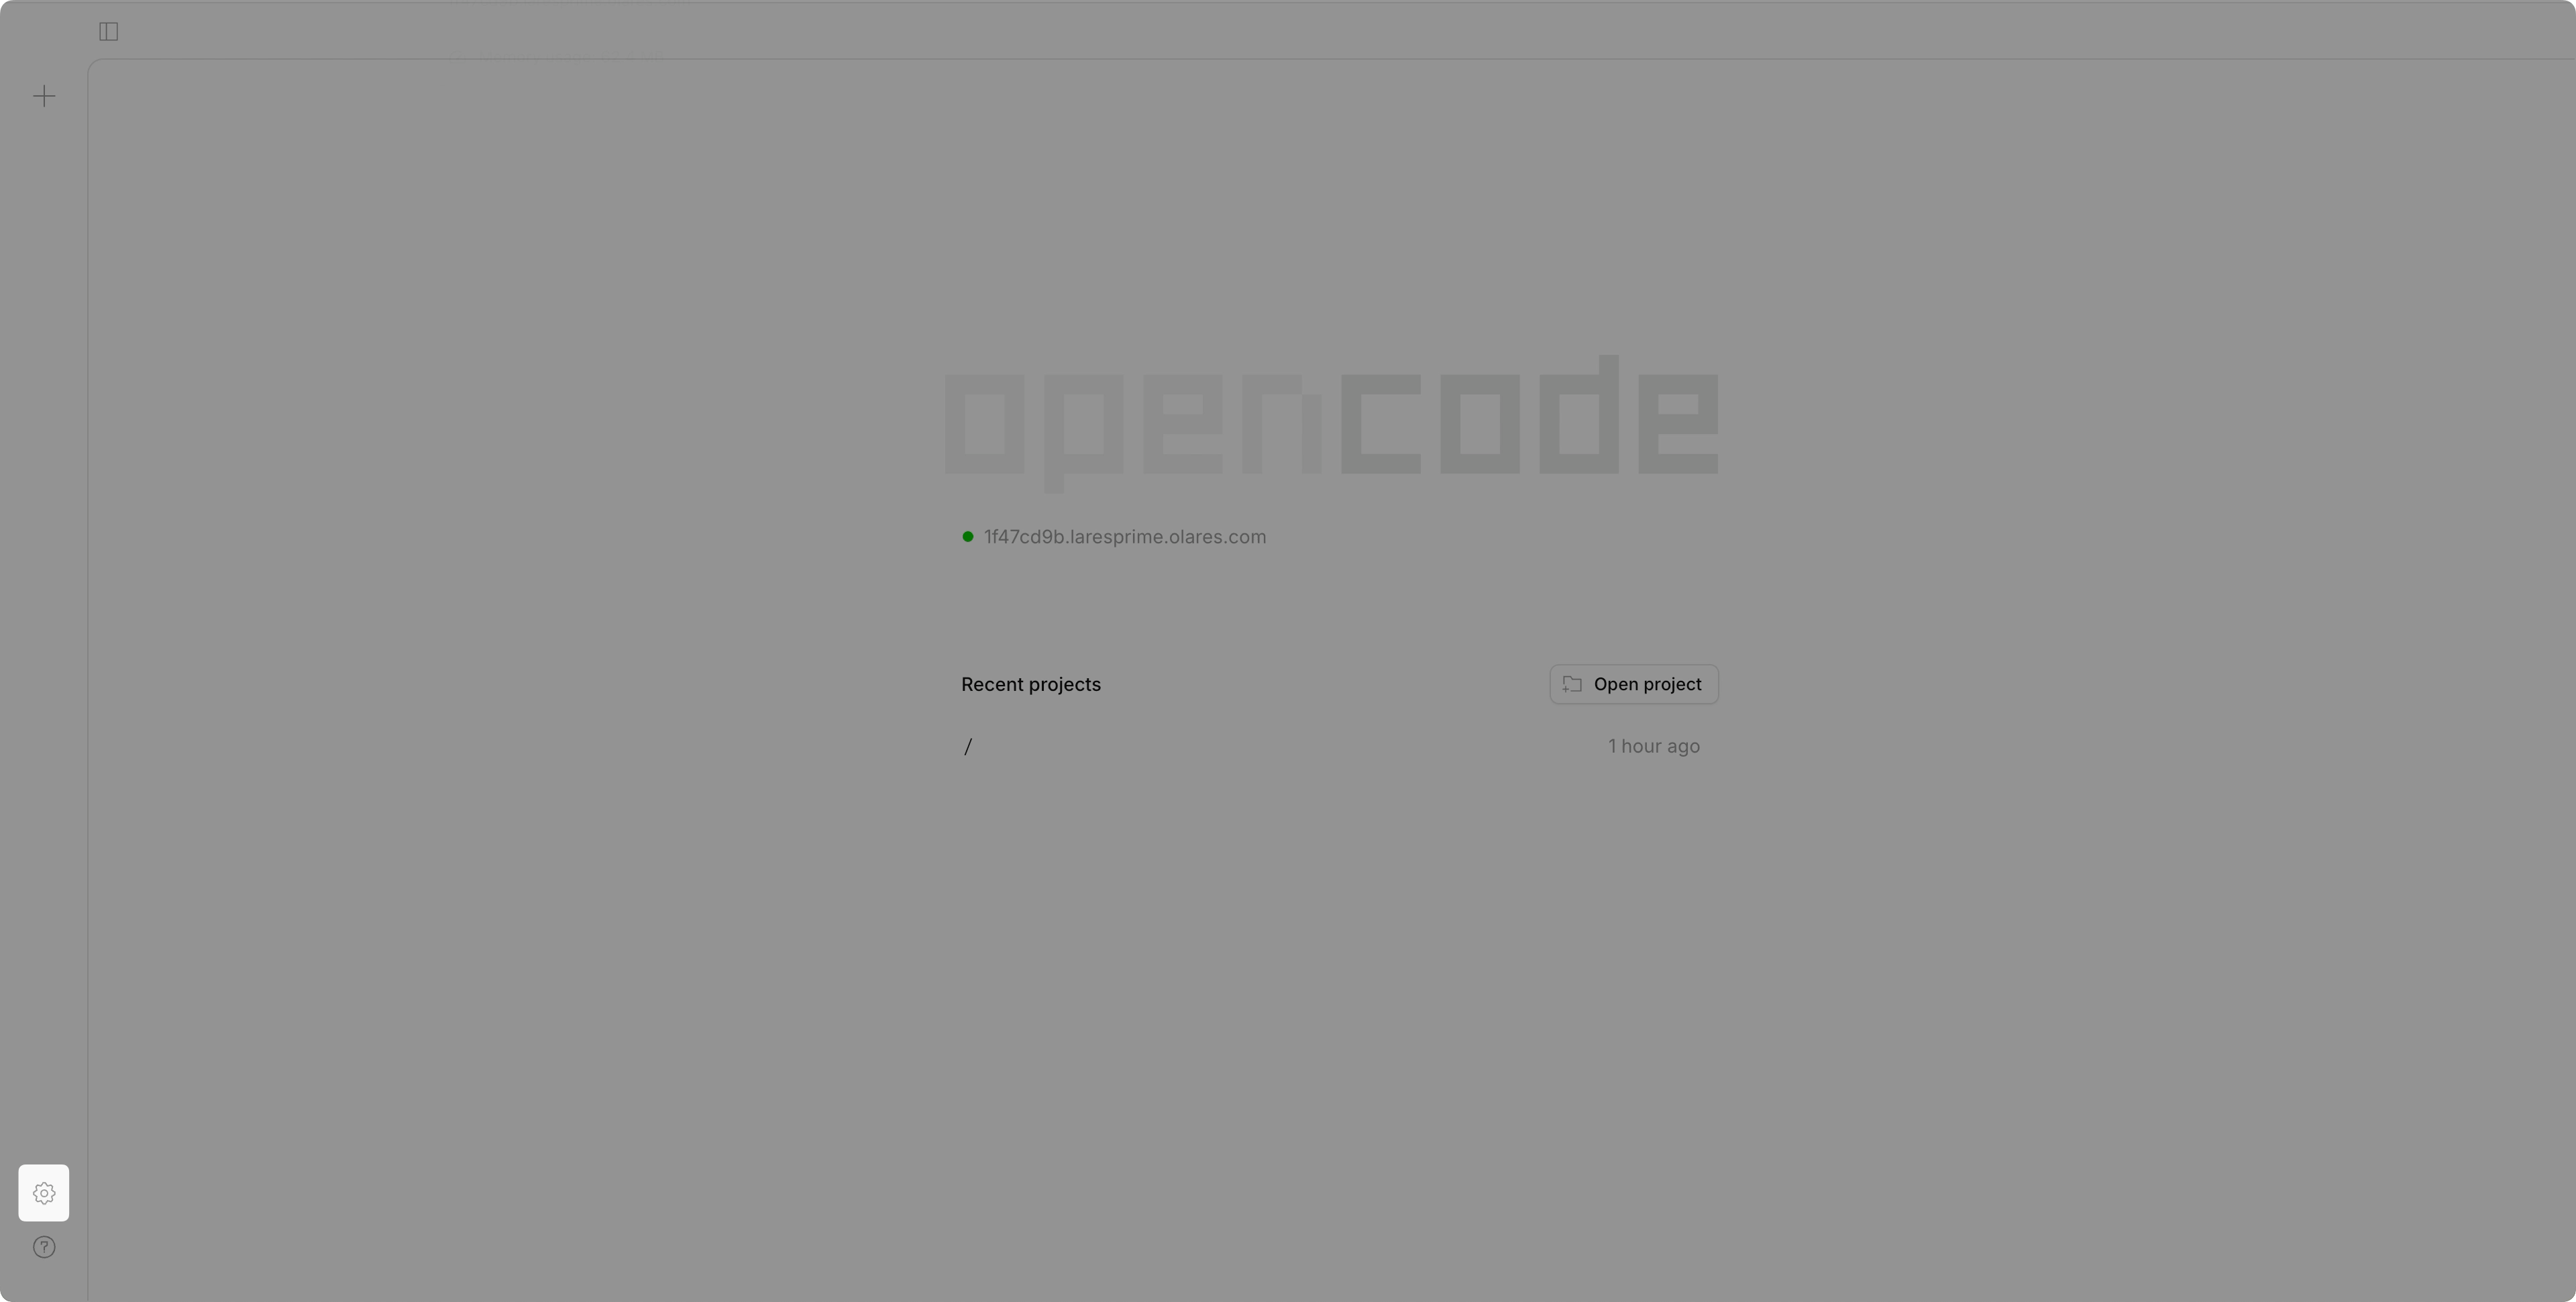
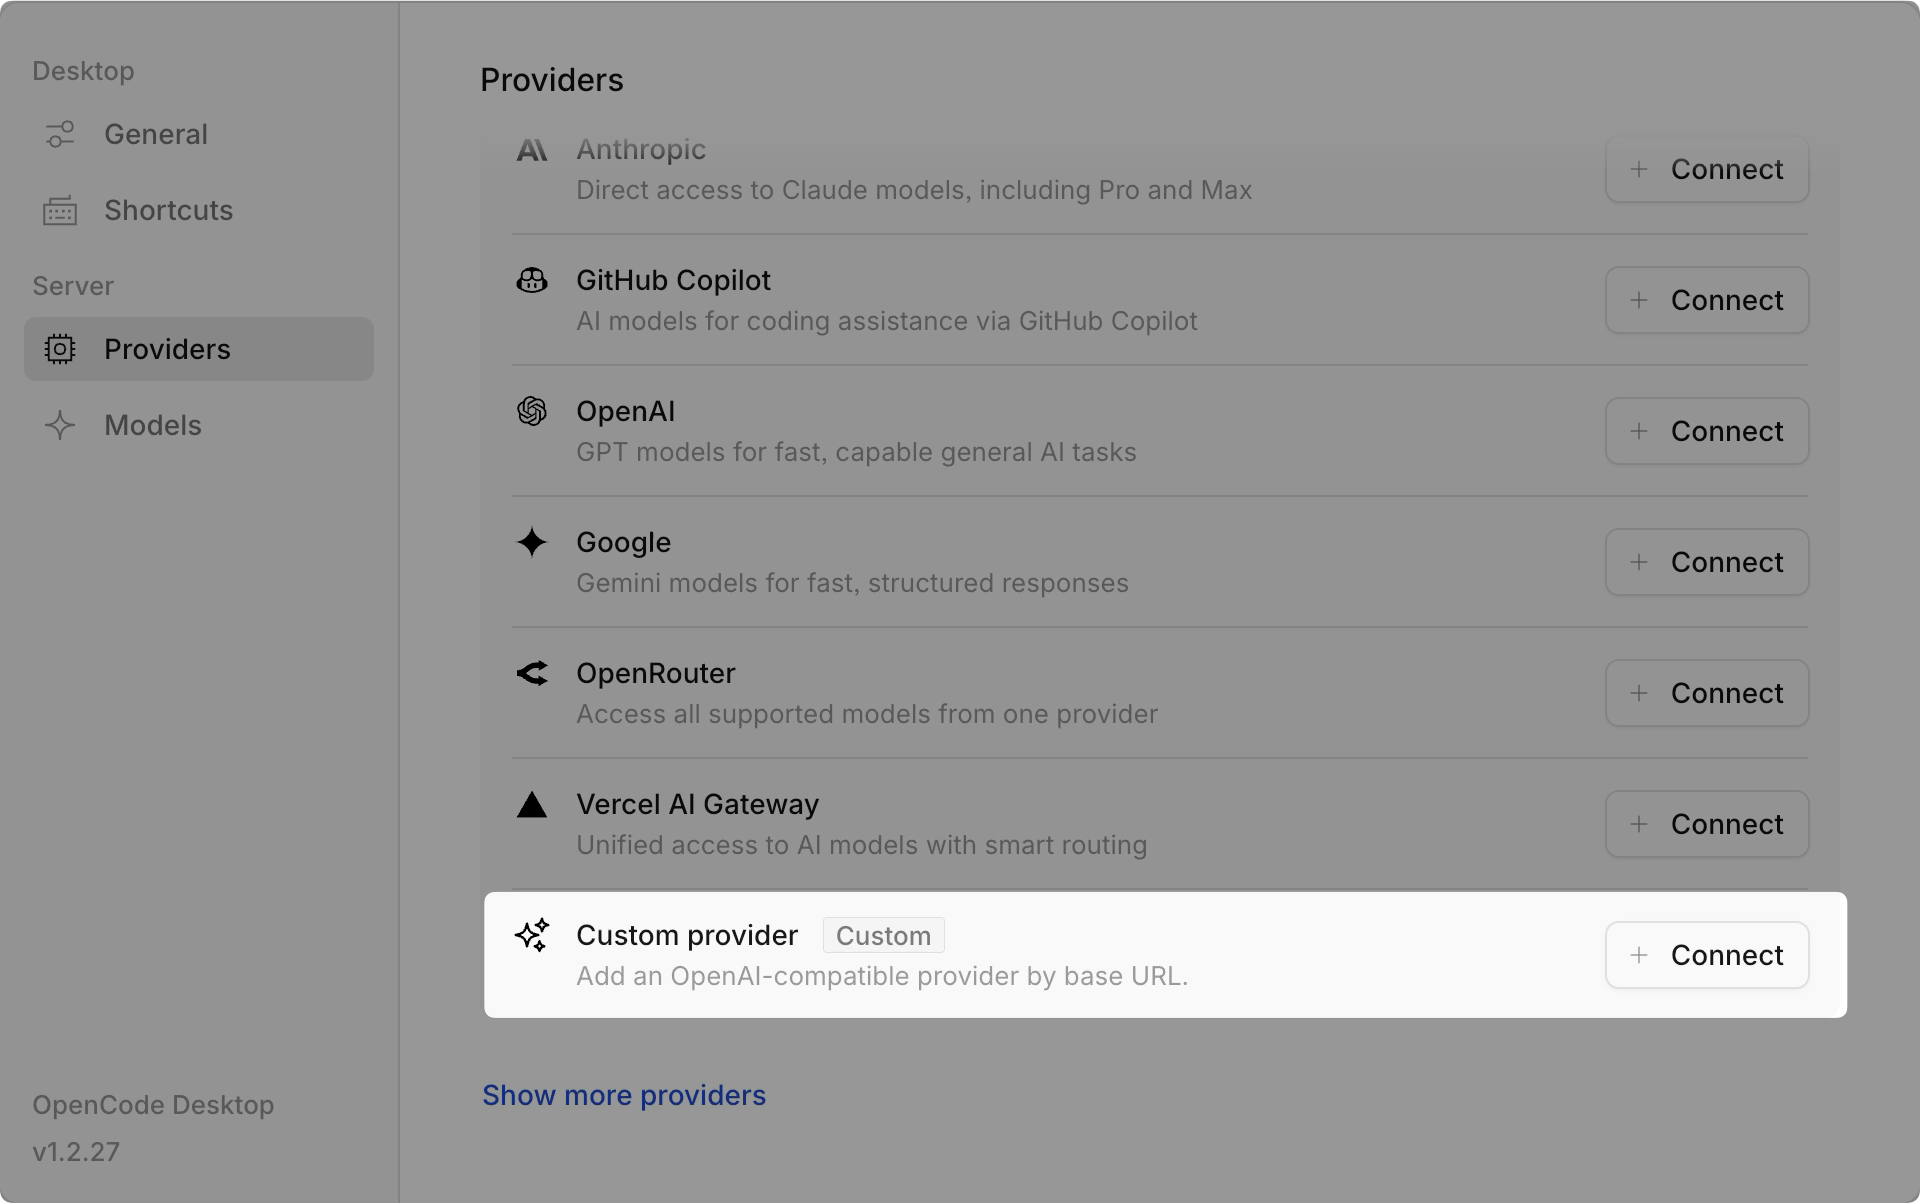
Select Providers, then scroll down and select Connect next to Custom Provider.
Enter the following details:
- Provider ID: Enter a unique identifier, such as
qwen3.6-27b. - Display name: Enter the name shown in the provider list, such as
Qwen3.6 27B. - Base URL: Paste the Base URL copied from Model Console. Use it exactly as displayed.
- Models:
- Model ID: Enter the exact Model name copied from Model Console. In this example, it is
unsloth/Qwen3.6-27B-GGUF:Q4_K_M. - Display Name: Enter the name shown for this model, such as
Qwen3.6 27B.
- Model ID: Enter the exact Model name copied from Model Console. In this example, it is
- Provider ID: Enter a unique identifier, such as
Click Submit to save the configuration. Your newly added provider will appear in the provider list.
Connect to OpenAI
OpenCode supports two practical ways to connect OpenAI:
- Browser sign-in: Recommended for ChatGPT Plus or Pro accounts.
- API key: Simple and direct. Usage is billed separately by OpenAI based on token usage, even if you also have a ChatGPT subscription.
Do not use headless sign-in
The headless sign-in method is prone to known failures caused by OpenAI security checks. After a failed attempt, the sign-in flow might not recover for a short period of time. Use browser sign-in or an API key instead.
Create a project
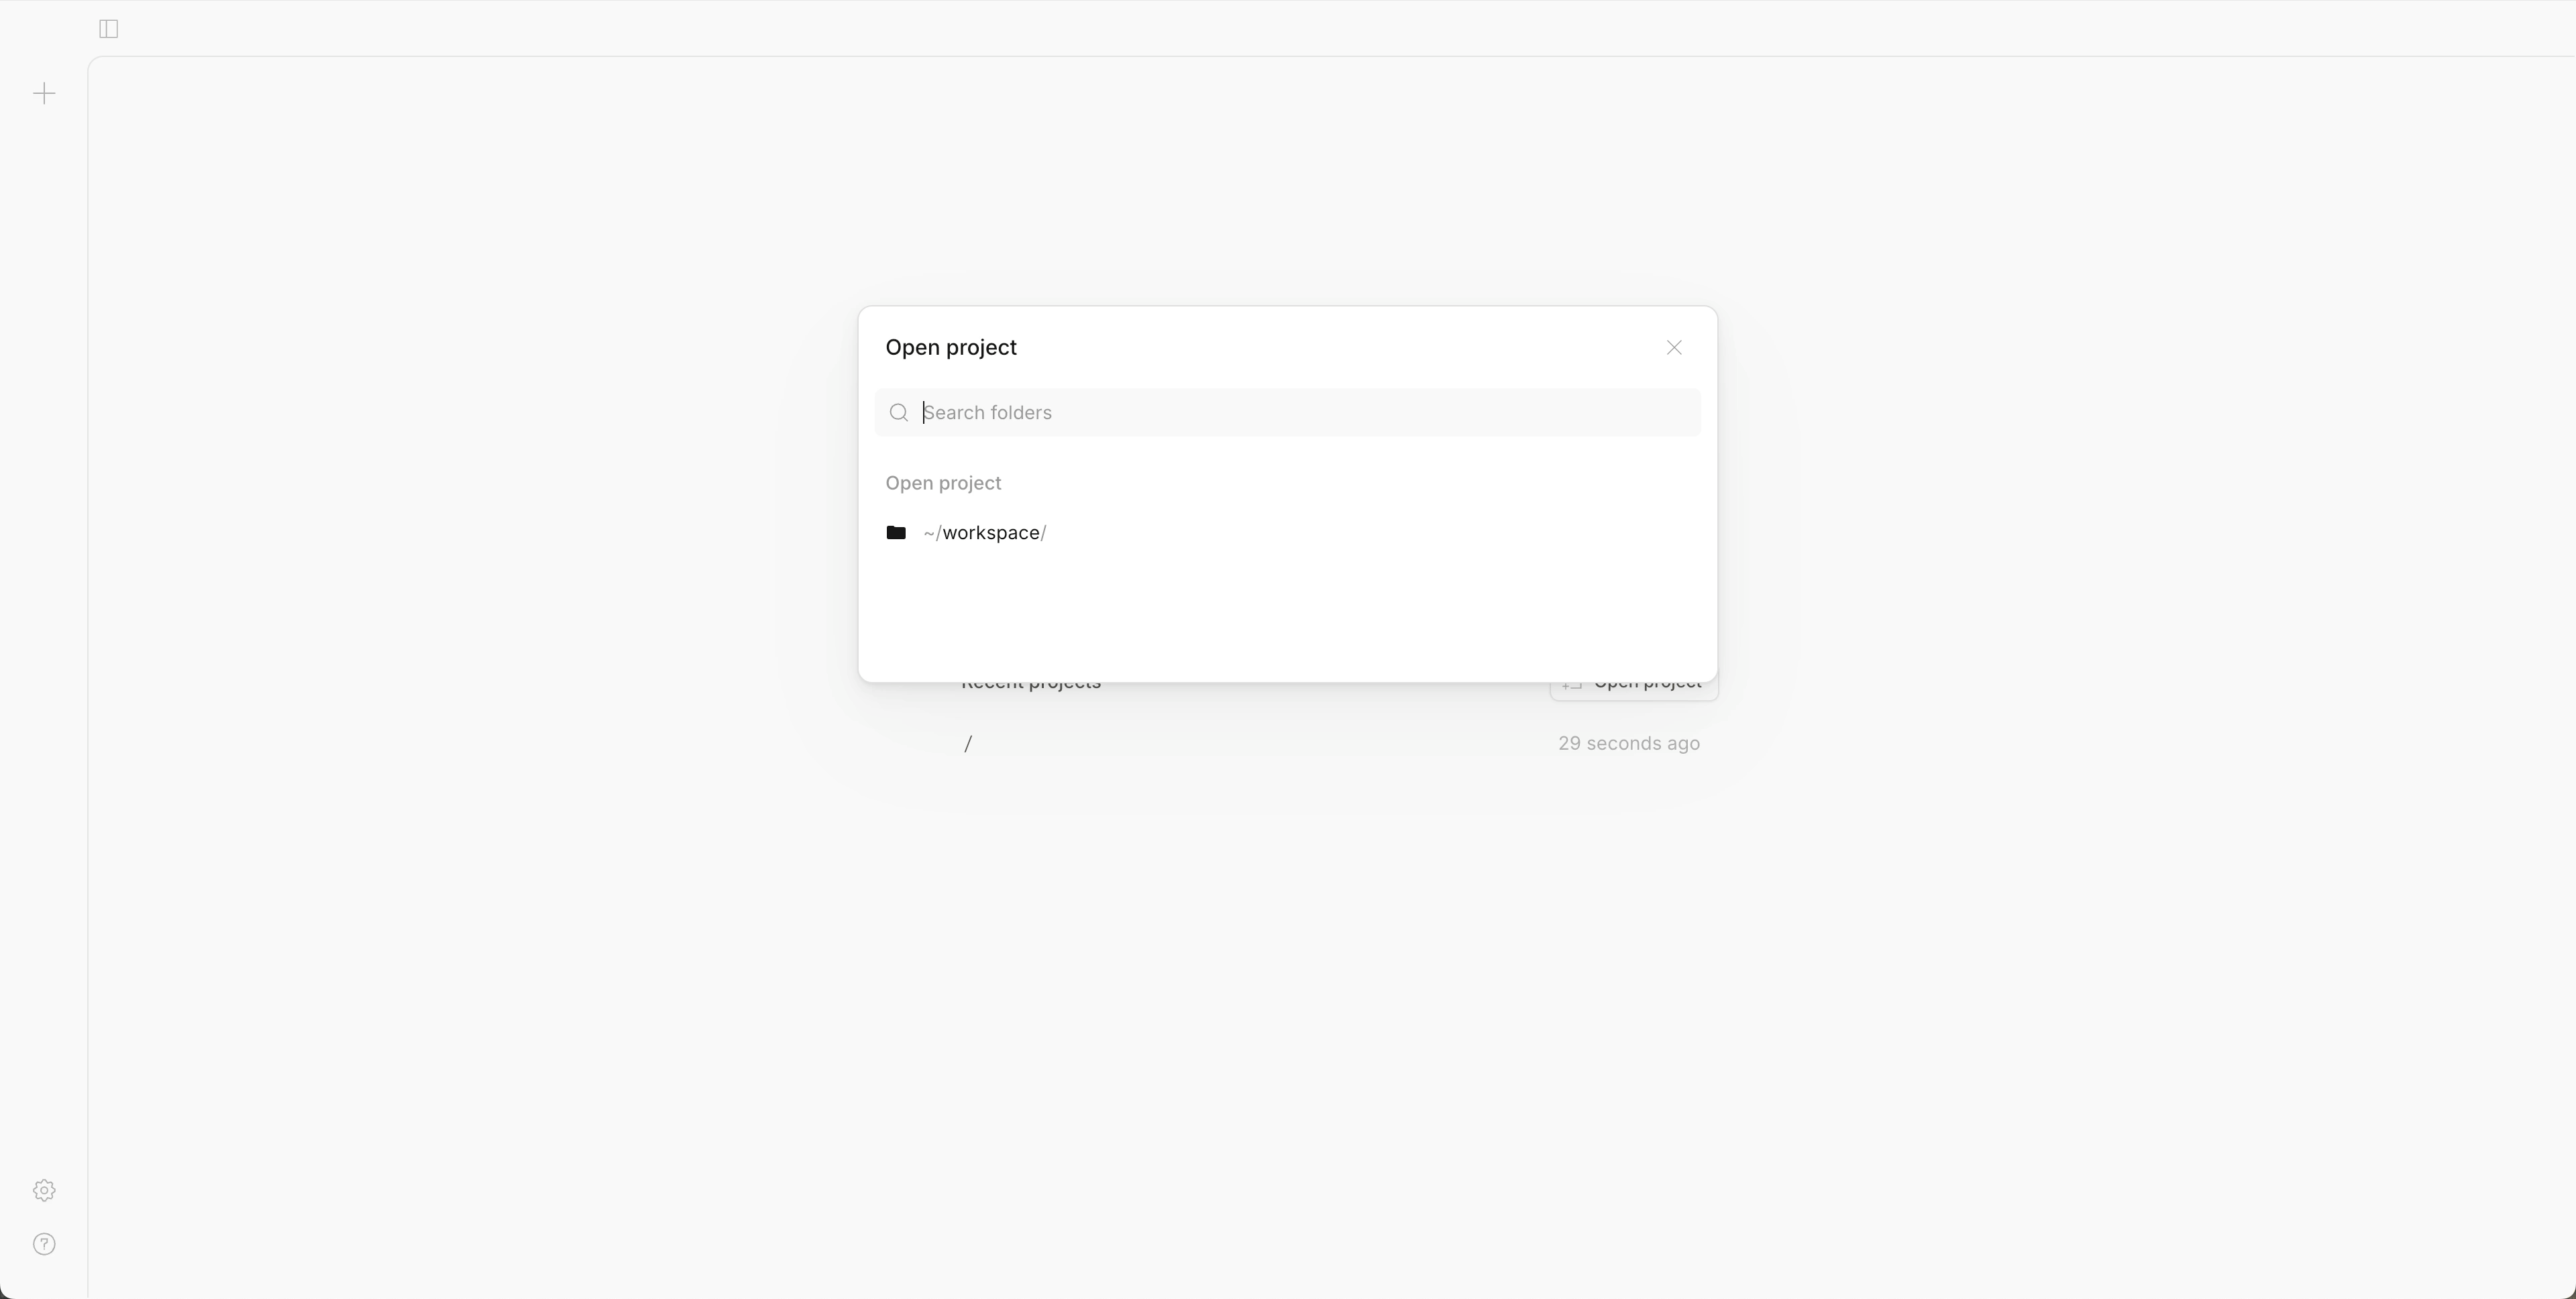
The default workspace is Home/Code in Files. Click + in the left navigation bar to create a project.
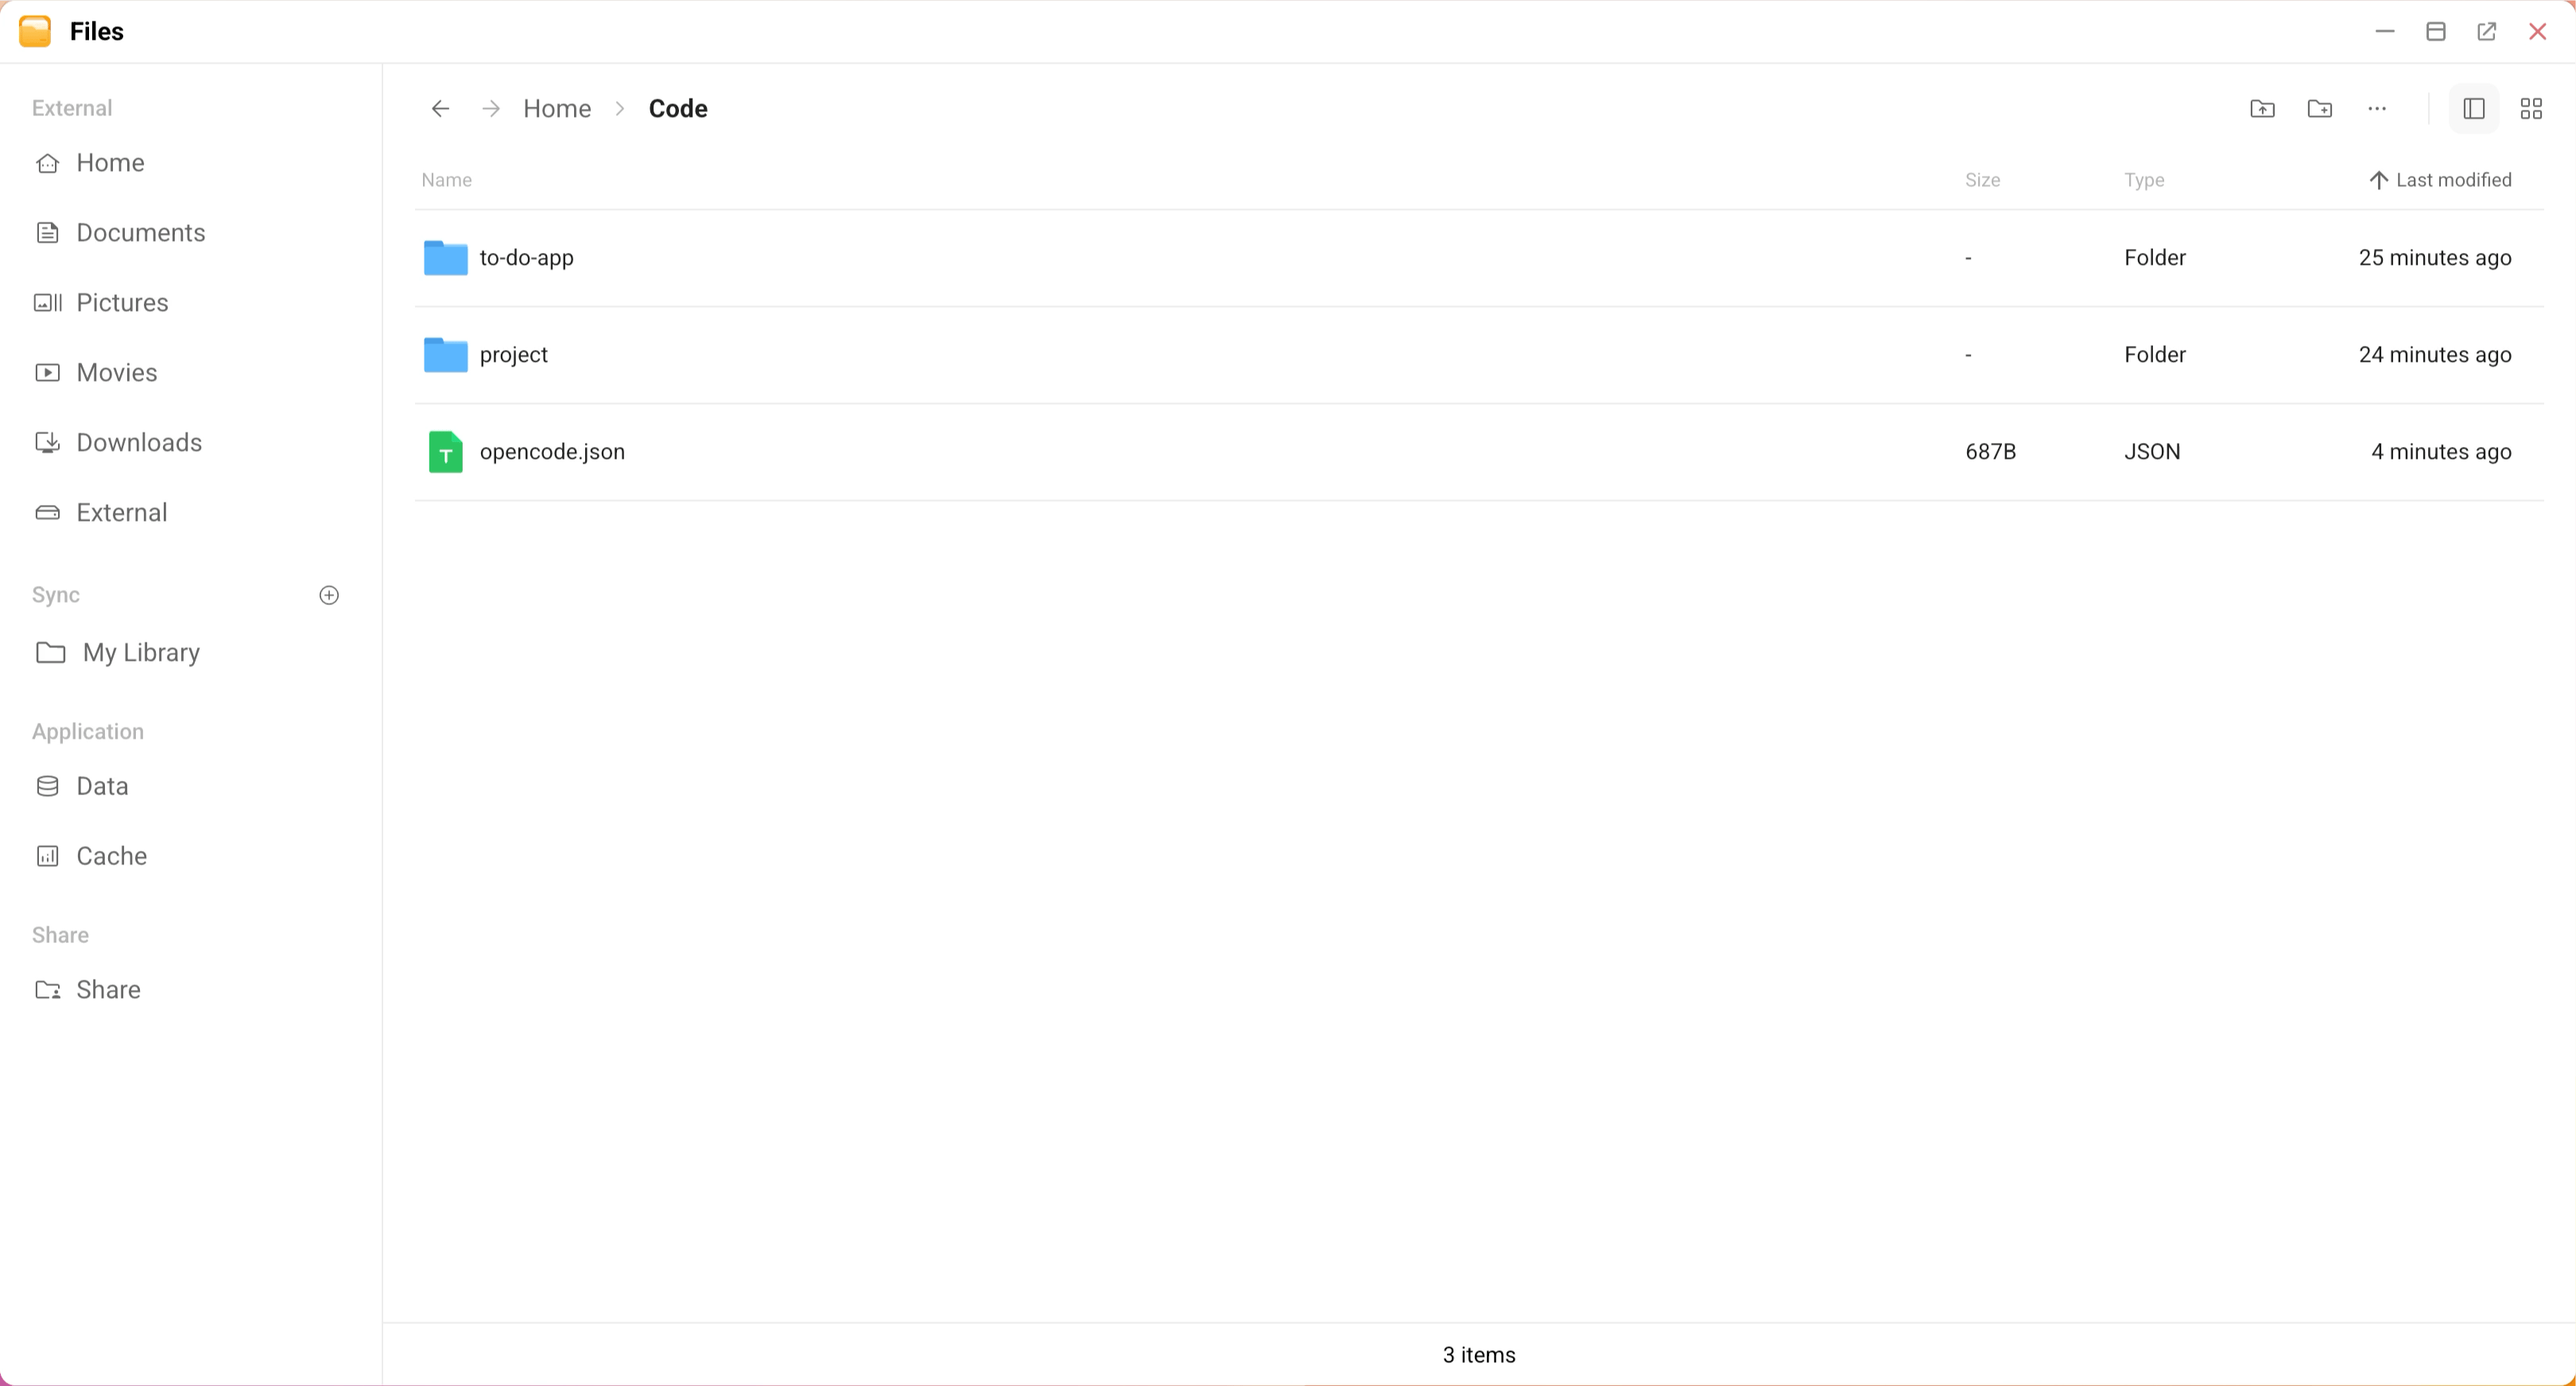
To work with multiple projects, create subfolders under Home/Code first:
Open Files and navigate to
Home/Code/.Create a subfolder for each project.
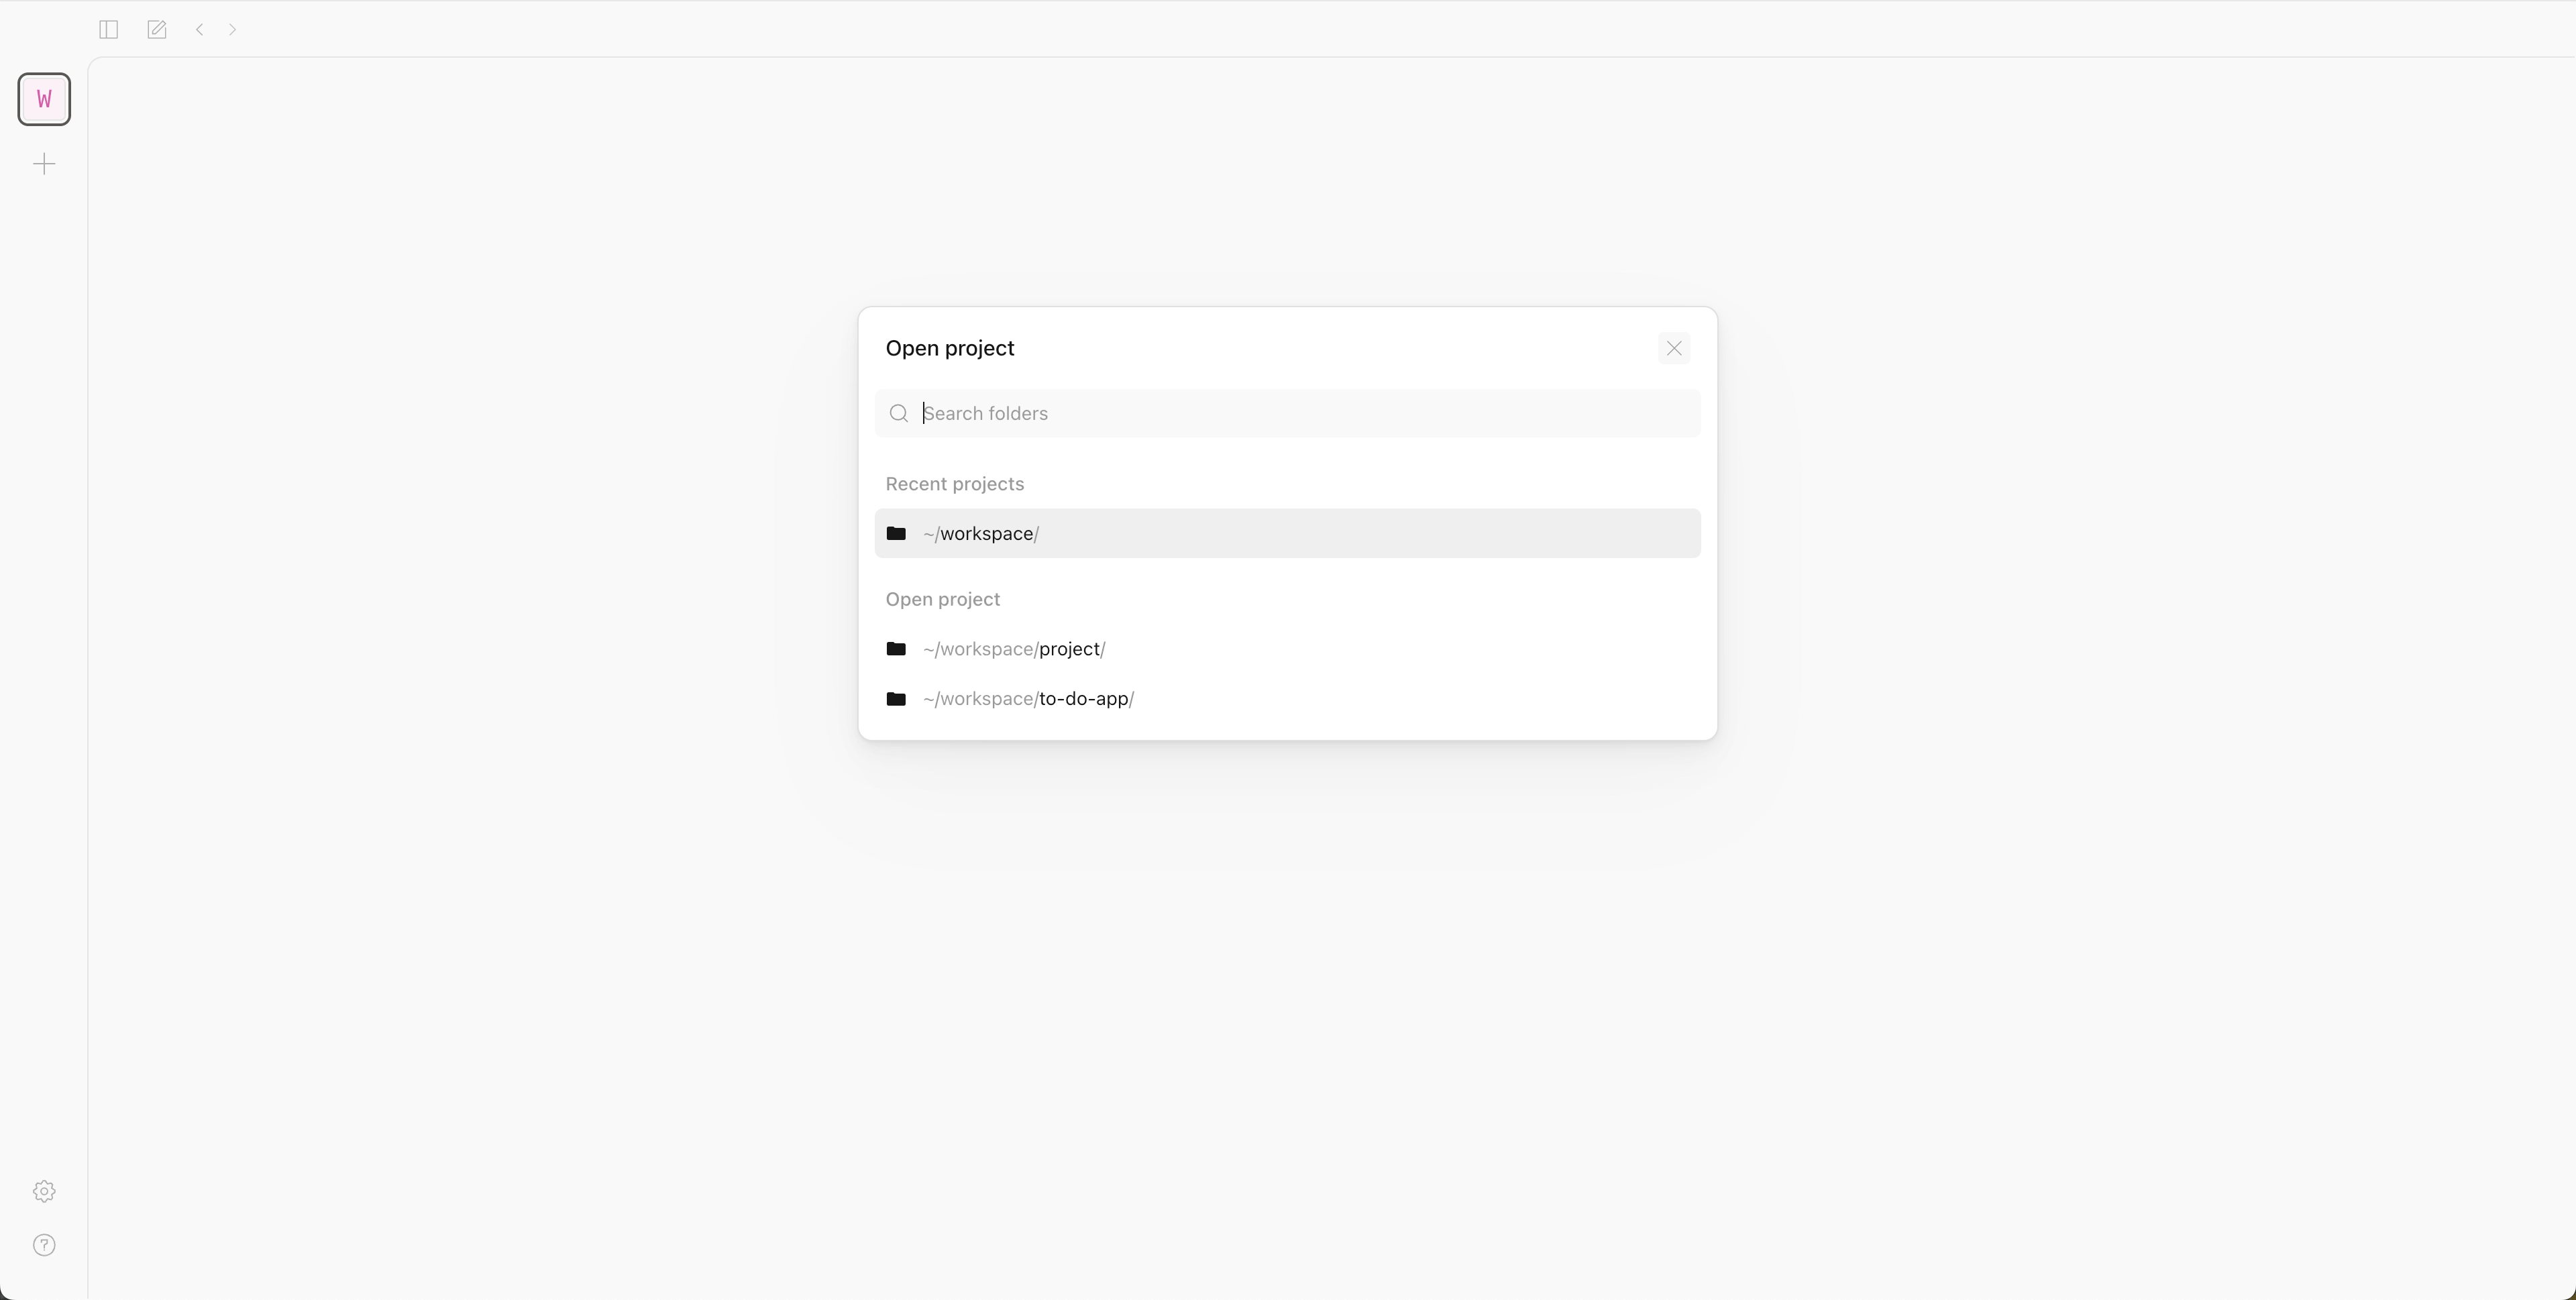
Go back to OpenCode, click +, and open the project with the subfolder name.
Start coding
You can now interact with OpenCode through the chat interface.
Select a project to open the coding agent interface.
Below the chat box, select Big Pickle to open the model selector, and select Qwen3.6 27B from the list.
Type a coding task in natural language.
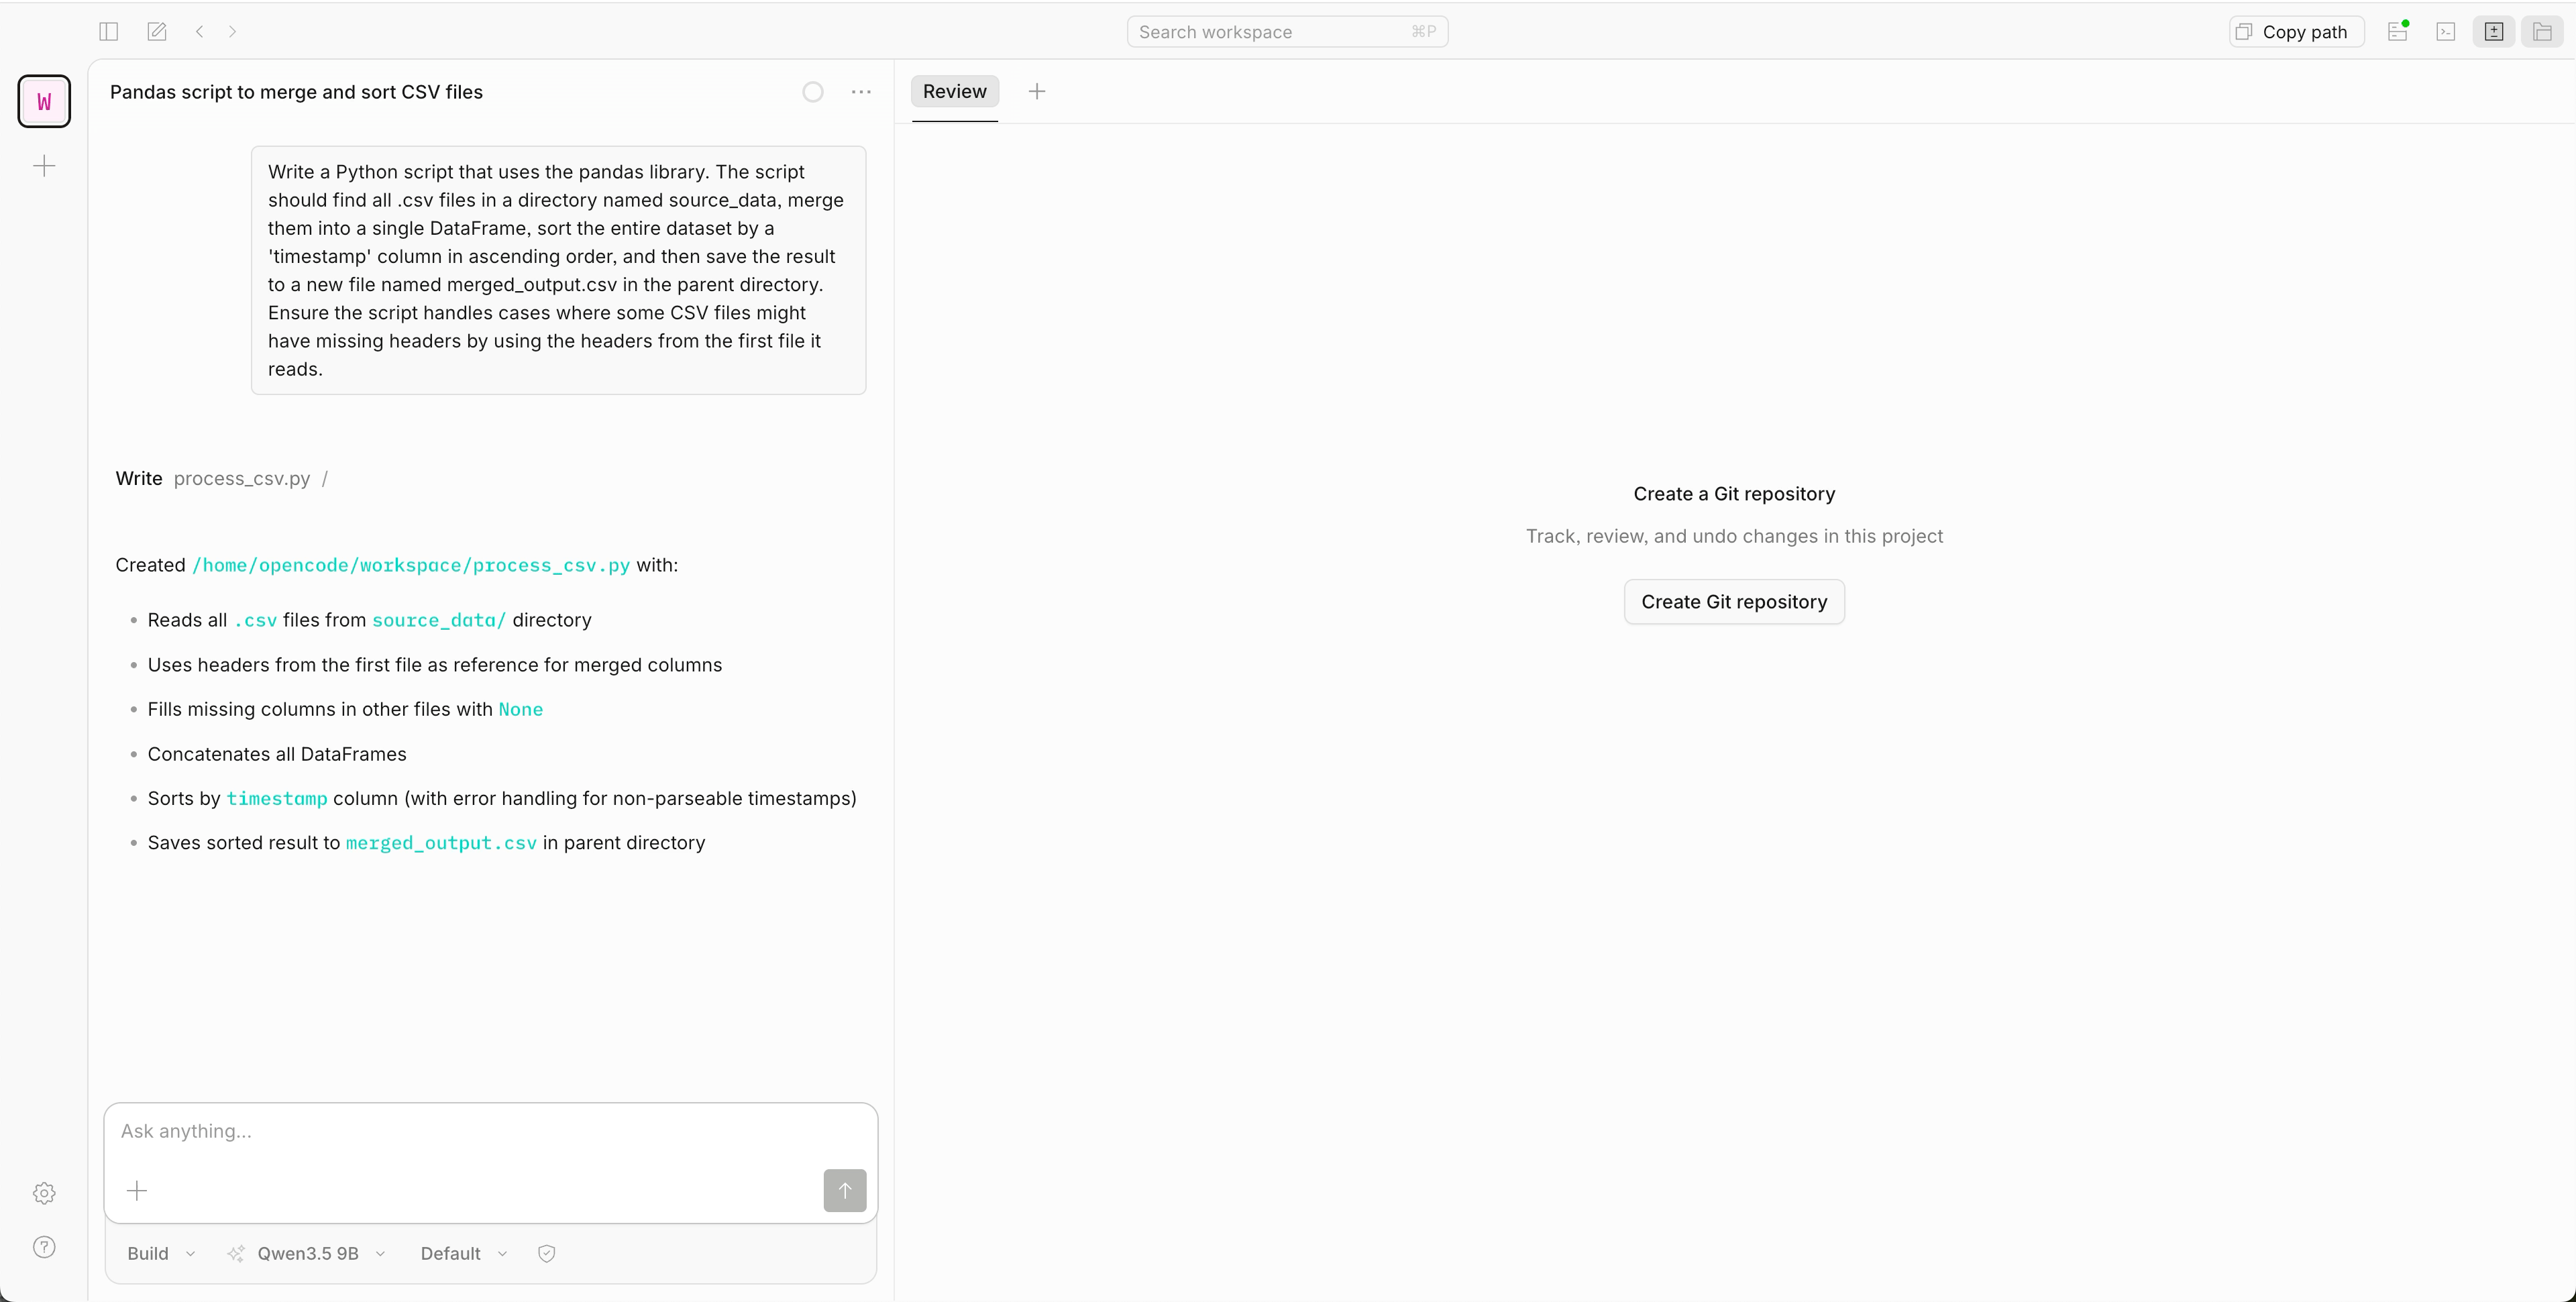
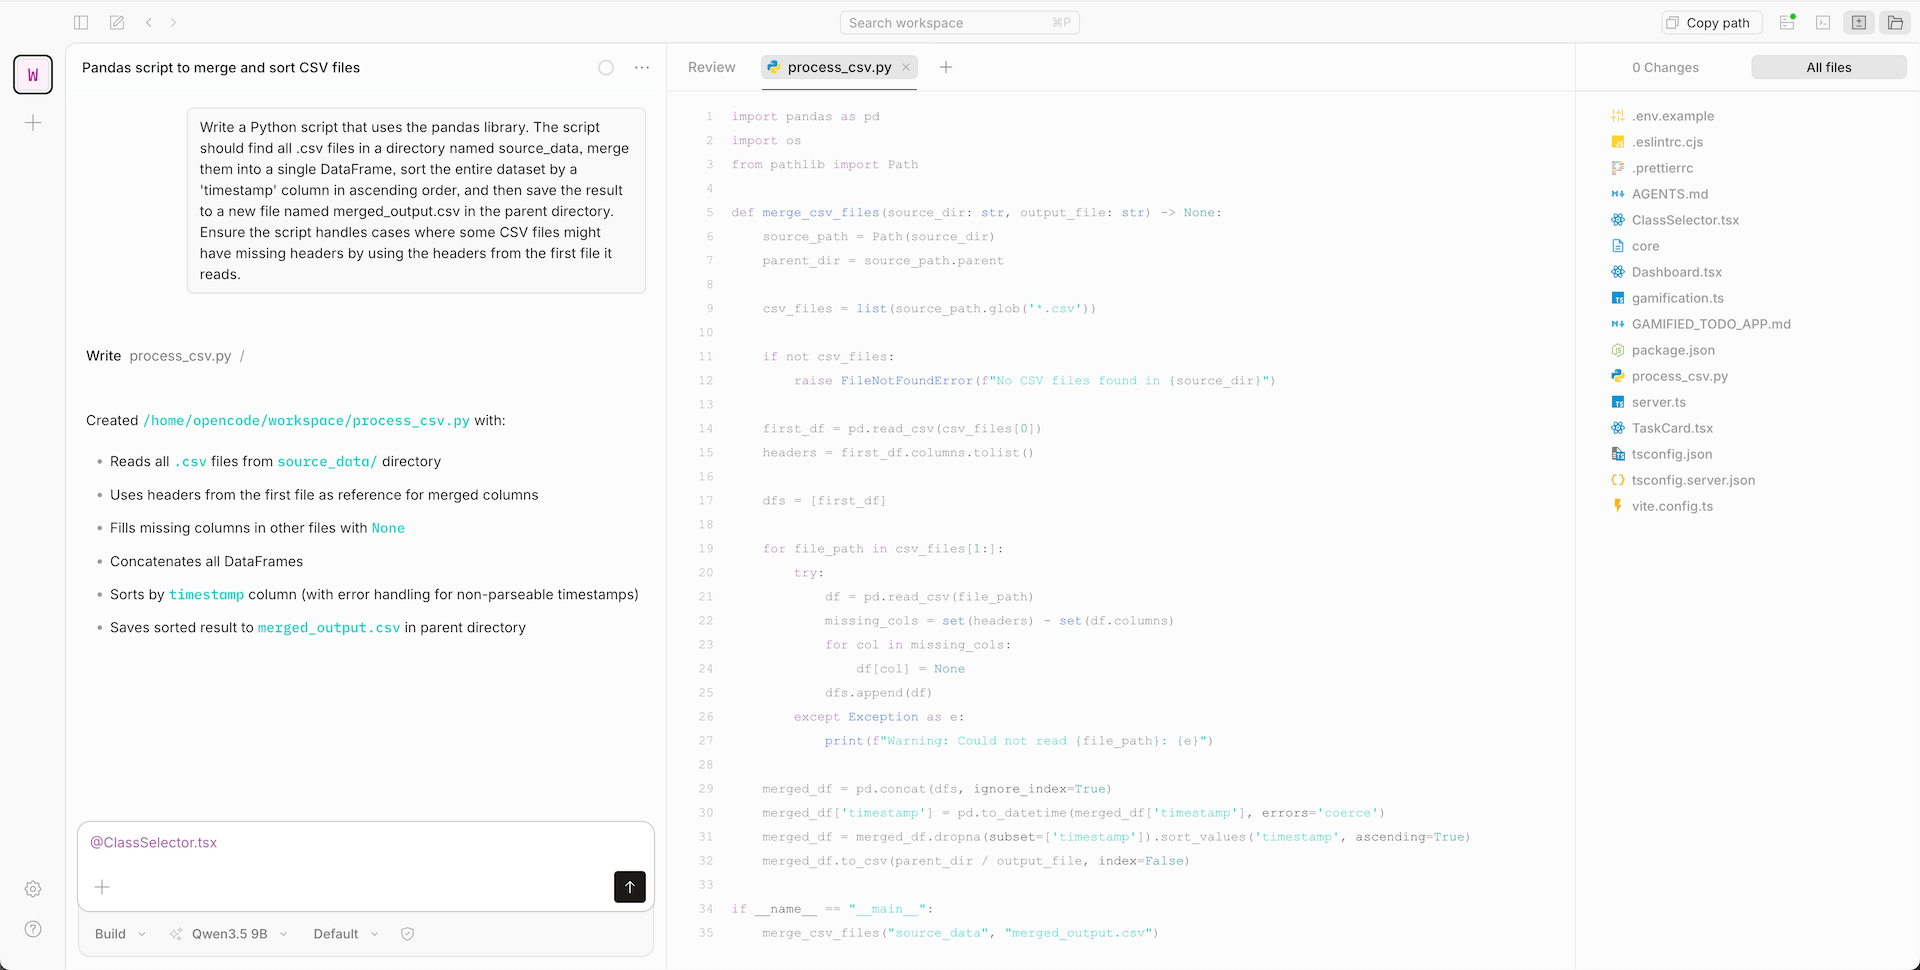
Click folder_open to open the file browser and review the generated code.
Use
@to mention a file in the chat window and ask OpenCode to edit it.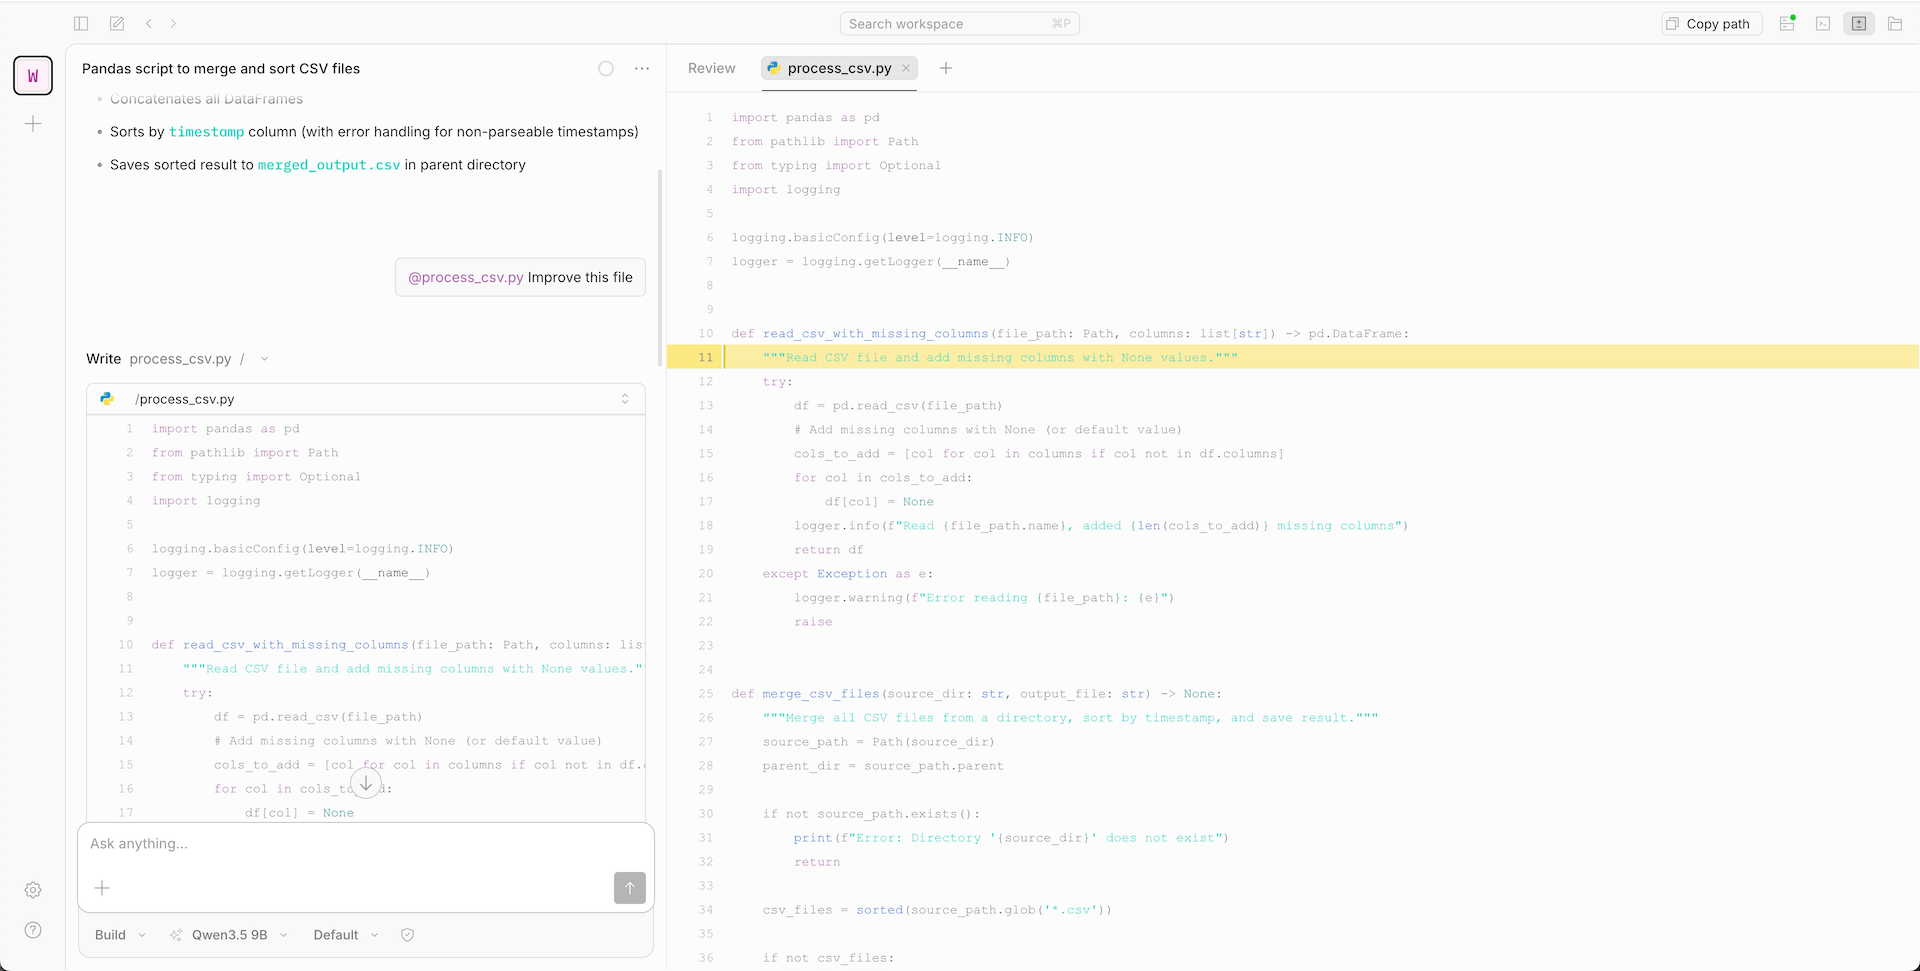
Use the TUI
OpenCode also offers a terminal-based UI (TUI). You can launch it in two ways:
- Inside the OpenCode UI: Open a terminal panel at the bottom of the OpenCode UI, similar to VS Code's integrated terminal. The agent chat stays visible above while the TUI runs in the panel.
- From OpenCode Terminal: Open OpenCode Terminal from Launchpad. It opens straight into a command line, without the chat UI.
Run OpenCode from your computer
This optional workflow installs the OpenCode CLI on your computer and connects it to Ollama on Olares through LarePass VPN.
Install OpenCode CLI
Install the CLI using the official installer:
bashcurl -fsSL https://opencode.ai/install | bash(Optional) If you encounter the
No config file found for zsherror, add the export line to your~/.zshrcfile by running:bashecho 'export PATH="$HOME/.opencode/bin:$PATH"' >> ~/.zshrcError message example:
textNo config file found for zsh. You may need to manually add to PATH: export PATH=/Users/{username}/.opencode/bin:$PATHReload your shell configuration:
bashsource ~/.zshrcVerify the installation:
bashopencode --versionThe version is displayed, such as
1.15.6.Run the following command to initialize OpenCode and create the configuration file:
bashopencodeThe config file is created at
~/.config/opencode/opencode.jsonc.
Get the Ollama service endpoint
OpenCode CLI connects to the Ollama app as a service provider.
How app endpoints work
When a client connects to another Olares app, it uses that app's endpoint as the network address. If the app exposes multiple endpoints, choose the one that matches the feature or protocol the client needs.
- Go to Olares Settings > Applications > Ollama > Entrances.
- Select Ollama API, then copy the Endpoint URL.
Configure the connection
Enable LarePass VPN on your computer to connect to Olares.
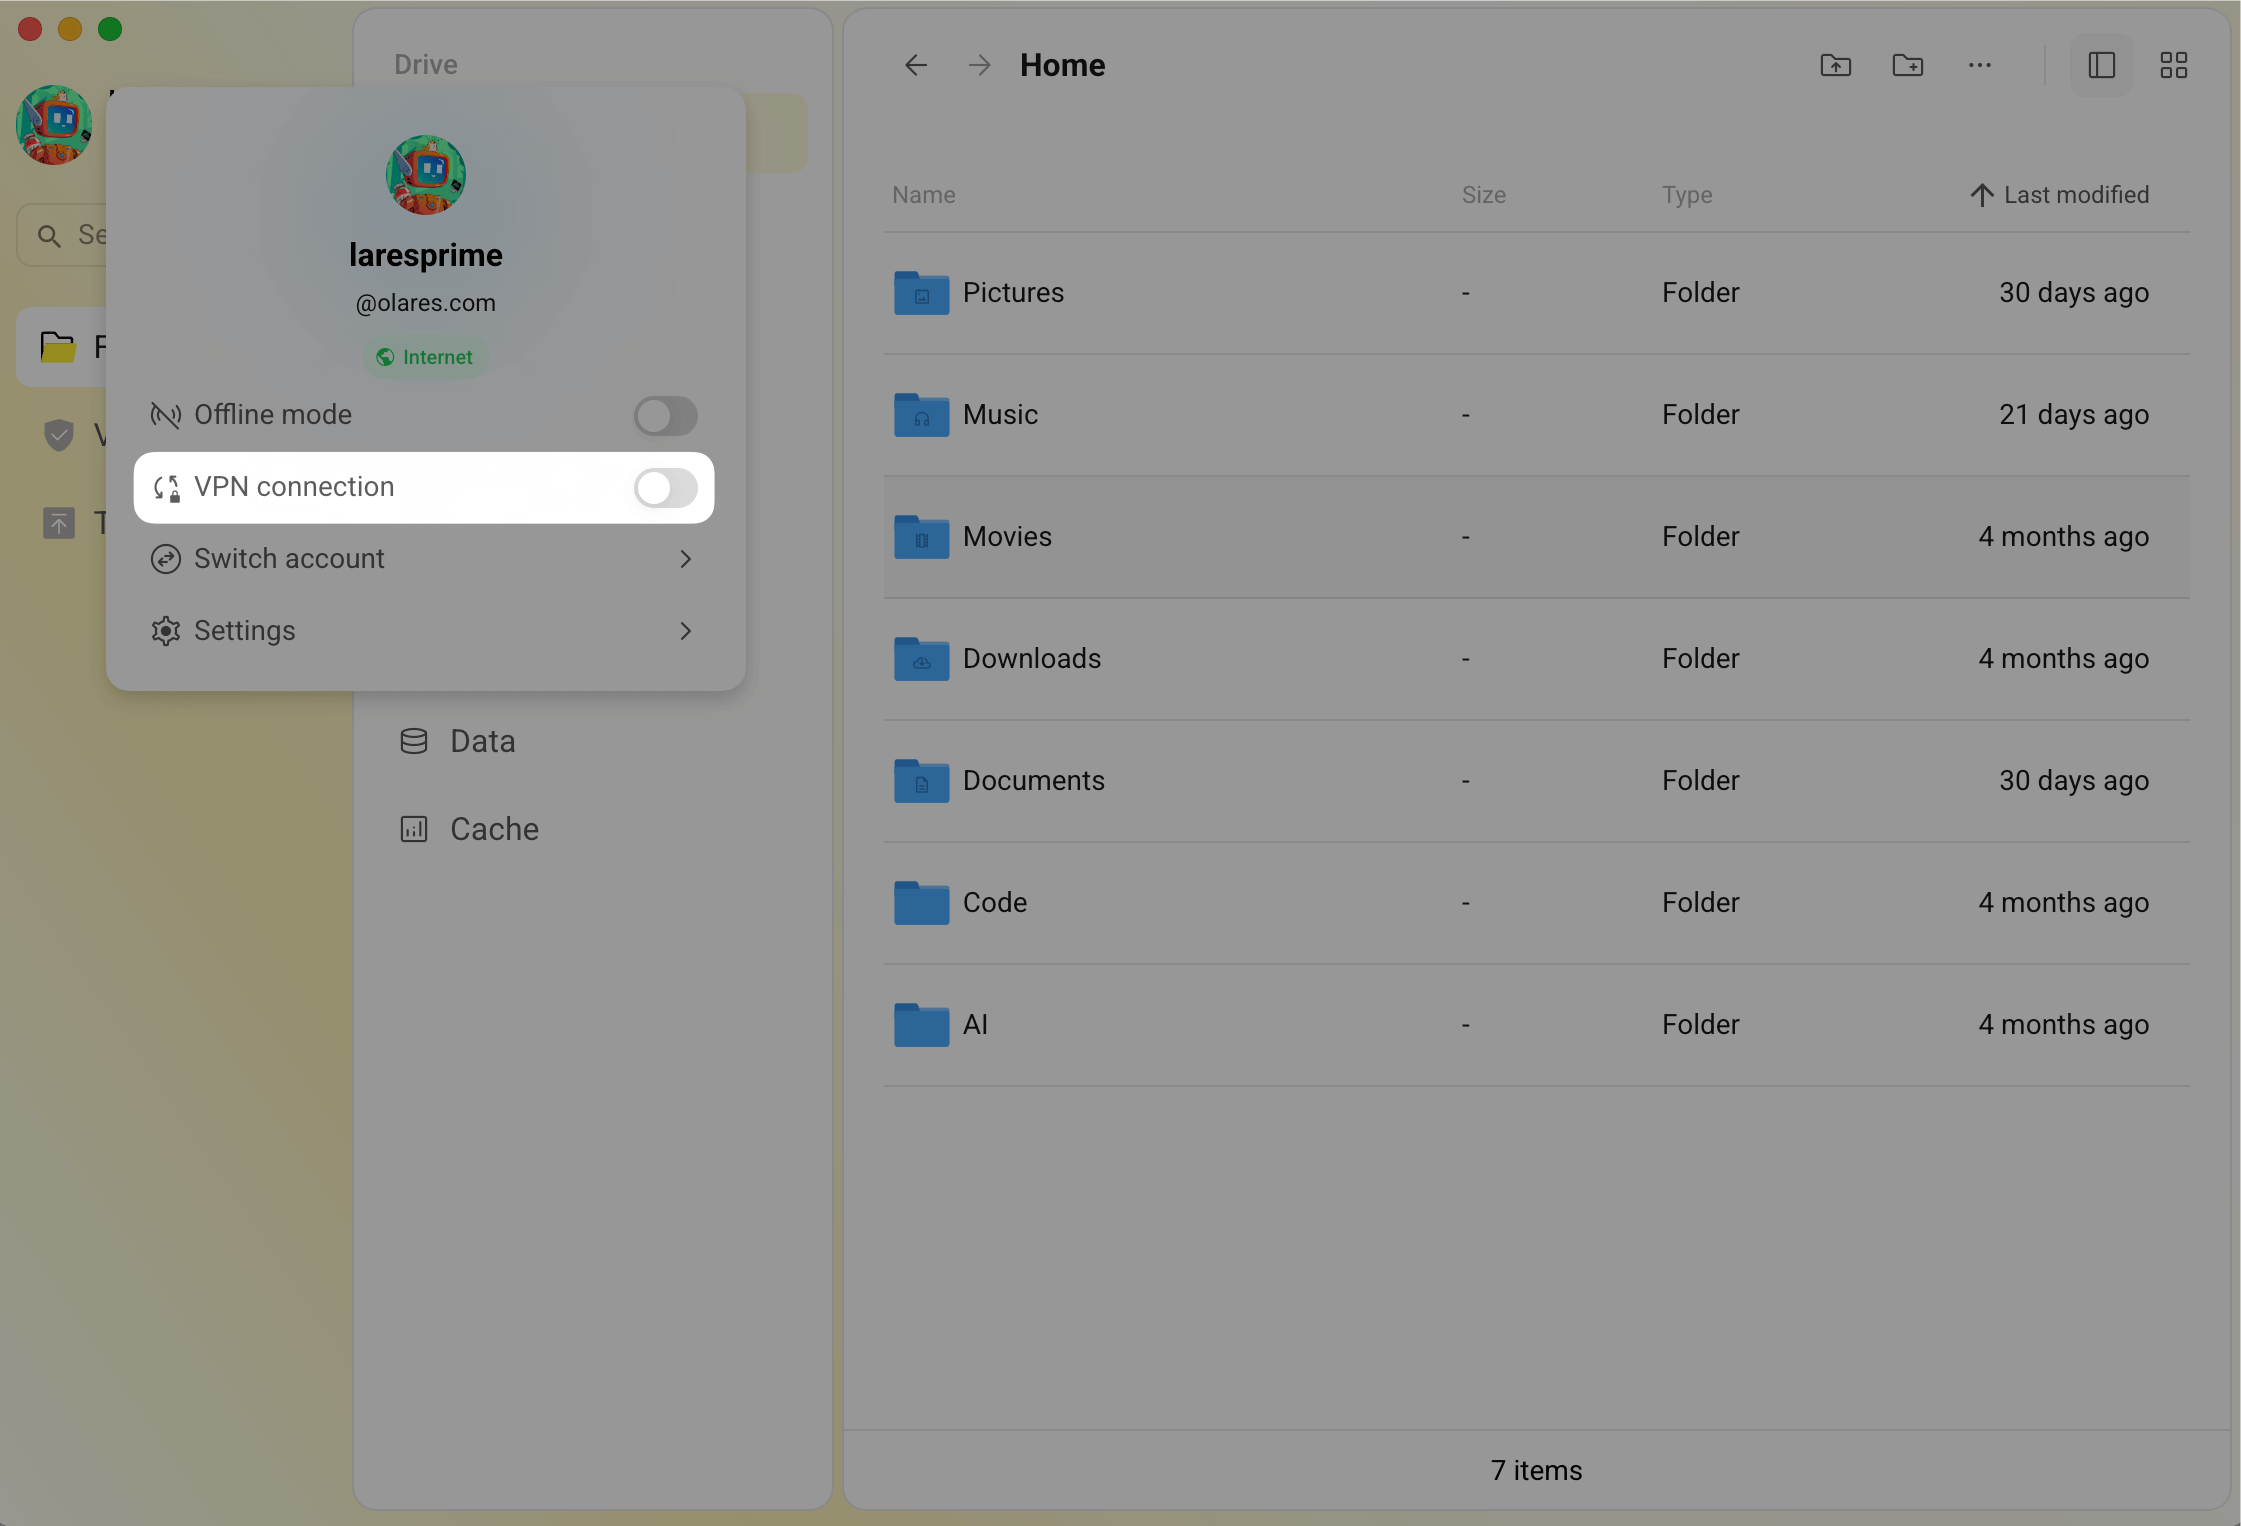
On the same local network?
If your computer and Olares are on the same LAN, you can skip VPN and use the
.localdomain instead. For details, see Use.localdomain.Open the OpenCode config file at
~/.config/opencode/opencode.jsoncin a text editor. Add a custom provider with your Ollama endpoint and model. The general format is:json{ "$schema": "https://opencode.ai/config.json", "provider": { "<provider-id>": { "npm": "@ai-sdk/openai-compatible", "name": "<display-name>", "options": { "baseURL": "<your-endpoint>/v1" }, "models": { "<model-id>": { "name": "<model-display-name>" } } } } }For example, to connect to Ollama on Olares with the Qwen3.6 27B model:
json{ "$schema": "https://opencode.ai/config.json", "provider": { "olares-ollama": { "name": "olares-ollama", "npm": "@ai-sdk/openai-compatible", "models": { "qwen3.6:27b": { "name": "Qwen3.6 27B" } }, "options": { "baseURL": "<Ollama-Endpoint>/v1" } } } }Windows WSL users
If you installed OpenCode in WSL, the config file path is
~/.local/share/opencode/config.json.Save the file.
Launch OpenCode TUI
In your terminal, run
opencodeto launch the TUI: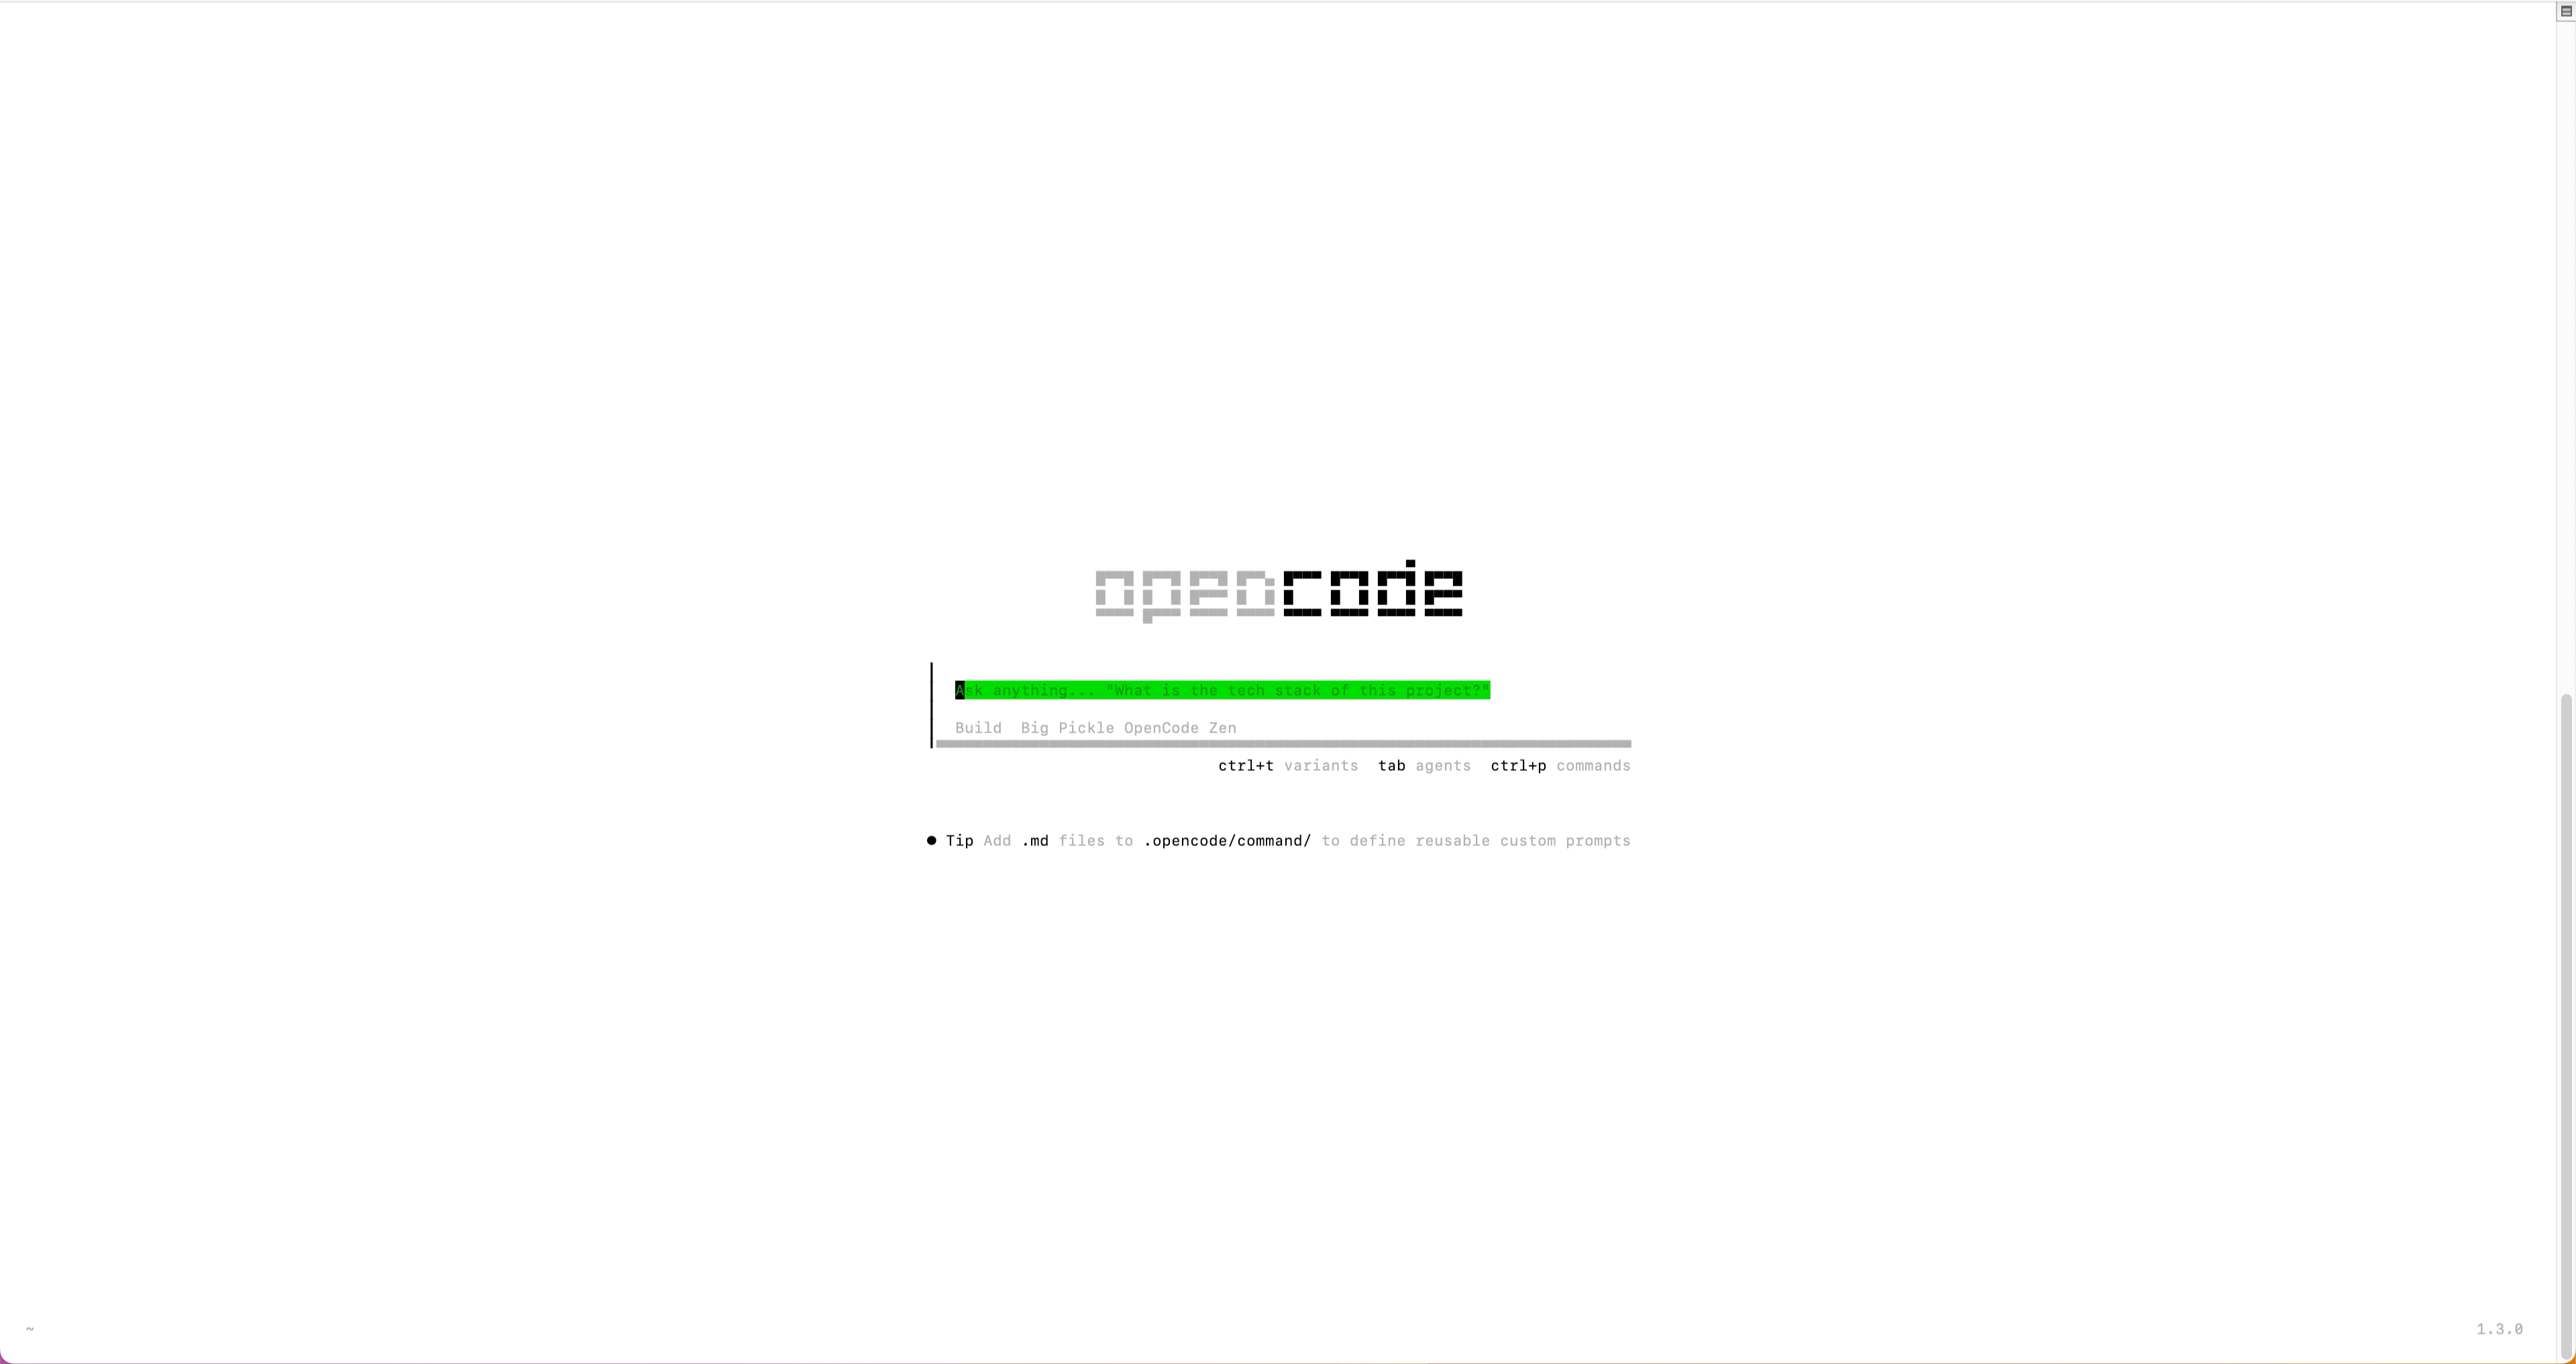
Use the
/modelscommand to switch to Qwen3.6 27B.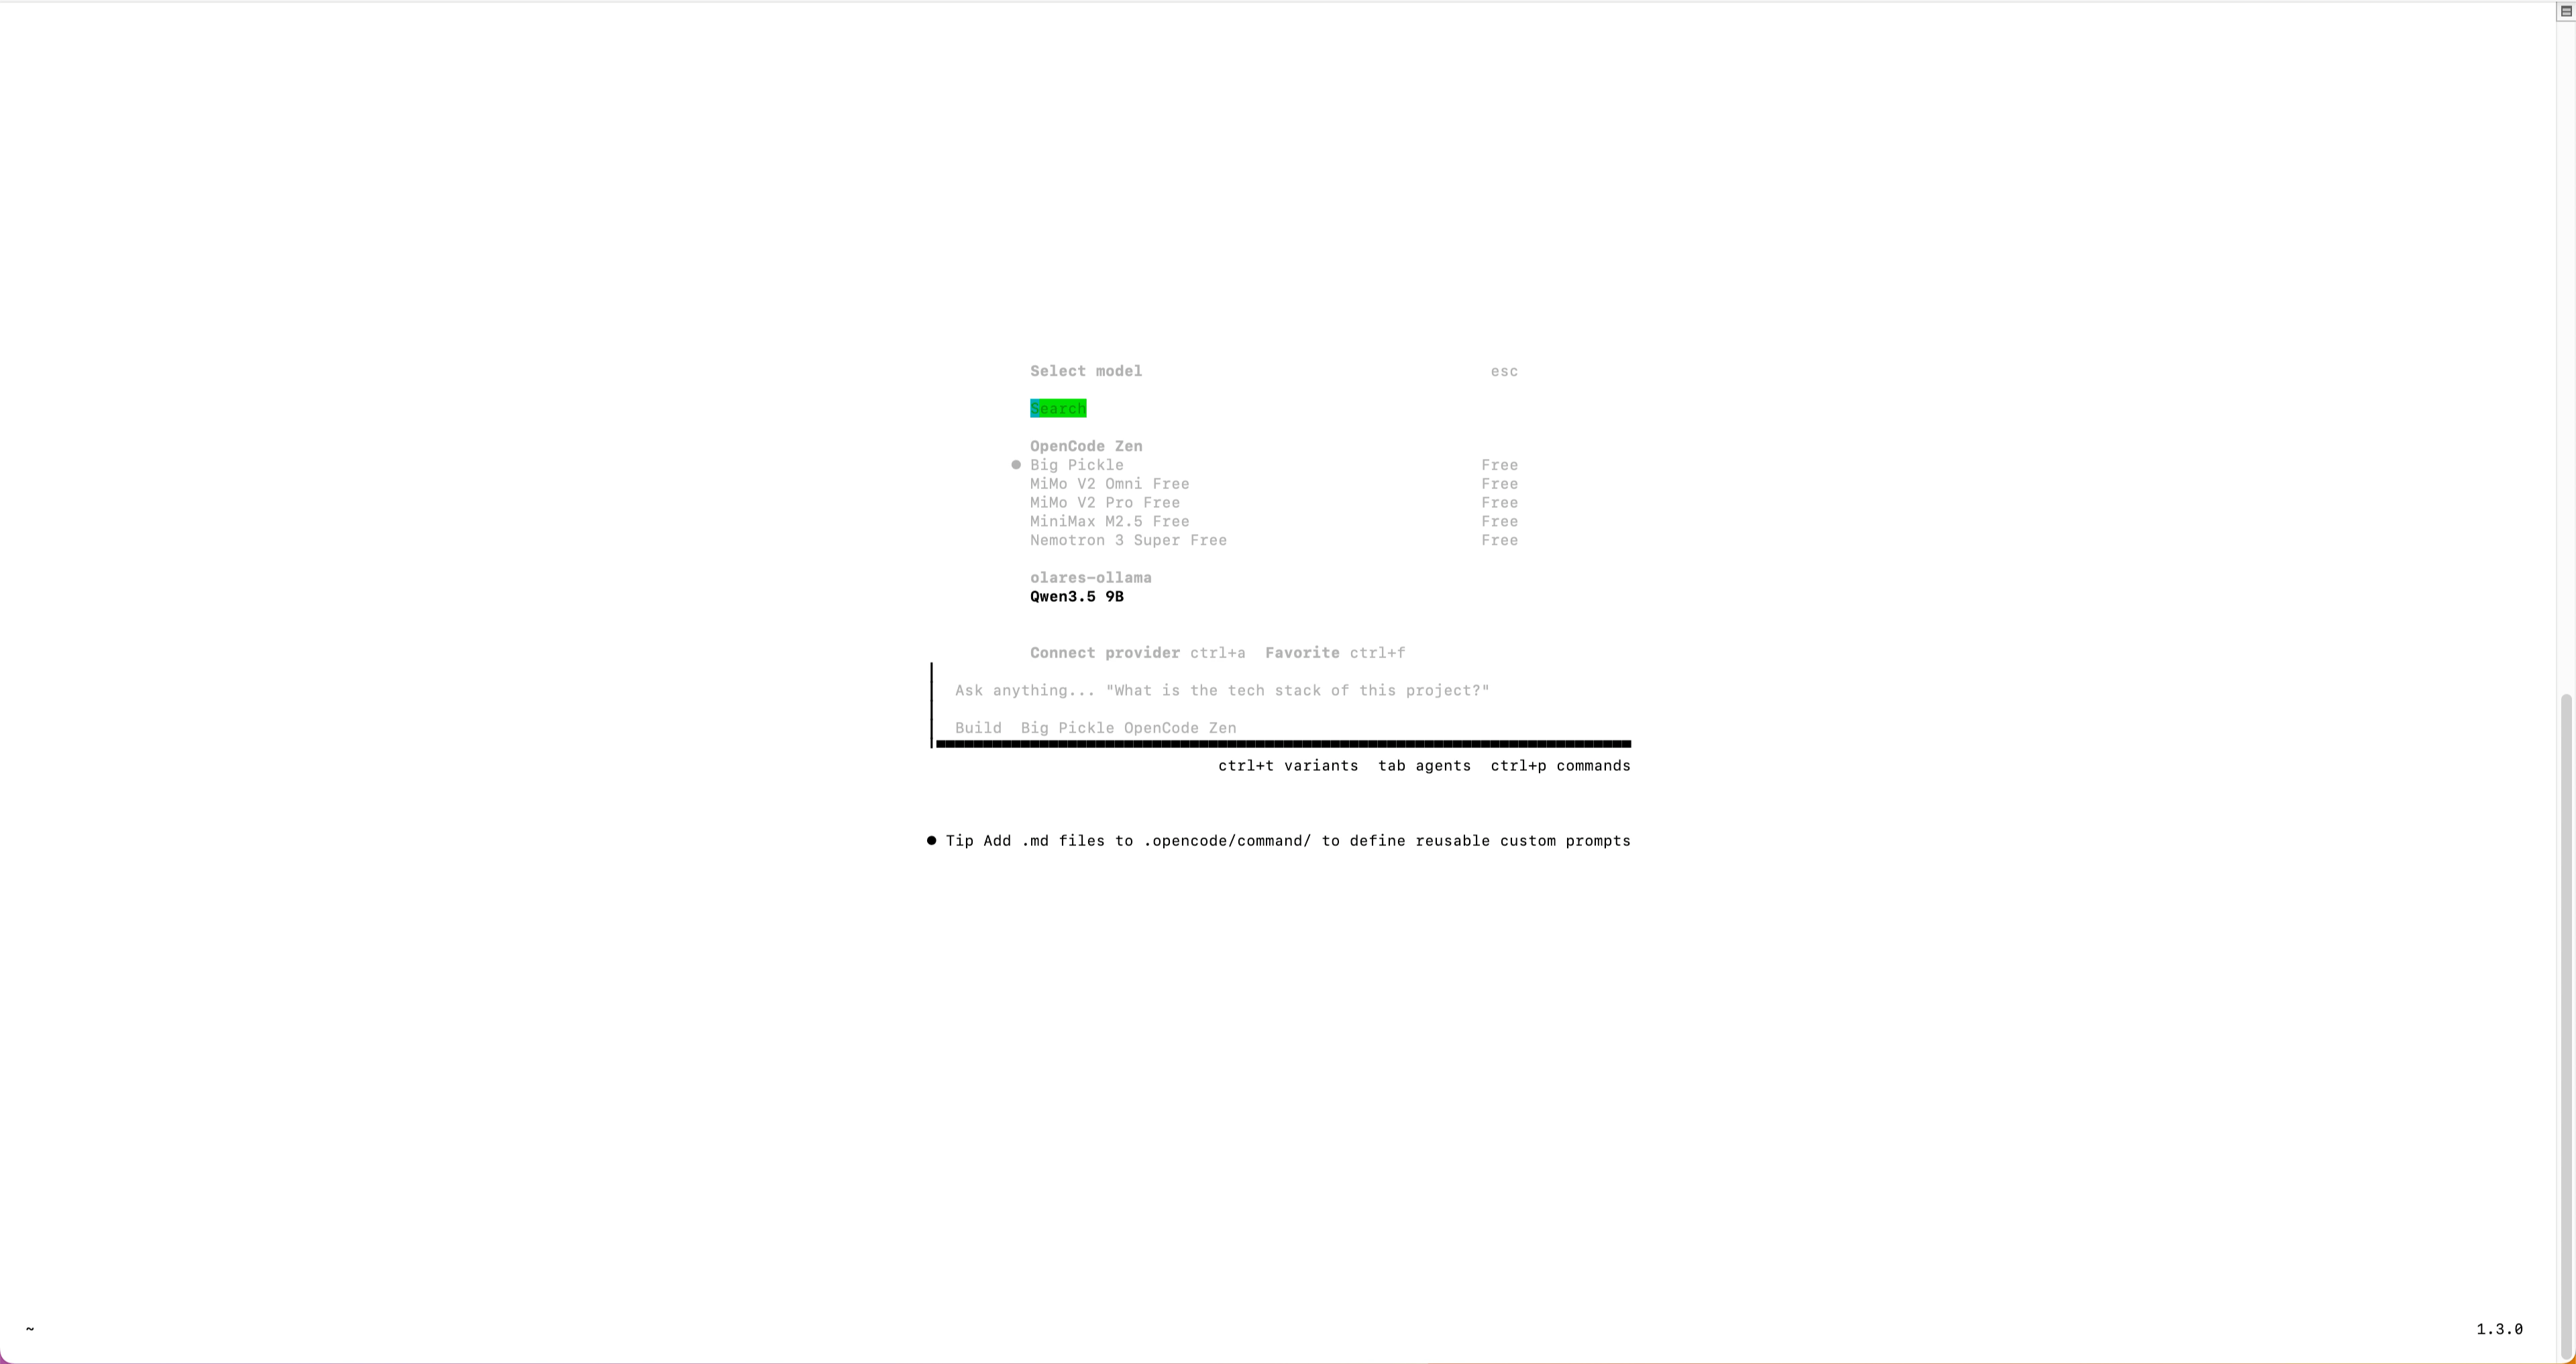
Start chatting with your self-hosted models.
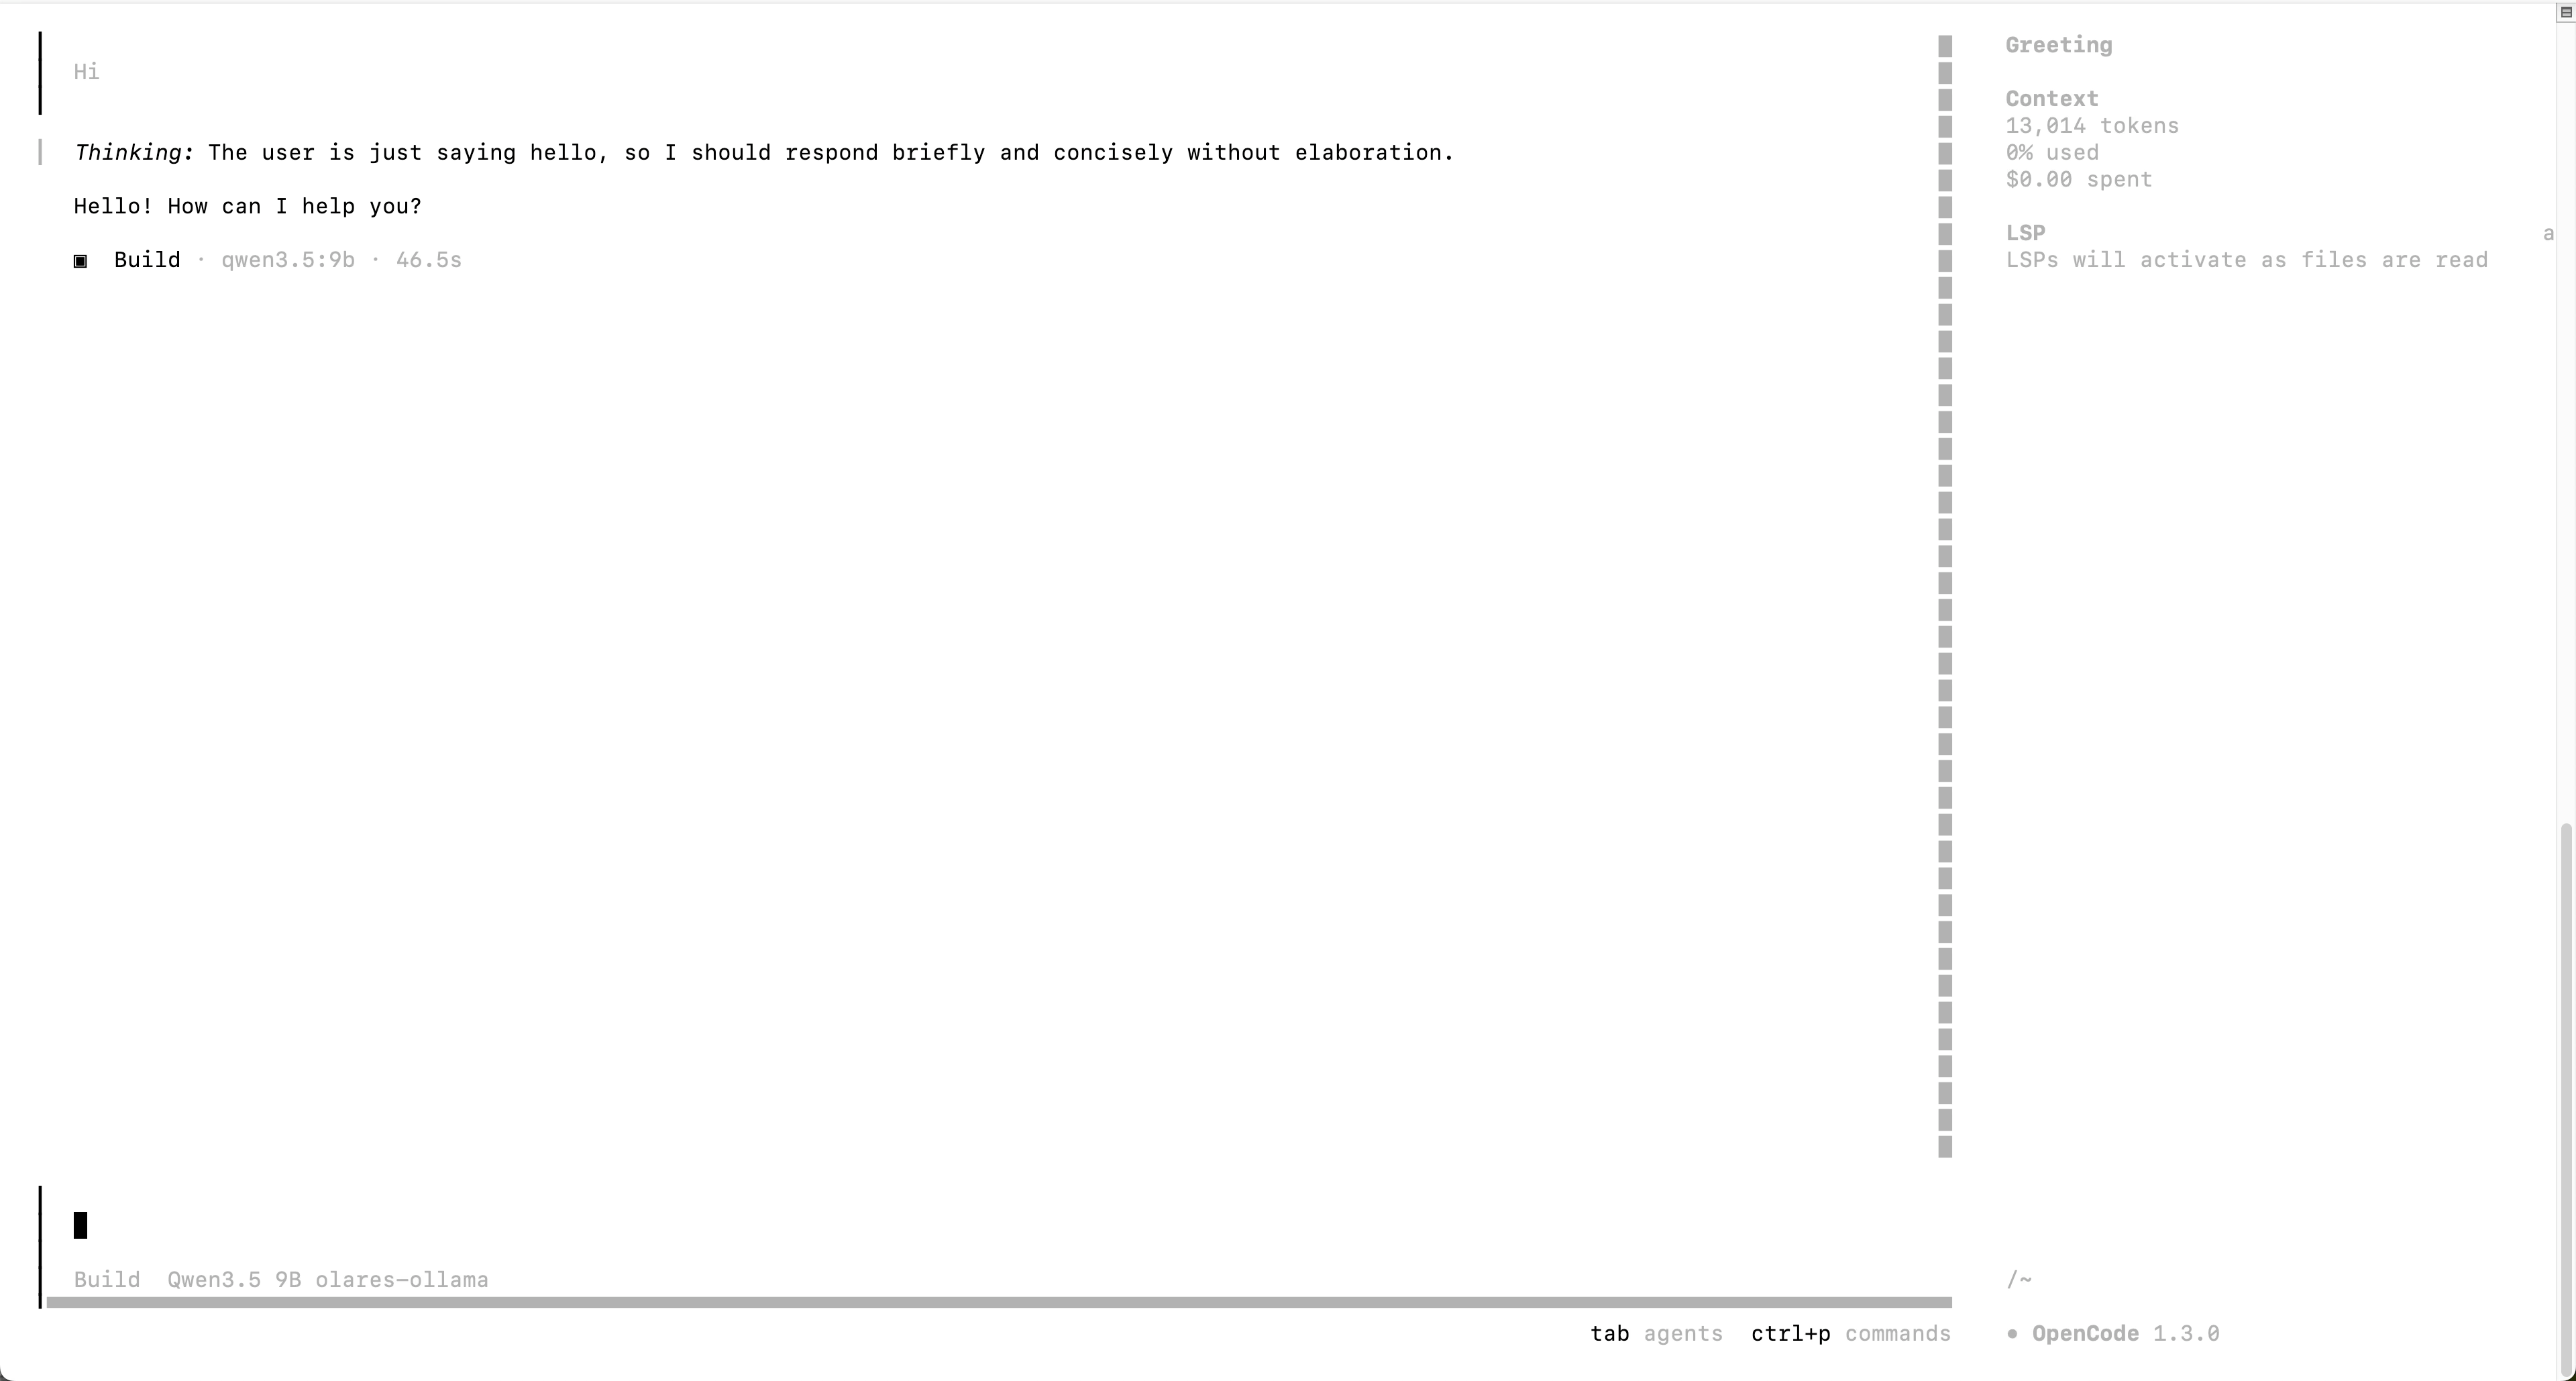
First connection
The first connection might take longer to establish.
Use OpenCode in VS Code
To work with your codebase directly, open a terminal in VS Code and run opencode from your project directory.
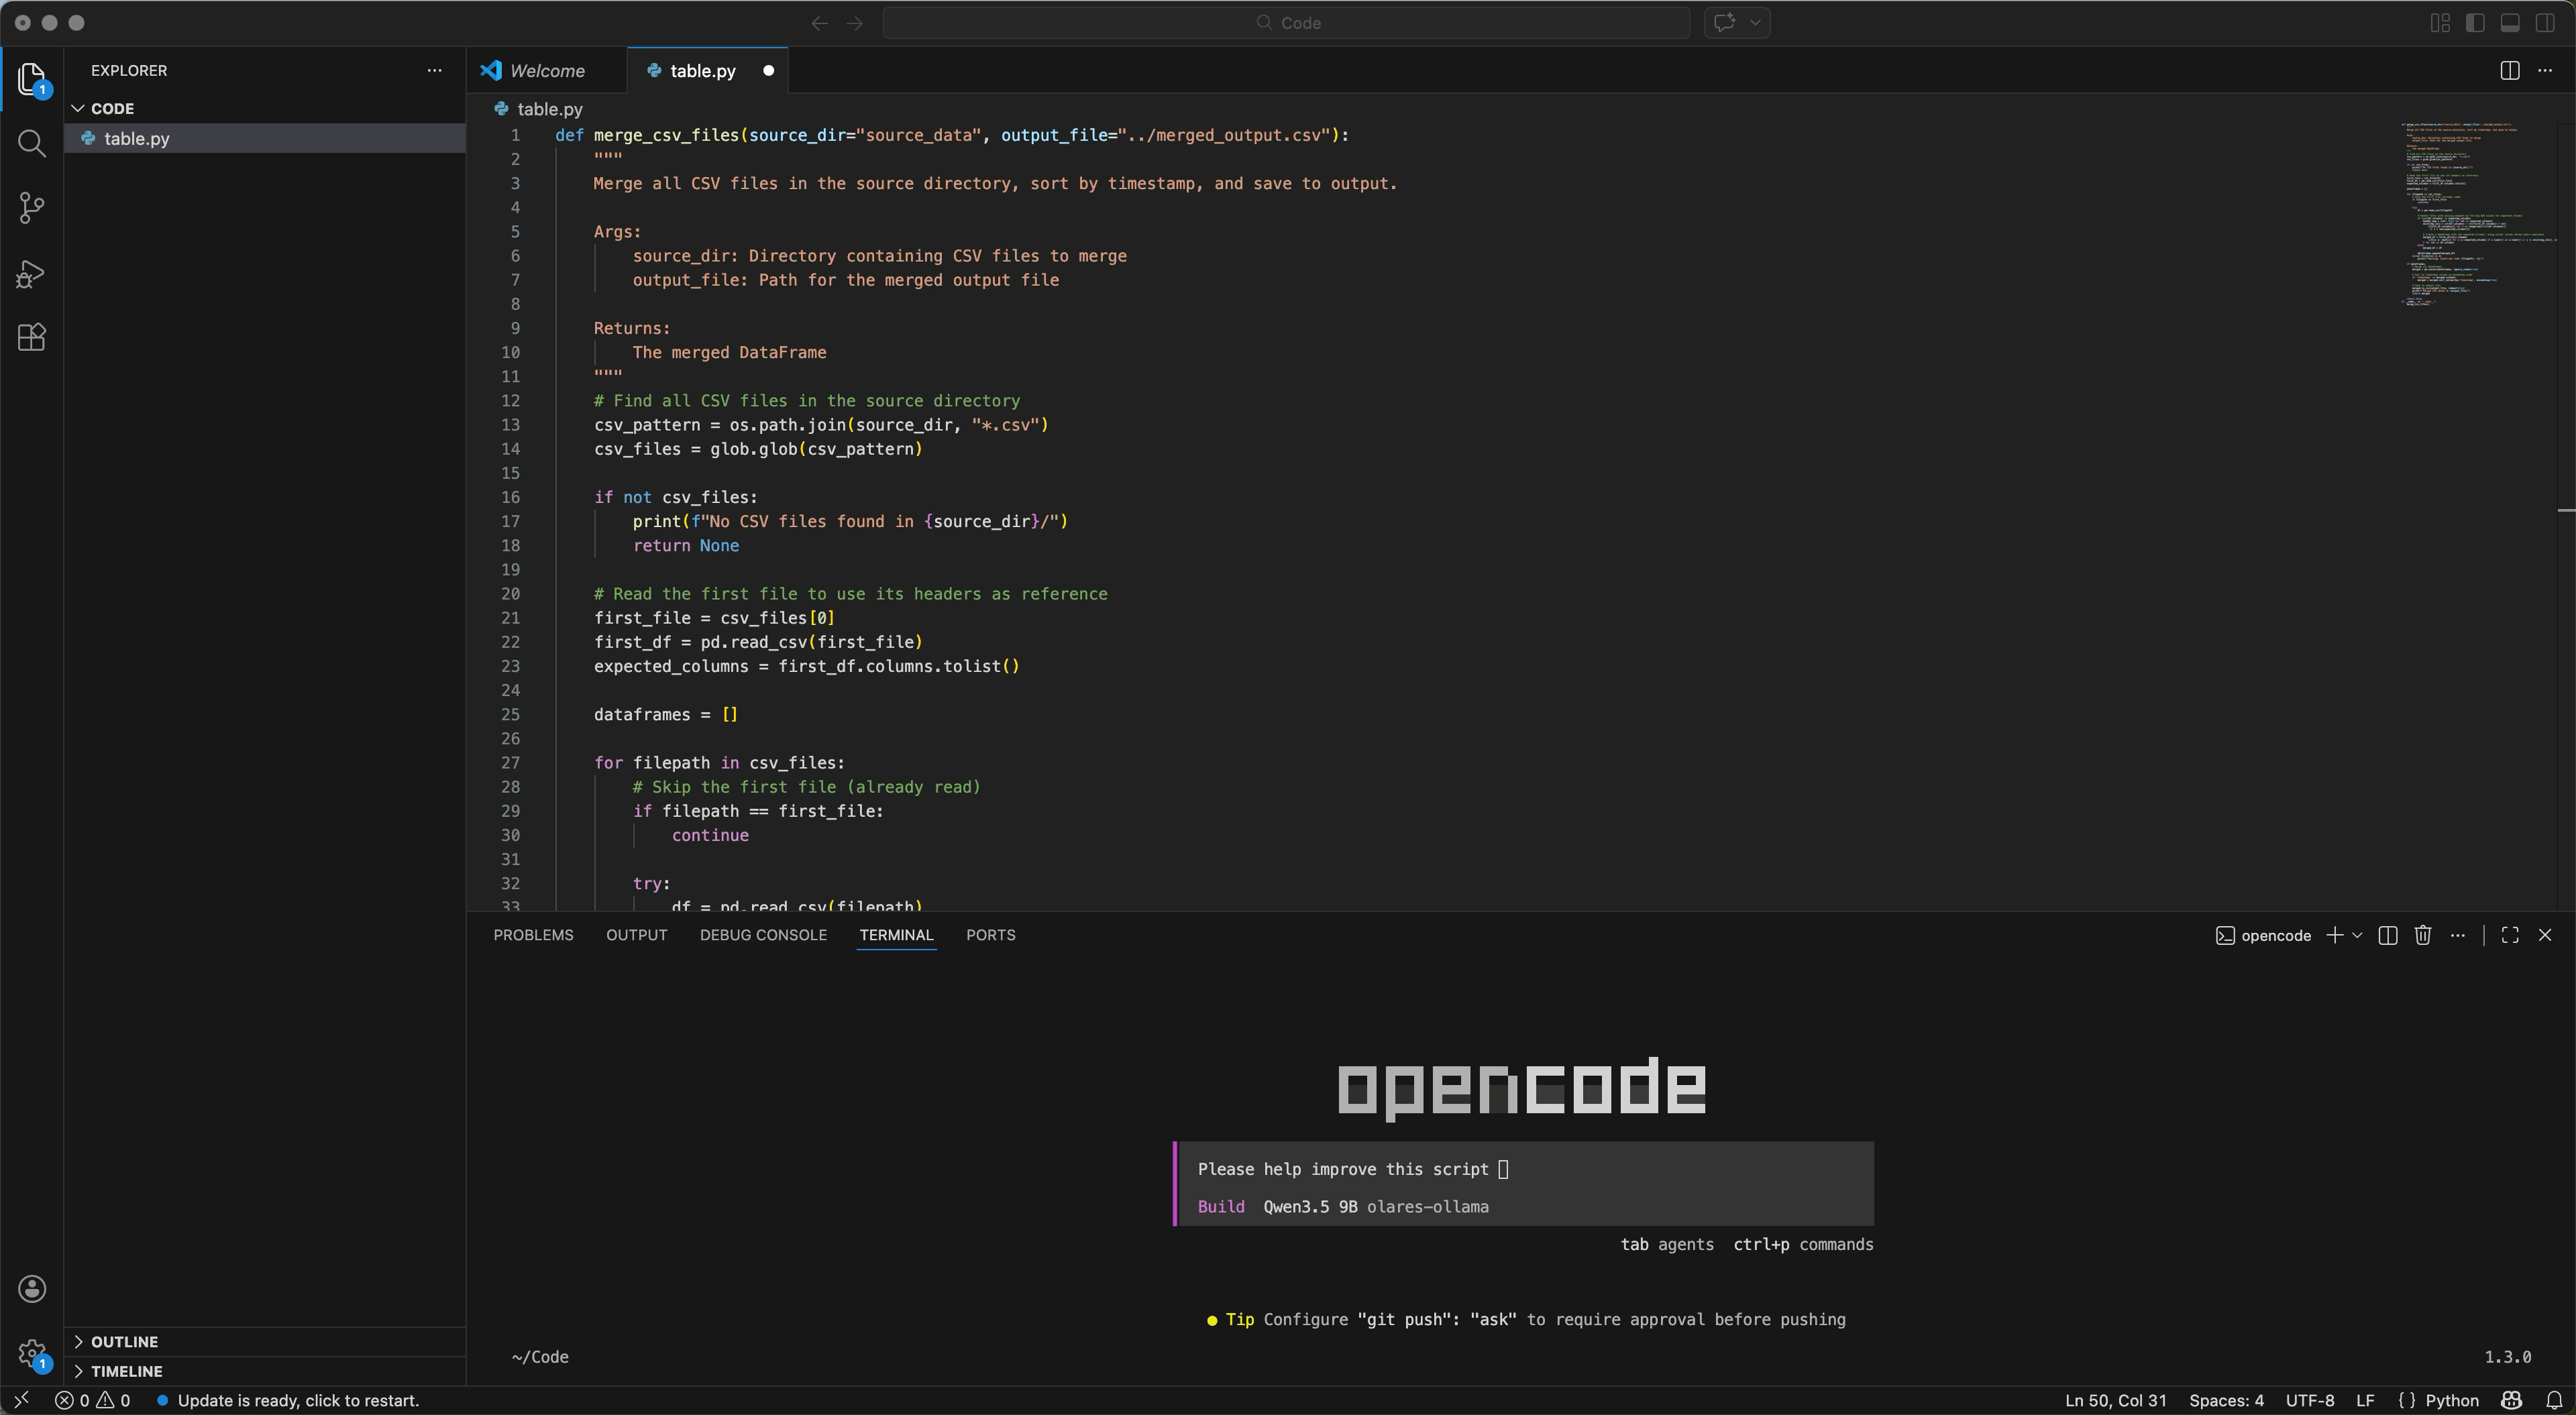
Edit the config file
OpenCode stores its configuration in a JSON file. You can edit this file directly to manage providers, models, and tools.
Open Files and navigate to
Application/Data/opencode/.config/opencode/.Right-click
opencode.jsoncand select Rename.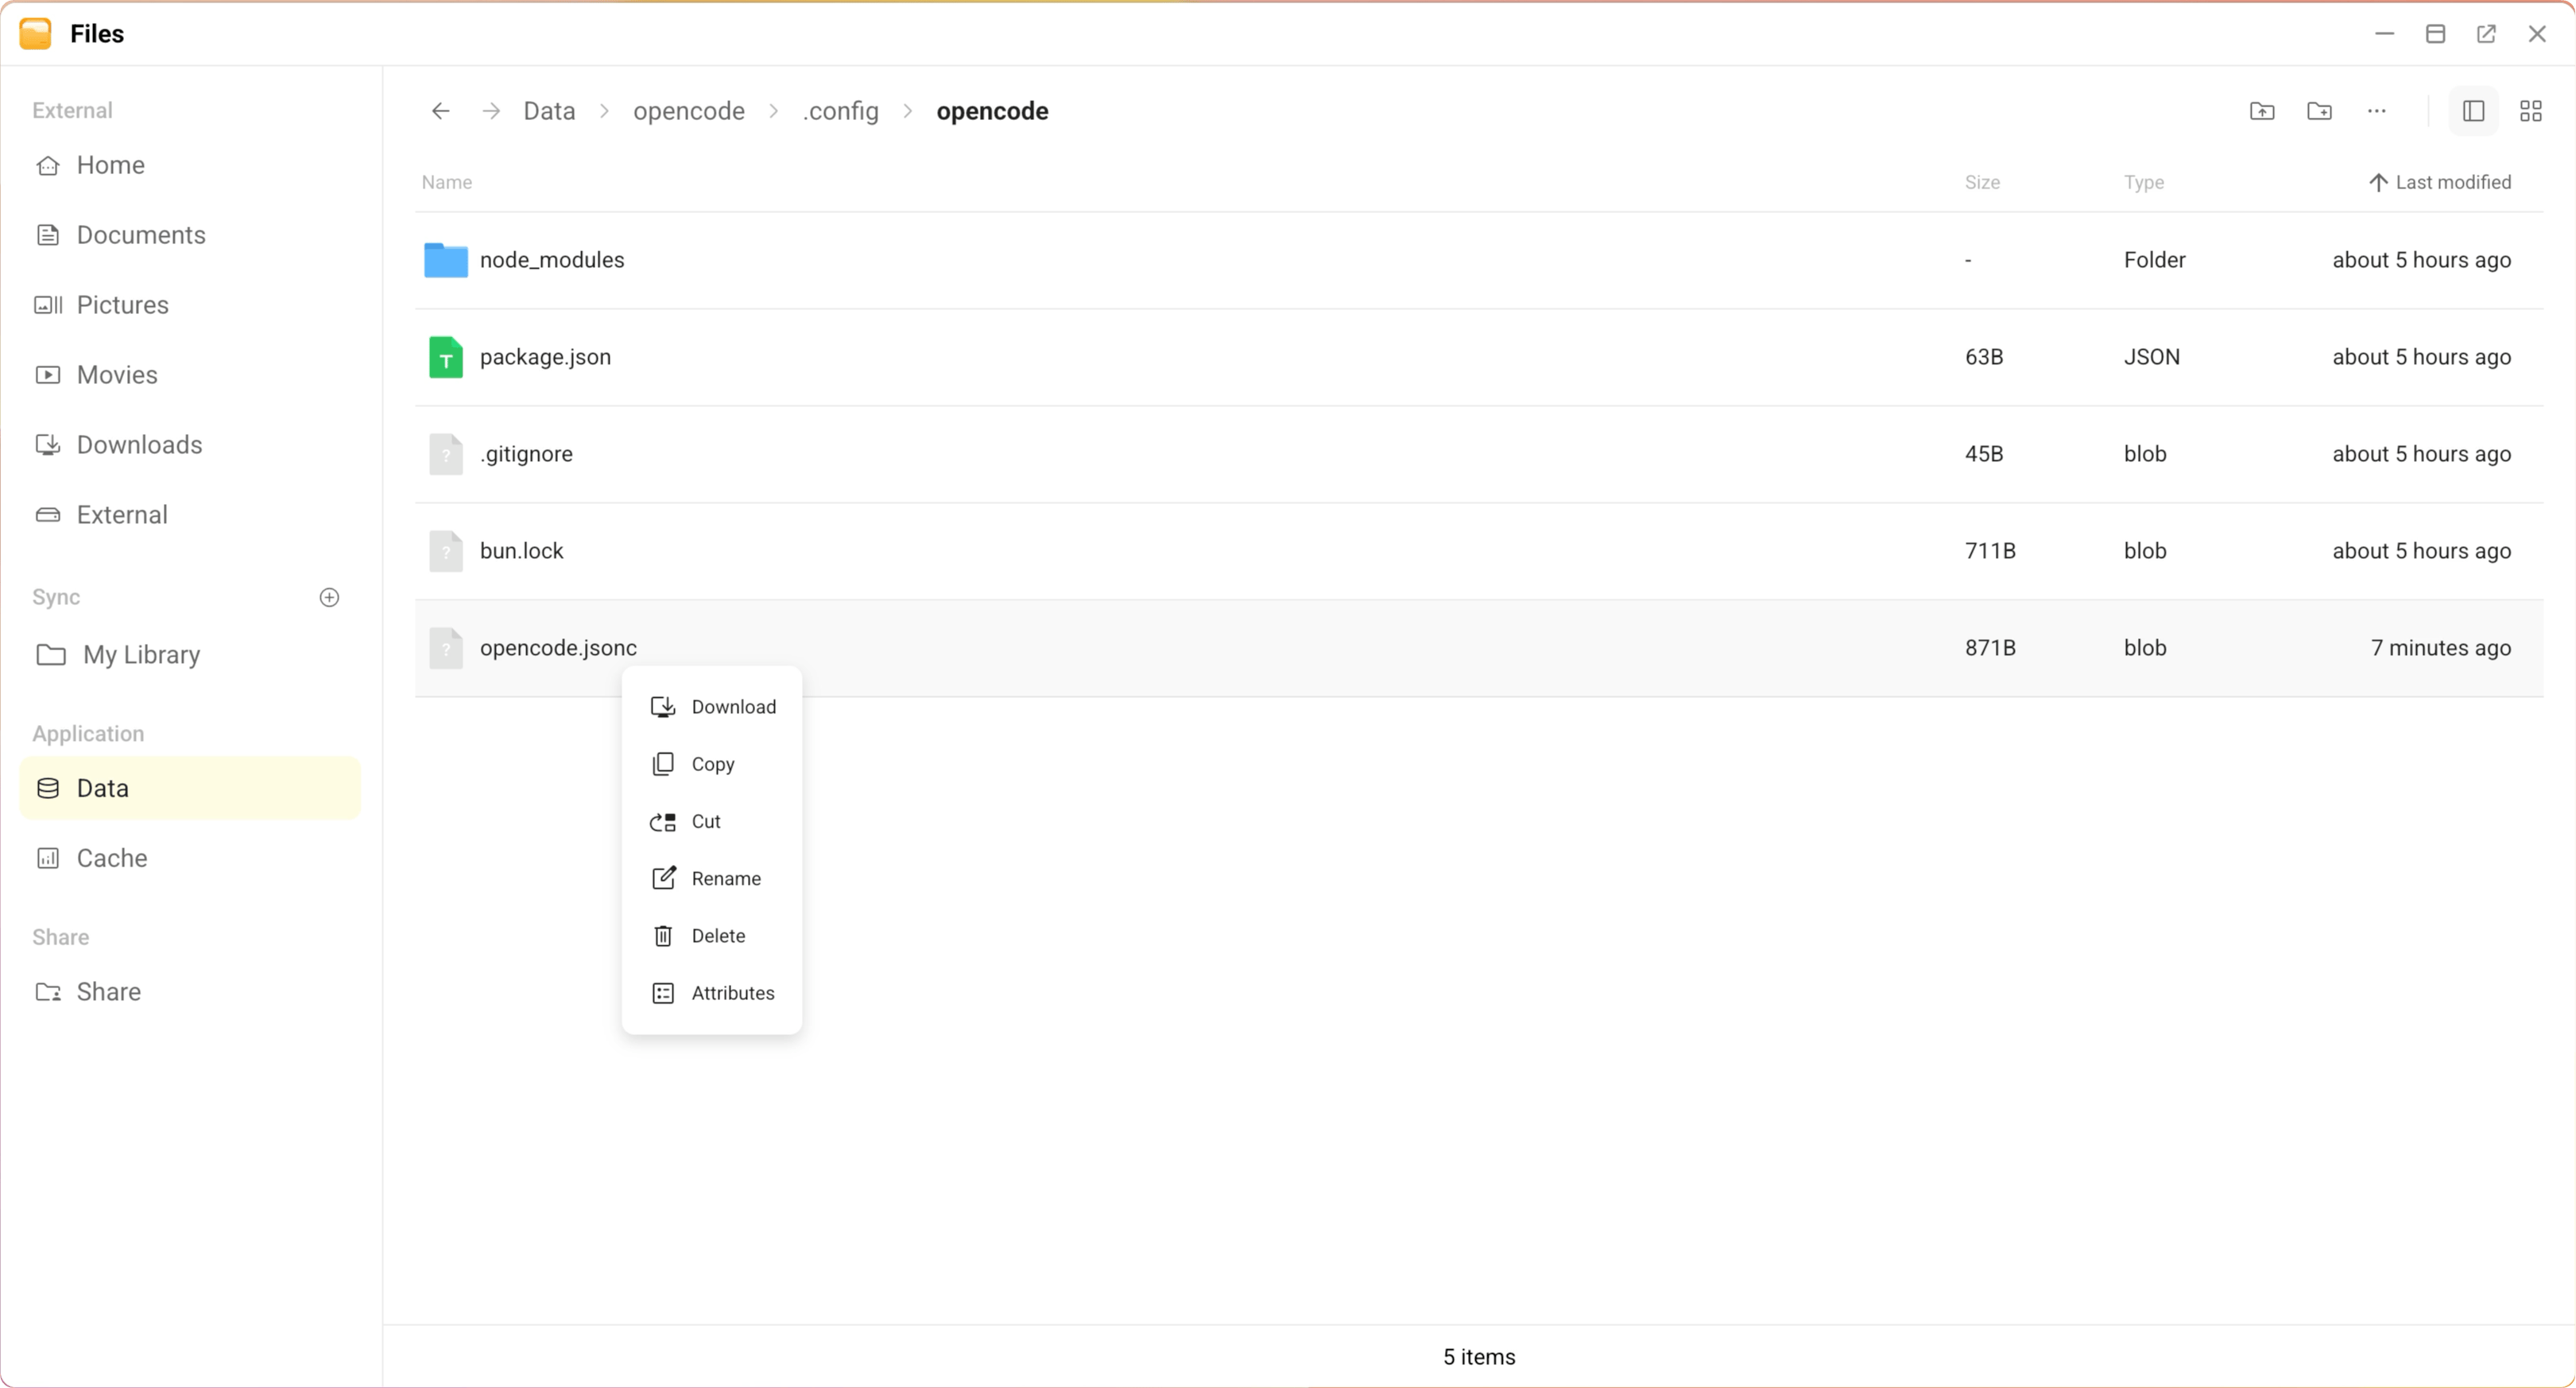
Rename the file to
config.jsonso you can edit it directly in Files. OpenCode recognizes both extensions.Open
config.jsonand click edit_square to edit it.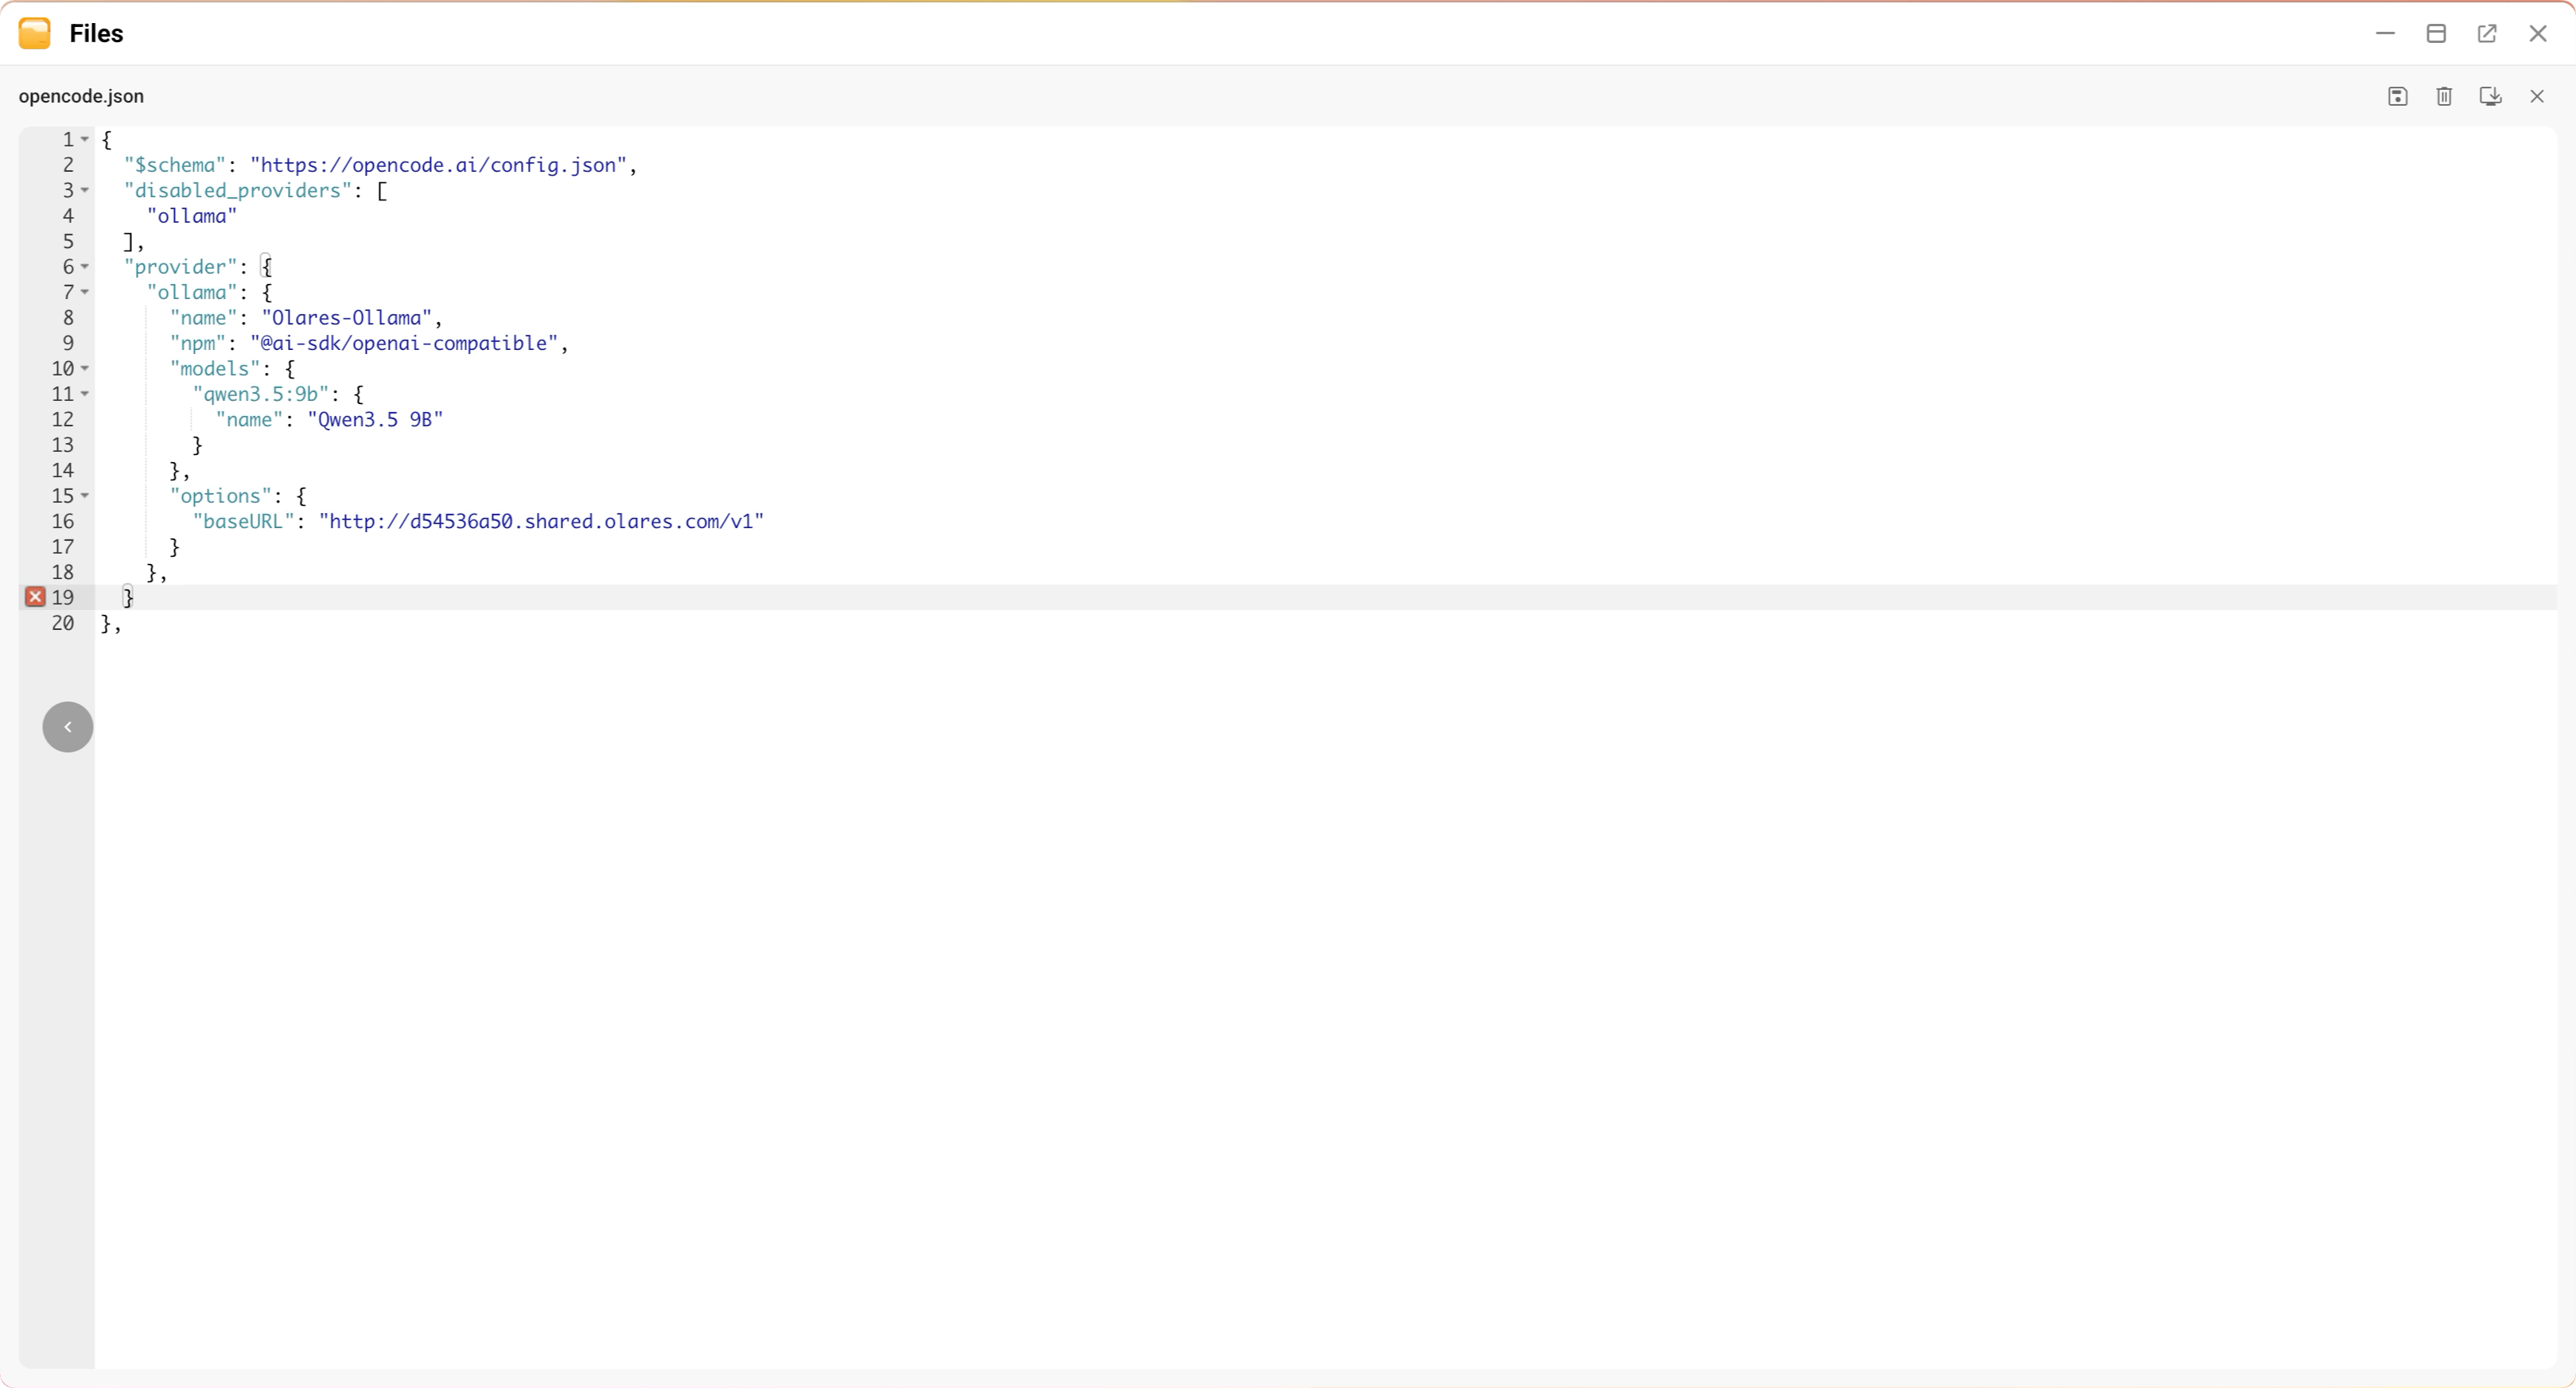
Save the changes.
Restart OpenCode from Settings > Applications to apply the changes.
Learn more
- Manage packages: Install system-level and language-specific packages.
- Skills and plugins: Add capabilities through skills and plugins.
- Orchestrate multi-agent workflows with oh-my-openagent: Enable OMO to run multi-agent collaboration in OpenCode.
- Common issues: Solutions for known problems.
- Connect AI coding assistants to up-to-date docs with Context7: Register Context7 as a remote MCP server in OpenCode.
- OpenCode official documentation