Build a research notebook with Open Notebook
Open Notebook is an AI-powered research workspace for collecting source materials, generating structured insights, chatting with your knowledge base, and turning research into editable notes or podcast episodes.
This guide walks you through your first complete Open Notebook workflow using an AI research project as an example. You can apply the same workflow to papers, courses, meeting notes, market research, product research, or other topics.
Learning objectives
In this guide, you will learn how to:
- Set up the AI models Open Notebook needs for chat, search, and podcast generation.
- Create a notebook and add research sources.
- Generate, review, and chat with AI insights.
- Save useful responses as editable notes.
- Generate a podcast episode from selected sources and notes.
Prerequisites
Before you begin, you need:
An Olares device with sufficient disk space and memory.
The following models:
Model type Model How to get it Chat Qwen3.6-27B (llama.cpp) Install from Market Embedding EmbeddingGemma Install from Market TTS speaches-ai/Kokoro-82M-v1.0-ONNXInstall Speaches from Market STT Systran/faster-whisper-smallInstall Speaches from Market. Optional if you will not process audio or video sources
Optional: Use a different model
You can use a different model size or provider instead of the one listed above:
- Install a different model app from Market.
- Create a model instance from Engine Base apps to bring your own model.
If your AI agent app has the Olares CLI and Agent Skills installed, ask it to deploy the model and skip the manual setup. For example:
Deploy qwen3.5:9b on my Olares using the Ollama Engine Base.How Open Notebook works
Open Notebook organizes your work around four main content types:
| Content type | Description |
|---|---|
| Notebook | A workspace for one research topic or project. |
| Source | Original material added to Open Notebook, such as a file, web page, audio, video, or pasted text. |
| Insight | AI-generated output created from a source by a transformation, such as a summary or key takeaways. |
| Note | Editable knowledge saved inside a notebook. A note can be written manually, saved from an AI response, or created from an insight. |
In this guide, you will create a sample AI research notebook, add sources, generate insights, chat with the materials, save notes, and create a podcast.
Install Open Notebook
Open Market and search for "Open Notebook".
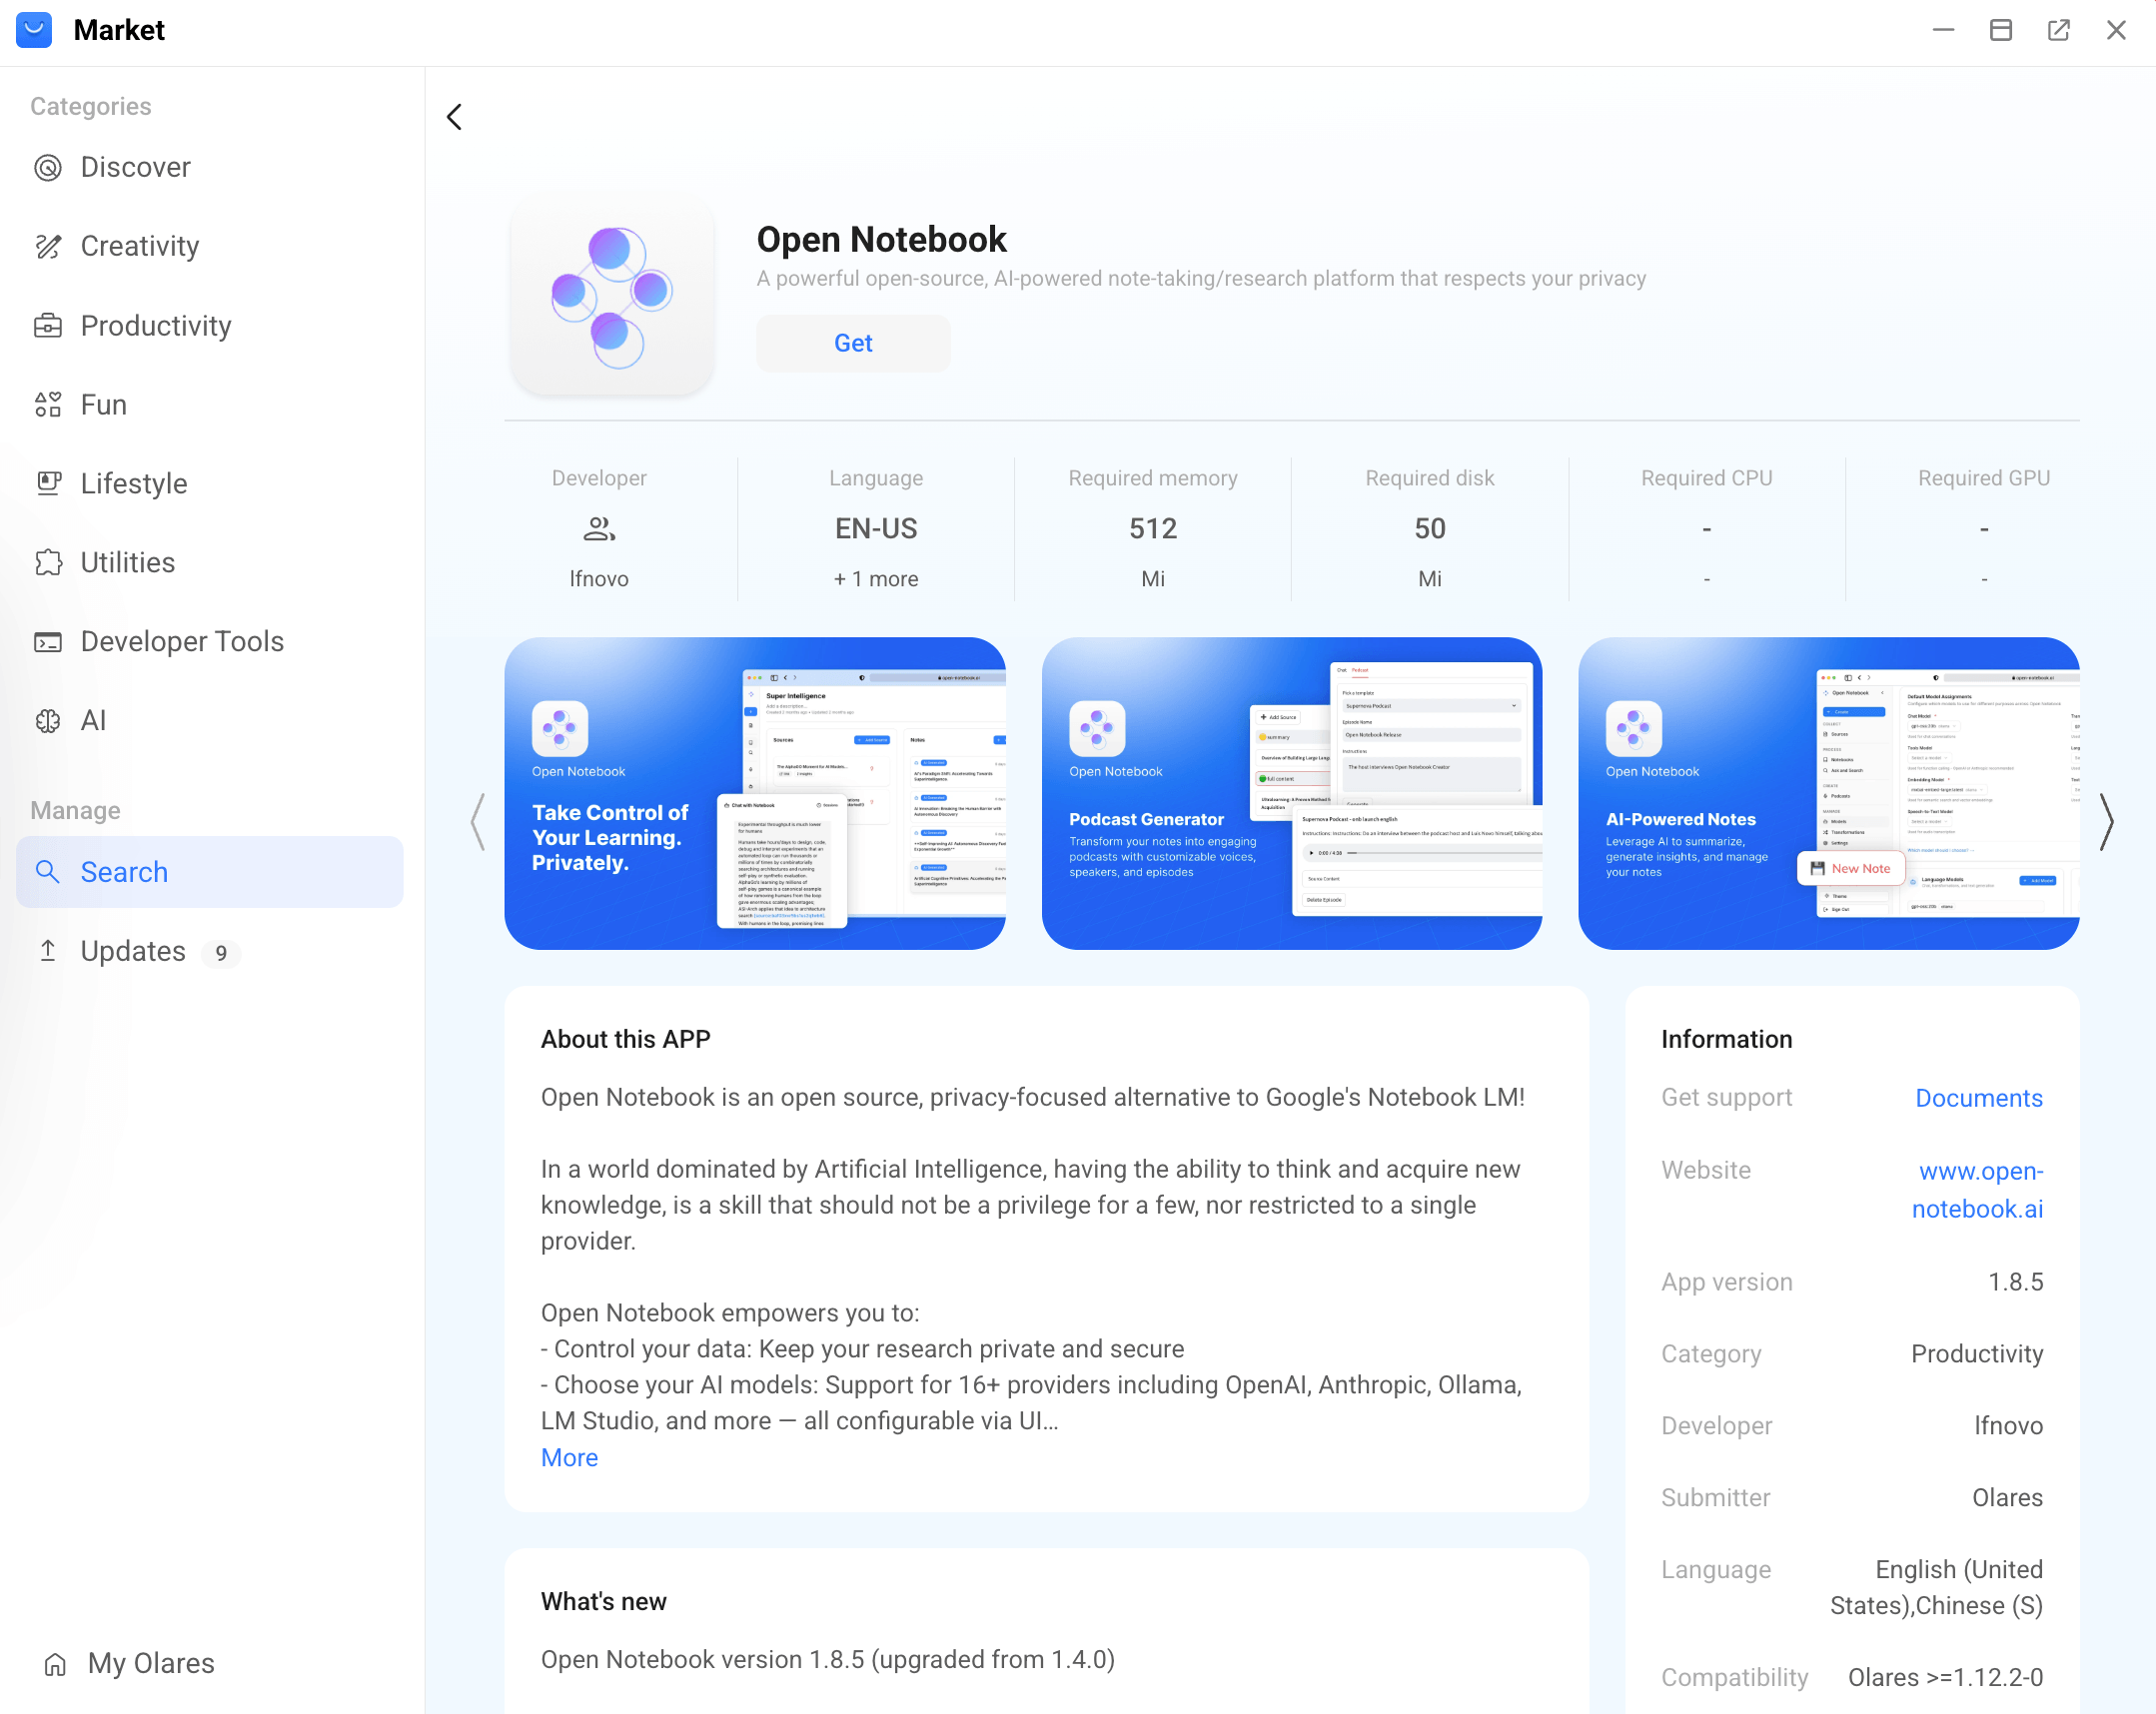
Click Get, then Install, and wait for installation to complete.
After installation, configure the required providers and models before starting your first research notebook.
Set up AI models
Open Notebook uses AI models for summaries, chat, retrieval, and podcast generation. You only need to set them up once.
Get model connection details
Standalone models
How model connections work
A standalone model on Olares runs as a separate service from the client app. To connect them, the client needs the exact Model name and a Base URL that matches the API format it expects.
You can get both values from the model's console. For more details, see Connect AI apps.
For Qwen3.6-27B (llama.cpp) and EmbeddingGemma:
Open the model app from Launchpad. Its Model Console opens automatically.
Wait until Model shows READY and Engine shows RUNNING.
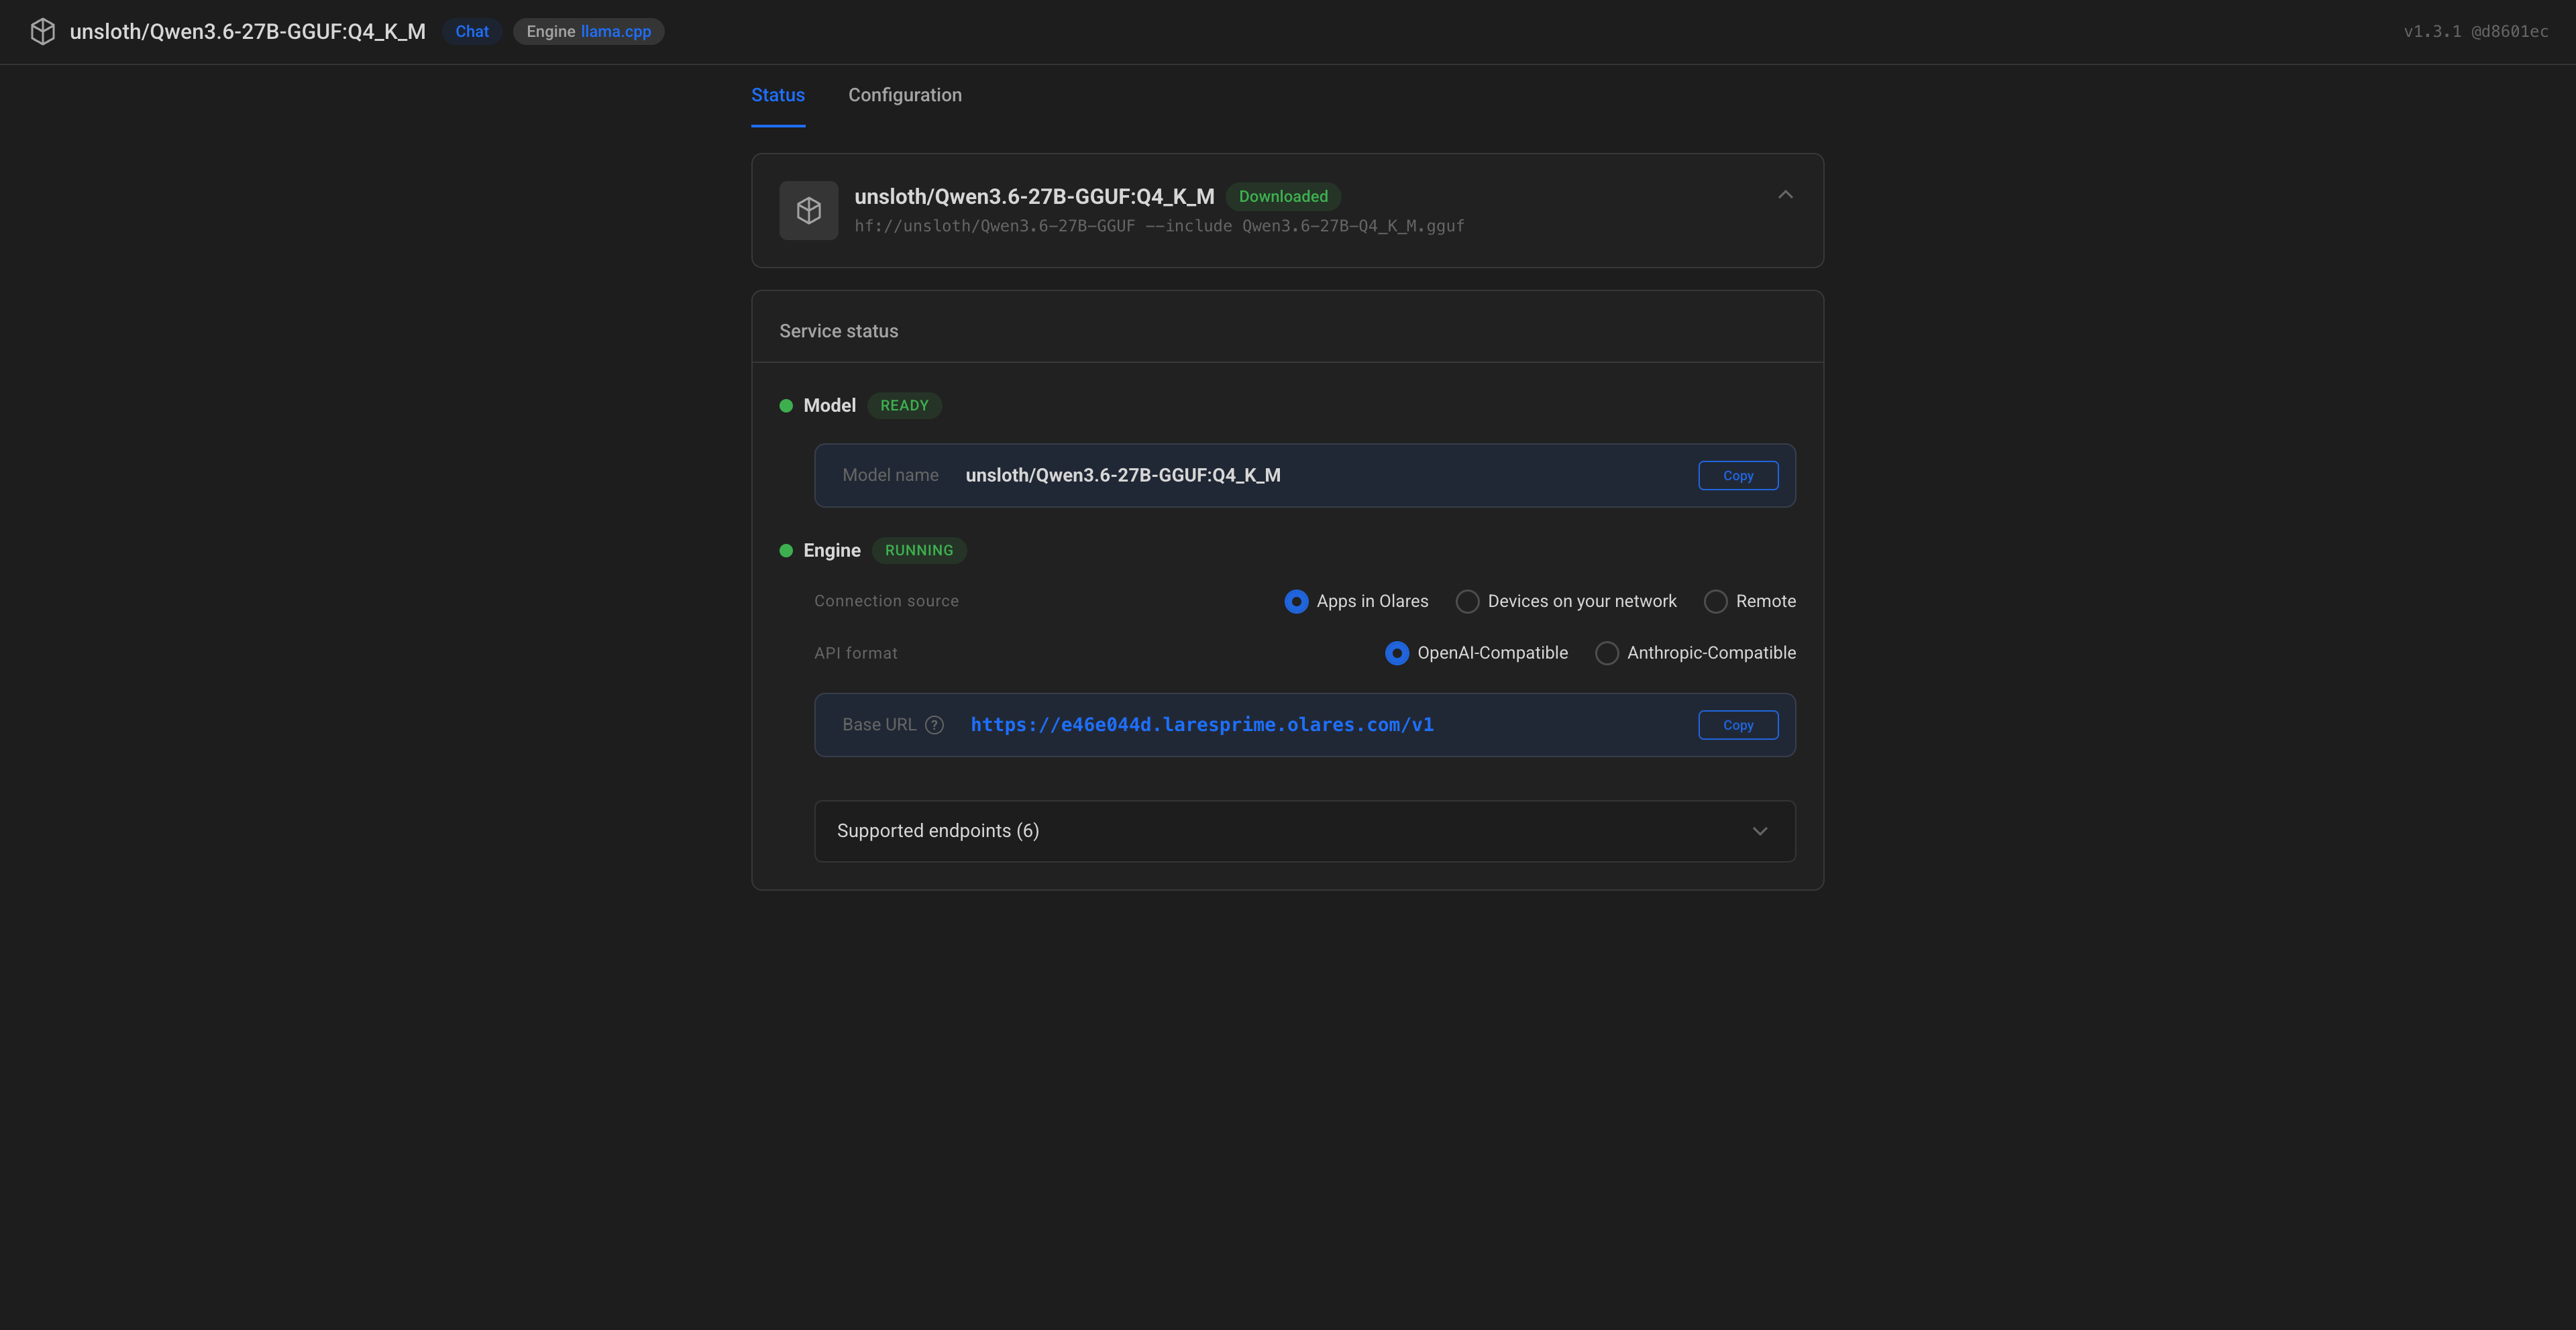
Under Model, copy the Model name exactly as shown.
Under Engine:
a. Connection source: Select Apps in Olares.
b. API format: Select OpenAI-Compatible.
c. Copy the provided Base URL exactly as shown.
Both models use the OpenAI-Compatible API format.
Speaches
How app endpoints work
When a client connects to another Olares app, it uses that app's endpoint as the network address. If the app exposes multiple endpoints, choose the one that matches the feature or protocol the client needs.
For Speaches:
- Go to Olares Settings > Applications > Speaches > Entrances.
- Select Speaches API, then copy the Endpoint URL.
Add provider configurations
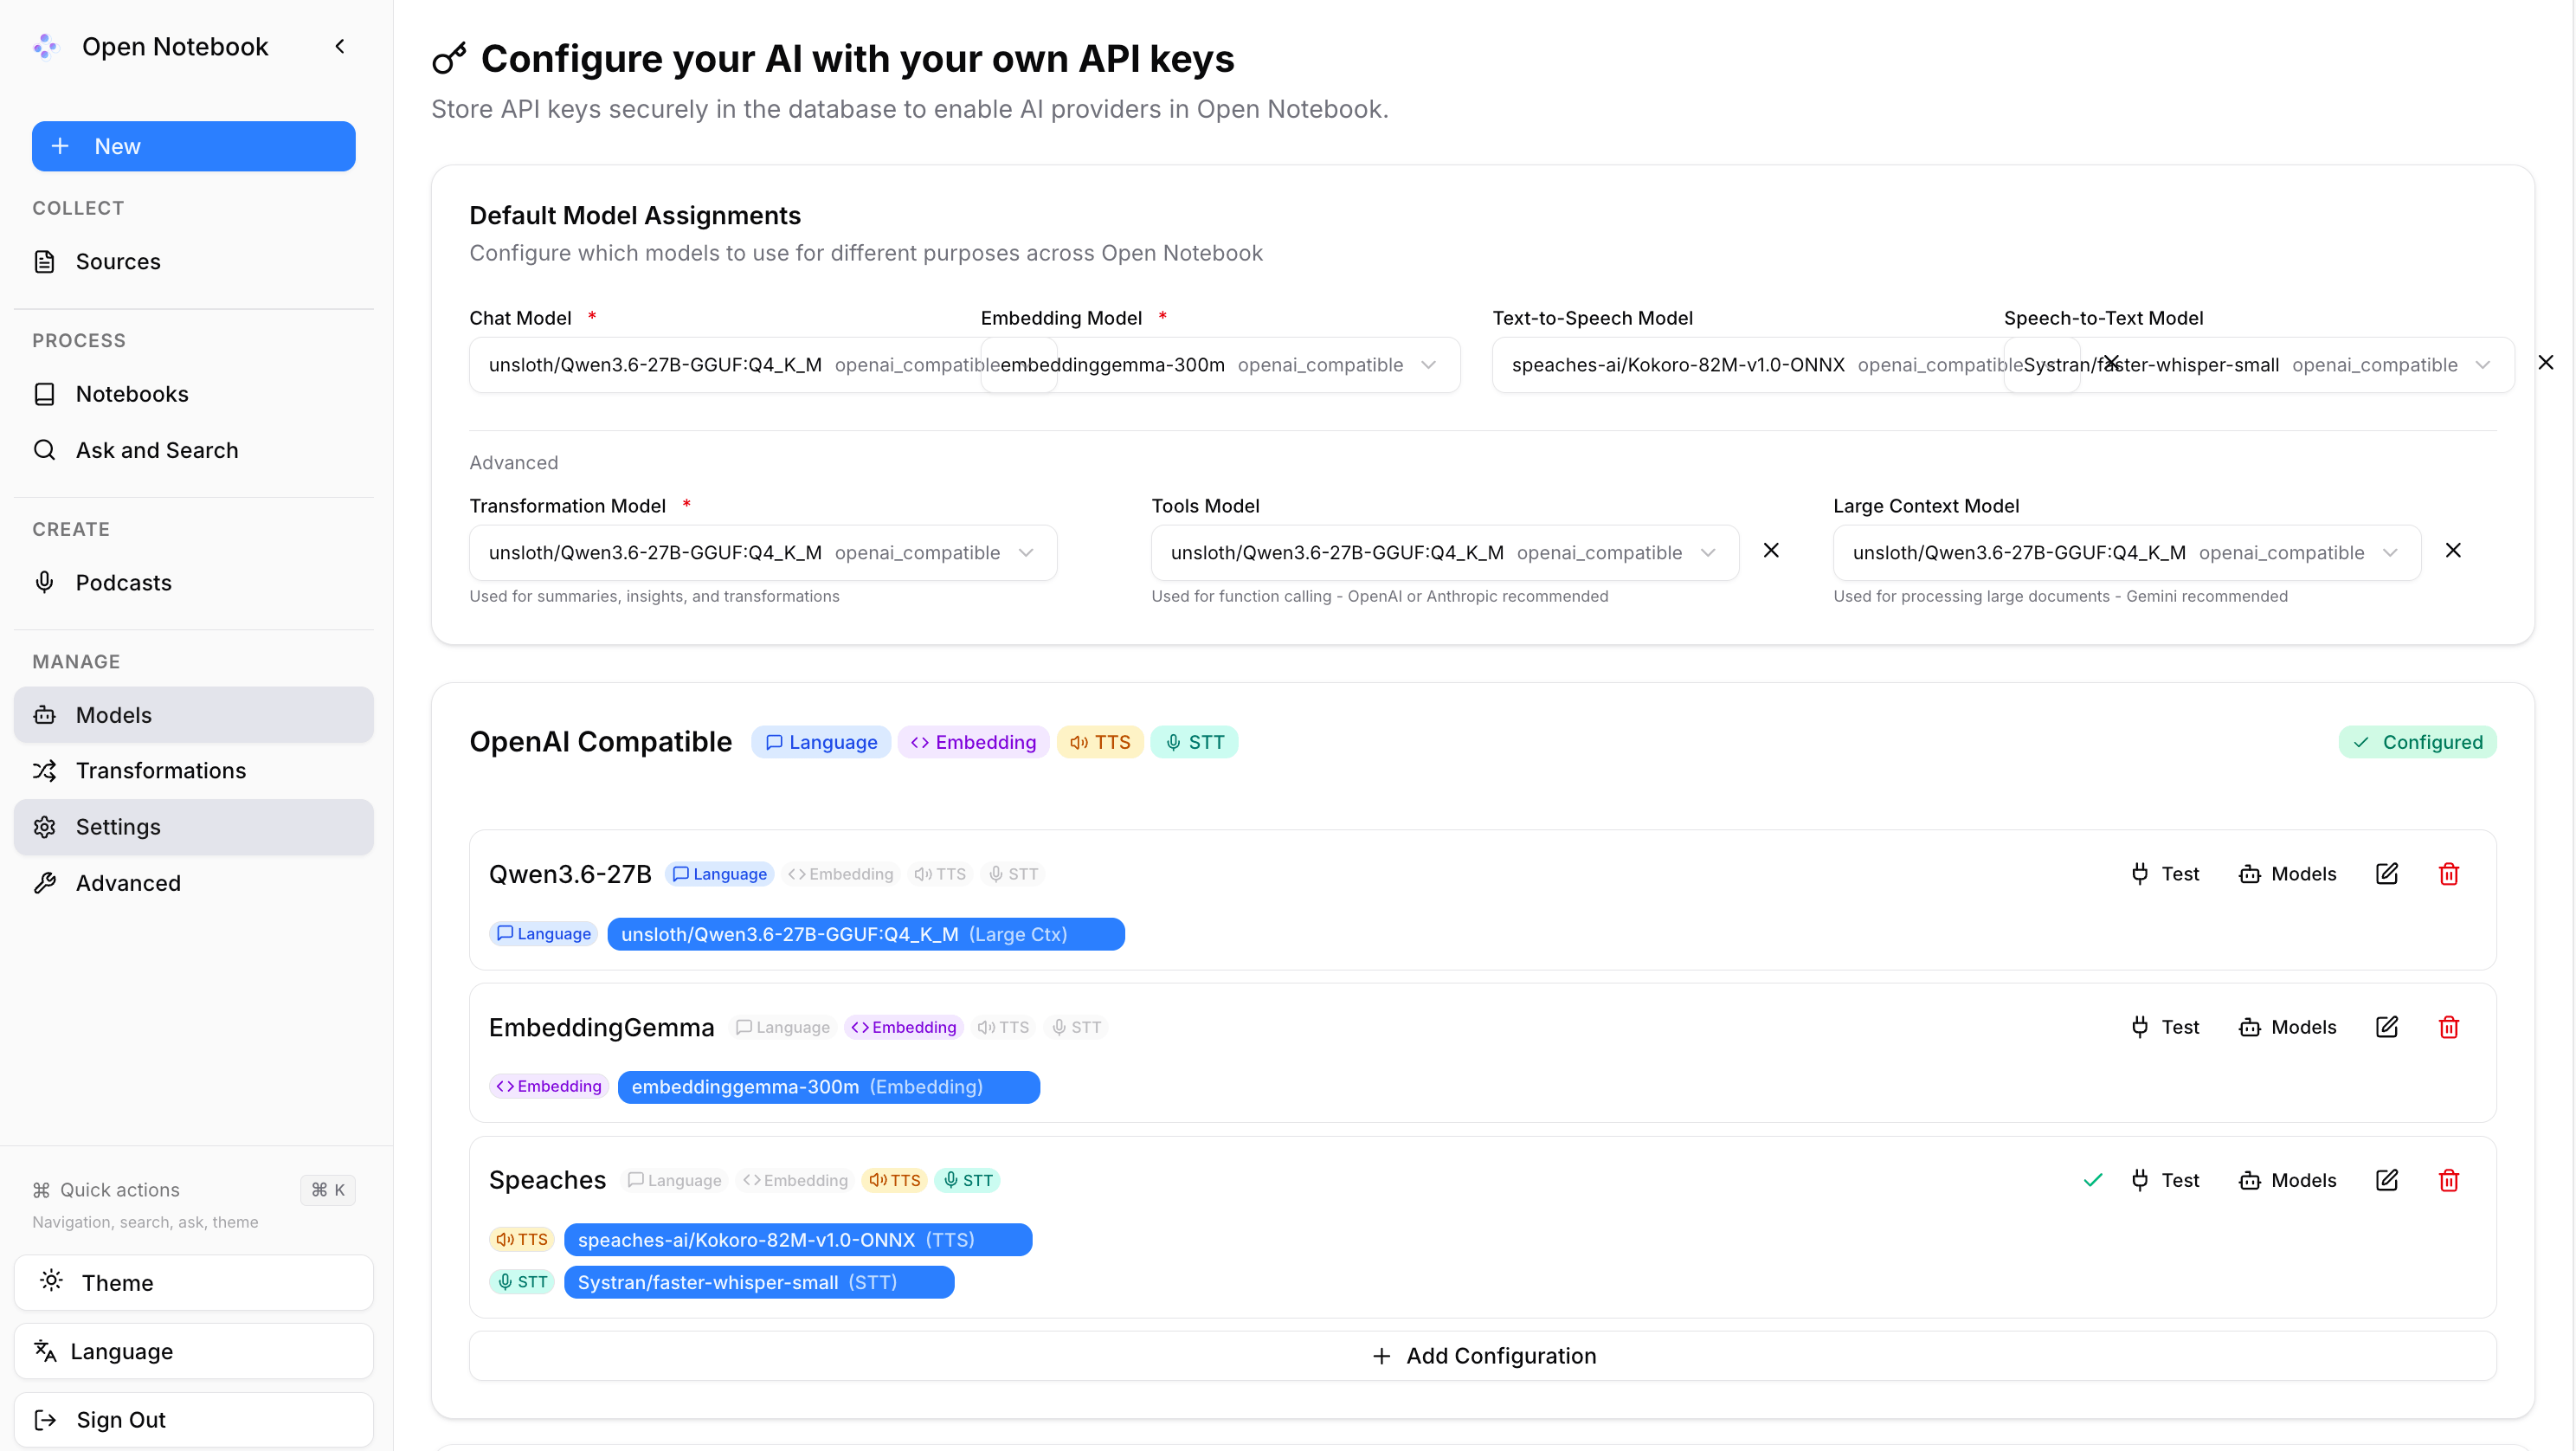
On Open Notebook, go to Manage > Models. For each service, find the matching provider and click Add Configuration.
| Service | Provider | Configuration name | Base URL |
|---|---|---|---|
| Qwen3.6-27B (llama.cpp) | OpenAI Compatible | Any recognizable name, e.g. Qwen3.6-27B | From the Qwen3.6-27B (llama.cpp) Model Console |
| EmbeddingGemma | OpenAI Compatible | Any recognizable name, e.g. EmbeddingGemma | From the EmbeddingGemma Model Console |
| Speaches | OpenAI Compatible | Any recognizable name, e.g. Speaches | Speaches API endpoint with /v1 appended |
Add models
In each configuration, click Models and add the following models:
| Configuration | Type | Model ID |
|---|---|---|
| Qwen3.6-27B (llama.cpp) | Language | unsloth/Qwen3.6-27B-GGUF:Q4_K_M |
| EmbeddingGemma | Embedding | embeddinggemma-300m |
| Speaches | TTS | speaches-ai/Kokoro-82M-v1.0-ONNX |
| Speaches | STT | Systran/faster-whisper-small |
Assign default models
Under Default Model Assignments, assign the models as follows:
| Slot | Model |
|---|---|
| Chat Model | unsloth/Qwen3.6-27B-GGUF:Q4_K_M |
| Embedding Model | embeddinggemma-300m |
| Text-to-Speech Model | speaches-ai/Kokoro-82M-v1.0-ONNX |
| Speech-to-Text Model | Systran/faster-whisper-small |
| Transformation Model | unsloth/Qwen3.6-27B-GGUF:Q4_K_M |
| Tools Model | unsloth/Qwen3.6-27B-GGUF:Q4_K_M |
| Large Context Model | unsloth/Qwen3.6-27B-GGUF:Q4_K_M |
If Auto-assign Defaults is available, you can use it to fill the slots automatically, then review the selections.
Create your first research notebook
A notebook is the workspace for one topic, project, course, or research question. In this guide, you will create a notebook for learning about generative AI, add a text source, generate an insight, and create a manual note.
Create a notebook
- Go to Process > Notebooks.
- Click New > Notebook.
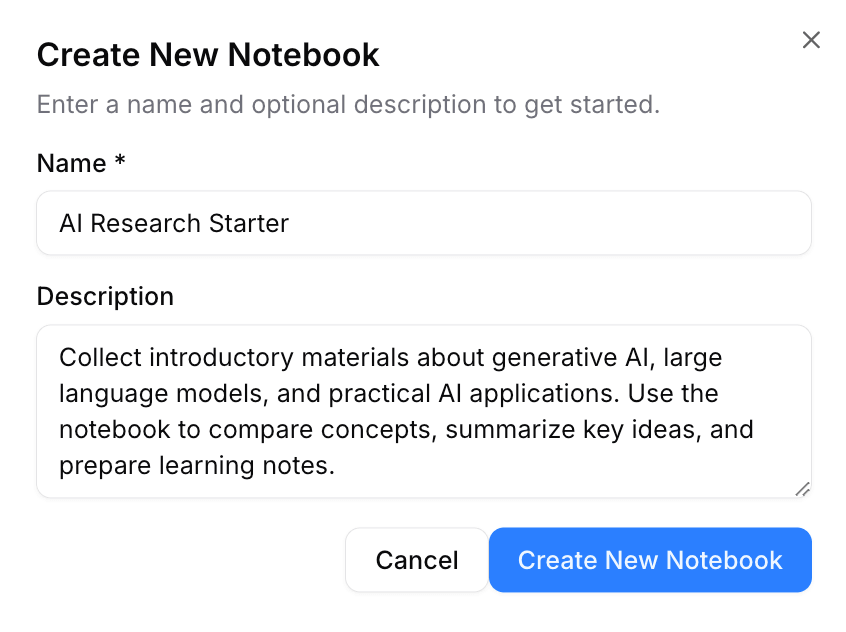
- Enter the notebook name and description.
Write a useful description
The notebook description helps the AI understand the context of your project. Describe the topic, purpose, and expected use of the notebook as clearly as possible.
- Click Create New Notebook.
Add a sample text source
Sources are the original materials you want Open Notebook to process. For your first run, use a lightweight text source so you can avoid failures caused by external websites, large PDFs, or unavailable video transcripts.
This guide provides sample text about generative AI. Add it as a Text source. After the first workflow succeeds, you can add more text sources or try external URLs, PDFs, YouTube videos, or audio/video files.
Open the notebook you just created.
In the Source area, click Add Source > Add Source.
Click the Enter Text tab.
Paste the following content:
plainGenerative AI is a type of artificial intelligence that can create new content based on patterns learned from data. It can generate text, images, audio, video, code, and other forms of content. In everyday work, generative AI is often used to draft documents, summarize long materials, rewrite text for different audiences, brainstorm ideas, create outlines, and answer questions. A common example is using a language model to help write a product document. The user can provide rough notes, requirements, or meeting records, and the model can turn them into a clearer draft. The user still needs to review the result, check accuracy, and decide whether the writing fits the intended audience. Generative AI is useful because it can reduce the time spent on repetitive writing and analysis tasks. It can also help users explore unfamiliar topics by explaining concepts, comparing viewpoints, and suggesting follow-up questions. However, generative AI has limitations. It may produce inaccurate or unsupported statements. It may miss important context. It may also sound confident even when the answer is incomplete or wrong. For this reason, users should treat generative AI as an assistant rather than a final authority. A reliable workflow is to combine AI output with source verification. Users can collect original materials, generate summaries, ask targeted questions, save useful answers as notes, and manually review the final result before using it in real work.Enter the following title:
plainWhat generative AI can doClick Next.
Link the source to your notebook if prompted.
Click Next to open the processing settings.
Under Transformations, select Dense Summary for the first run.
You can choose a different transformation depending on your goal:
Transformation Use it when Dense Summary You want a compact, information-rich overview of the source.
Recommended for the first run.Simple Summary You want a shorter summary before reading in detail. Key Insights You want main takeaways, claims, or findings. Paper Analysis You are processing an academic paper. Reflection Questions You want questions for discussion or follow-up research. Table of Contents You want to understand the structure of a long source. Keep Enable search vector embedding selected.
Click Done.
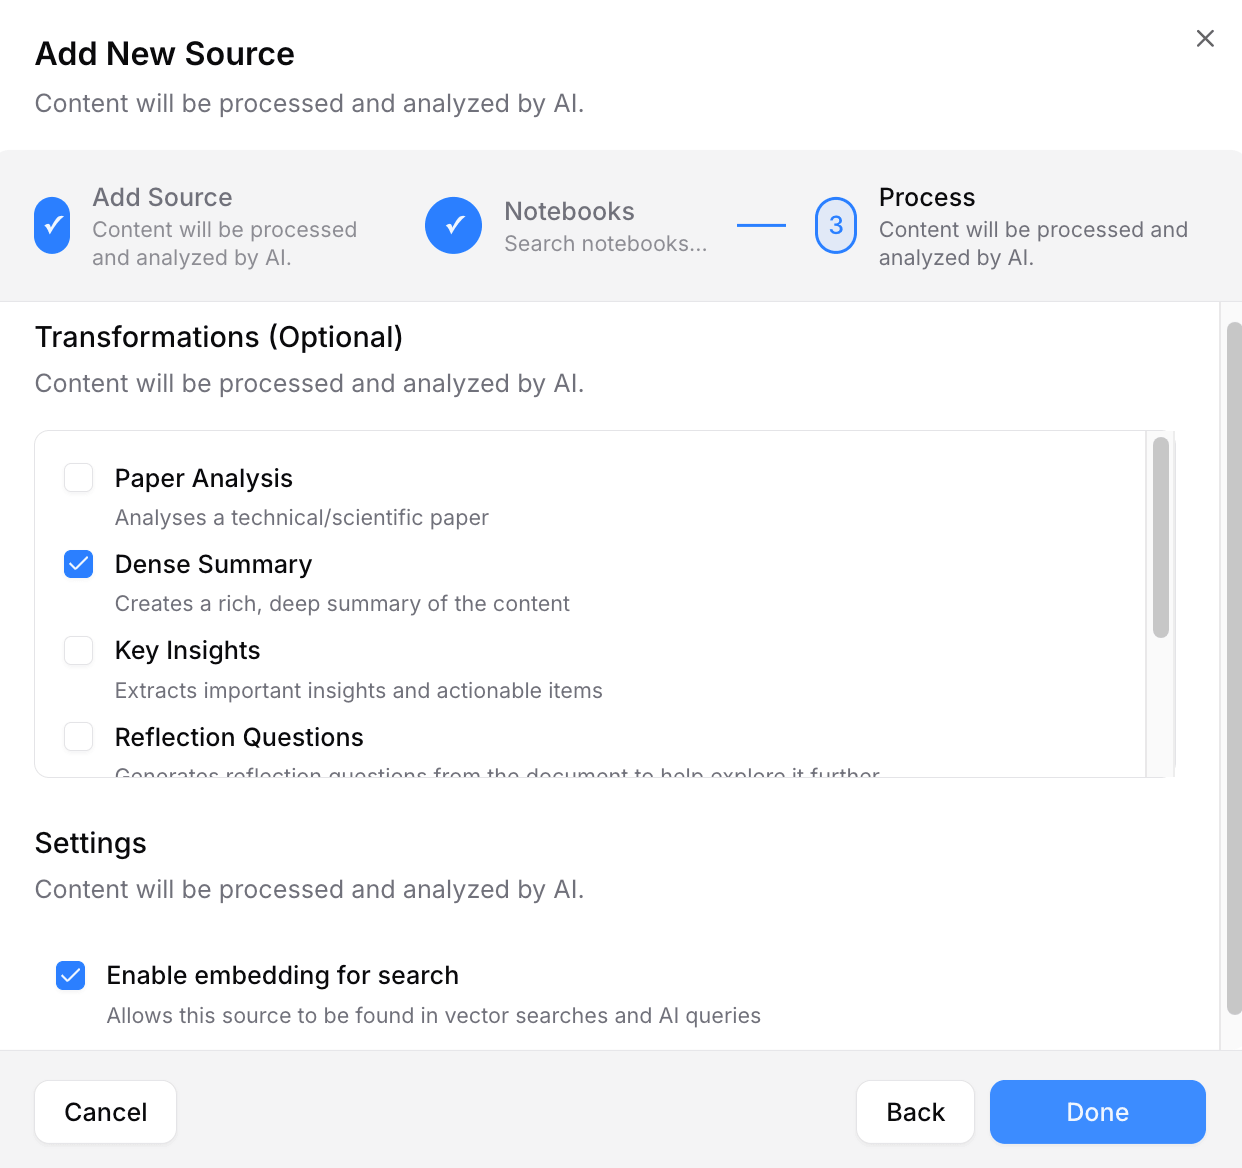
Open Notebook starts processing the source and generates the Dense Summary insight. When processing finishes, you can review the insight and use the source for chat, notes, and citations.
After the first workflow succeeds, you can add other materials in a similar way.
| Source type | Supported content |
|---|---|
| Upload file | Documents, images, archives, and media files. Audio or video files require a Speech-to-Text model. |
| Add URL | Web pages and other supported online content. |
| Enter text | Content pasted or typed directly. |
Avoid heavy processing
When using local models, process one source with one transformation first. Processing many large sources or applying multiple transformations at the same time may cause slow processing, timeouts, or failed tasks.
You can generate additional insights later from the source's Insights tab by using Generate New Insight.
Review the generated insight
Open Notebook generated a Dense Summary when it processed the source.
- Open the processed source.
- Click the Insights tab.
- Click View Insight to review the result.
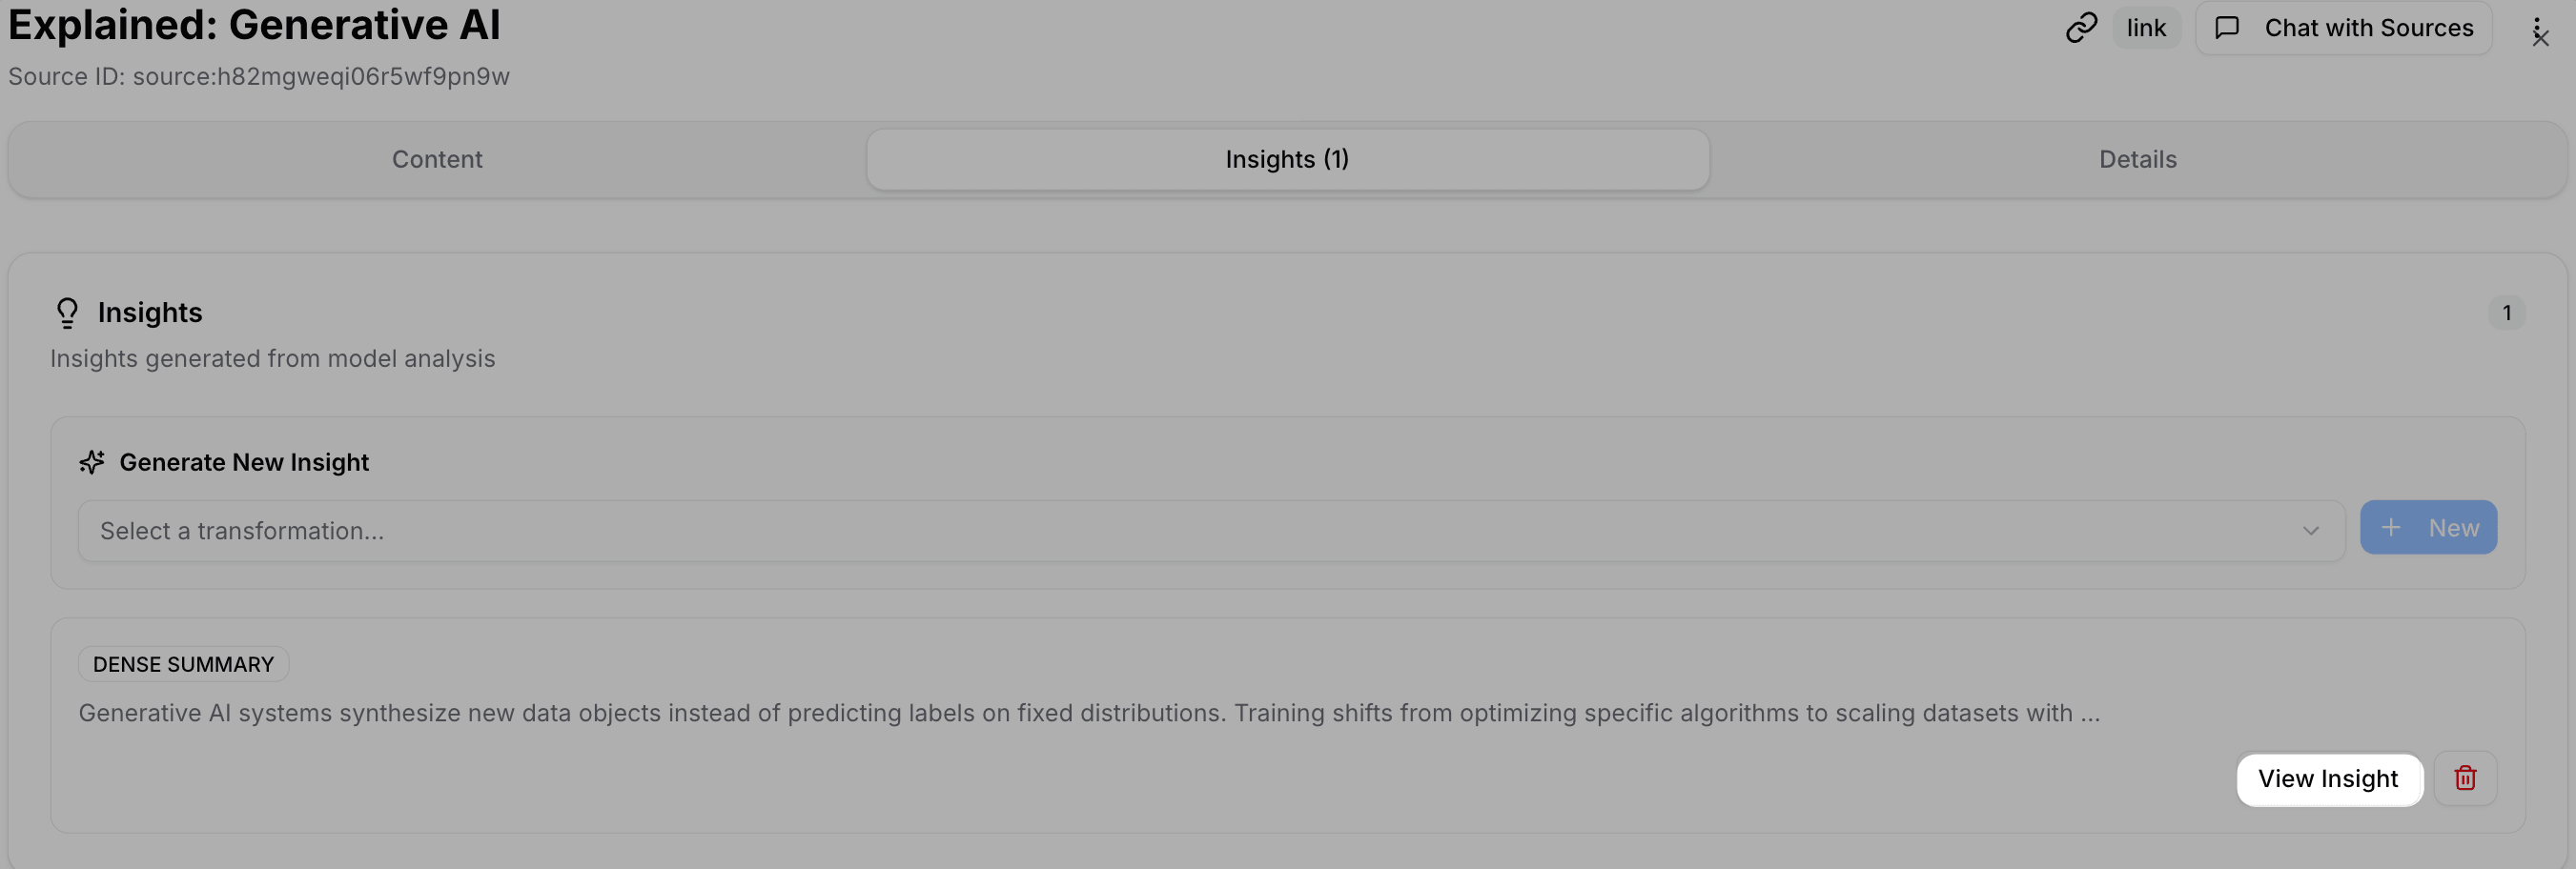
Generate another insight
Use Generate New Insight in the Insights tab to create another insight from the same source.
Create a note manually
Notes are editable items for summaries, outlines, questions, drafts, or conclusions.
- Open your notebook.
- Go to the Notes area.
- Click Write Note.
- Enter a title and write the note content. Markdown is supported.
- Click Create Note.
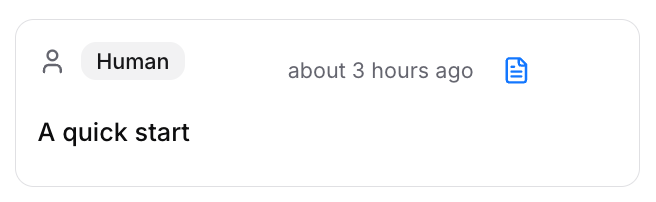
Your note appears in the Notes area with a Human tag.
Chat with your notebook and save notes
After your sources are processed, you can ask questions based on the materials in your notebook. You can also save useful AI responses as notes.
Ask a question about your sources
Open your notebook.
In Chat with Notebook, select the model you want to use.
Click the icon next to each source to choose how much of each source the AI can use:
Icon Context level Recommended use news Full content Use for the most important sources when you need detailed answers and citations. lightbulb_2 Insights only Use for background sources when a summary is enough. visibility_off Not included in chat Use for irrelevant, sensitive, or unnecessary sources. Enter your question and send it.
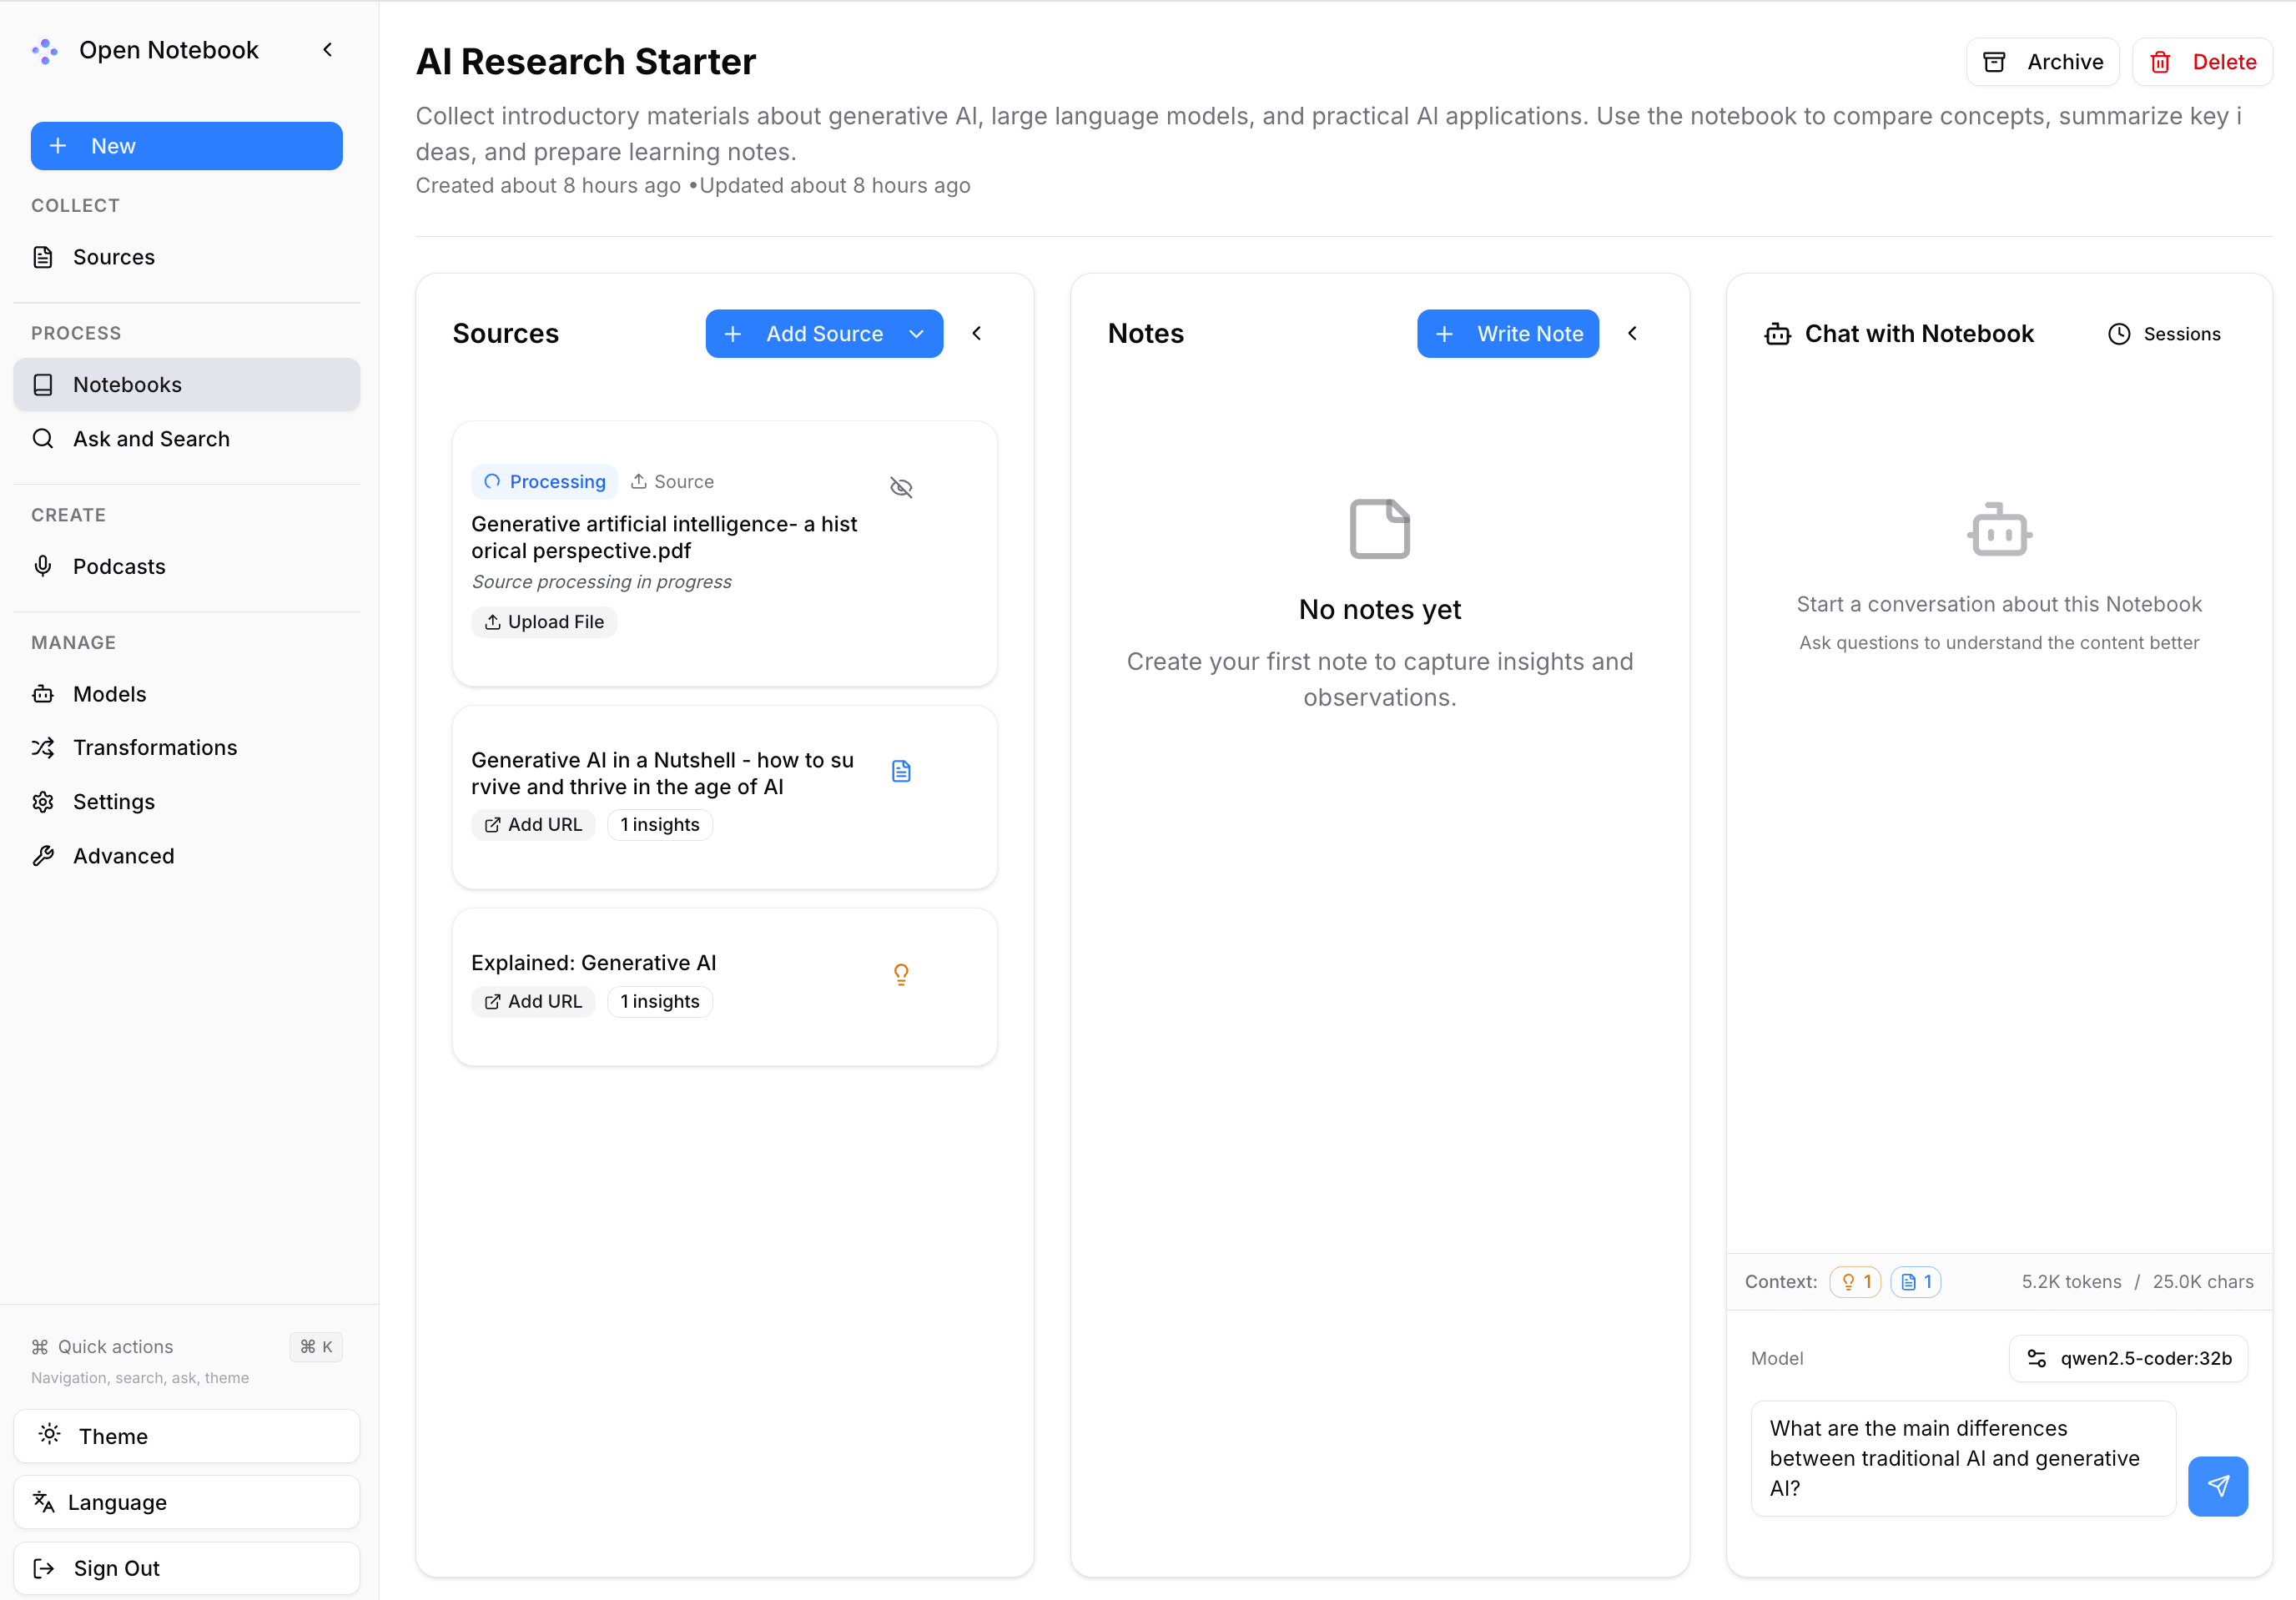
Open Notebook answers based on the sources included in the current chat context.
Verify citations
When an answer includes citations, click them to open the referenced source passages. Compare the answer with the original content to check whether the AI response is supported by your sources.
Save a useful AI response as a note
When you receive a useful answer in chat:
Click the save icon under the AI response.
In the Notes area, click the saved note with the
AI Generatedtag to review it.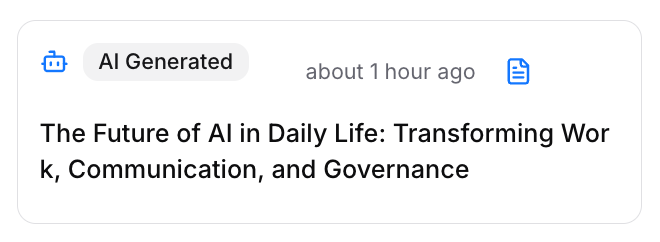
Update the title or content when needed, then click Save Note.
You can use saved notes as part of future notebook context, or include them in podcast generation.
Generate a podcast
After you have sources, insights, and notes, you can turn your research materials into a podcast episode.
Configure podcast profiles
Before generating a podcast, configure the required models and voices in podcast profiles.
Go to Create > Podcasts, then click the Profiles tab.
For a Speaker Profile, open a profile that suits your needs. Select a voice model and enter a voice ID supported by that model.
Use a voice ID supported by the selected TTS model
The default voice ID in a speaker profile may not be supported by your selected TTS model. For example,
novais not available inspeaches-ai/Kokoro-82M-v1.0-ONNX. Use a supported Kokoro voice ID such asaf_heartinstead.For an Episode Profile, open a profile that suits your needs. Select the speaker profile, outline model, transcript model, language, segment count, and briefing.
Save your changes.
Generate the audio
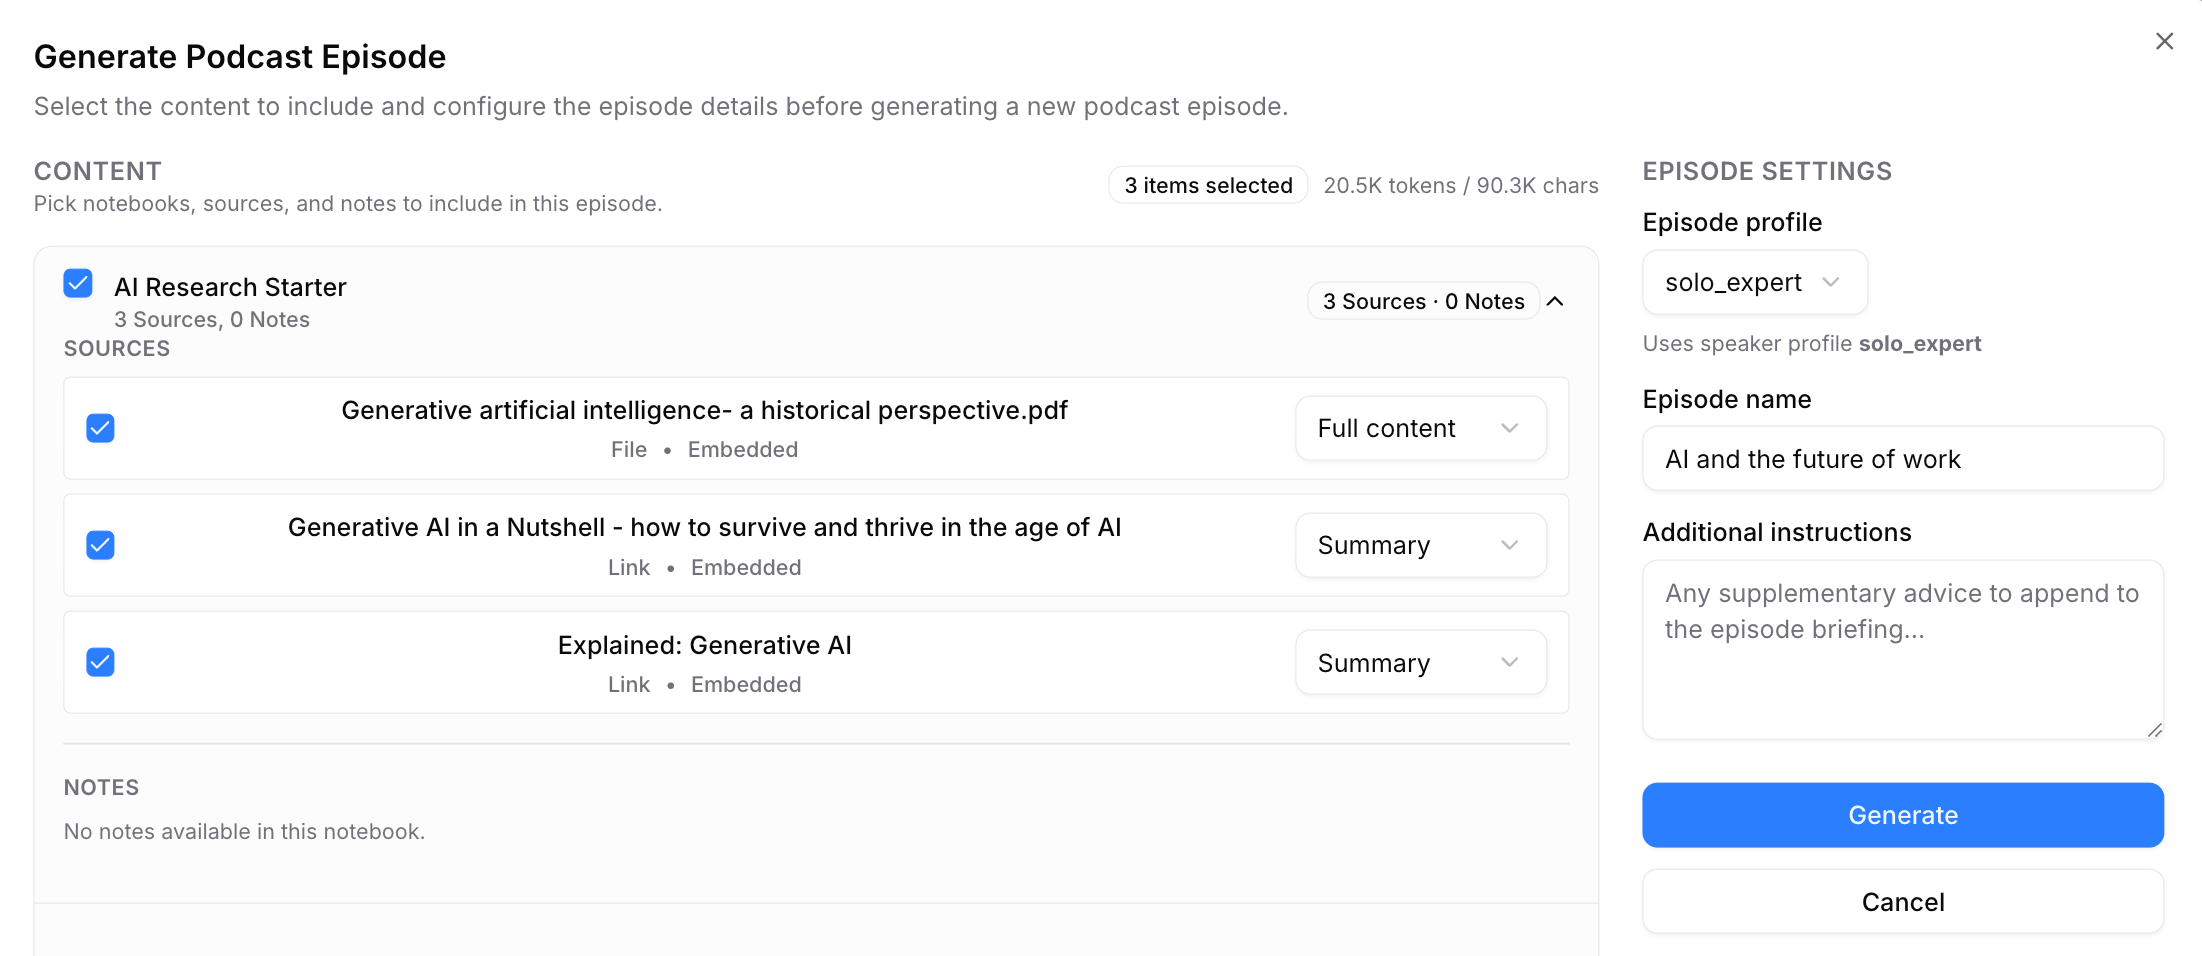
- Click the Episodes tab, then click Generate Podcast.
- Select the sources or notes to include.
- Select the episode profile.
- Set the episode name.
- Add extra instructions if needed.
Match the language and voice
Some TTS voices work best with specific languages. Make sure the podcast language matches the selected voice. If you use an English voice, add extra instructions such as:
Generate the entire podcast script in ENGLISH only. - Click Generate.
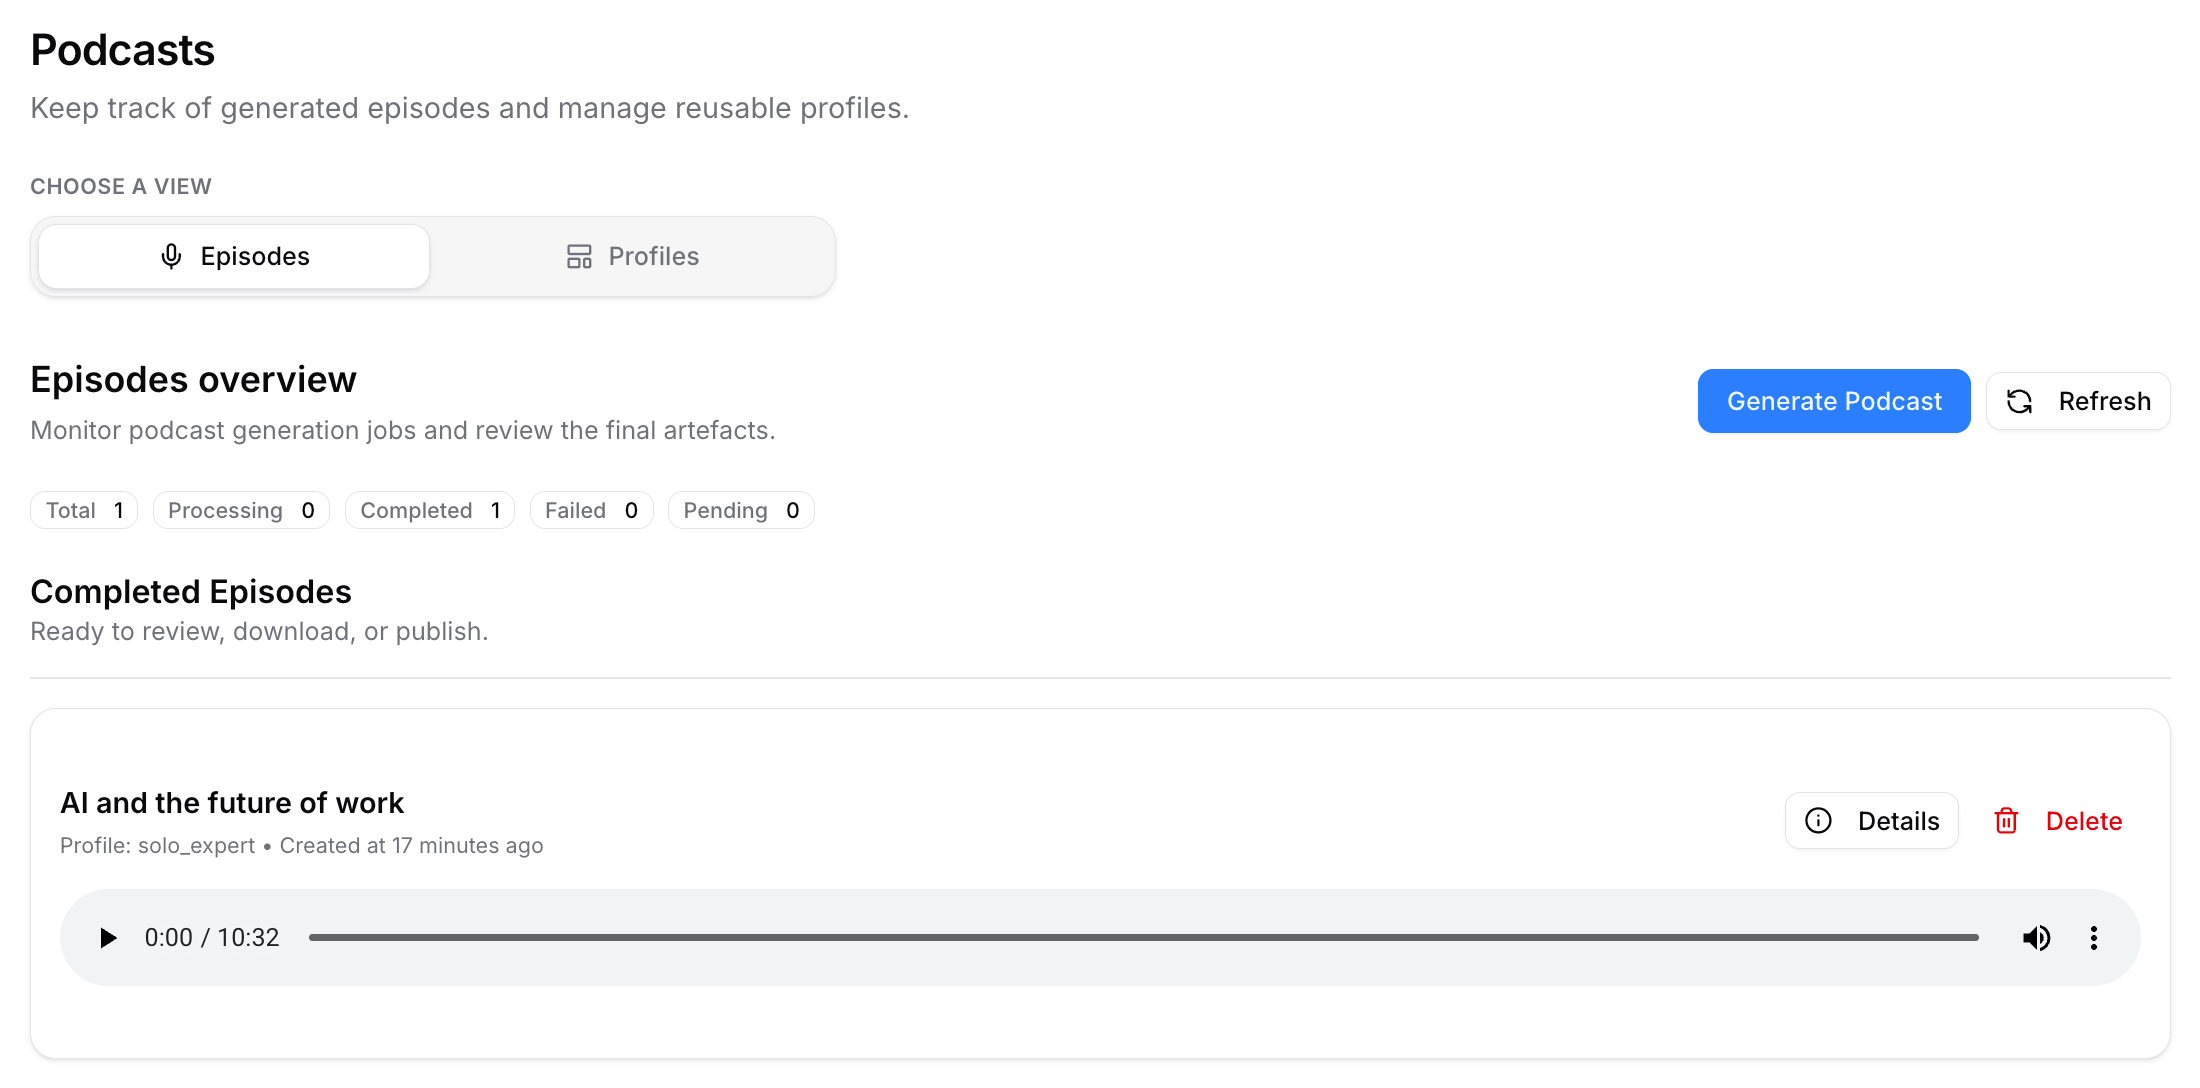
After the episode is complete, you can:
- Play it in the browser.
- Download the audio file.
- Review the generated transcript in Details.
Explore more features
Search across your knowledge base
Go to Process > Ask and Search when you want to find information across your sources and notes.
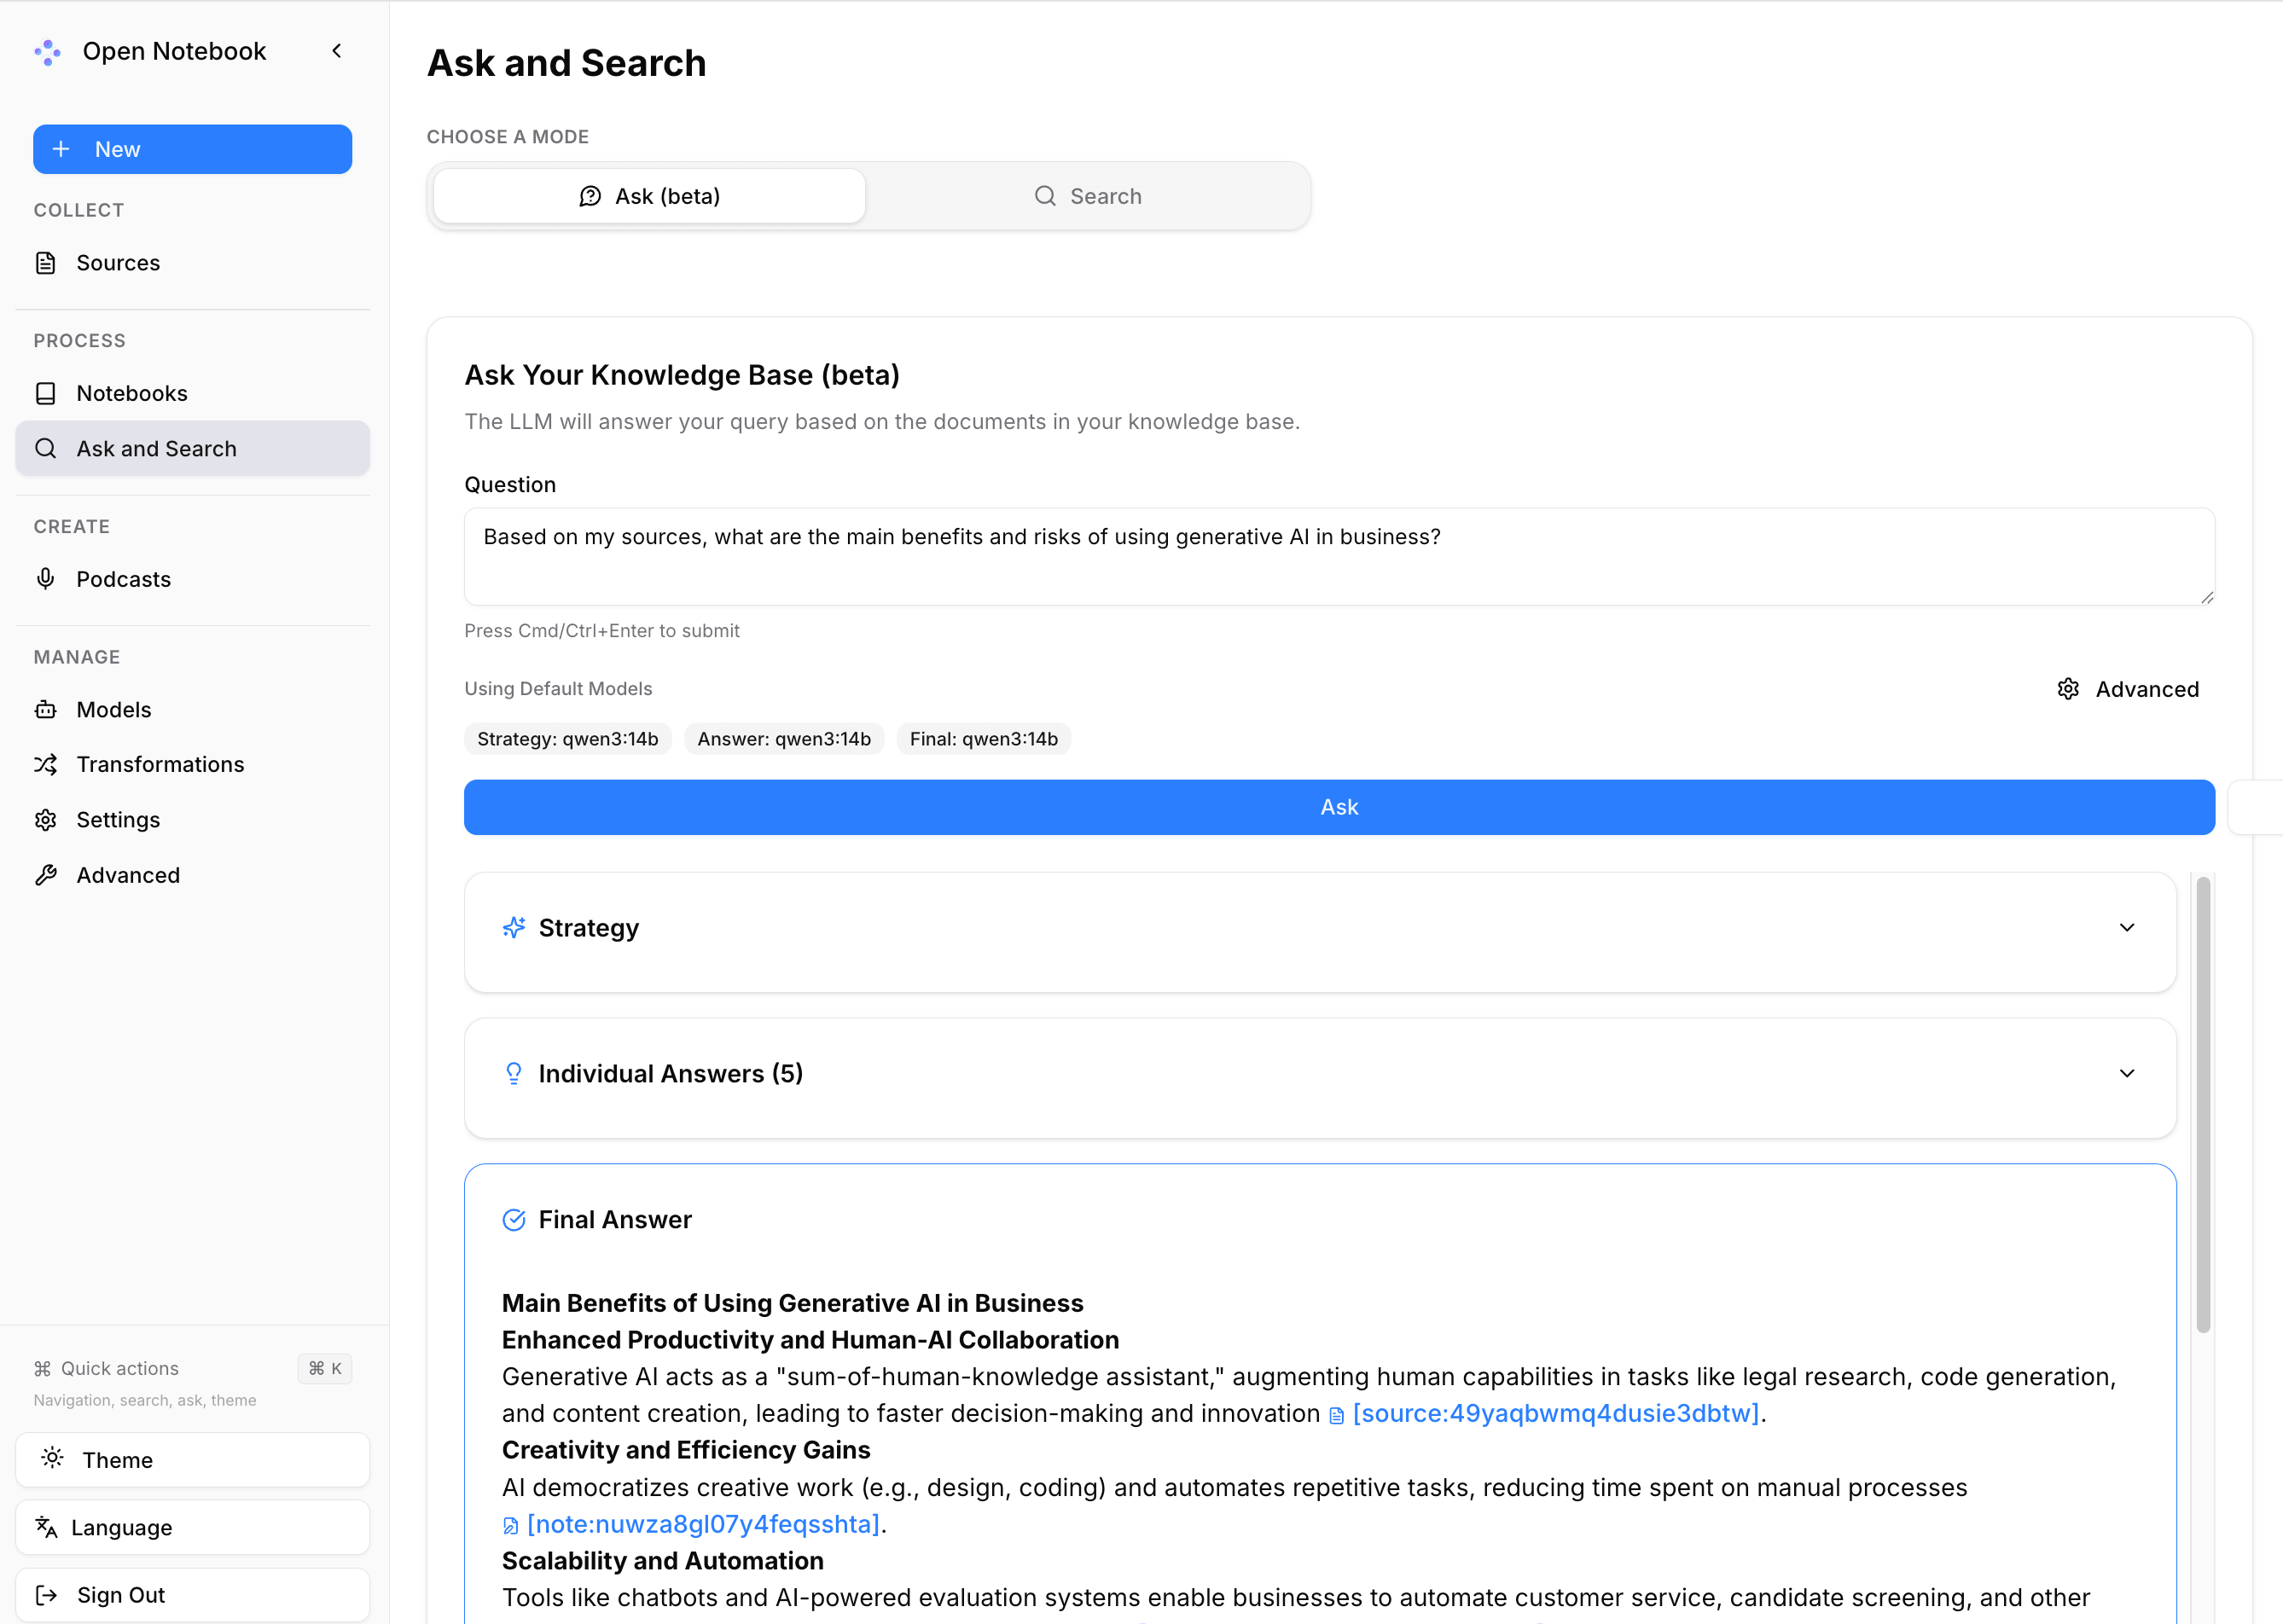
Ask a question
Use Ask when you want a synthesized answer.
Open Process > Ask and Search.
Click the Ask tab.
Enter your question.
Example:
plainBased on my sources, what are the main benefits and risks of using generative AI in business?Click Ask.
Open Notebook returns a synthesized answer based on matching content from your knowledge base.
Search for source fragments
Use Search when you want to inspect matching fragments yourself.
- Open Process > Ask and Search.
- Click the Search tab.
- Choose a search type:
- Text Search: Use this when you remember exact words or phrases.
- Vector Search: Use this when you remember the meaning but not the exact wording.
- Enter your query.
Embedding model required
Vector search requires a configured Embedding Model. The source also needs embeddings enabled during processing. If embeddings are missing or incorrectly configured, vector search may return no useful results.
Customize transformations
Transformations are reusable AI prompts that turn source content into structured insights, such as summaries, key takeaways, paper analysis, or reflection questions.
How transformations are applied
Use Manage > Transformations to view, edit, test, or create templates.
To apply a transformation to a source:
- Select a transformation when adding a source.
- For an existing source, open the source, go to the Insights tab, and click Generate New Insight.
You can either edit an existing transformation or create a new one.
Edit an existing transformation
Use this when a built-in transformation is close to what you need.
- Go to Manage > Transformations.
- Find the transformation you want to adjust, then click Edit.
- Modify the title, description, or prompt.
- Click Edit Transformation to save your changes.
Editing a transformation only changes how it works the next time you apply it. Existing insights are not updated automatically. To get a new result, run the transformation again from the source's Insights tab.
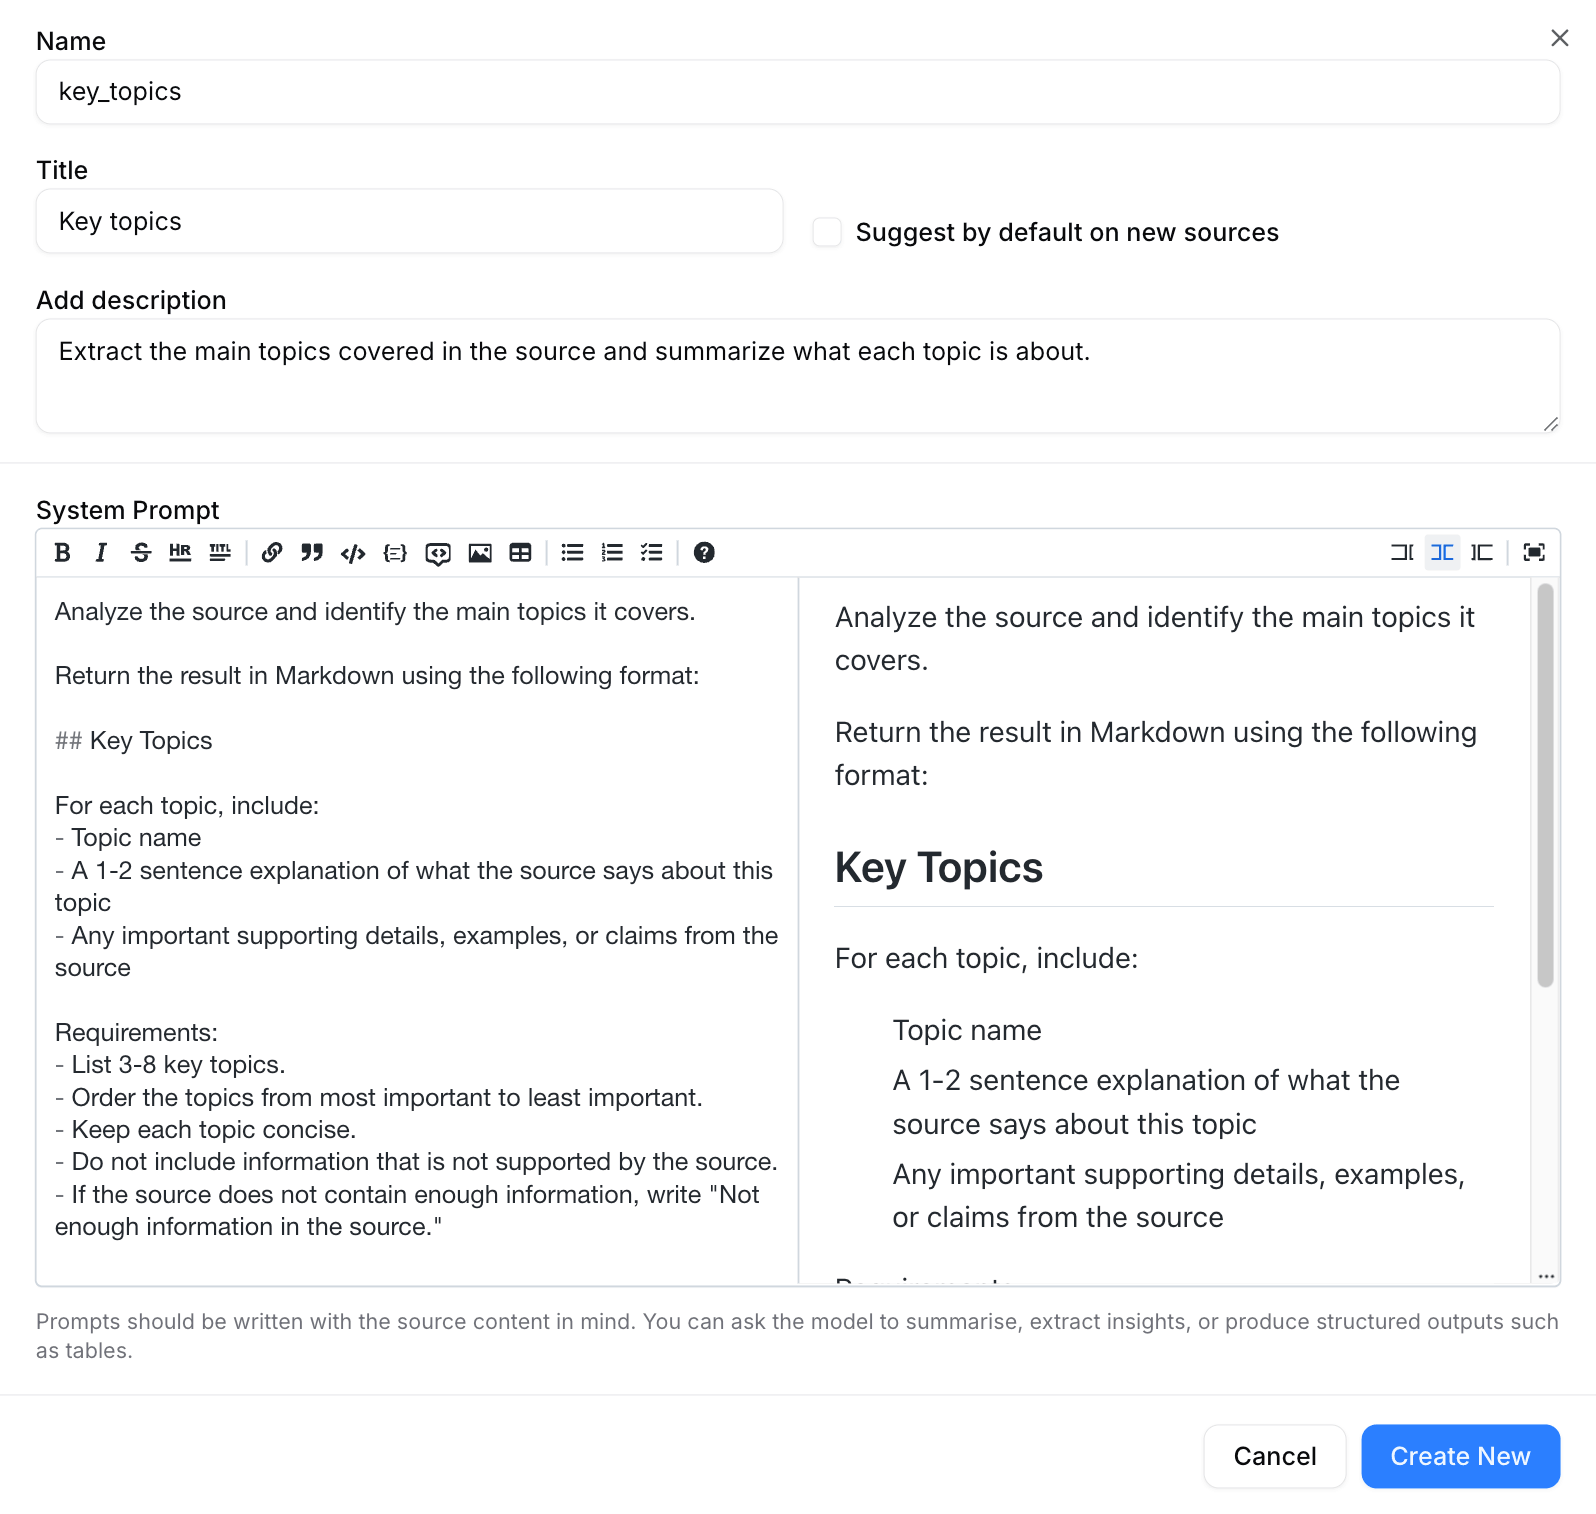
Create a new transformation
Use this when you want a separate template for a specific analysis task.
Go to Manage > Transformations.
Click Create New.
Enter a name, title, description, and prompt.
Click Create New.
Test a transformation
Before applying a transformation to real sources, test it with a short sample.
- In Manage > Transformations, find the transformation you want to test.
- Click Playground.
- Paste a short excerpt from a source.
- Run the transformation and review the output.
- If the output does not meet your expectation, click Edit to refine the prompt, then test again.
Test before applying to full sources
Use Playground to check the output format, length, and accuracy before applying a transformation to full sources.
FAQs
Why is processing slow or unstable?
Processing can be slow or unstable for two common reasons:
- You are processing multiple sources or applying multiple transformations at the same time.
- Other GPU-intensive apps are using GPU resources needed by Open Notebook or its configured model services.
To improve performance:
- Process one source with one transformation first.
- Stop or pause other GPU-intensive apps. Keep only the model services assigned in Manage > Models running. See Manage accelerator resources for details.
Why does vector search return no useful results?
Vector search requires:
- A configured Embedding Model.
- Sources processed with embeddings enabled.
If vector search returns no useful results:
- Go to Manage > Models and check the Embedding Model assignment.
- Make sure the selected model is an embedding model, not a language model.
- Check whether the source was processed with Enable search vector embedding selected.
- Reprocess the source.
Why does podcast generation fail?
Podcast generation may fail if required models are missing, selected sources are not ready, the TTS provider is unavailable, the transcript language does not match the selected voice, or the speaker voice ID is not supported by the selected TTS model.
Check the following:
- The episode profile has an outline model and a transcript model.
- The speaker profile has a valid TTS model.
- Each speaker uses a voice ID supported by the selected TTS model.
- The selected sources are processed and ready.
- The podcast language matches the selected voice.
- The TTS provider is running.
If the error message lists supported voice IDs, update the speaker profile with one of those IDs, then create a new podcast generation task.
Learn more
- Ollama: Download and run local language models on Olares.
- Speaches: Set up local speech-to-text and text-to-speech services.
- Manage accelerator resources: Allocate accelerator resources for local AI apps.