Generate images and videos in FlowStudio
Generate images, edit them, and create videos using ready-made workflows in FlowStudio.
Tutorial overview
This tutorial uses a coastal car poster as a running example across four scenarios: image generation, image editing, video generation from two images, and reference-based video generation.
| Scenario | Workflow | What you will create |
|---|---|---|
| Text-to-image generation | Qwen-Image 2.1 NVFP4 · Text to Image | A coastal poster featuring a red vintage car. |
| Image editing | Qwen-Image 2.1 NVFP4 · Image Edit | A version of the poster with blue car paint. |
| Video generation from two images | FastVideo FastH3: Image to Video | A video using the blue and red posters as its starting and ending images. |
| Reference-based video generation | MiniMax H3 NVFP4 · Reference to Audio-Video | A red car driving out of a picture frame onto a desk, using the original image and generated video as references. |
Prerequisites
- Olares OS 1.12.7 or later
Avoid running FlowStudio generation and Qwen3.8-27B chats at the same time
When using Qwen3.8-27B (llama.cpp) in Lares, wait for any image or video generation task started directly in FlowStudio to finish before sending a message. Running both at the same time can cause GPU memory conflicts and make the model unresponsive.
Install FlowStudio
If you installed FlowStudio previously, update it to the latest version before continuing.
Open Market and search for "FlowStudio".
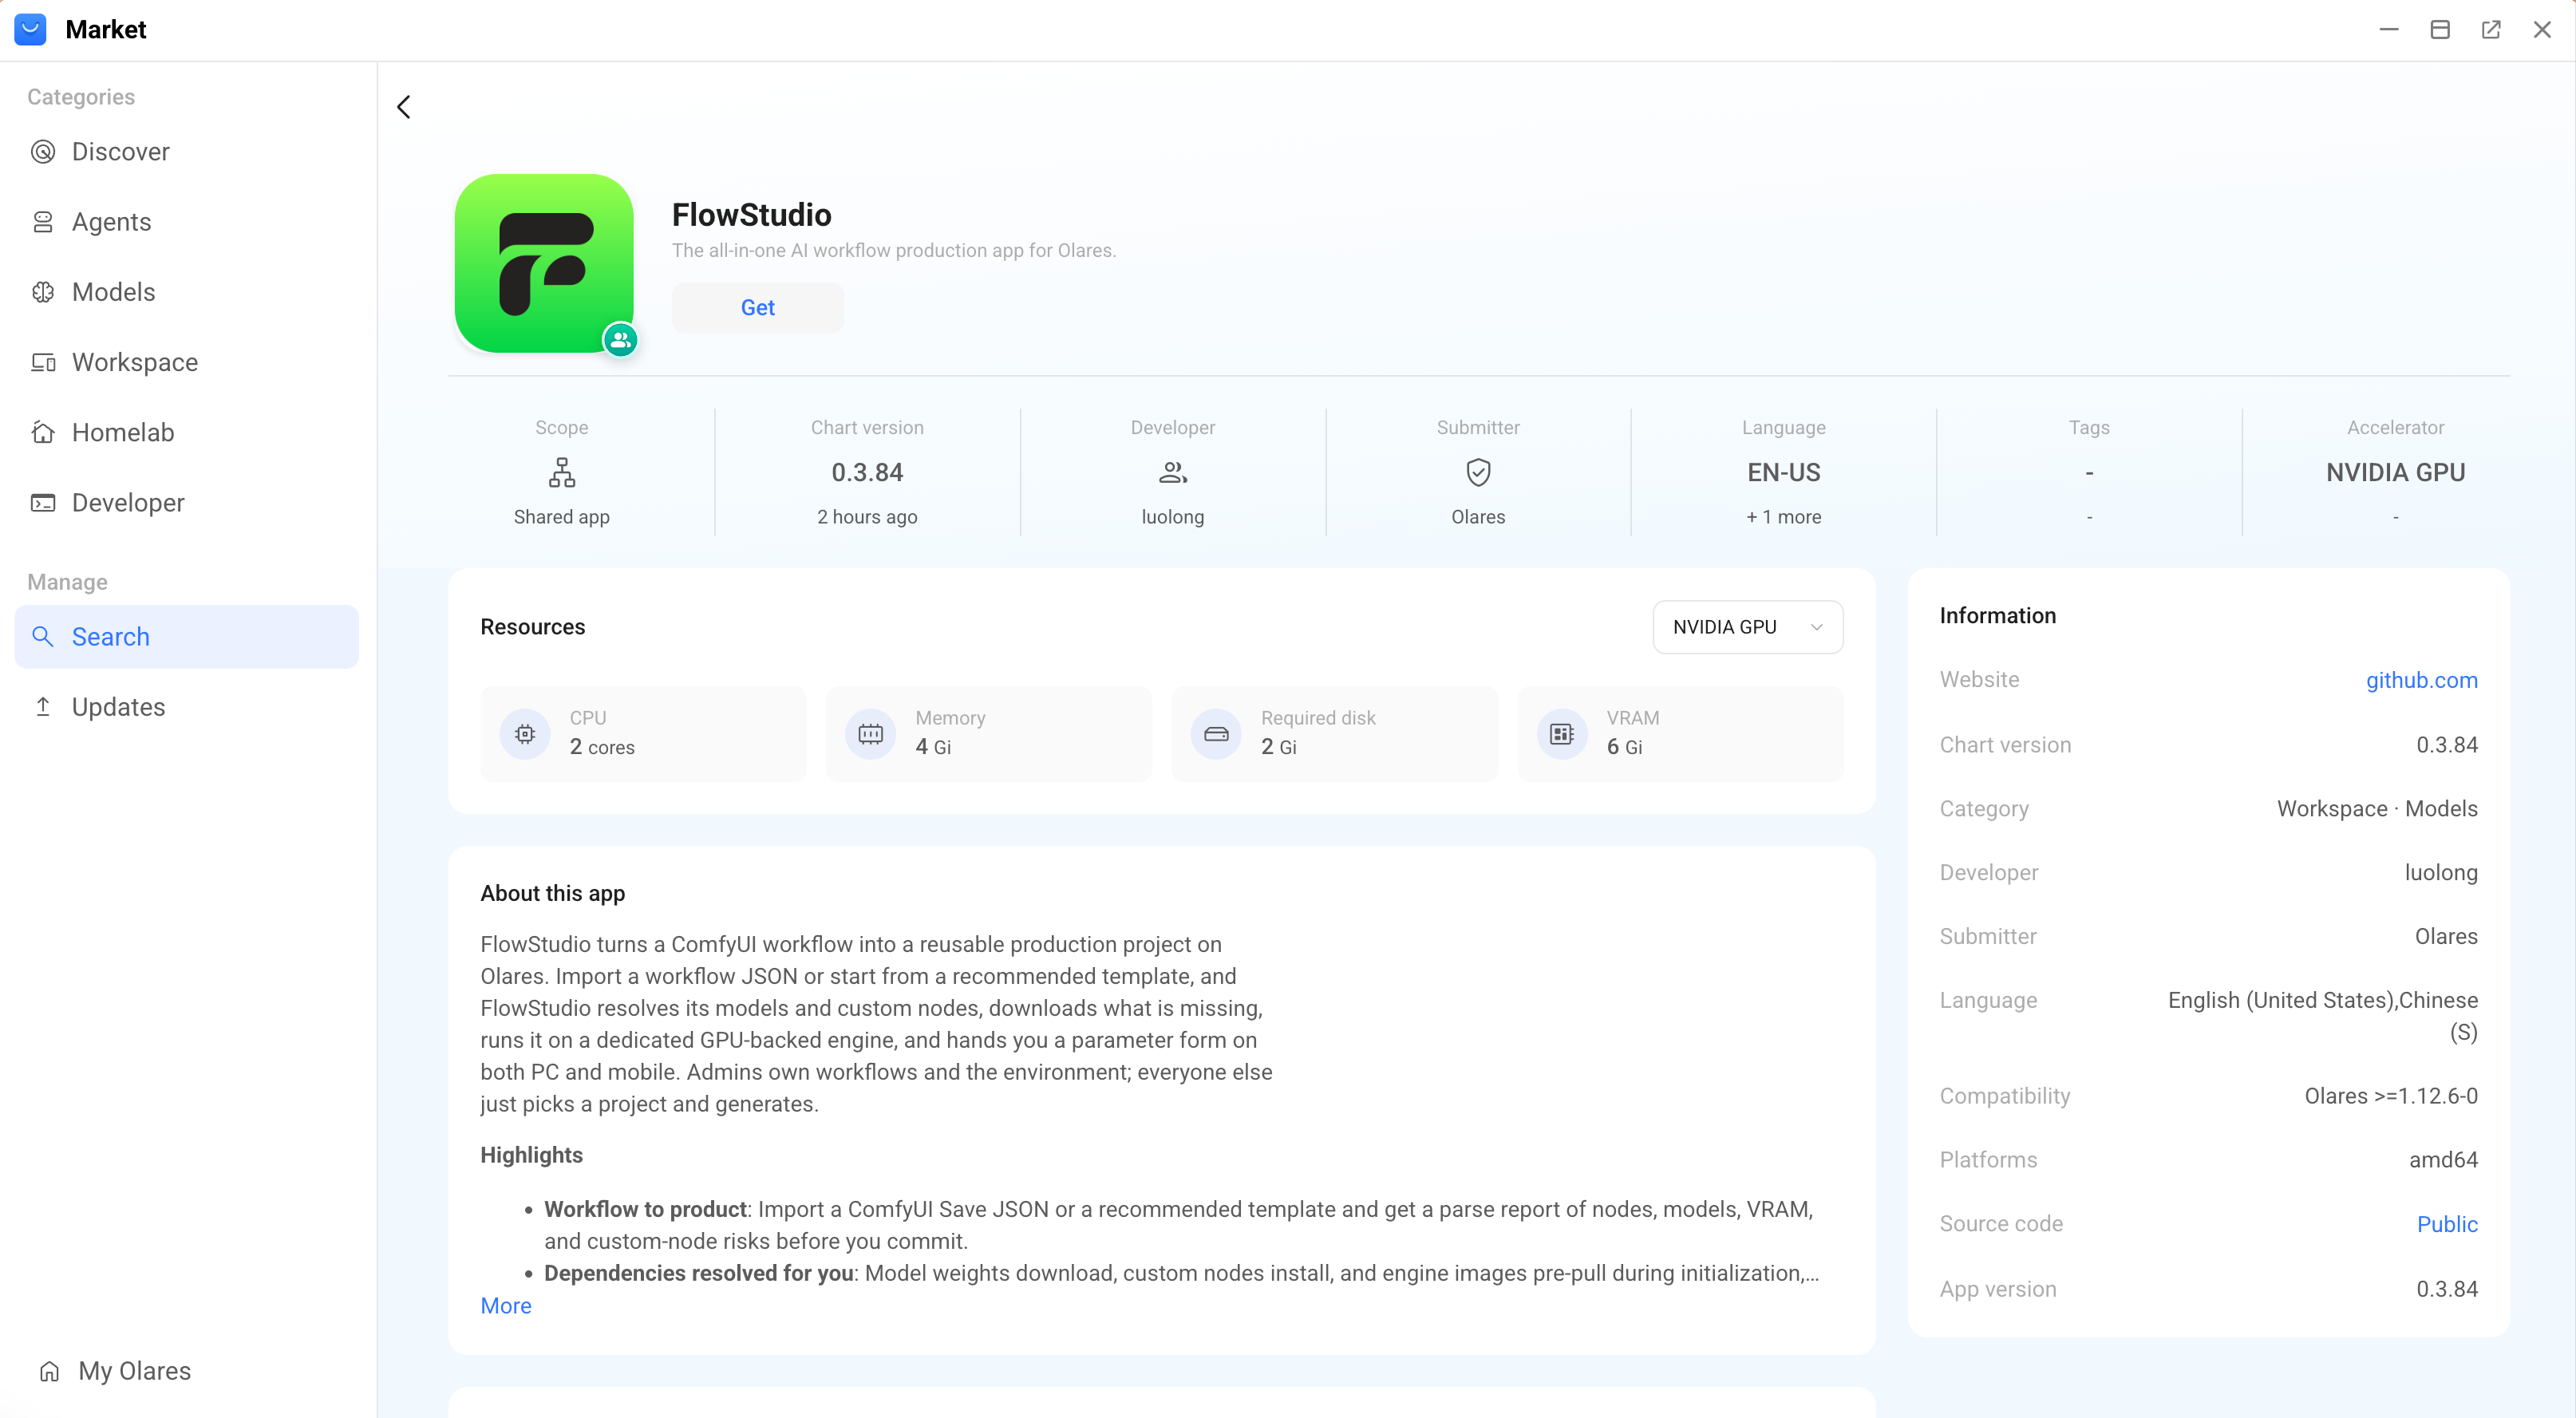
Click Get, then Install, and wait for the installation to complete.
Upload requirements
Each uploaded file must be 64 MB or smaller.
| Supported formats | |
|---|---|
| Image | PNG, JPG, WEBP, GIF, and BMP. HEIC and AVIF images are automatically converted to WebP during upload. |
| Video | MP4, WEBM, MOV, M4V, AVI, and MKV. |
| Audio | MP3, WAV, FLAC, OGG, M4A, and AAC. |
Generate an image from text
Use Qwen-Image 2.1 NVFP4 · Text to Image to generate images from text prompts, with support for text rendering, realistic textures, fine details, and transparent backgrounds.
Prepare the scene
Open FlowStudio, go to Workflow Plaza, and select Image.
Search for
Qwen-Image 2.1, and then select Qwen-Image 2.1 NVFP4 · Text to Image.Review Pre-run checks. When it shows Checks passed, click Create scene.
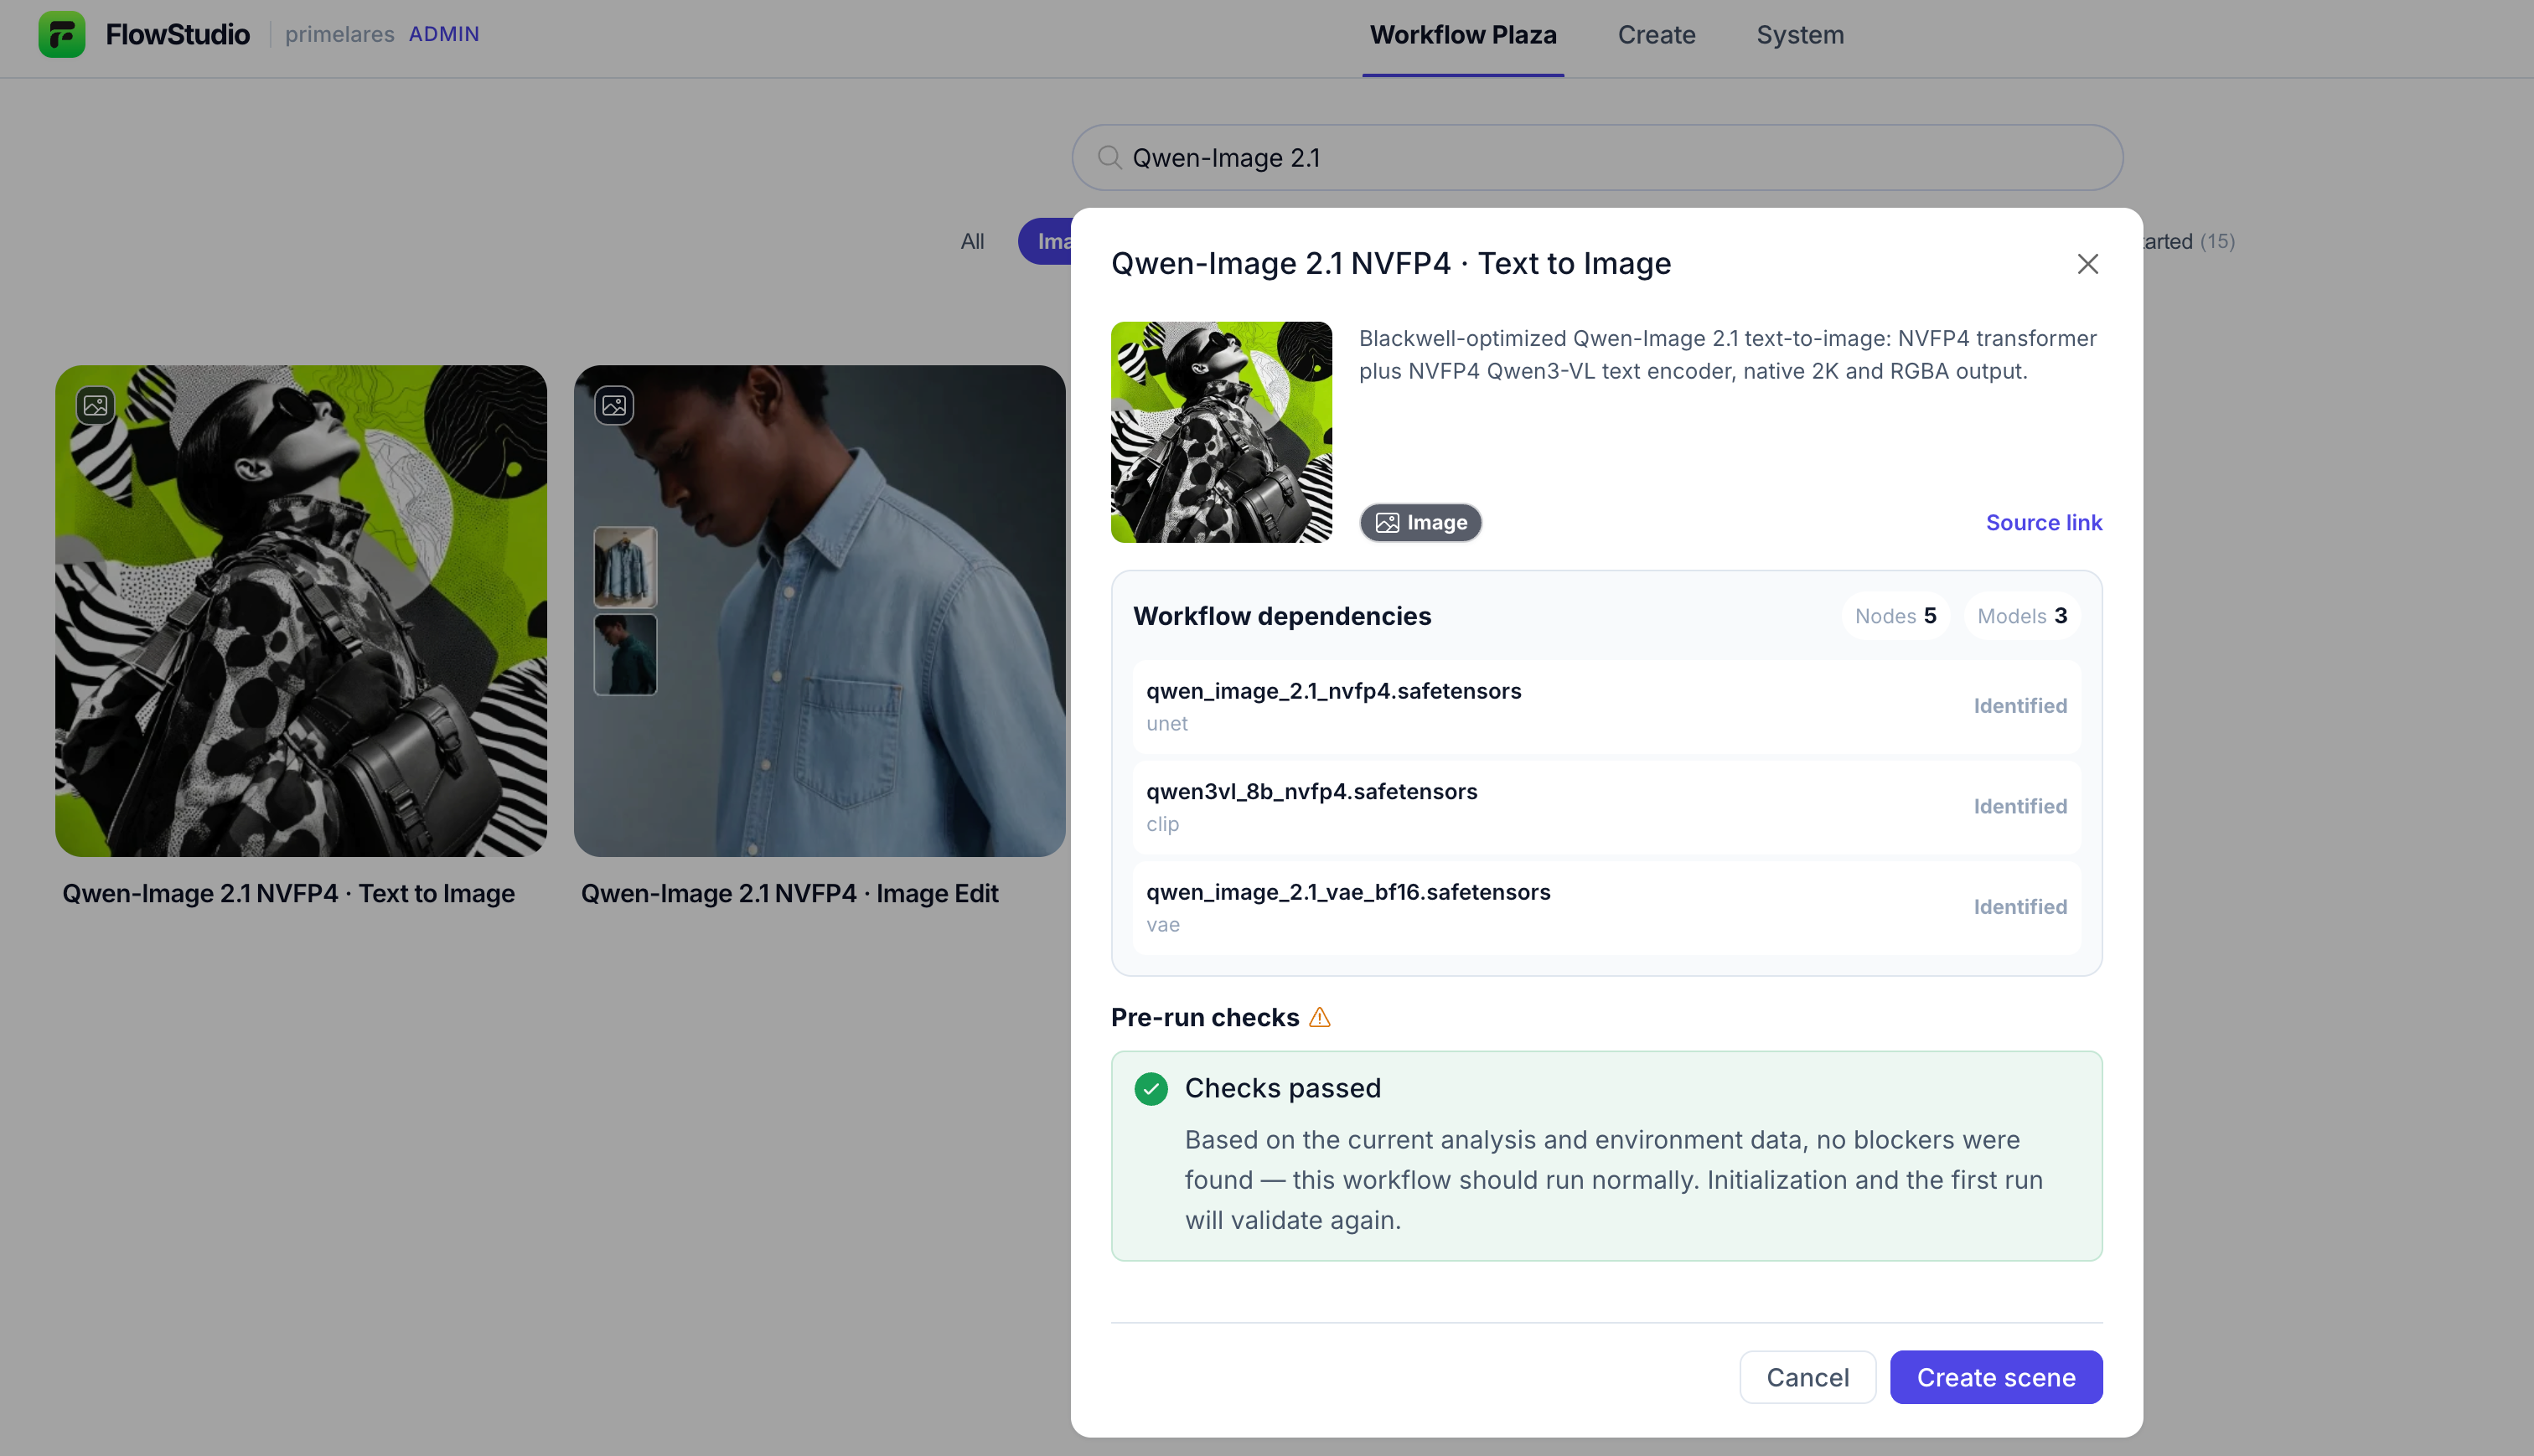
Insufficient GPU memory
If the check reports insufficient GPU memory, stop other GPU-heavy apps or unassign their GPU resources, then check again.
The Initialization progress panel opens on the right. Wait until it shows Init finished.
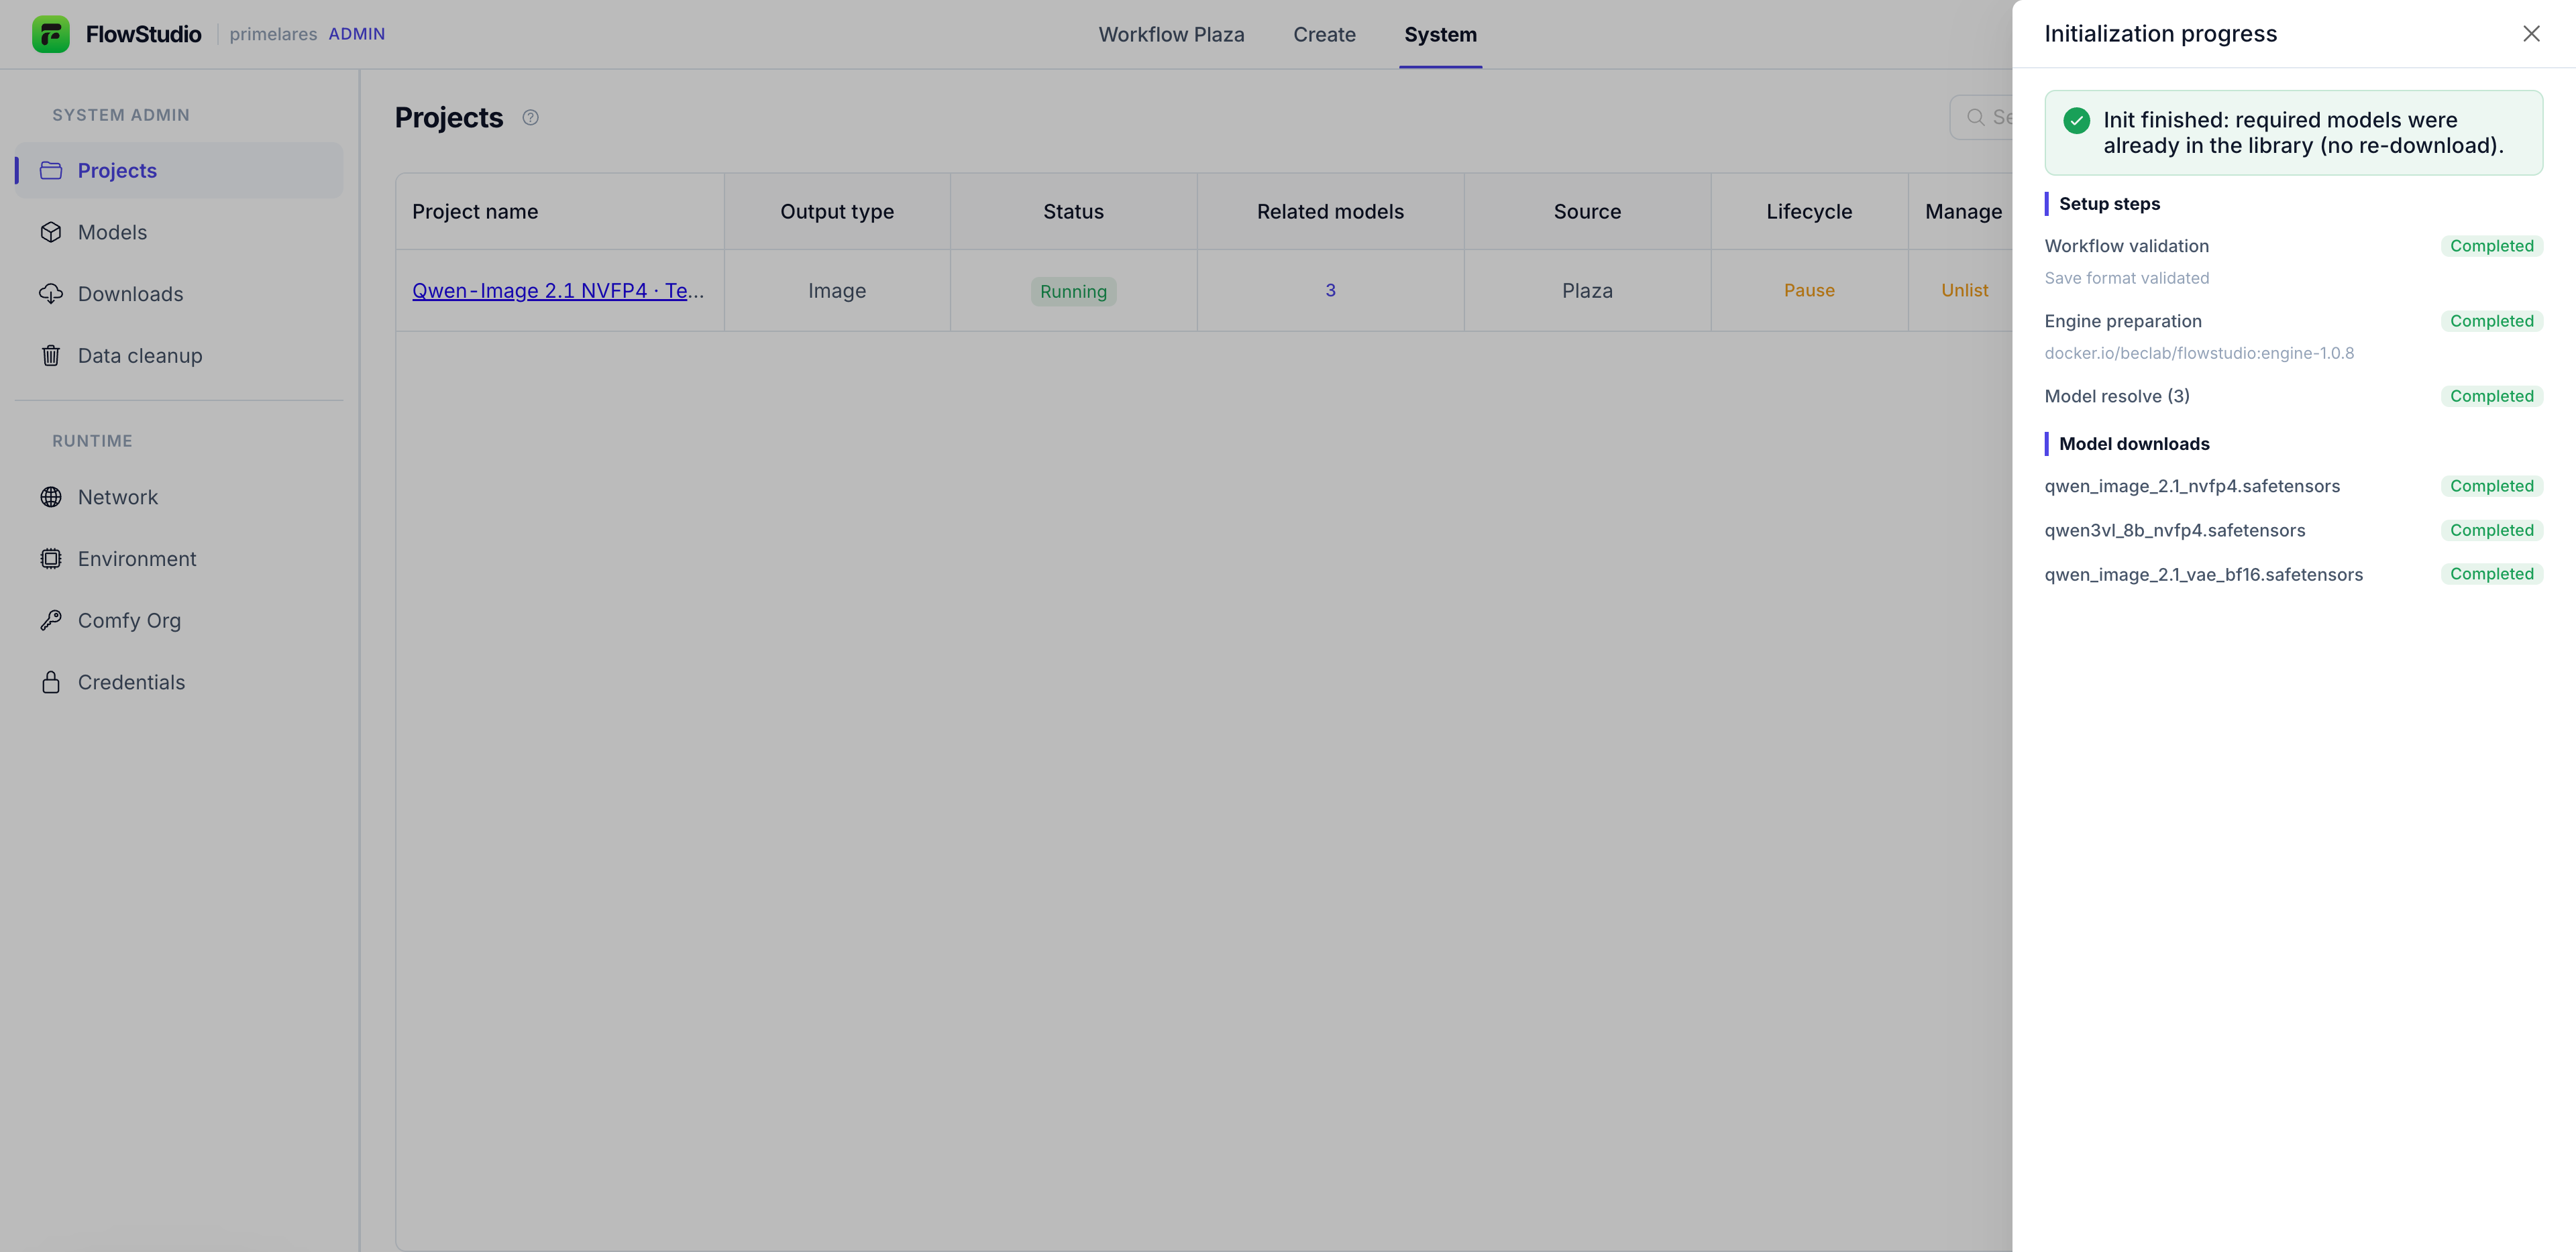
Configure and generate the image
Open Create > Scenes, and then select Qwen-Image 2.1 NVFP4 · Text to Image.
Enter a prompt. The example below creates a coastal poster featuring a red vintage car and the headline "TIMELESS DRIVE":
textCreate a cinematic automotive travel poster. A cherry-red vintage two-door coupe is parked at a scenic coastal overlook, shown in full from a low front three-quarter angle, with its front pointing left. Position the car across the lower center of the frame. Show finely detailed chrome trim, realistic tire tread, silver alloy wheels, subtle leather upholstery visible through the windows, and reflections of the sky and coastline in the glossy paint. In the middle distance, a winding road follows rugged cliffs past a small seaside village with colorful facades. A weathered stone wall borders the overlook. In the foreground, textured pavement and a few tufts of coastal grass add detail. Beyond the cliffs, turquoise water reveals submerged rocks, with white surf along the shore. Late-afternoon sunlight creates warm highlights on the car, cool shadows, and atmospheric depth in the distant coastline. Keep the car sharply defined and the background slightly softer, but recognizable. Place the exact headline "TIMELESS DRIVE" in elegant, clearly legible ivory uppercase letters in the upper-left sky area. Keep the headline modest in size and clear of the car and village. Photorealistic automotive photography with refined travel-poster typography. No people, brand logos, or additional text.Generate an image with transparent background
To generate an image with a transparent background, explicitly request an RGBA image with an alpha channel and a transparent background in your prompt. For example:
textThis is an RGBA image with transparency. The image has an alpha channel and a transparent background. A small red vintage toy car, shown in full from a front three-quarter angle, with glossy paint, silver wheels, and chrome trim. Center the car with space around it.Click Parameters and configure the image:
Parameter Setting Aspect ratio Select 16:9 for this example. Megapixels Choose an output resolution from the list. Batch Select 1 for this example. Click Generate and wait for the task to finish.
Open the generated image to check the details.
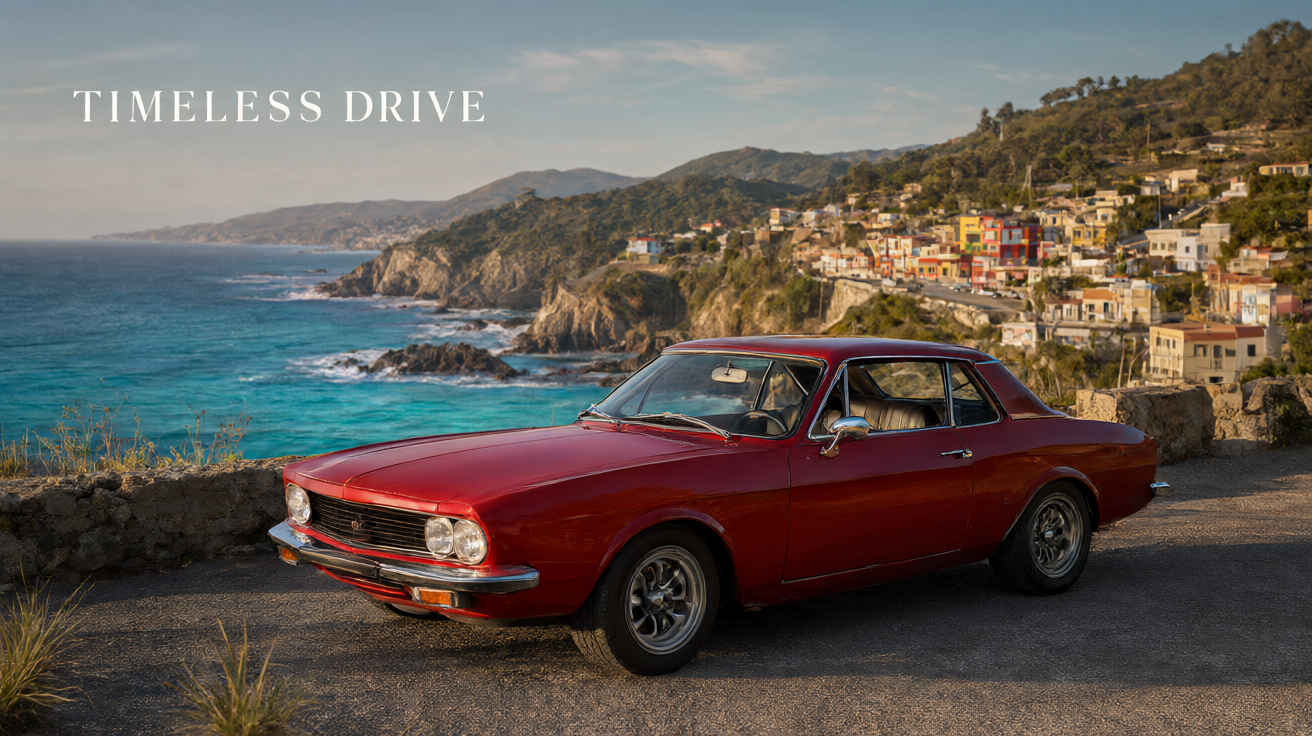
Hover over the generated image and click the download icon. You will use this red-car image in the next section.
Edit an image
Use Qwen-Image 2.1 NVFP4 · Image Edit to modify an image with text instructions while preserving the subject's identity and visual details.
Prepare the scene
Open FlowStudio, go to Workflow Plaza, and select Image.
Search for
Qwen-Image 2.1, and then select Qwen-Image 2.1 NVFP4 · Image Edit.Review Pre-run checks. When it shows Checks passed, click Create scene.
The Initialization progress panel opens on the right. Wait until it shows Init finished.
Text to Image and Image Edit use the same three model files. Models already installed in the library are reused rather than downloaded again.
Configure and edit the image
This example uses the red-car poster from the previous section and asks the model to change only the car's paint color.
Open Create > Scenes, and then select Qwen-Image 2.1 NVFP4 · Image Edit.
Click Parameters and configure the image:
Parameter Setting Editable image Click Choose reference, then select Upload to upload the image you want to edit. Use the red-car image from the previous section for this example. Aspect ratio No adjustment is needed. The output follows the input image's aspect ratio regardless of this setting. Megapixels Choose an output resolution from the list. Batch Select 1 for this example. Enter a prompt. The example below changes the car's paint from red to blue:
textChange only the car's red paint to a rich metallic blue. Preserve the car's body shape, chrome trim, wheels, windows, and interior. Keep the coastal village, sea, mountains, road, camera angle, and composition unchanged. Preserve the exact text "TIMELESS DRIVE" in its original position and style. Maintain the warm late-afternoon lighting, with natural highlights and reflections on the new blue paint.Click Generate. When the task finishes, open the edited image and check that the requested changes have been applied.
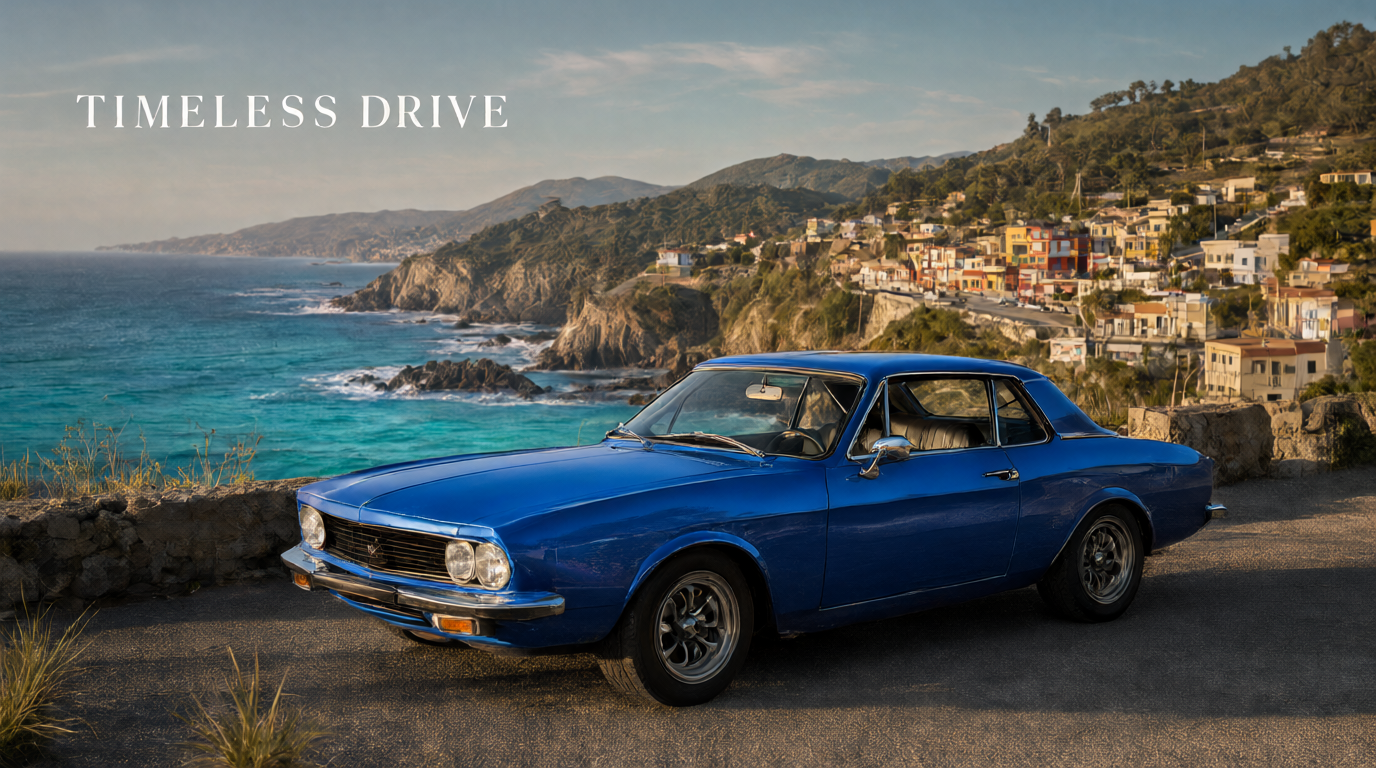
Hover over the edited image and click the download icon. You will use this blue-car image in the next section.
Generate a video from two images
Use FastVideo FastH3: Image to Video to create a video with audio from a starting image and an optional ending image.
Prepare the scene
- Open FlowStudio, go to Workflow Plaza, and select Video.
- Search for
FastVideo FastH3, and then select FastVideo FastH3: Image to Video. - Review Pre-run checks. When it shows Checks passed, click Create scene.
- The Initialization progress panel opens on the right. Wait until it shows Init finished.
Configure and generate the video
This example uses the blue-car image as the starting image and the red-car image as the ending image. The prompt asks the car to move forward while its paint changes from blue to red.
Open Create > Scenes, and then select FastVideo FastH3: Image to Video.
Click Parameters and configure the video:
Parameter Setting First frame Click Choose image to upload the required starting image. The output follows this image's aspect ratio. Use the blue-car image for this example. Last frame Optionally upload an ending image. Match the starting image's aspect ratio to avoid stretching or cropping. Use the red-car image for this example. Megapixels Select 480p for this example. Available resolutions are 360p, 480p, 540p, and 720p; the default is 480p. Duration Set to 5 seconds for this example. The range is 2–15 seconds, with a default of 5. Enter a prompt. To specify the sound, include dialogue, sound effects, or music in your prompt.
The example below asks the car to move forward while its paint changes from blue to red:
textCreate a continuous tracking shot, starting with the blue car in the first frame and ending with the red car in the last frame. The car drives slowly forward along the coastal road, toward the left side of the scene. Its wheels rotate naturally. The camera tracks alongside it at the same speed, keeping the car at a consistent size and position in the frame while the road and coastal scenery move gently behind it. As the car moves, its paint gradually changes from metallic blue to the red shown in the last frame. Complete the color transition by the end of the clip. Preserve the car's body shape and details. Maintain warm late-afternoon lighting and realistic reflections. Keep the "TIMELESS DRIVE" headline fixed and legible as a screen overlay. Smooth motion, no cuts, no sudden acceleration, and no body deformation.Click Generate and wait for the task to finish.
The following video is an example output:
Download the generated video to use as a reference in the next section.
Generate a video from reference media
Use MiniMax H3 NVFP4 · Reference to Audio-Video to generate video with audio from reference images, videos, or audio.
Prepare the scene and references
- Open FlowStudio, go to Workflow Plaza, and select Video.
- Search for
MiniMax H3, and then select MiniMax H3 NVFP4 · Reference to Audio-Video. - Review Pre-run checks. When it shows Checks passed, click Create scene.
- The Initialization progress panel opens on the right. Wait until it shows Init finished.
Configure the reference inputs
This example uses the red-car image and the previously generated video to create a short commercial in which the car drives out of a picture frame onto a desk.
Open Create > Scenes, and then select MiniMax H3 NVFP4 · Reference to Audio-Video.
Click Parameters and configure the video:
Parameter Setting Reference image group Add up to 3 images. Images are resized to the output resolution. For this example, click the add button and select the original red-car image. Reference videos Optionally add one video lasting 2–15 seconds that includes visual content. Any portion beyond the output duration is trimmed. Its original audio is automatically used as an audio reference. For this example, select the video generated in the previous section. Reference audio Optionally add one audio clip lasting 2–15 seconds. Audio is not trimmed; longer clips use more GPU memory and take longer to process. Leave empty for this example. Aspect ratio 16:9 (Widescreen), matching the poster's landscape composition. Megapixels Select 480p, the default and recommended resolution for reference-based video generation. Frame rate Keep 24 fps. Changing this value changes playback speed and the actual video duration rather than adding frames. Duration Set to 5 seconds for this example. The supported range is 2–15 seconds, with a default of 5. For GPU memory usage, follow these recommendations: - With a reference video, keep output at 5 seconds or less to avoid exhausting GPU memory.
- With image and audio references but no reference video, you can select up to 15 seconds.
Quick Generation Leave enabled for faster previews. Turn it off for higher quality at a slower generation speed.
Prompt and generate the video
Enter a prompt. The example below asks the red car to emerge from a framed picture as a miniature car:
textCreate a playful 5-second miniature car commercial. Use the uploaded image as the artwork inside a framed picture and as the reference for the red vintage car. Use the uploaded video only for the car's driving motion and rotating wheels. A framed picture of the red car on a coastal road stands upright on a wooden desk. The camera faces the frame at a slight angle. The car comes to life inside the picture. It drives toward the viewer and physically crosses the frame's lower edge: first the front bumper, then the front wheels, followed by the body and rear wheels. As it emerges, it becomes a solid miniature car on the desk. The camera gently pulls back to keep the entire car and frame visible. The car rolls forward and stops on the desk, fully outside the frame. The coastal landscape stays inside the picture, with no car remaining in it. Keep the car red throughout. The frame stays upright and stationary. One continuous shot with warm afternoon lighting. No cuts, no duplicate cars, and no added text. Add a tiny engine rev, a soft tap as the wheels touch the wooden desk, and a playful musical finish. No dialogue.Click Generate and wait for the task to finish.
Play the video to review the result.
The following video is an example output:
Learn more
- Qwen-Image 2.1: Read the official model description.
- FlowStudio overview: Compare direct creation with calling FlowStudio through Lares.
- Use FlowStudio through Lares: Prepare the apps and scenes for conversational creation.