Back up and restore data in Olares
Olares' backup feature lets you create full and incremental backups for specified file directories and the Wise application. You can back up data to local and network storage, and restore files or app data from snapshots stored on local paths, Olares Space, or cloud services such as AWS S3 and Tencent COS.
Back up your data
Add a backup task
To add a backup task:
Go to Settings › Backup, and click Add backup.
Choose Backup files or Backup applications.
On the Add backup task page, configure the following options:
Option Description Backup location - Local path: Recommended to select an external device such as a USB drive, SMB share, or external hard drive.
- Cloud storage: Supports Olares Space, AWS S3, and Tencent COS. Click Add account in the dialog to add a storage account. For details, see Connect cloud storage.Region (for network storage) Choose the region for the selected storage service. Backup path (for file backups) Specify the directory to back up. Select application (for app backups) Choose the application to back up from the dropdown. Currently, only Wise is supported. Backup name Enter a recognizable task name. Recommended to include the purpose and timestamp. WARNING
Ensure the selected storage has enough available space to store the backup data.
Set backup schedule & security:
- Snapshot frequency: Choose from daily / weekly / monthly
- Snapshot time: Set the time when the backup task should run
- Backup password: Protect your snapshots with a password
Click Submit to start the backup task. The first execution will perform a full backup. Subsequent runs will perform incremental backups.
WARNING
Before starting the backup, please make sure:
- The selected storage has enough available space to store the backup data;
- You have an active subscription for the selected cloud storage service;
- You have read and write permissions for the target storage location, for example, an SMB directory.
Manage backup tasks
Once created, your backup task will appear in the task list. Click the > button on the right to open the detail page. Available actions include:
| Action | Description |
|---|---|
| Manage | - Edit: Modify the snapshot frequency and backup time - Pause: Pause the backup task - Delete: Remove the task and all associated snapshots |
| Snapshot now | Manually trigger a backup immediately |
View snapshot records
At the bottom of the backup management page, you'll see a list of snapshots for the backup task, with snapshot information such as:
- Creation time: The execution time of the snapshot.
- Size: Size of the snapshot.
- Status: The execution status of the snapshot.
- Backup type: The snapshot is a full backup or an incremental backup.
Restore data from a backup
You can use existing backup snapshots to restore files to a specified directory or recover application data. Currently, only the Wise application is supported for app restore.
Restore from a local backup
- Go to Settings › Restore, then click Add restore.
- Select From local path.
- Select the local backup path. The path must point to the backup task folder. For example, if the task name is
demoand the location is/documents, the correct path would be:/documents/olares-backups/demo-xxxx. - Enter your backup password.
- Click Query snapshots to get available snapshots.
- Click Restore next to the desired snapshot to load it.
- If restoring files, specify the restore location and destination folder, then click Start Restore.
If restoring the Wise application, simply click Start Restore without specifying a path.
Restore from Olares Space
INFO
Understand charges for storage and bandwidth before using backup and restore services. Each instance includes a certain amount of free traffic, and any usage exceeding the quota will incur charges. For self-hosted Olares users, it's also important to monitor the storage usage of backups. For more information, see Billing.
Use the LarePass app to scan and log in to Olares Space.
Click Backup in the left navigation pane. The Backup Usage section shows the total storage used by all backups and the total quota.
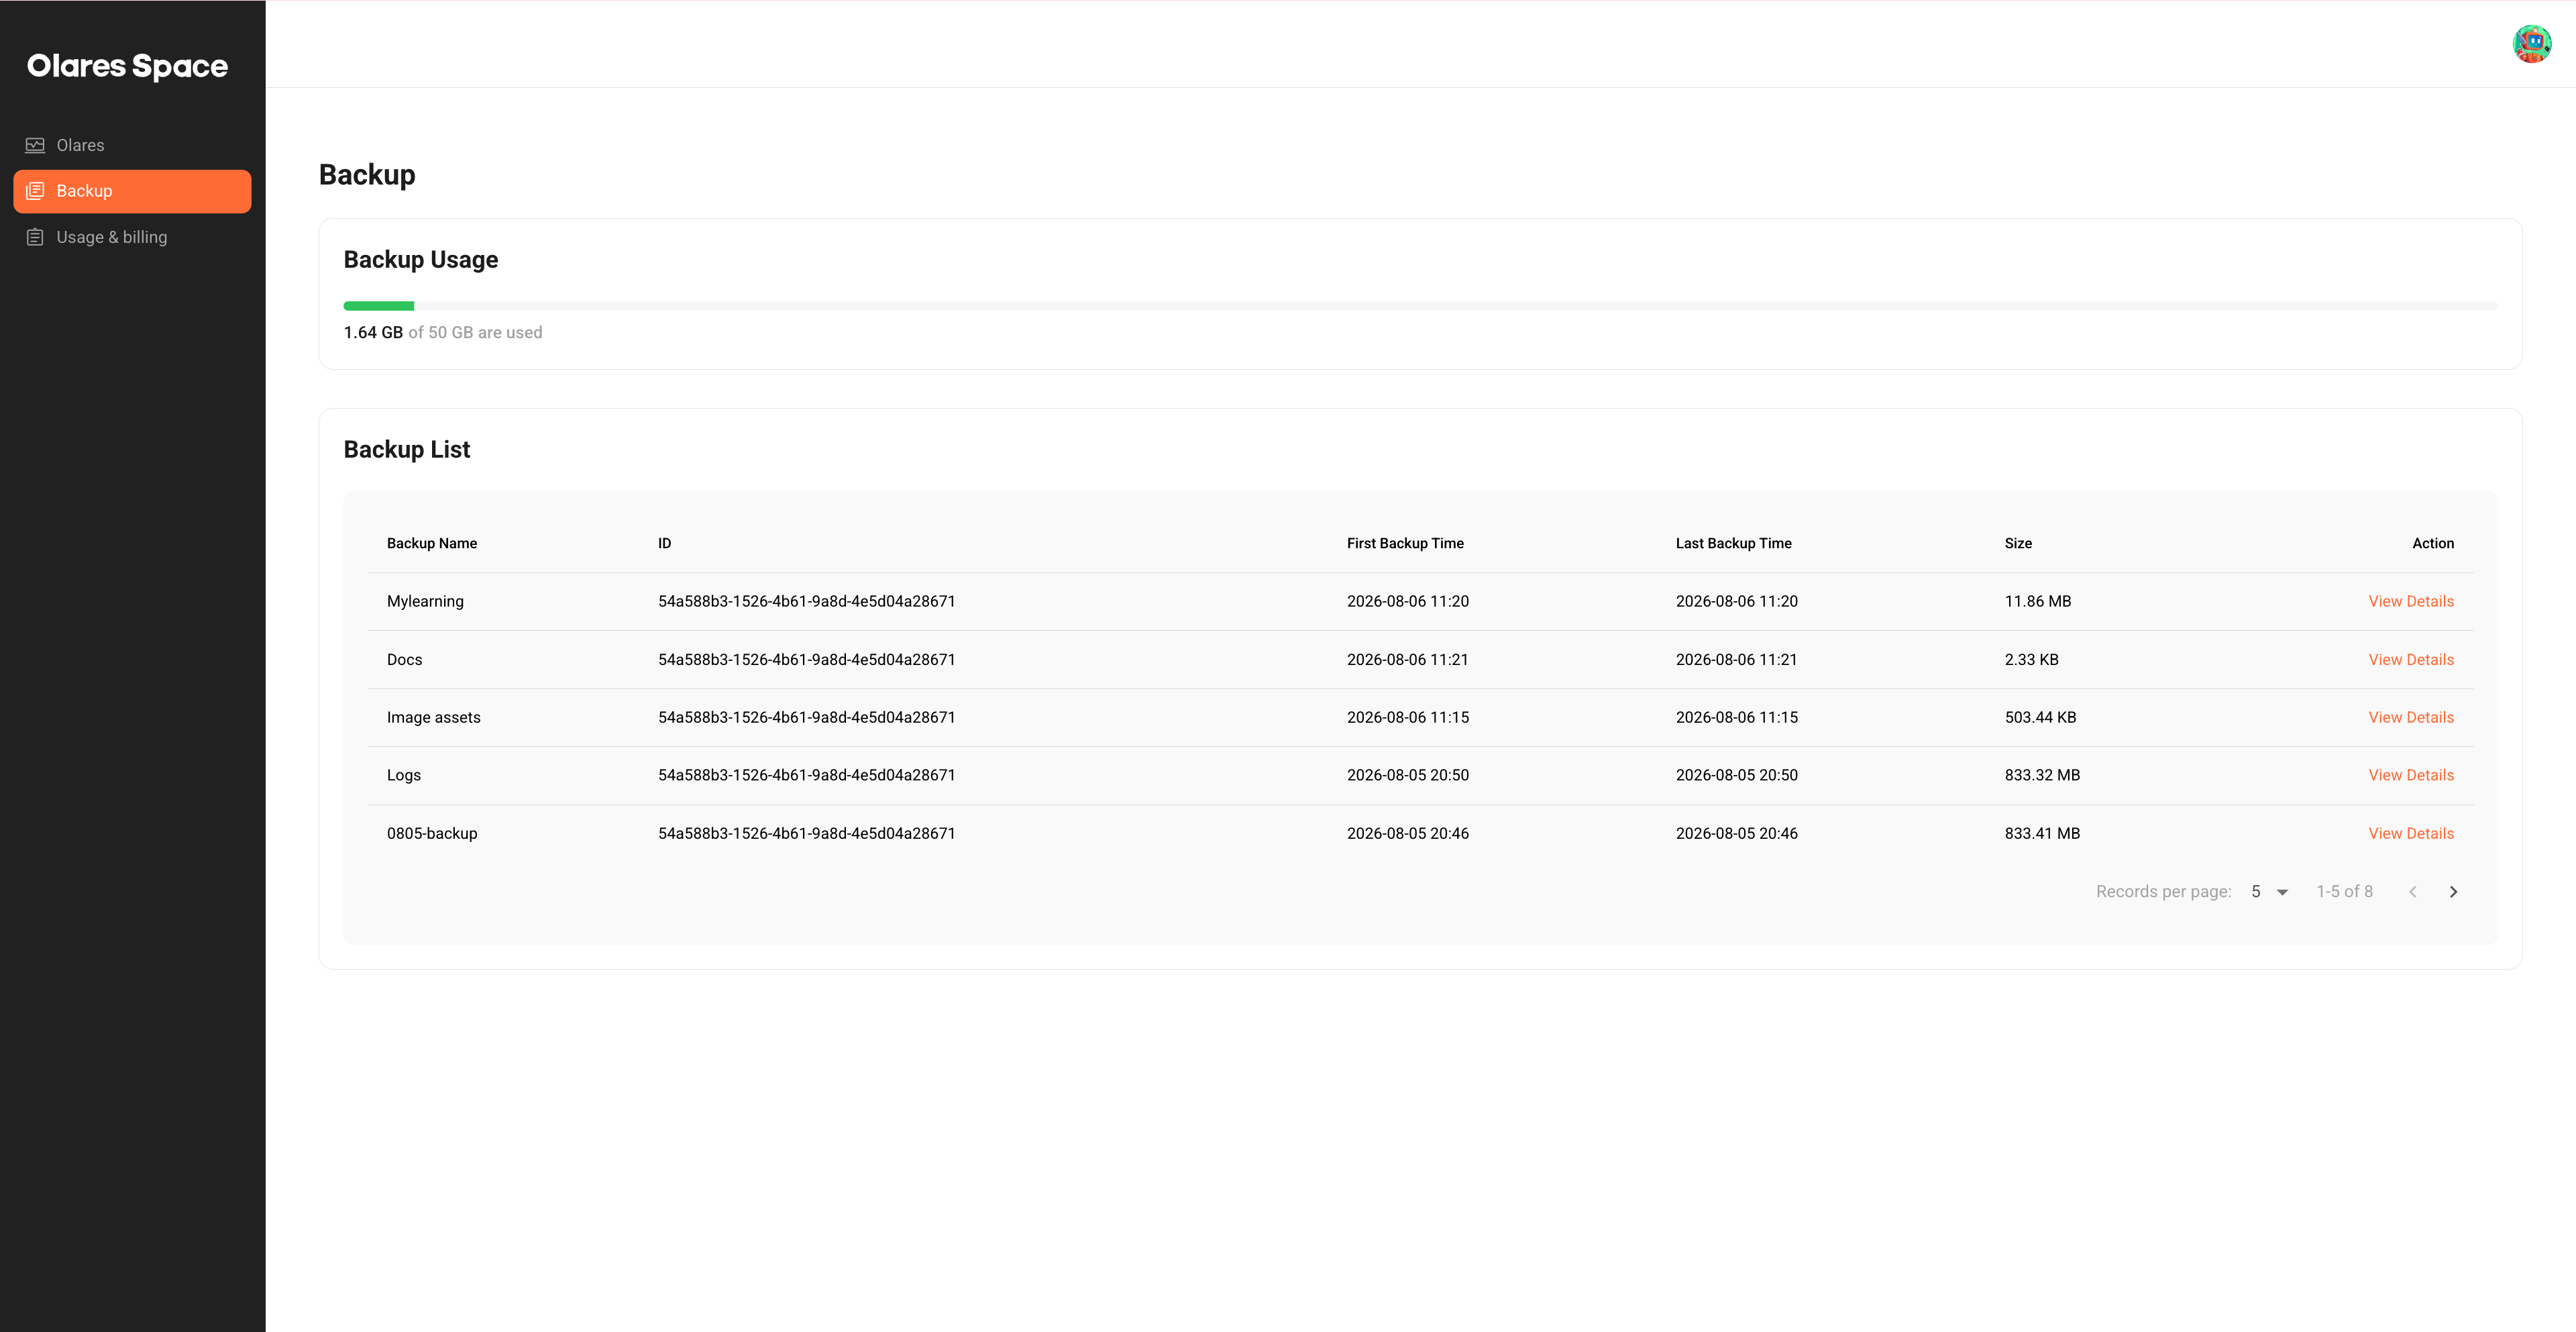
Locate the target backup task and click View Details to review its snapshots.
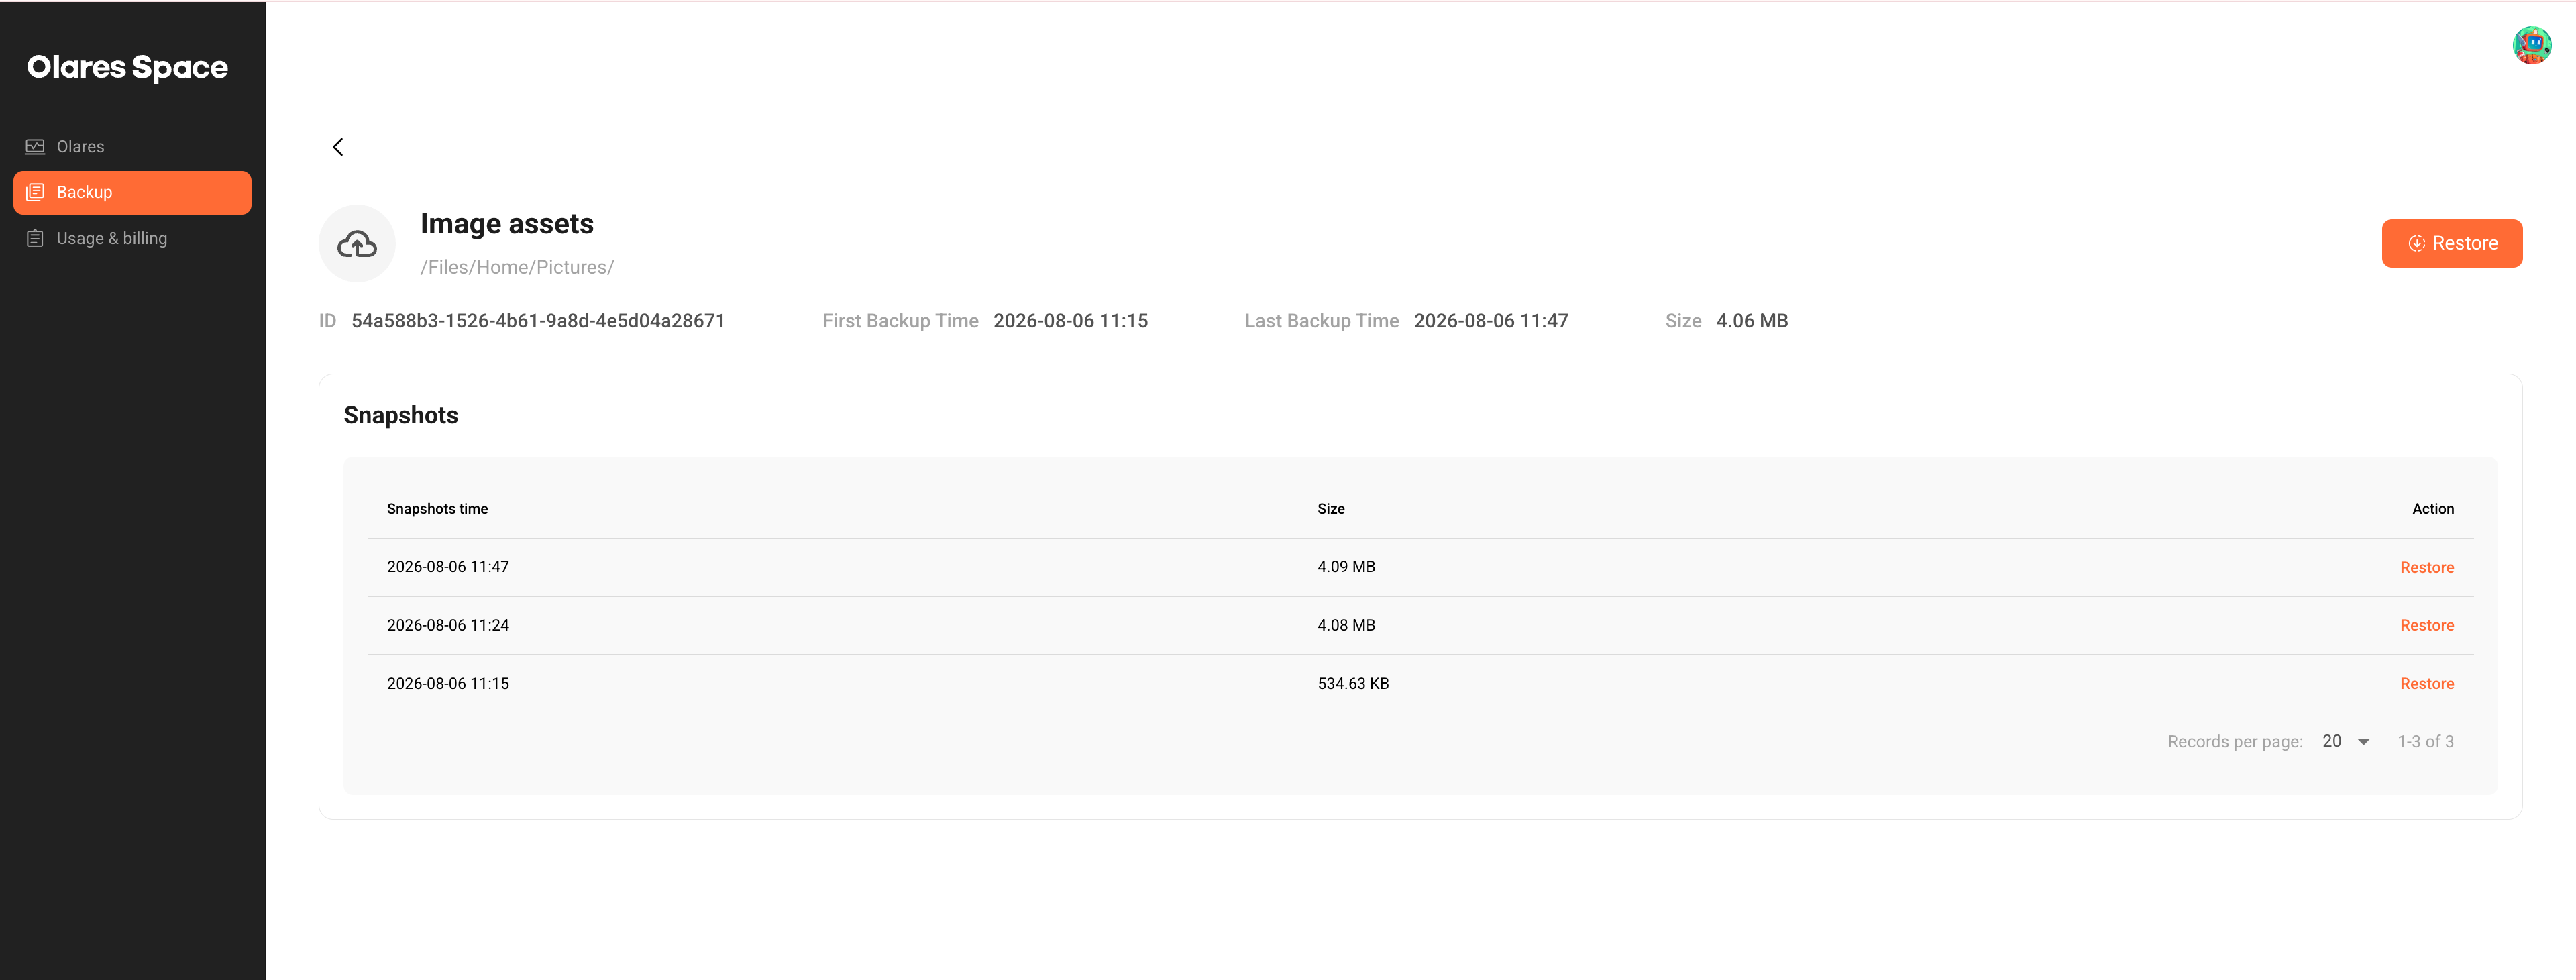
Select the snapshot to restore:
- To restore the most recent snapshot, click Restore in the upper-right corner.
- To restore a specific snapshot, find it in the Snapshots table, and then click Restore on that row.
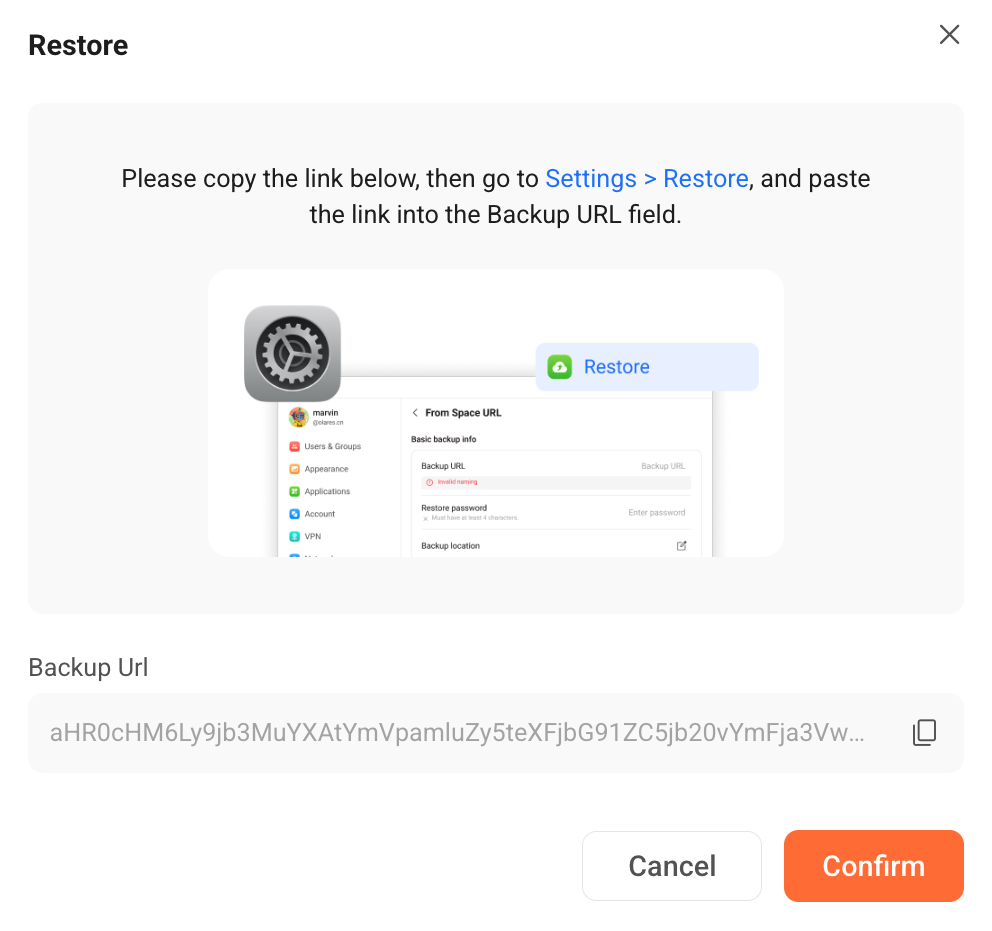
In the Restore window, copy the Backup Url.
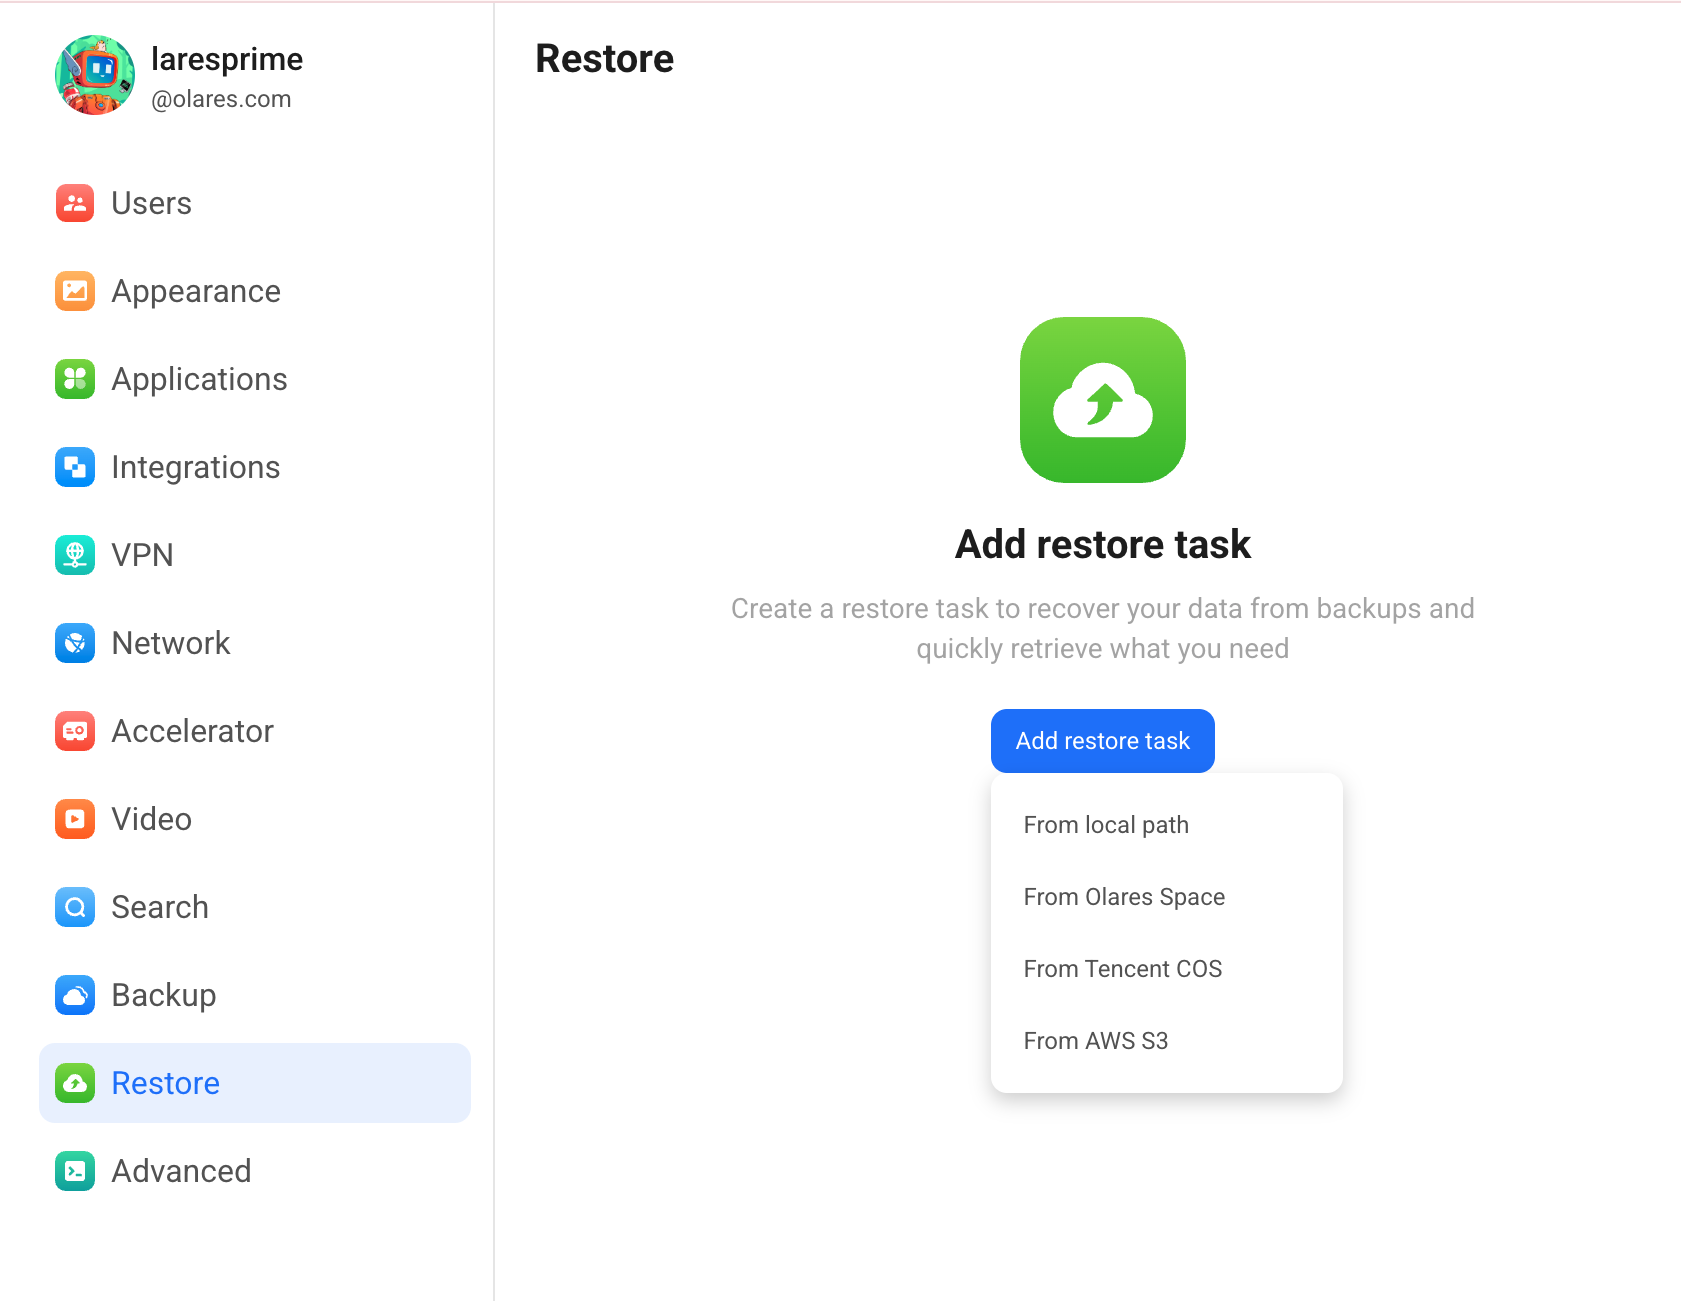
Switch to your Olares. Go to Settings › Restore and add a restore task:
- If the page is empty, click Add restore task, and then select From Olares Space.
- If the page already has restore tasks, click add in the upper-right corner, and then select From Olares Space.
Fill in the restore information:
- Backup URL: Paste the copied Backup Url.
- Restore password: Enter the password you set when creating the backup task.
- Restore location: Select the directory where you want to restore the files.
- New folder name: Enter a name for the new folder that will contain the restored files.
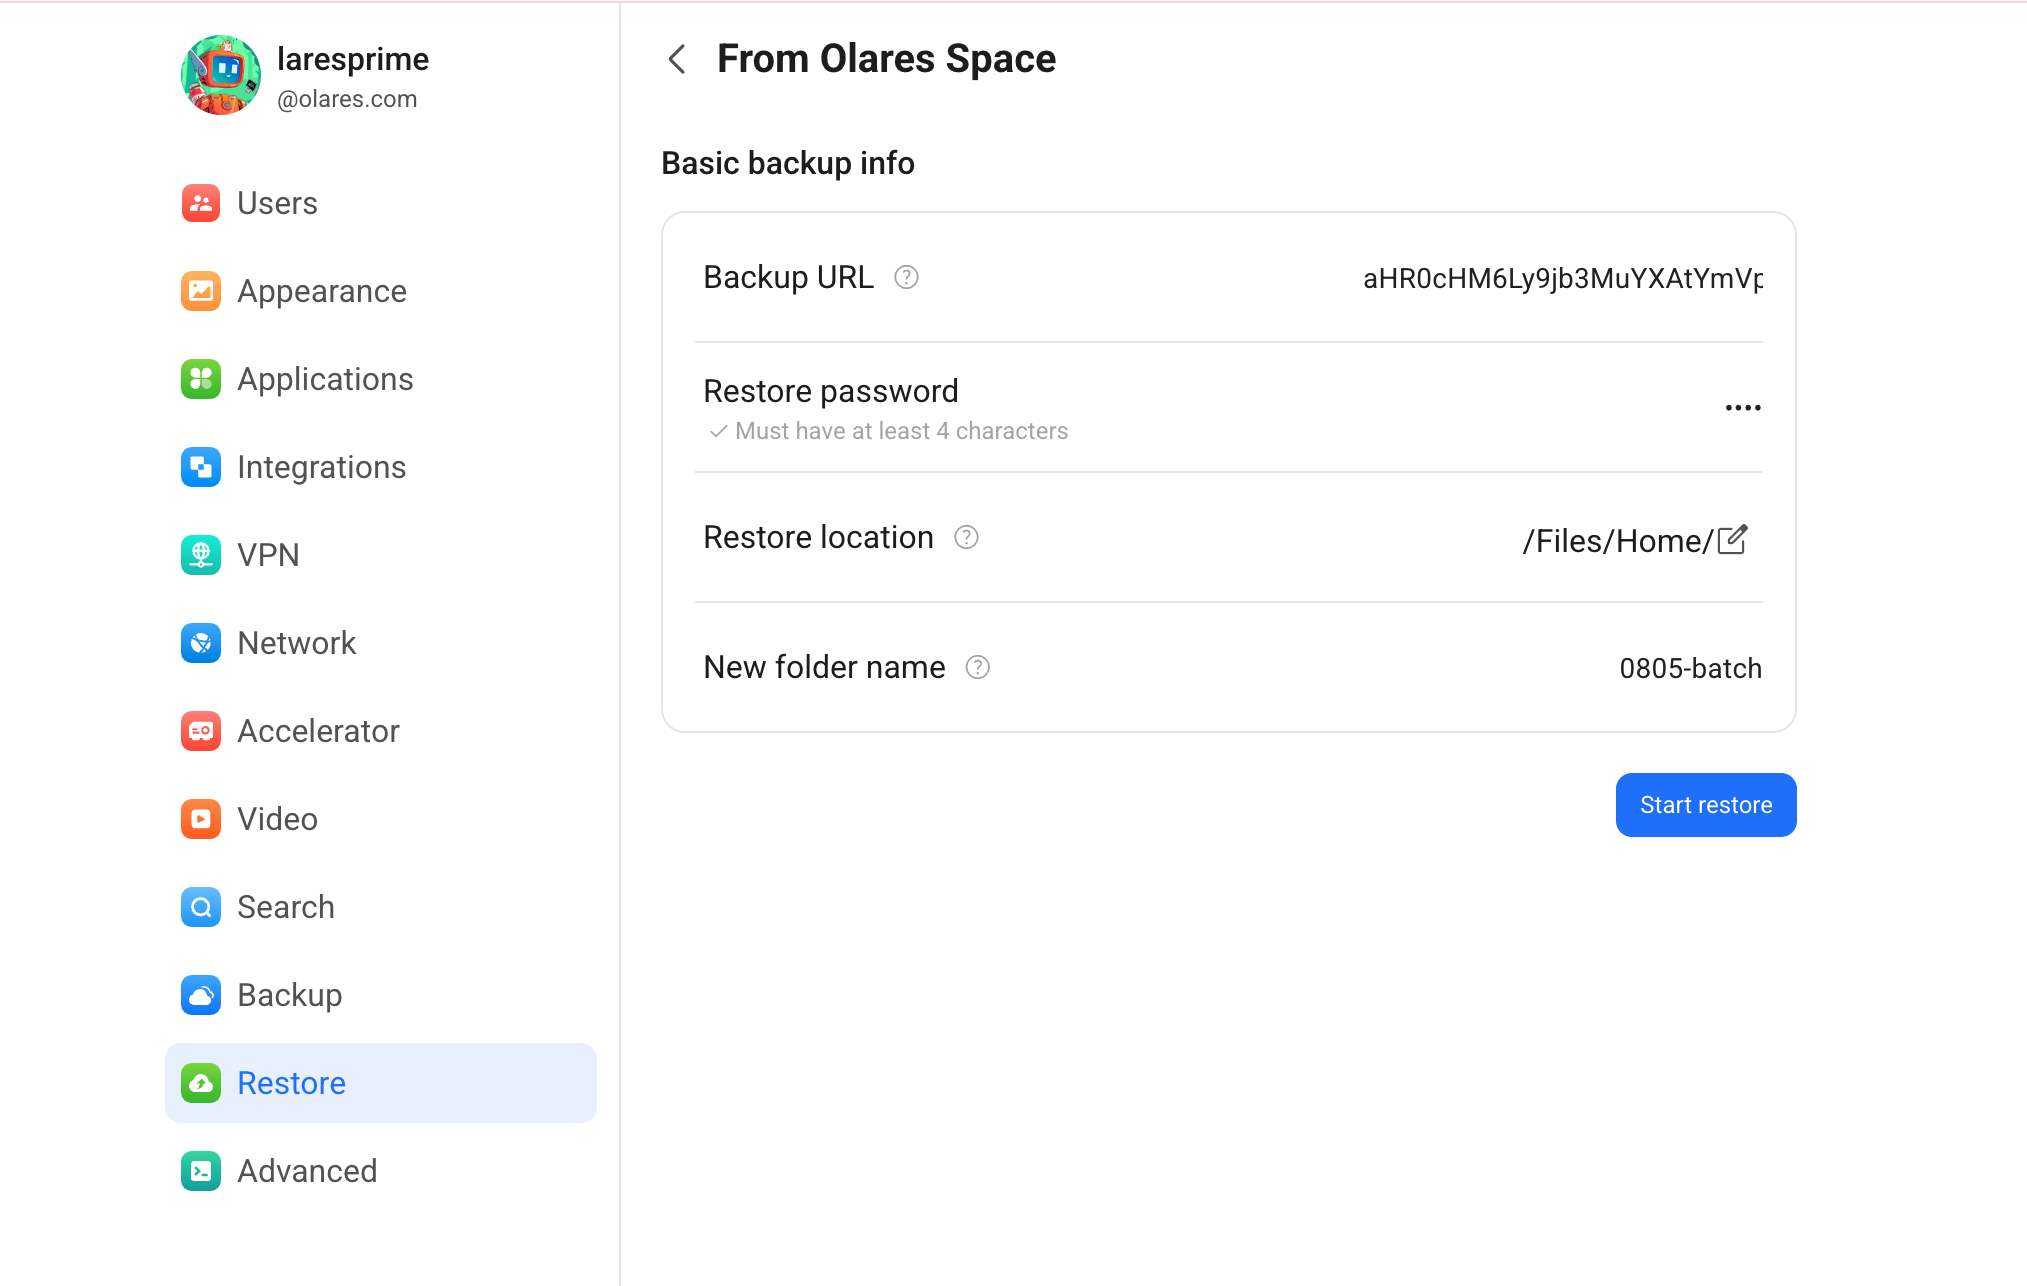
Click Start restore.
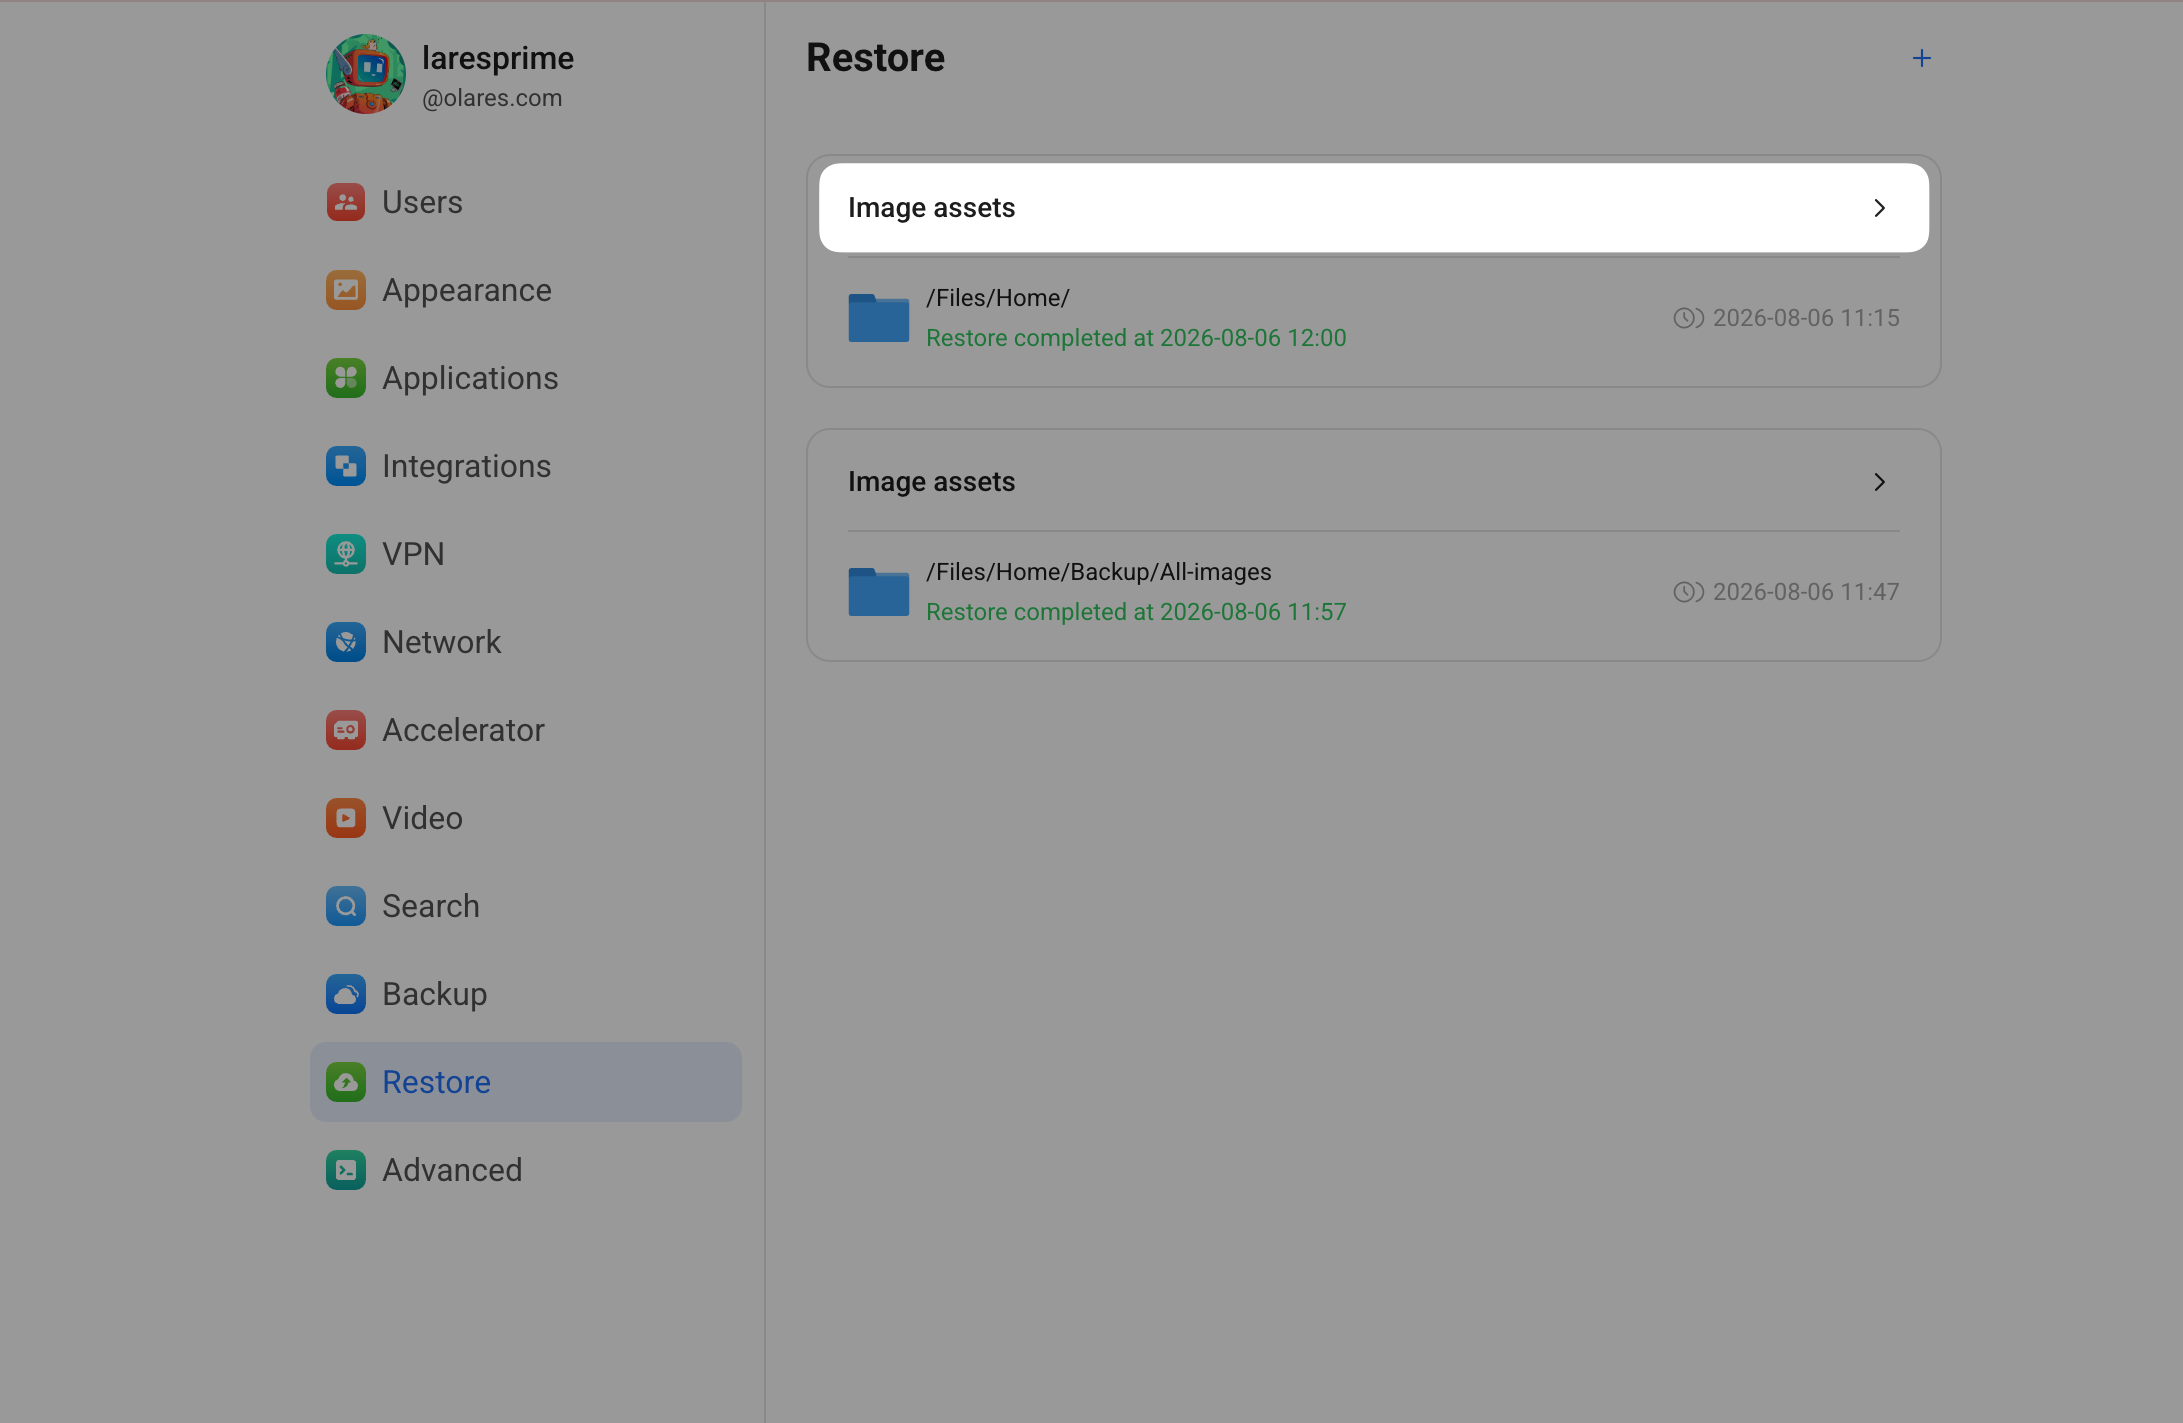
After the restoration finishes, click the restore task card on the Restore page to open the restore details.
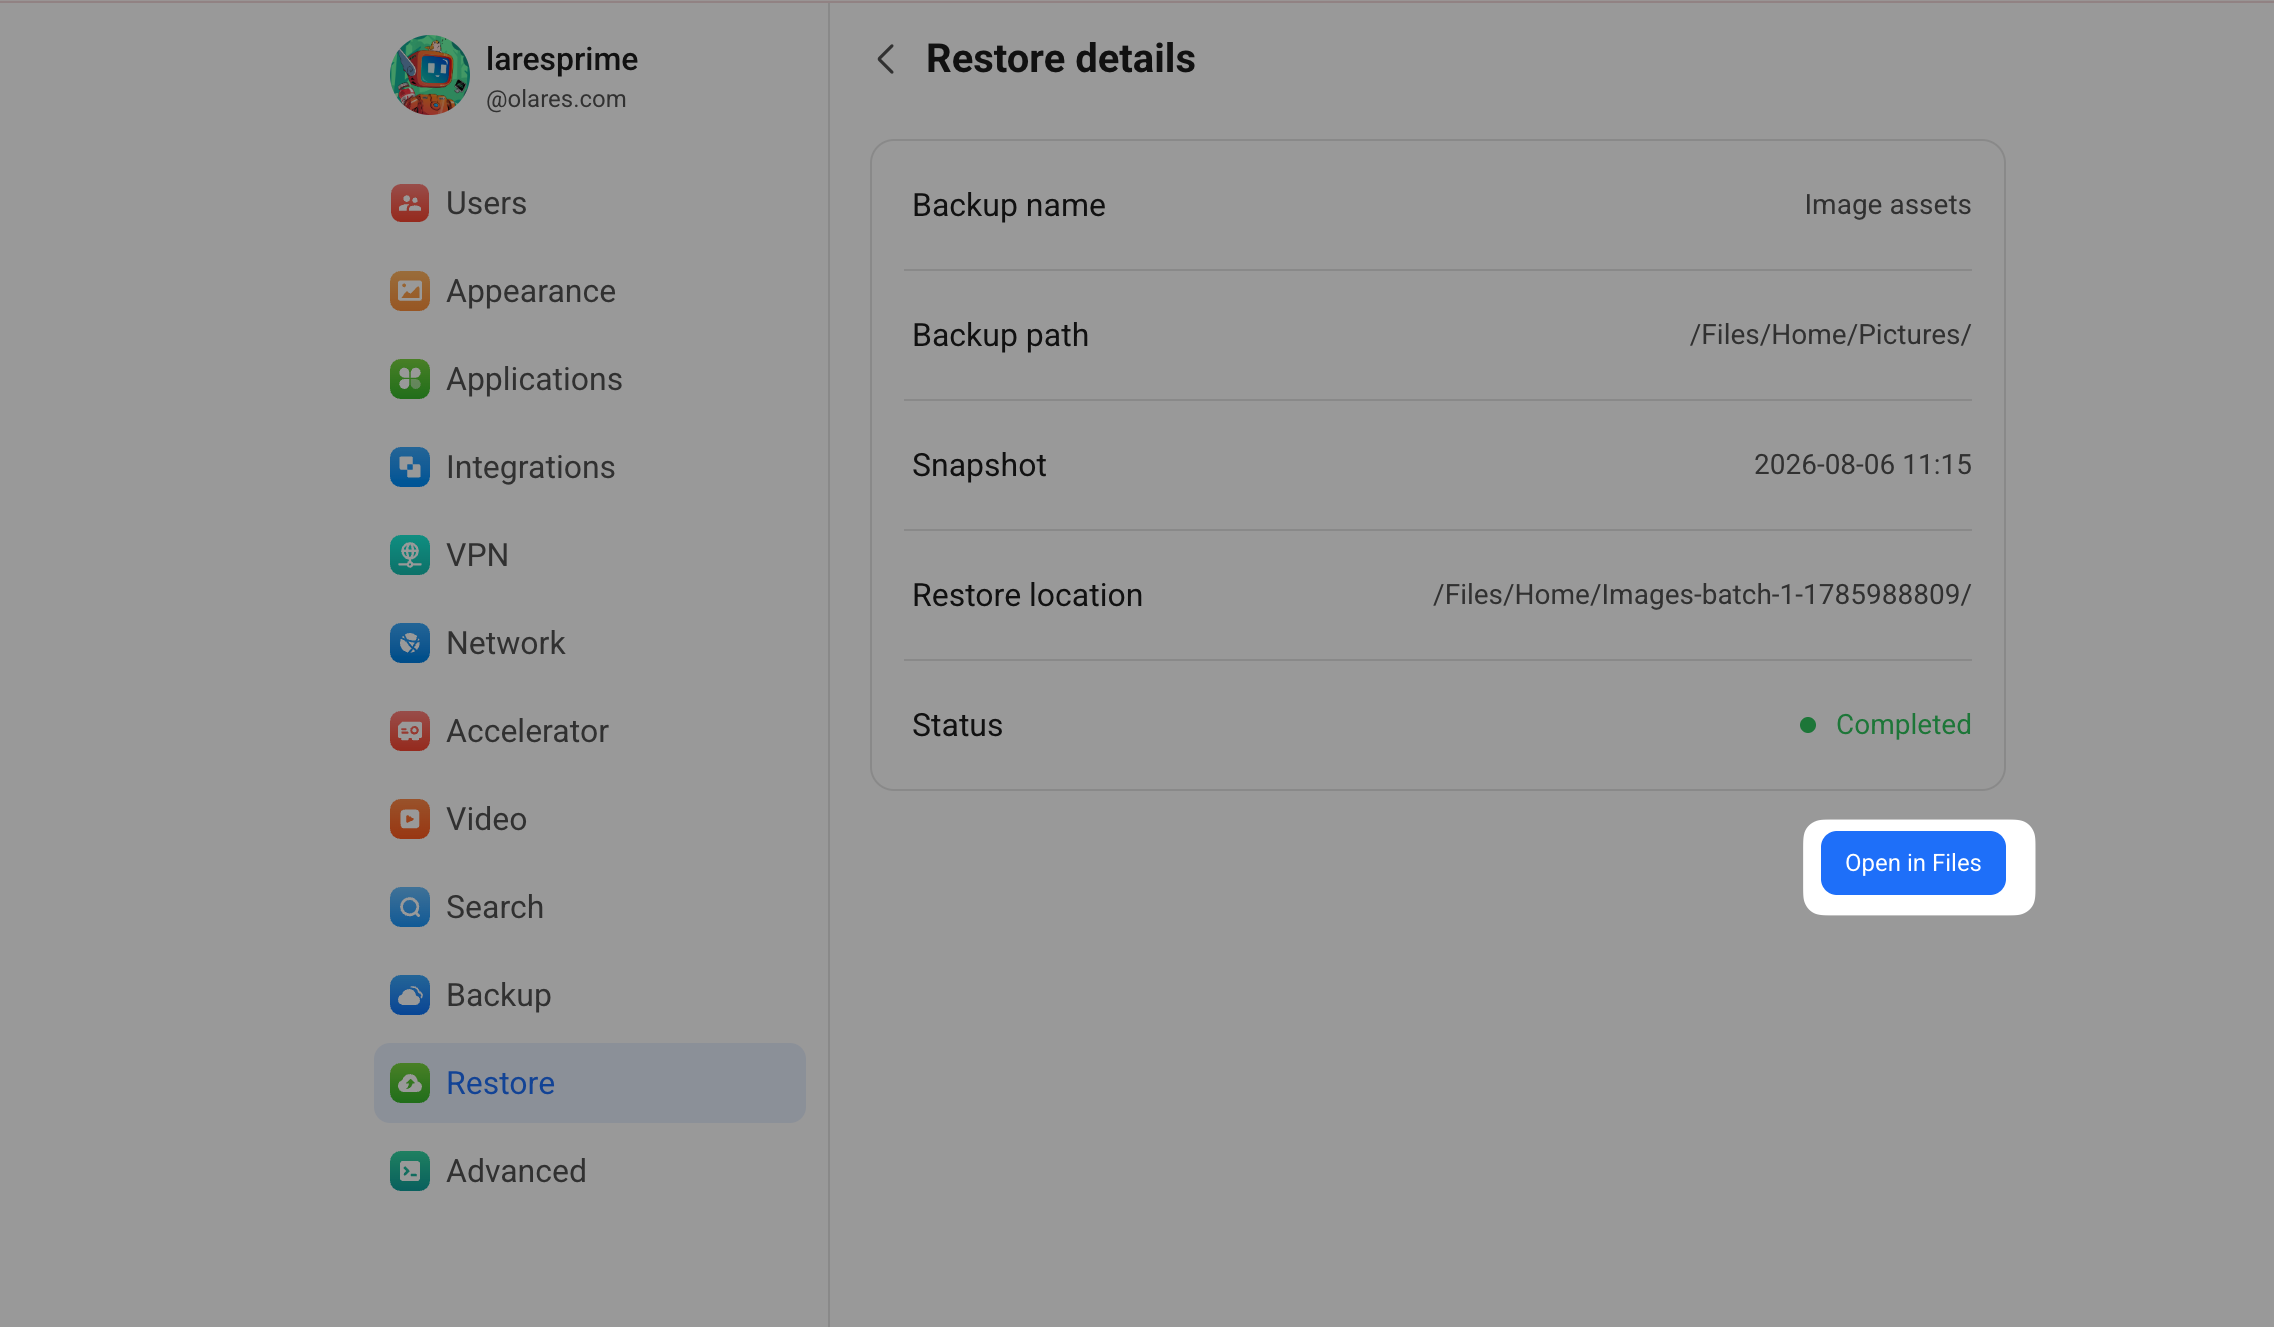
On the Restore details page, click Open in Files. The Files app opens the folder containing the restored files.
Restore from AWS S3 or Tencent COS
- Get a link to the backup folder:
- AWS S3: Go to the AWS S3 Console, navigate to your bucket, and locate the
olares-backupsdirectory. Select the target backup folder, then generate a pre-signed URL for that folder. See AWS S3 documentation for help. - Tencent COS: Go to the Tencent Cloud COS console > Bucket > Files, and locate the target backup folder in the
olares-backupsdirectory. Open the folder details and copy the temporary access link at the bottom. See Tencent Cloud documentation for help.
- AWS S3: Go to the AWS S3 Console, navigate to your bucket, and locate the
- Go to Settings › Restore, click Add restore, and select the corresponding cloud storage option.
- Paste the link into the Backup URL field.
- Enter your backup password.
- Click Query snapshots to load available snapshots.
- Click Restore next to the desired snapshot.
- If restoring files, specify the restore location and destination folder, then click Start Restore.
If restoring the Wise application, simply click Start Restore without specifying a path.
Manage restore tasks
Once created, your restore task will appear in the task list on the Restore page. Click the › button on the right to view the task details. Available actions include:
- Cancel restore task: Click Cancel to interrupt and stop the restore process.
- View files or app: Once completed, click Open App or Open Folder to access the restored data.