Compress and extract files
In the Files app, you can compress files to save space or share them, and extract archives in various common formats.
Compress files
Open the Files app.
Right-click the file or folder you want to compress, and then hover over Compress to....
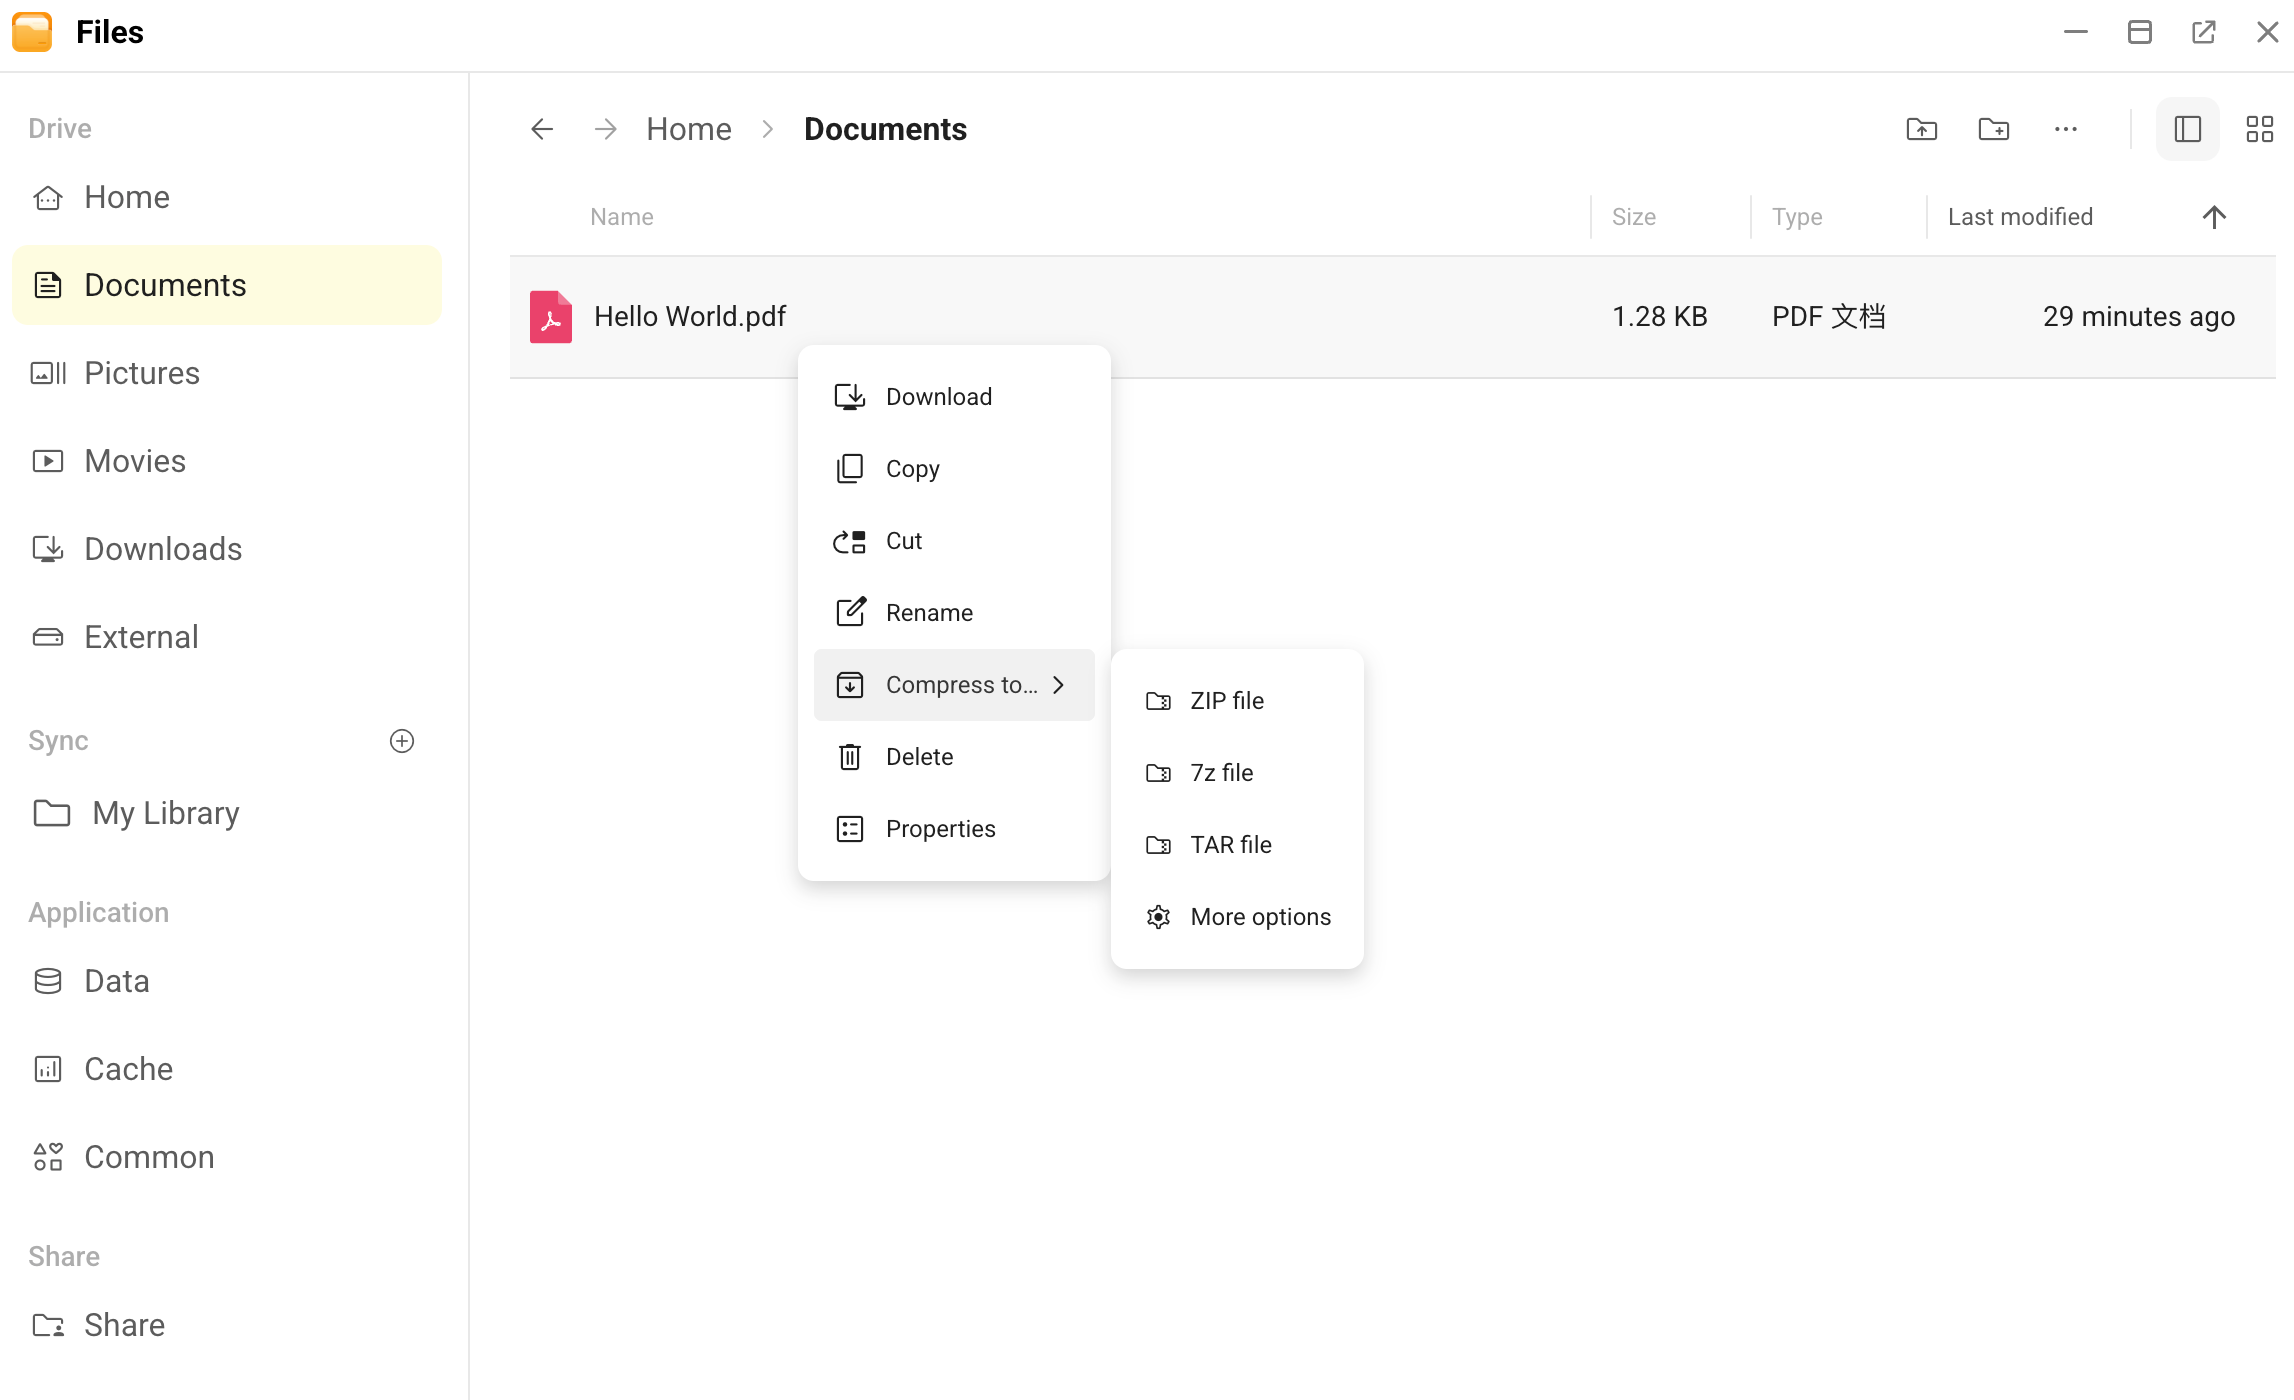
To compress it quickly, select ZIP file, 7z file, or TAR file. The archive will be created directly in the current folder.
To compress to other formats or customize compression settings, select More options:
a. In the Create archive window, configure the following settings as needed:
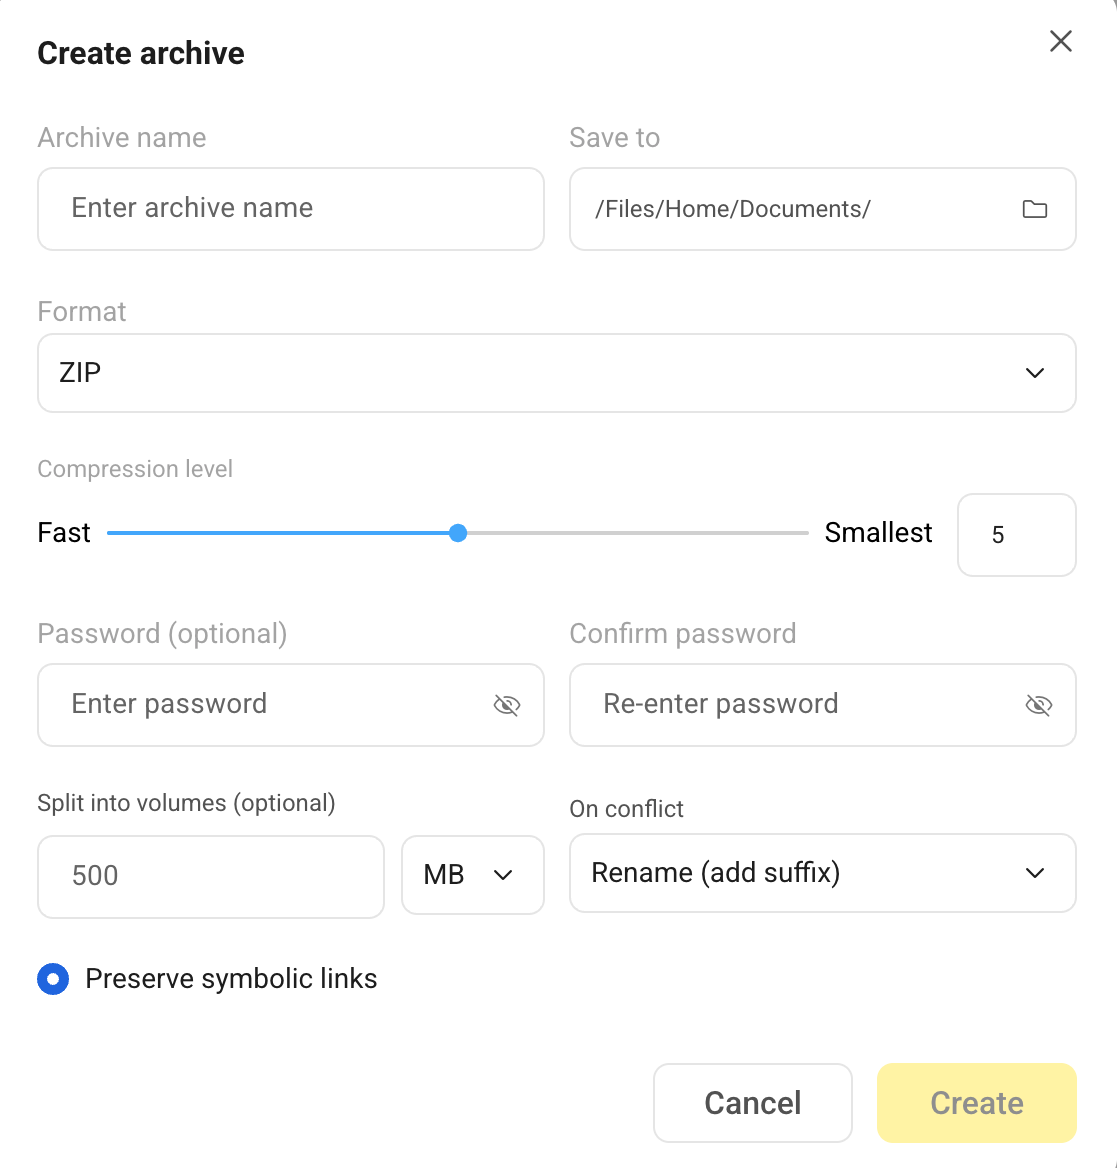
Parameter Description Archive name Enter a name for the archive. Save to Choose the destination path for the archive. Format Select the compression format: ZIP, 7z, TAR, tar.gz, tgz, tar.bz2, tar.xz,
gzip, bzip2, or xz.
Note: TAR, tar.gz, tgz, tar.bz2, tar.xz, gzip, bzip2, and xz do not
support password protection or volume splitting.Compression level Drag the slider or enter a value between 1 and 9: - A lower value means faster compression but a larger archive size.
- A higher value means slower compression but a better compression ratio.
Password (optional) Set an encryption password for the archive.
This password is required when extracting the archive.Confirm password Re-enter the password to confirm. Split into volumes (optional) Set the maximum size for each volume and select the unit (KB, MB, or GB).
If the resulting archive exceeds this limit, it will be automatically split into
multiple volumes, each within the set size.
Use this feature to split large archives into multiple volumes, ensuring each
file meets the size limits of upload services such as email attachments.
Note: When extracting, all volume files must be in the same folder.On conflict Choose how to handle the situation when a file with the same name
already exists in the destination folder:- Rename (add suffix): Append a sequence number to the new archive
name and keep both files. For example,file(1).zip. - Overwrite: Replace the existing file with the new archive.
- Skip: Discard the new archive and retain the existing file.
Preserve symbolic links Specify how to handle symbolic links (similar to shortcuts): - If you select this option, only the link itself is saved in the archive,
taking up very little space. - If you do not select this option, the system will follow the link to the
actual source file and include it in the archive.
b. Click Create.
Extract files
Open the Files app.
To preview archive contents before extracting:
a. Right-click the target archive, and then select Preview contents.
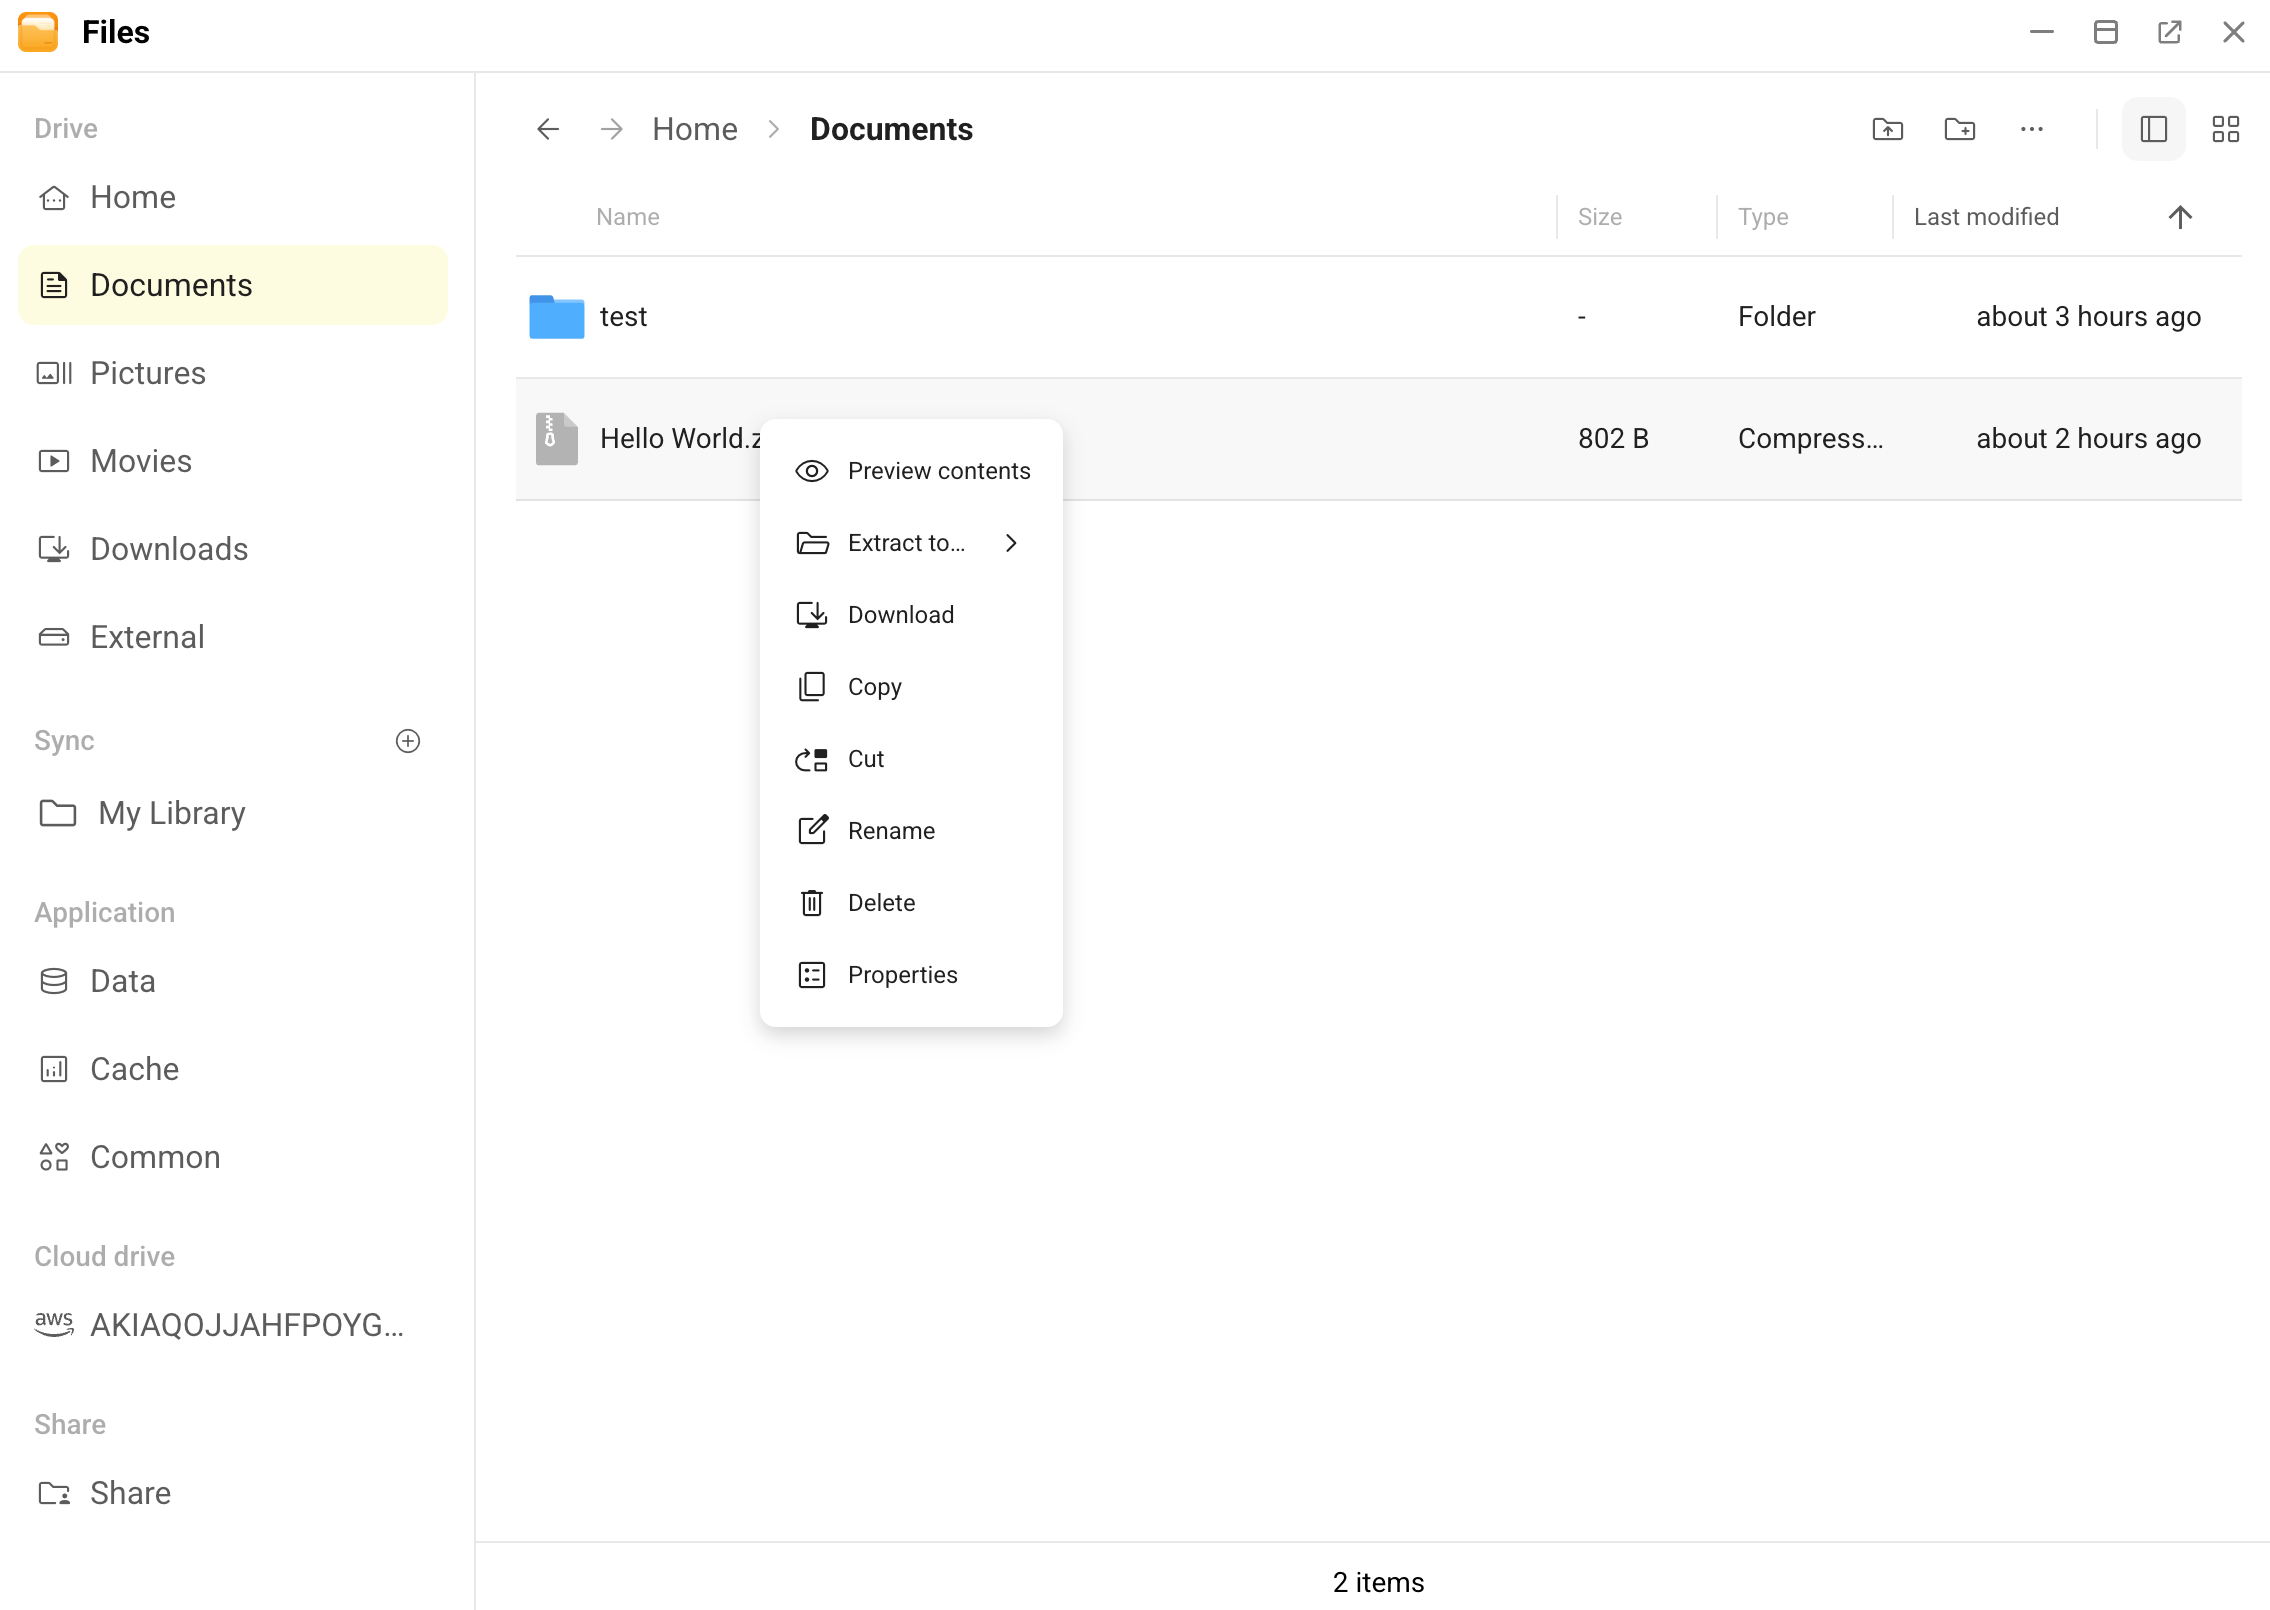
b. Review the archive contents, and then click Extract all....
c. In the Extract archive window, configure the following settings as needed:
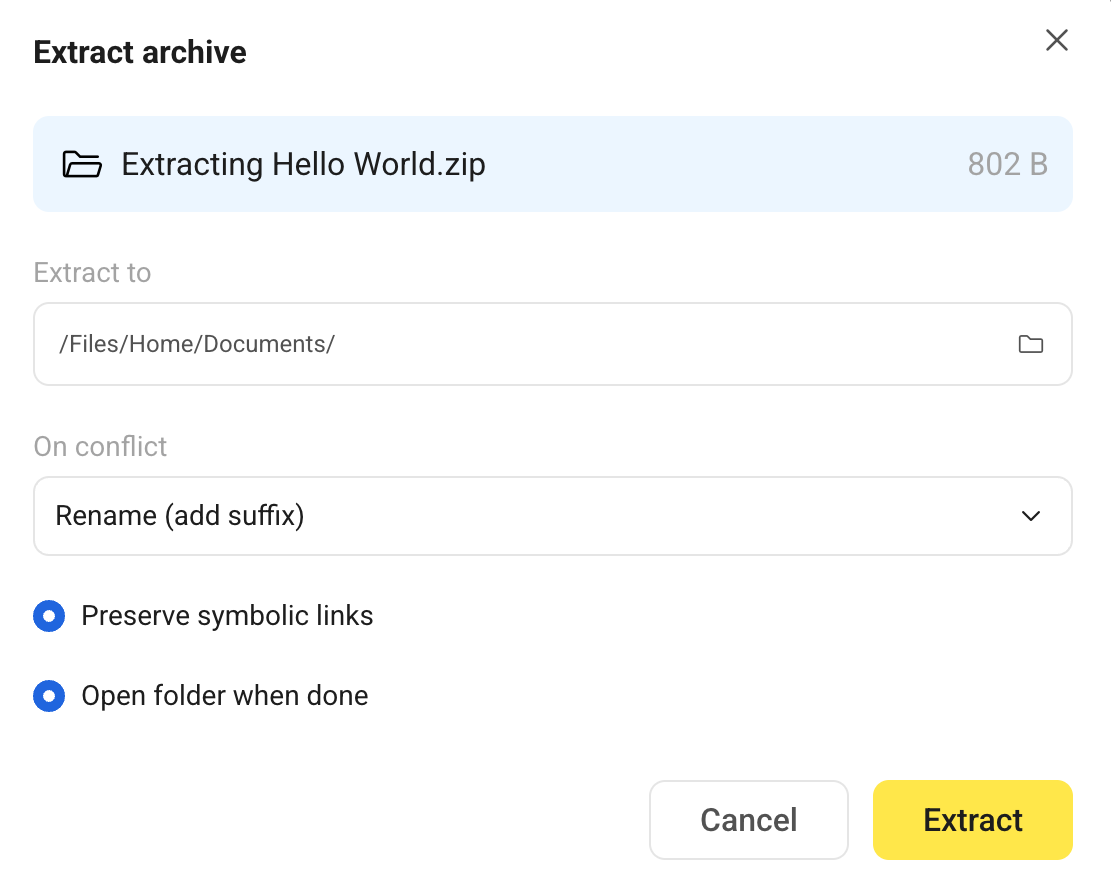
Parameter Description Extract to Specify the destination path for the extracted files. On conflict Choose how to handle the situation when an extracted file has the
same name as an existing file in the destination folder:- Rename (add suffix): Append a sequence number to the extracted file
and keep both files. For example,file(1).txt. - Overwrite: Replace the existing file with the extracted file.
- Skip: Keep the existing file and discard the extracted file.
Preserve symbolic links Specify how to handle symbolic links (similar to shortcuts): - If you select this option, symbolic links in the archive will be
extracted as link files. - If you do not select this option, they will be resolved into actual
files or folders during extraction.
Open folder when done If you want the system to automatically open the folder containing
the extracted content when extraction is completed, select this option.d. Click Extract.
- Rename (add suffix): Append a sequence number to the extracted file
To extract without preview:
a. Right-click the target archive, and then hover over Extract to....
b. To extract directly to the current location, select Current folder.
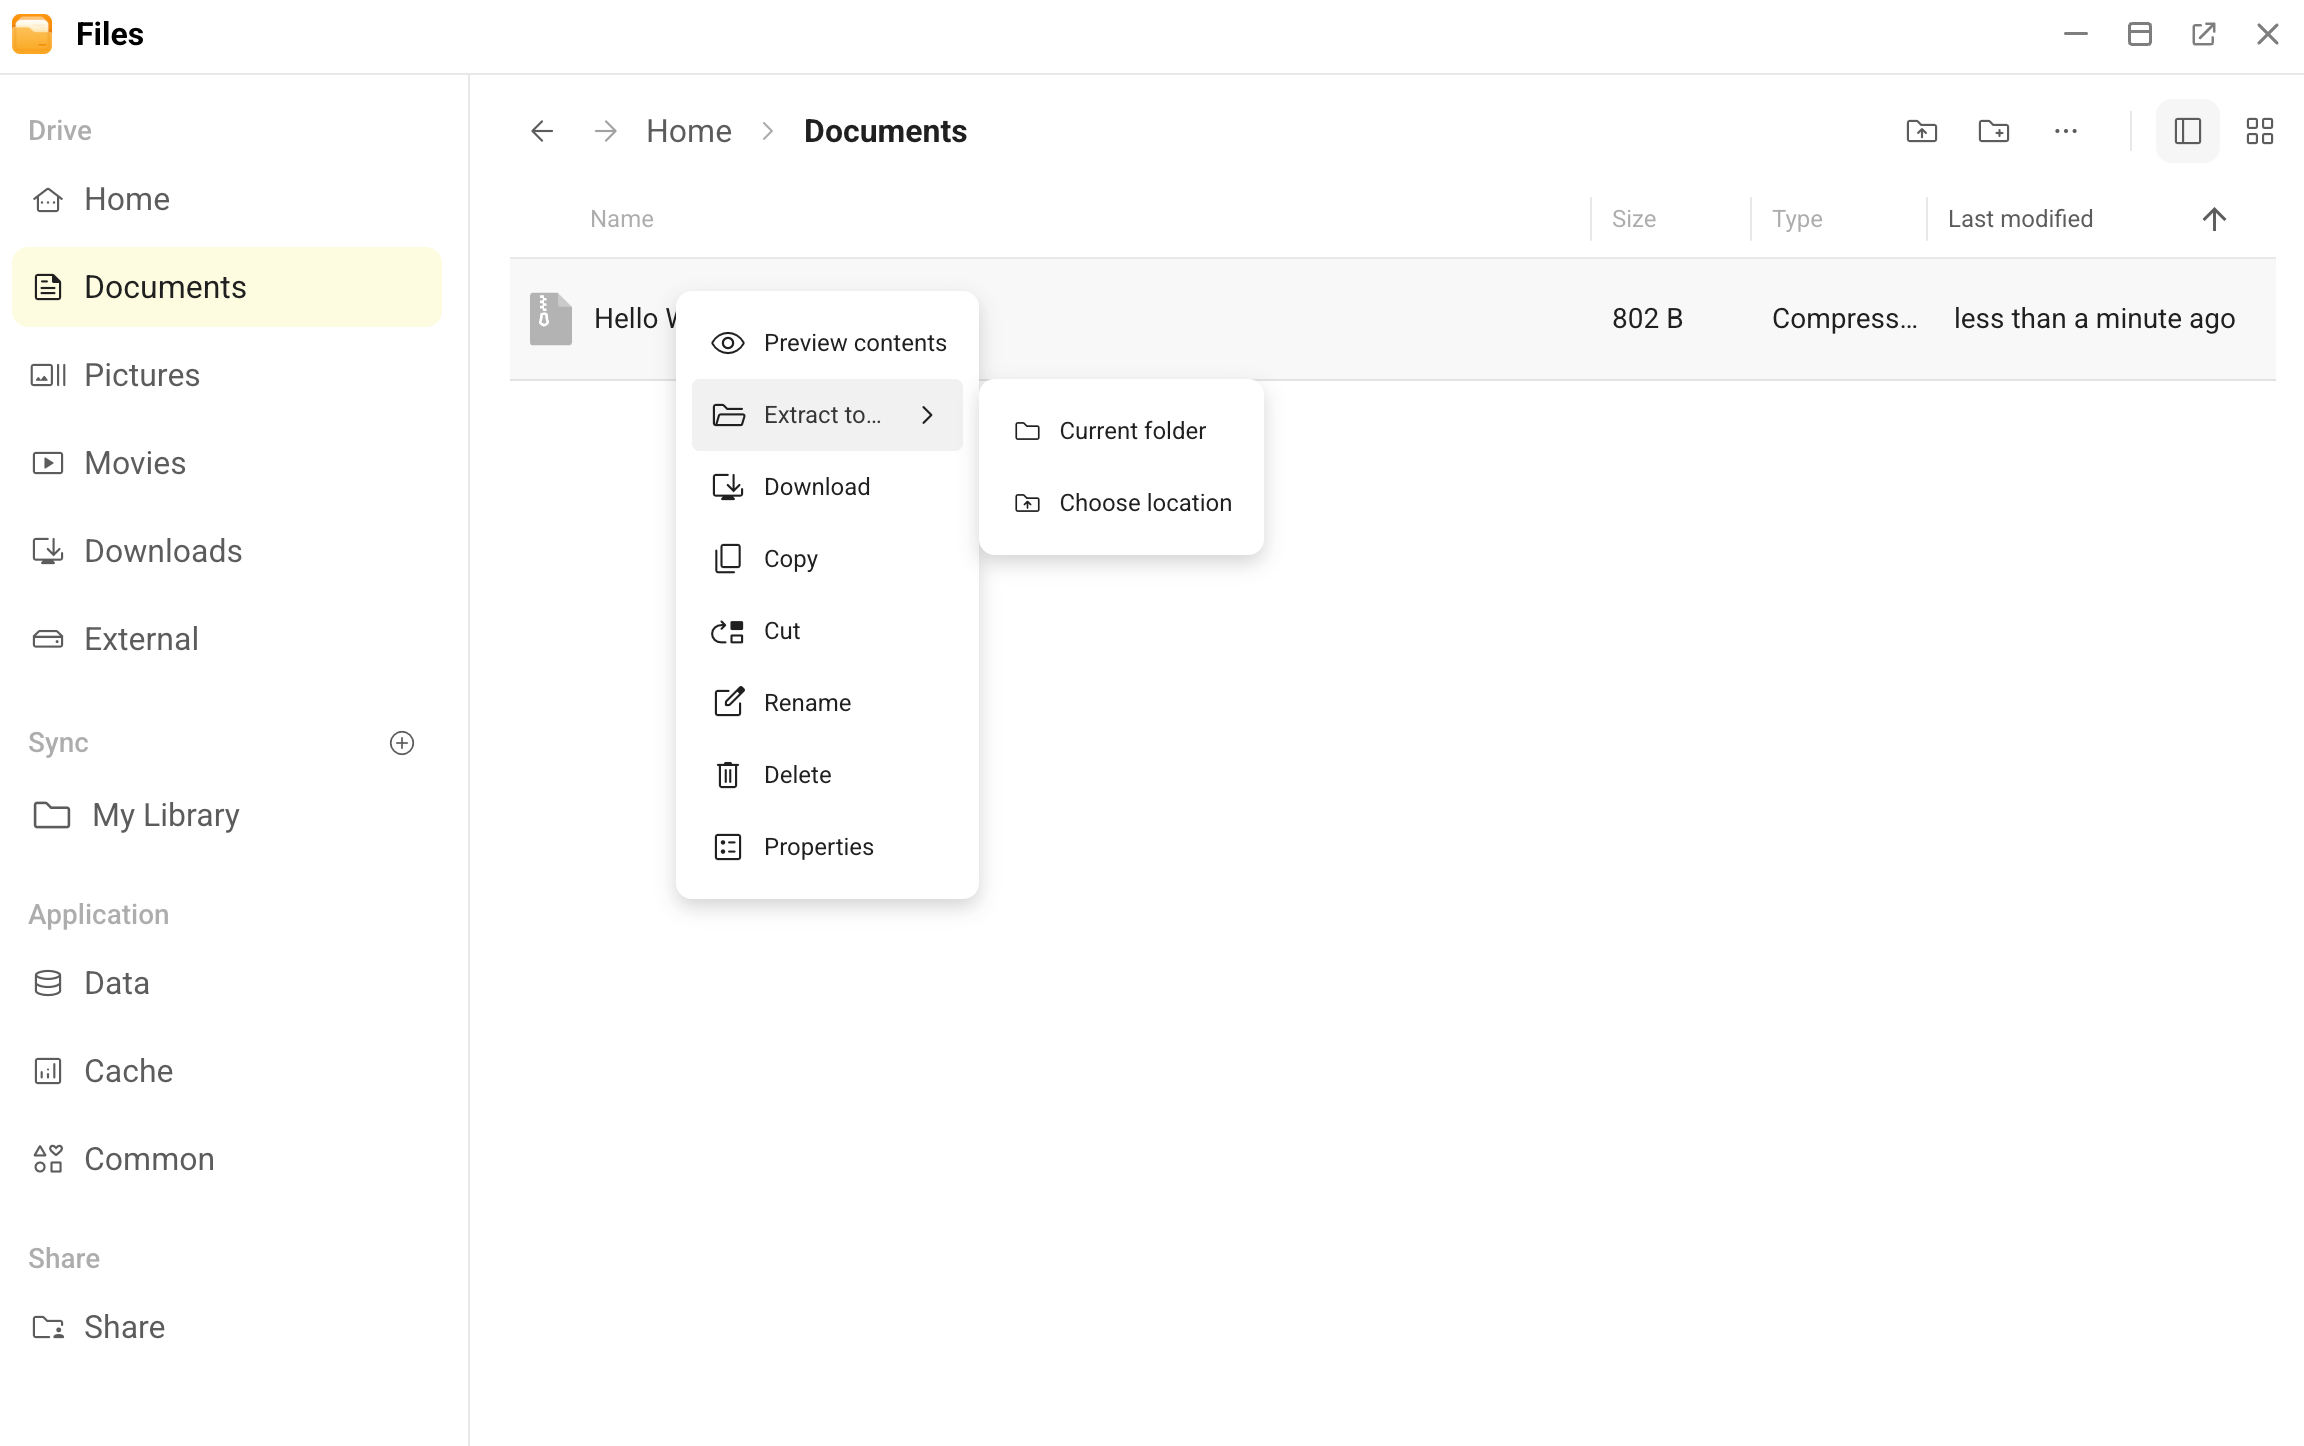
c. To specify another path or customize extraction settings, select Choose location, configure the same settings as in Step 2c, and then click Extract.