Customize application URLs
Use this guide when you want to make your Olares applications easier to access. Olares provides two ways to personalize application URLs:
- Custom route ID: Replace the auto-generated route ID in your Olares URL with a memorable name.
- Custom domain name: Use your own domain name instead of the default Olares domain.
Prerequisites
To use a custom domain name, you need:
- A registered domain name that you control.
- Access to your domain's DNS settings to create a CNAME record.
- A valid HTTPS certificate and its RSA private key in PEM format.
Set a custom route ID
A route ID is the part of an Olares application URL that identifies the app, such as 7e89d2a1 in https://7e89d2a1.laresprime.olares.com. By default, Olares assigns community applications a random route ID made of numbers and letters, which is hard to remember.
You can get a simpler URL by setting a custom route ID. Using Jellyfin as an example:
Use a unique route ID
A custom route ID must not duplicate another app entrance's default or custom route ID under the same Olares account. If app URLs return 404 after changing a route ID, see Custom route ID prevents app access.
On Olares, open Settings, then go to Application > Jellyfin.
Under Entrances, click Jellyfin.
Under Endpoint settings, next to Set custom route ID, click add.
Enter a route ID that is more memorable and recognizable. For example,
jellyfin.Click Confirm.
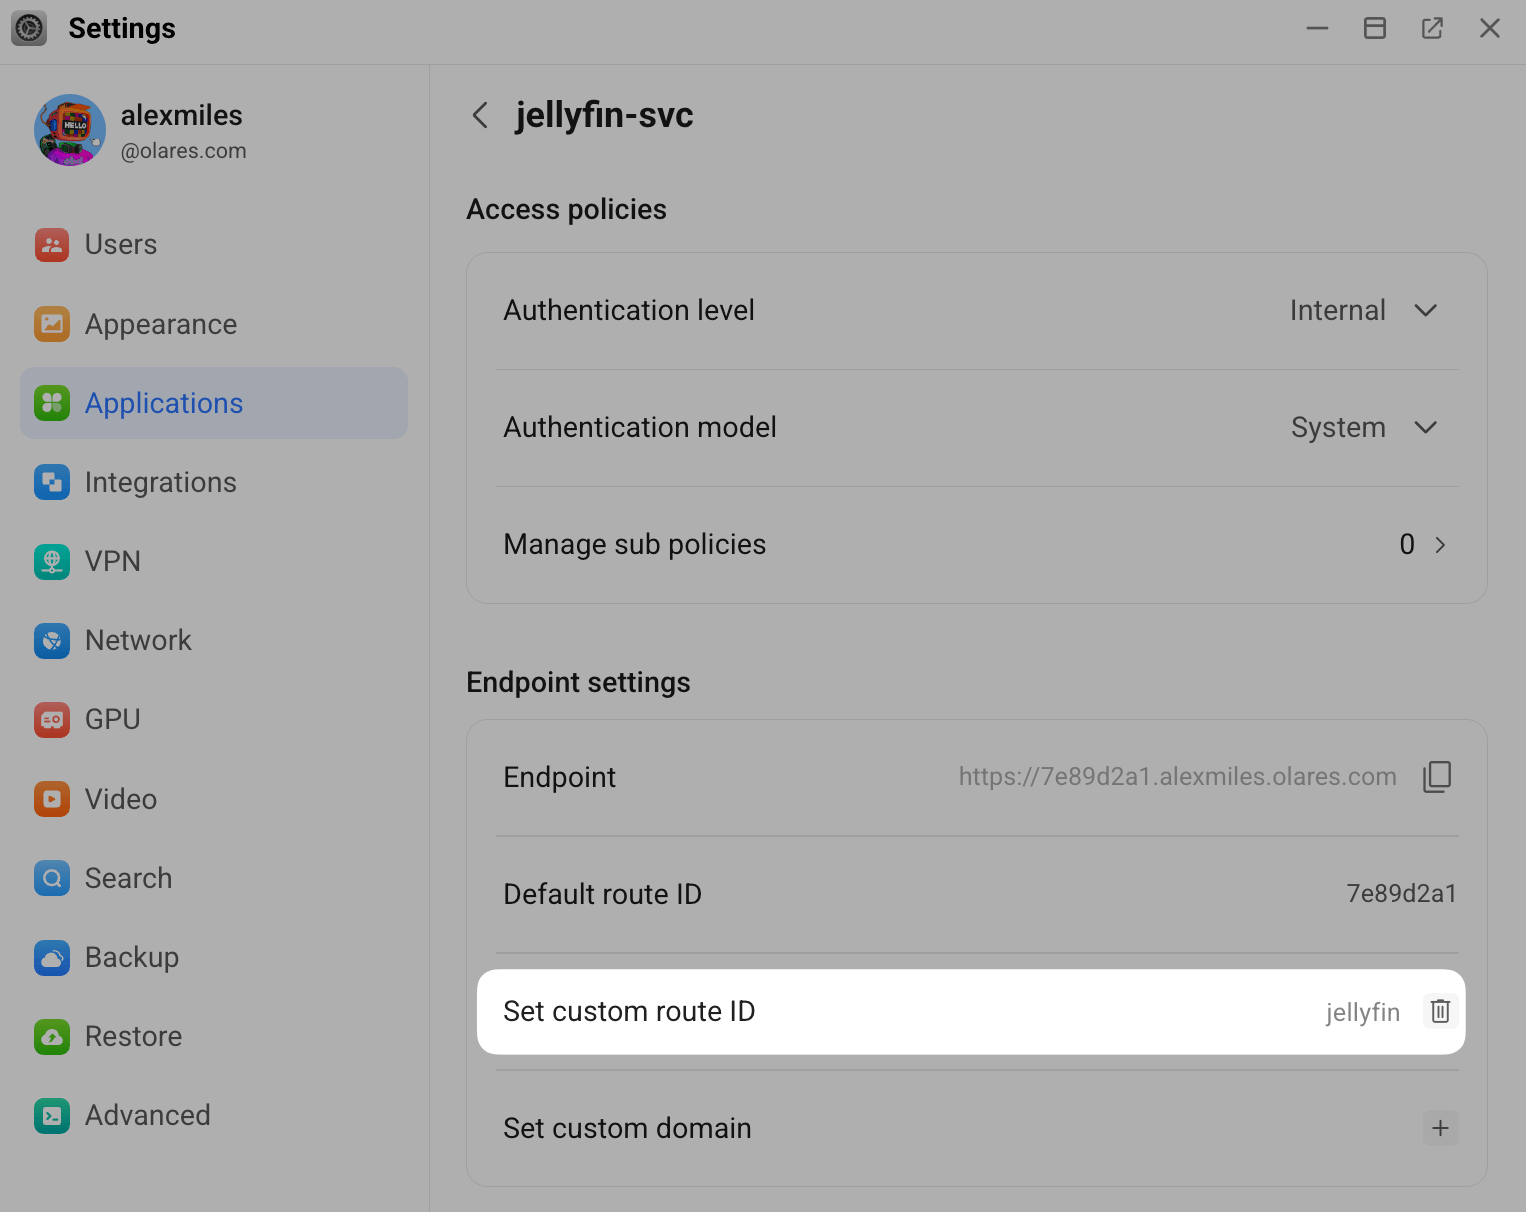
Now, you can access Jellyfin from both URLs: https://7e89d2a1.laresprime.olares.com or https://jellyfin.laresprime.olares.com.
Set a custom domain name
Custom domains disable Olares authentication
Apps with custom domains do not support Olares authentication. Only application entrances with Authentication level set to Public support custom domains.
You can assign a custom domain to a single application. To use the same custom domain across all Olares services, set it up in Olares Space before activating your device. See Set up a custom domain for your Olares.
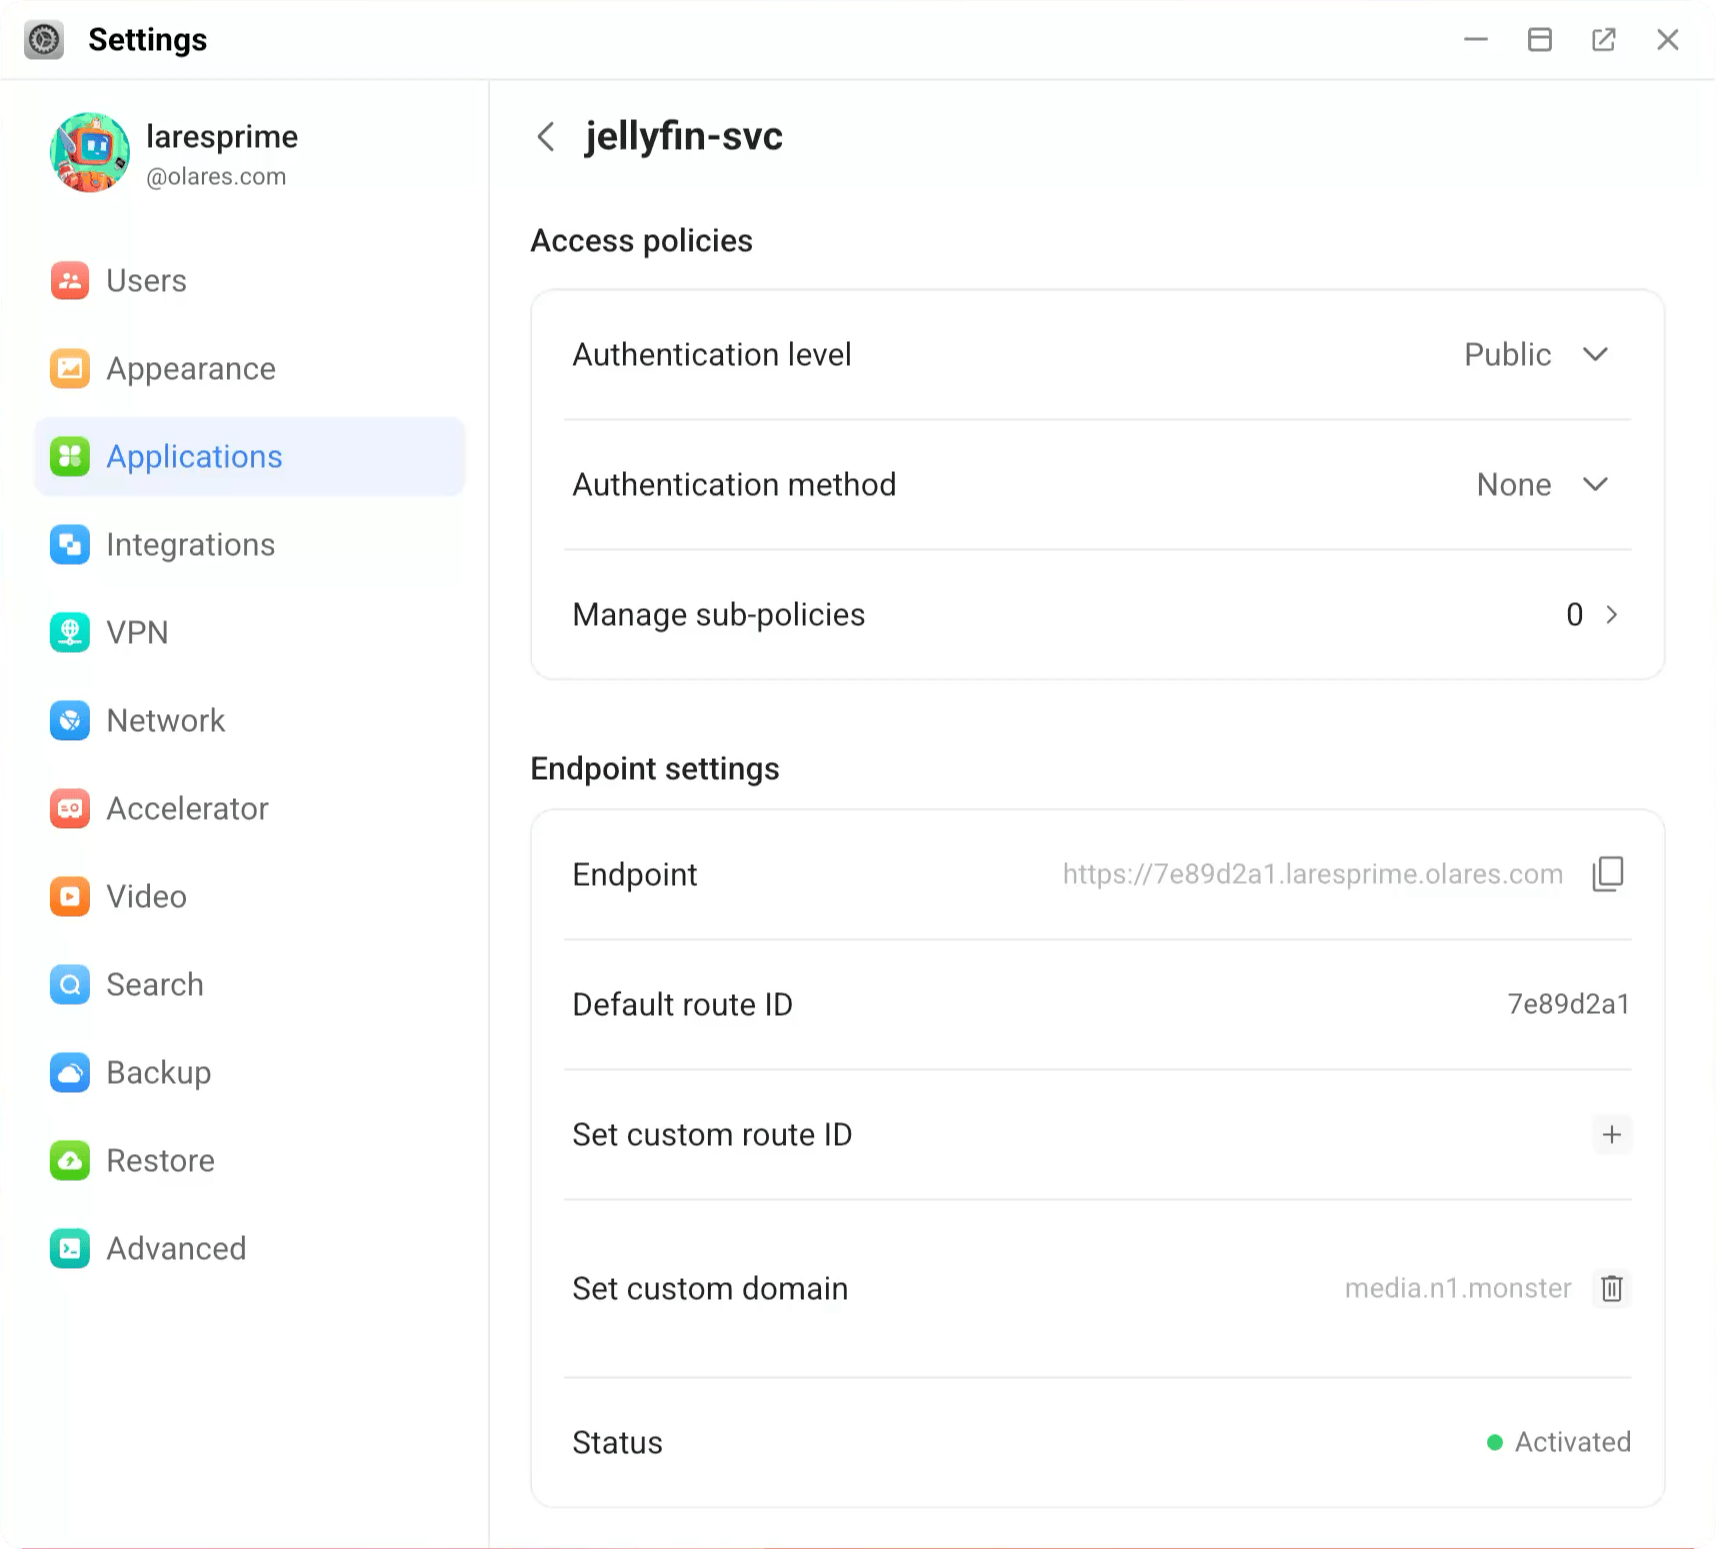
For example, change Jellyfin's access URL from https://7e89d2a1.laresprime.olares.com to https://media.n1.monster.
On Olares, open Settings, then go to Application > Jellyfin.
Under Entrances, click Jellyfin.
Under Access policies, set Authentication level to Public, then click Submit to apply changes.
Under Endpoint settings, next to Set custom domain, click add.
In the Set custom domain pop-up, enter your custom domain, and paste the valid HTTPS certificate and private key. Both files should start with a
-----BEGIN-----line and end with a-----END-----line.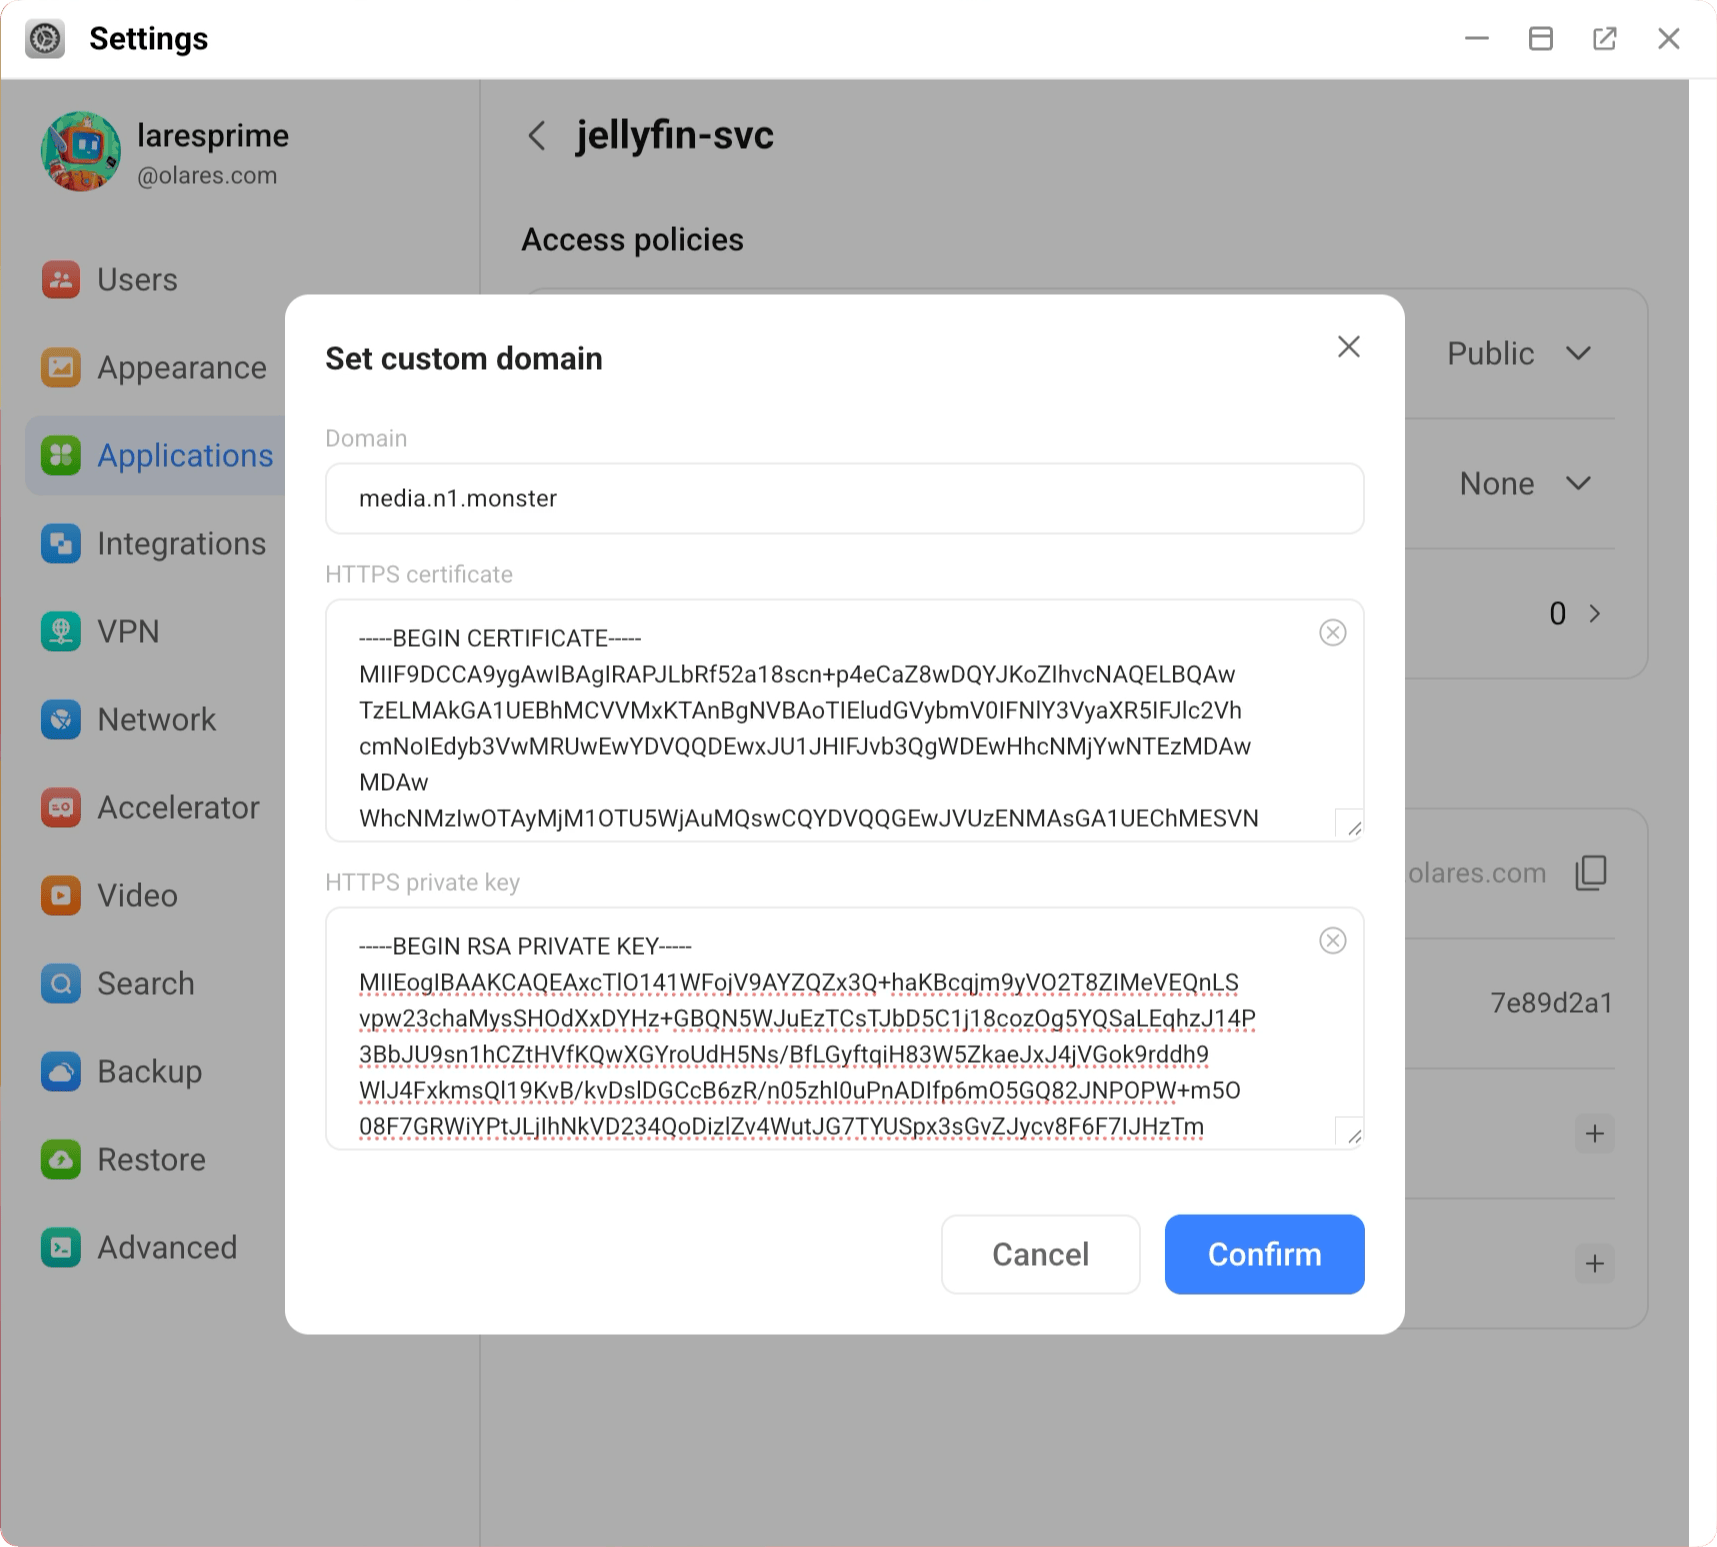
Click Confirm to submit.
Click the Activation button to open the activation instruction pop-up.
Follow the instructions in the pop-up to add a CNAME record with your domain registrar. In this example, add a CNAME record with Name set to
mediaand Value set tolaresprime.olares.com.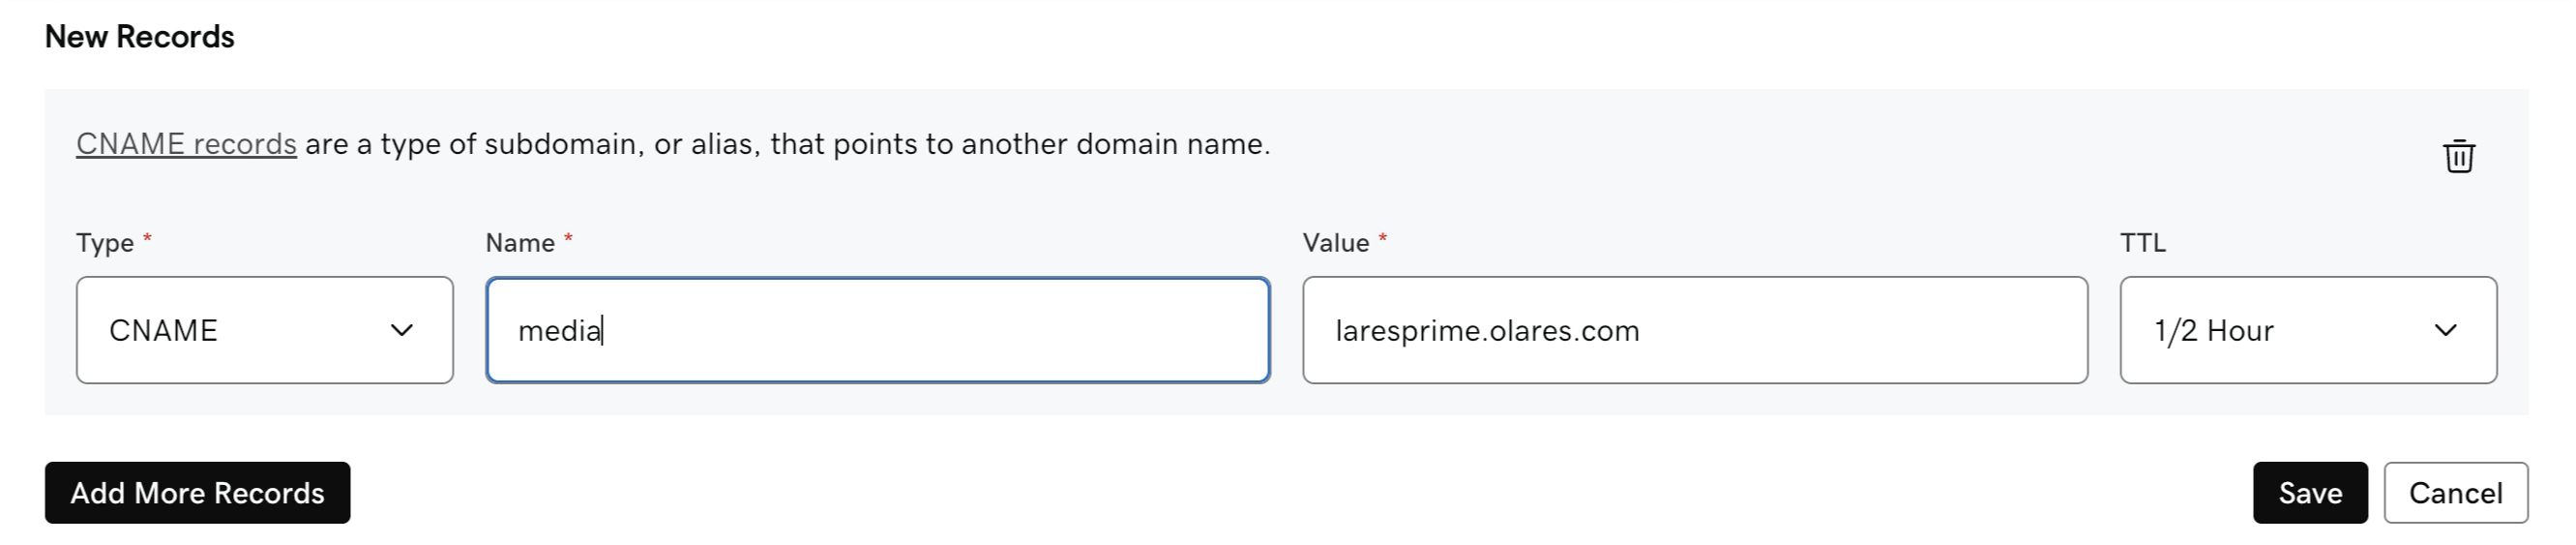
Click Confirm to close the activation pop-up. The custom domain status should display "Wait for CNAME to be activated".
DNS propagation typically takes a few minutes or hours, depending on your domain registrar.
Once the CNAME record is verified, the custom domain status will automatically update to "Activated".
Now, you can access Jellyfin from both URLs: the original Olares URL https://7e89d2a1.laresprime.olares.com and the custom domain https://media.n1.monster.