Install Olares via ISO
This guide explains how to install Olares on a physical machine using the official ISO image.
Installing on Olares One?
This ISO is for self-hosted x86-64 hardware. For Olares One, follow the Olares One ISO guide and use the device-specific image to keep Olares One features available.
Prerequisites
- Olares device: A physical machine that meets the Linux system requirements.
- Processor: Intel or AMD x86-64. ARM is not supported.
- LarePass: Install LarePass on your phone. It is required to finish setup and activate Olares.
- Network: A wired LAN connection.
- USB flash drive: At least 8 GB of capacity.
- Setup computer: A Windows, macOS, or Linux computer for creating the bootable USB drive.
Create a bootable USB drive
Download the latest Olares ISO image for self-hosted hardware.
Download and install Balena Etcher.
Insert the USB flash drive into your computer.
Launch Etcher and follow these steps:
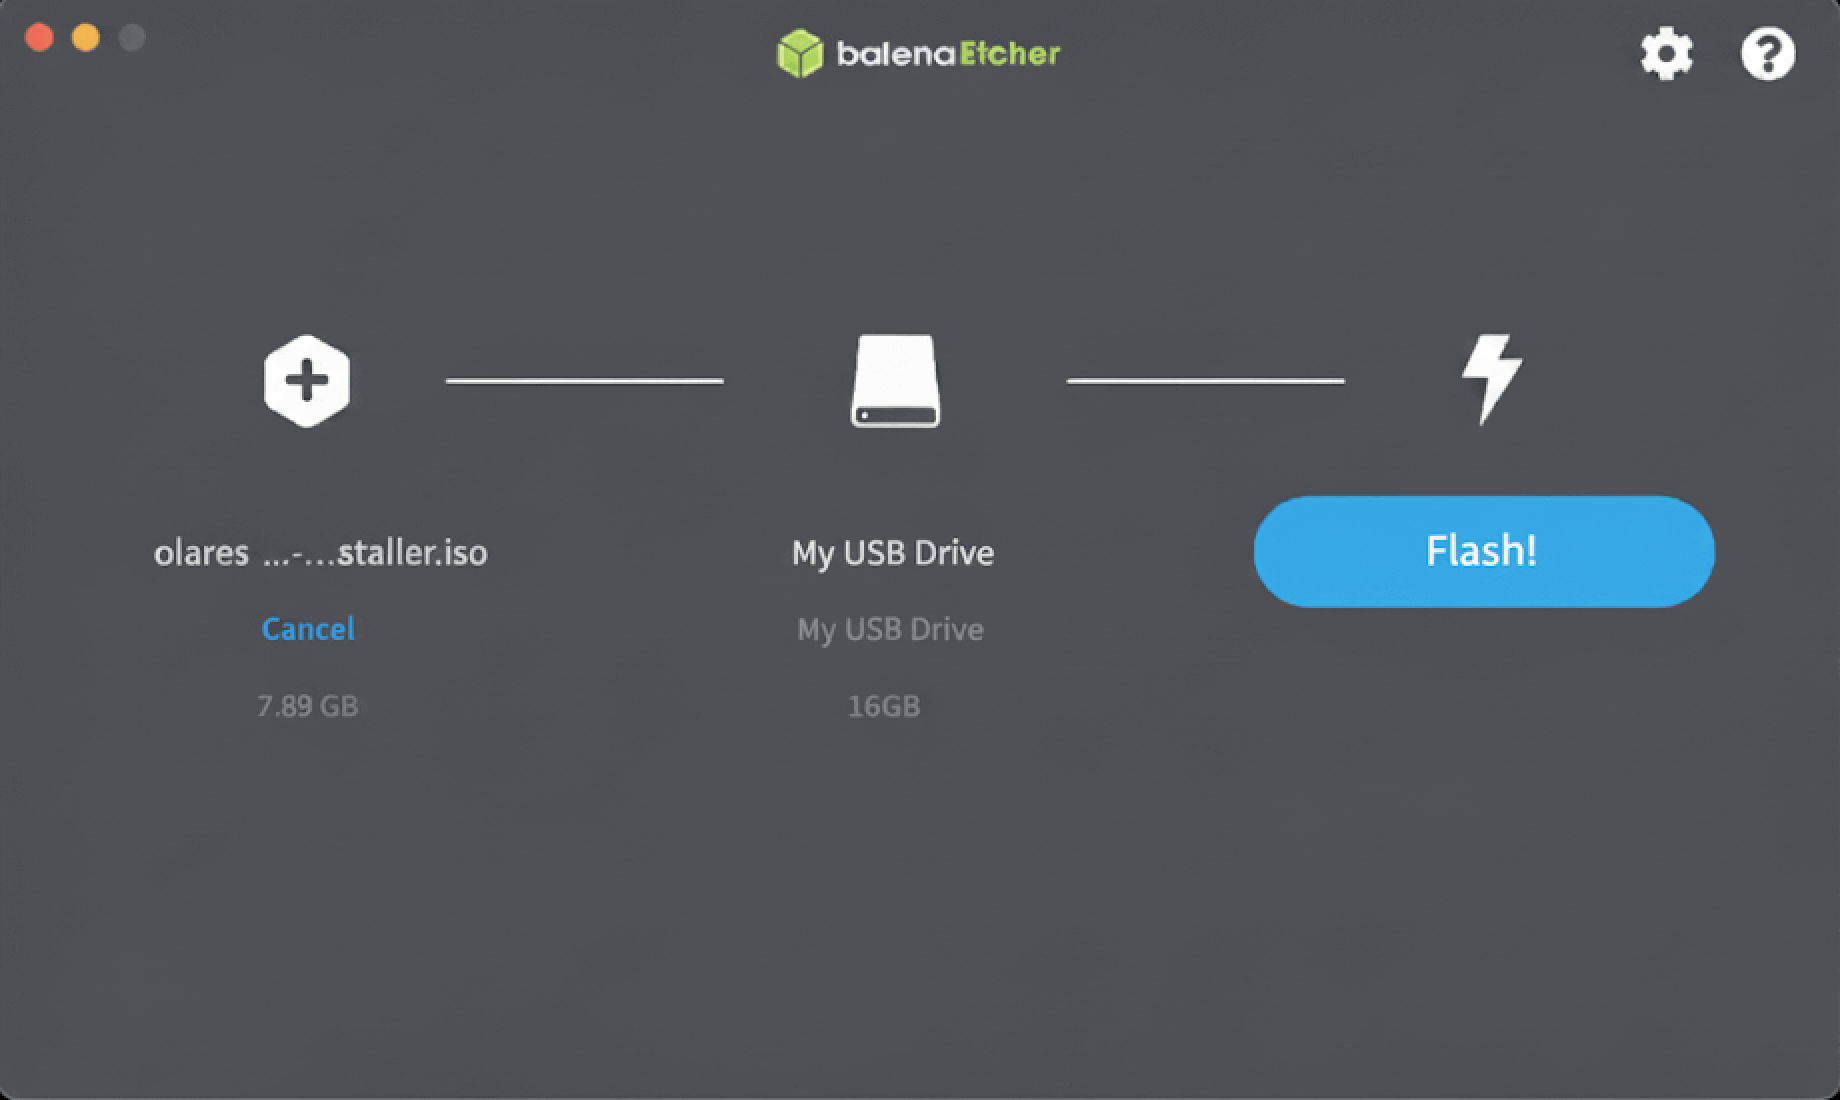 a. Image: Select the Olares ISO.
b. Target disk: Select your USB drive.
c. Click Flash to write the installer to the USB drive.
Boot from USB drive
- Insert the bootable USB drive into the target machine.
- Enter the BIOS setup and set USB Boot as the first boot option.
- Save and restart. The system will automatically boot into the Olares installer interface.
Install Olares
From the Olares installer interface, select Install Olares to Hard Disk and press Enter.
The installer will display a list of available disks (e.g.,
sda 200G HARDDISK).
Type/dev/followed by the disk name (e.g.,/dev/sda) to select the installation target. The installation typically takes 4–5 minutes.Note
During installation, you may see prompts related to NVIDIA GPU drivers.
Simply press Enter to confirm.Once you see the message below, the installation has completed successfully:
shellInstallation completed successfully!
You can now remove the USB drive and press Ctrl + Alt + Del to restart.
Verify installation
After rebooting, the system will enter Ubuntu.
Log in using the default credentials:
- Username:
olares - Password:
olares
- Username:
Run the following command to verify the installation:
bashsudo olares-checkIf the output shows the following, Olares has been installed successfully:
bashcheck list --------- check Olaresd: success check Containerd: success
Finish installation and activate Olares
Same network required
To avoid activation failures, ensure that both your phone and the Olares device are connected to the same network.
Open LarePass. If you do not have an Olares ID, tap Create an account and follow the prompts.
On the activation page, tap Discover nearby Olares. LarePass lists the Olares instances detected on the same network.
Select your Olares instance and tap Install now.
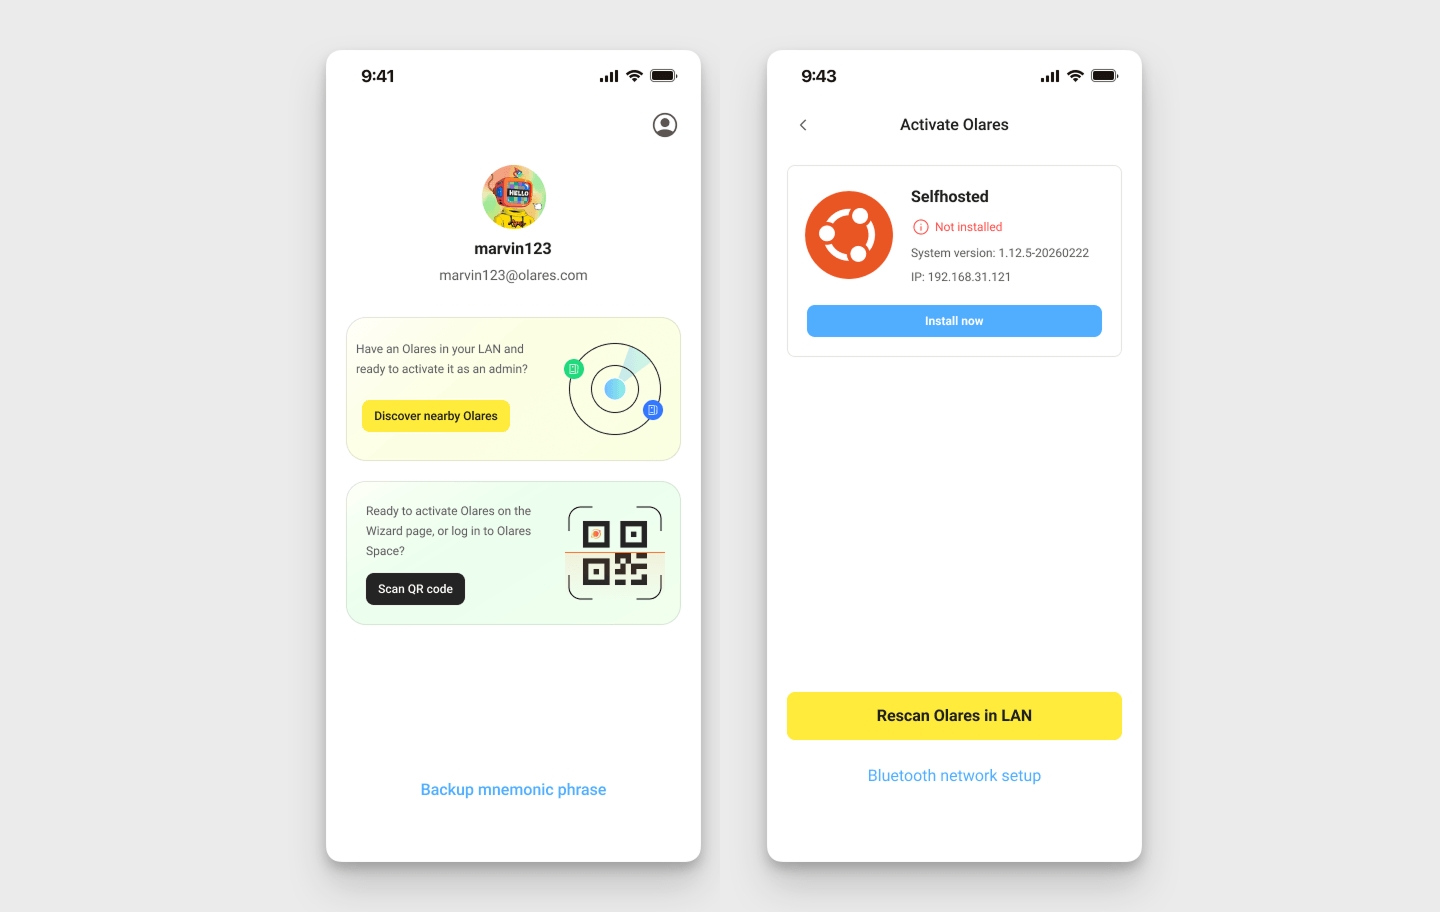
When the installation completes, tap Activate now.
In the Select a reverse proxy dialog, select a node that is closer to your geographical location. The installer will then configure HTTPS certificate and DNS for Olares.
Note
- You can change this setting later on the Change reverse proxy page in Olares.
- If your Olares device is connected to a public IP network, this step will be skipped automatically.
Select the language for Olares. Olares supports English, Simplified Chinese, German, Spanish, Italian, French, and Japanese.
INFO
This selection does not change the language of the LarePass app. The remaining activation steps stay in the current LarePass language. After activation, Olares Desktop uses the language selected here.
Follow the on-screen instructions to set the login password for Olares, then tap Complete.
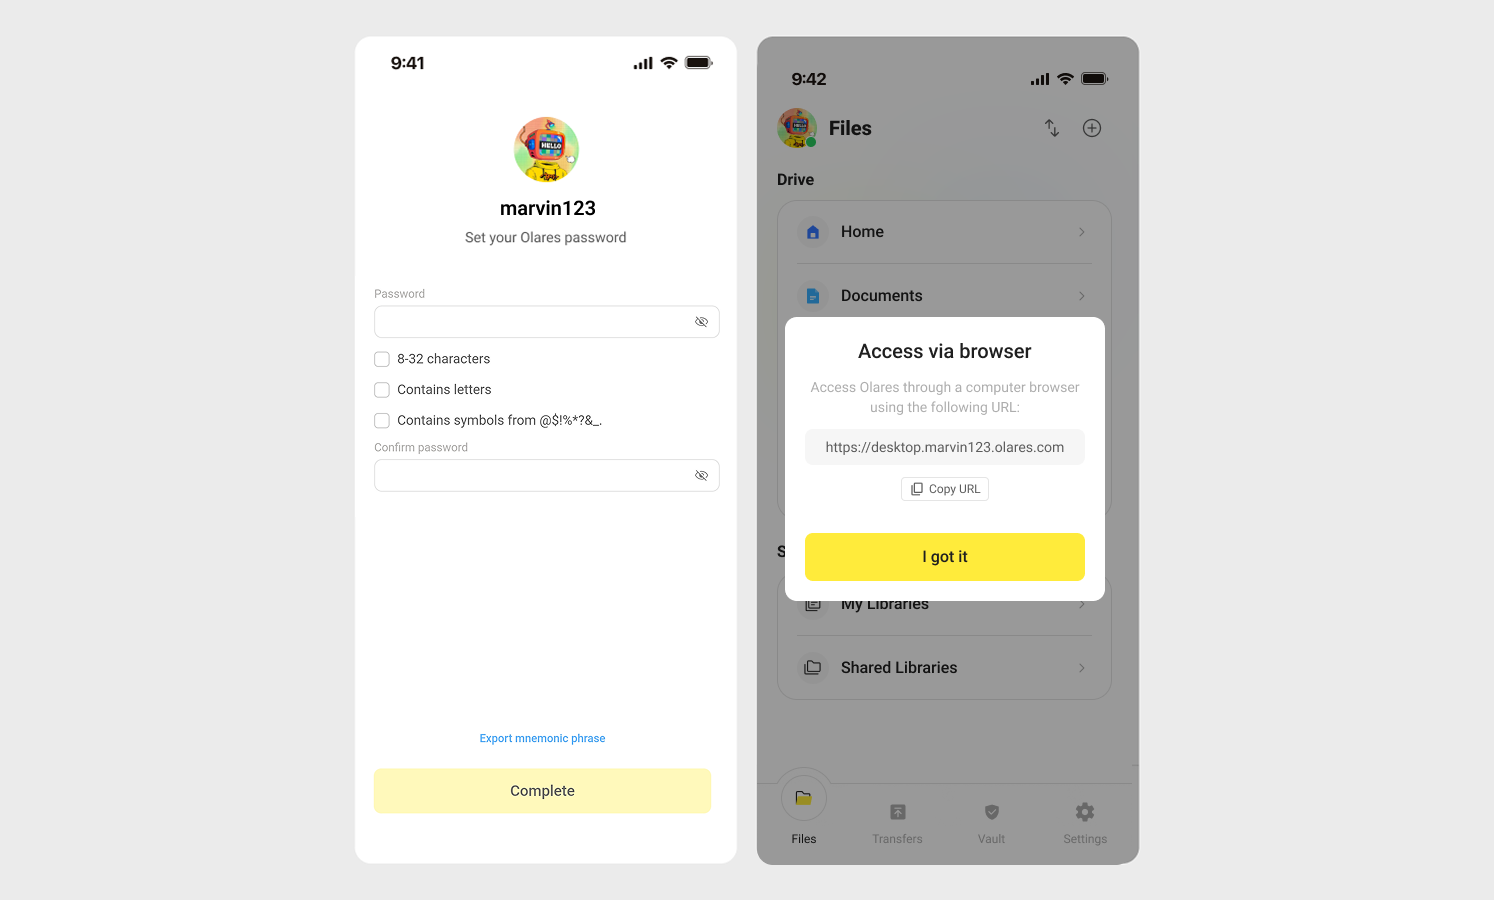
Once activation is complete, LarePass will display the desktop address of your Olares device, such as https://desktop.marvin123.olares.com.
Log in to Olares
Open the Olares desktop address in your browser, and press any key to continue.
On the login page, enter your Olares login password.
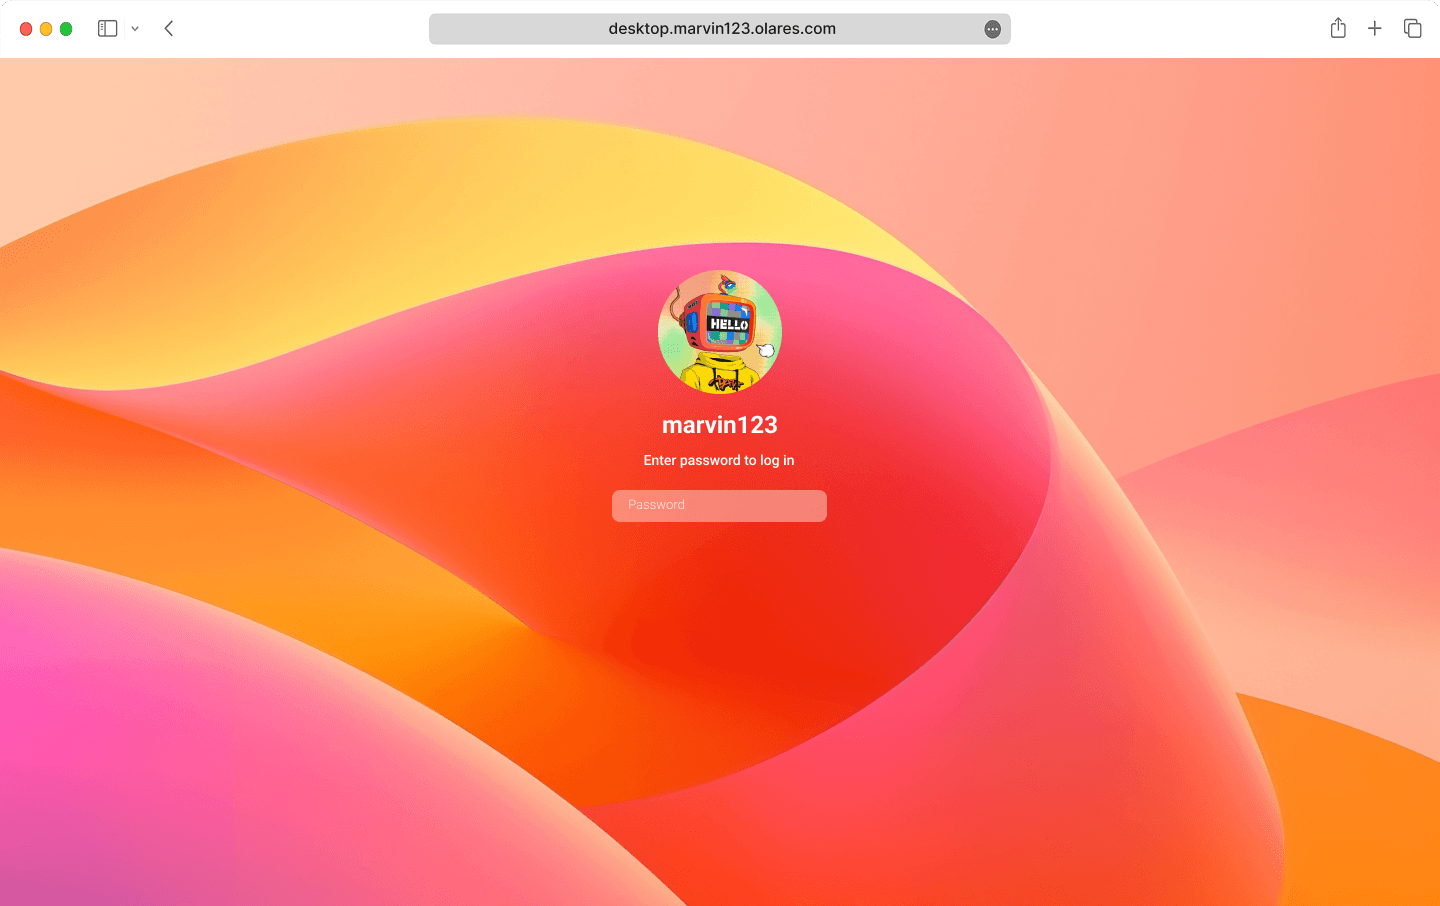
You will be prompted to complete two-factor verification:
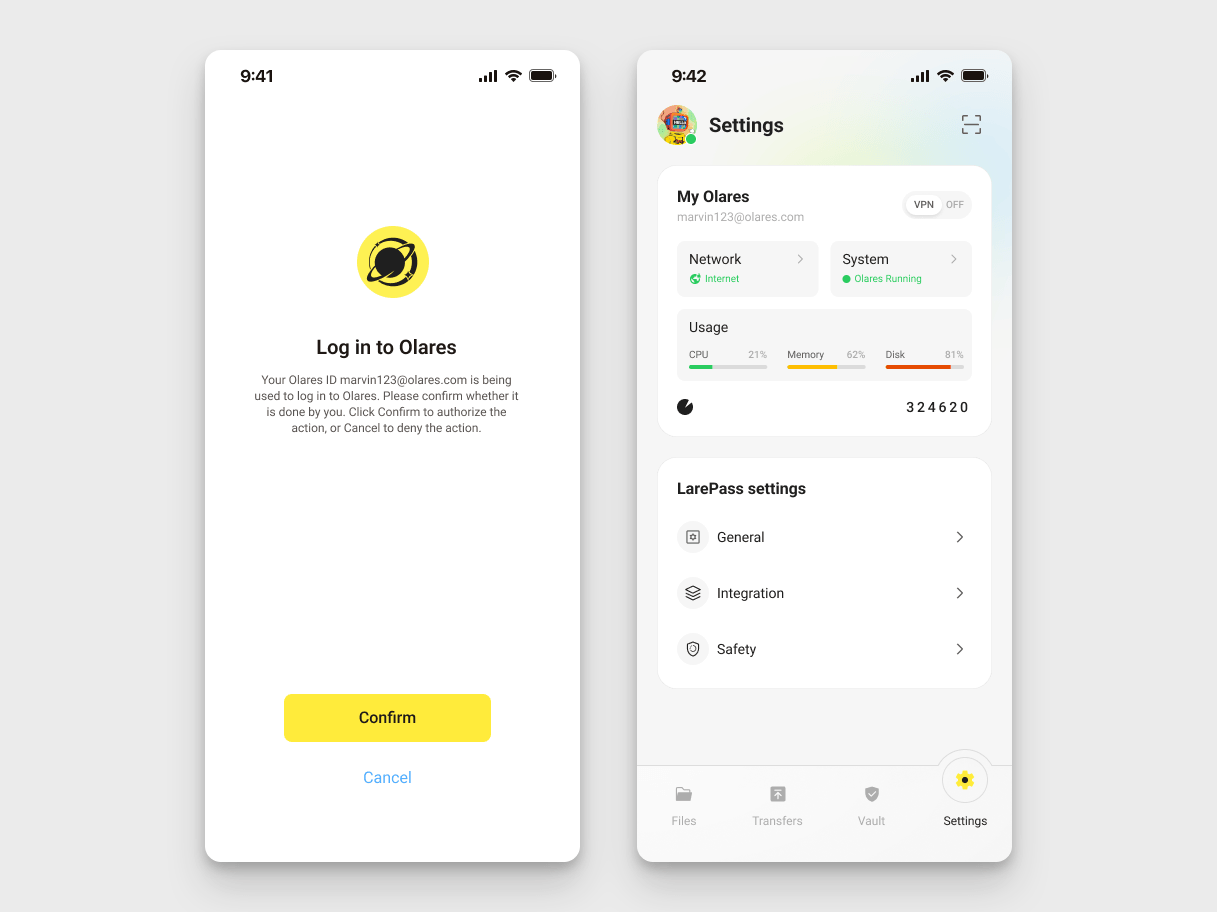
- Confirm on LarePass: Open the login notification on your phone, and tap Confirm.
- Enter the code manually: Select Verify using one time password from LarePass on the login page. Get the 6-digit code from the LarePass app on your phone (Settings > My Olares card, tap the authenticator) or from the LarePass desktop client (Vault, the first item in the list), and enter it to complete the login.
INFO
The verification code is time-sensitive. Ensure you enter it before it expires.
Once you've logged in, you'll be directed to the Olares desktop.🎉
Next step: Protect your Olares ID
You're almost ready to start using Olares! Before diving in, it's crucial to ensure your Olares ID is securely backed up. Without this step, you won't be able to recover Olares ID if needed.
Having trouble?
If you run into any issues, submit a GitHub Issue and include your platform, installation method, and error details.