Activate an Olares device using the Olares CLI
This tutorial walks you through activating an Olares device (e.g., Olares One) using the Olares CLI tool.
The process assumes the device is freshly unboxed and has not been installed or activated.
Use the standalone CLI
The built-in olares-cli included in the current system does not have the activation feature. You must download a standalone daily build CLI to perform the activation. Review the following requirements for using the tool:
- Do not overwrite system files: A strict version correspondence exists between the system's built-in
olares-cli,olaresd, and the cluster version. Therefore, never move or copy the downloaded standalone CLI to overwrite the system/usr/bin/olares-clifile. Doing so breaks this version chain and impacts future system upgrades. - Execution path differences: Run
./olares-clito execute the standalone version downloaded to the current directory. Do not runolares-clidirectly, because it executes the built-in system version which lacks activation features.
Learning objectives
In this tutorial, you will learn how to:
- Download and extract the standalone Olares CLI tool.
- Install Olares on a new device.
- Retrieve a Fast Reverse Proxy (FRP) host for remote access.
- Run the activation command to configure your device.
Prerequisites
Before you begin, ensure the following requirements are met:
You can access the Olares device directly with a keyboard and monitor, or via SSH.
The device has internet access to download packages, query FRP servers, and complete activation.
You can run commands as the root user, or prepend commands with
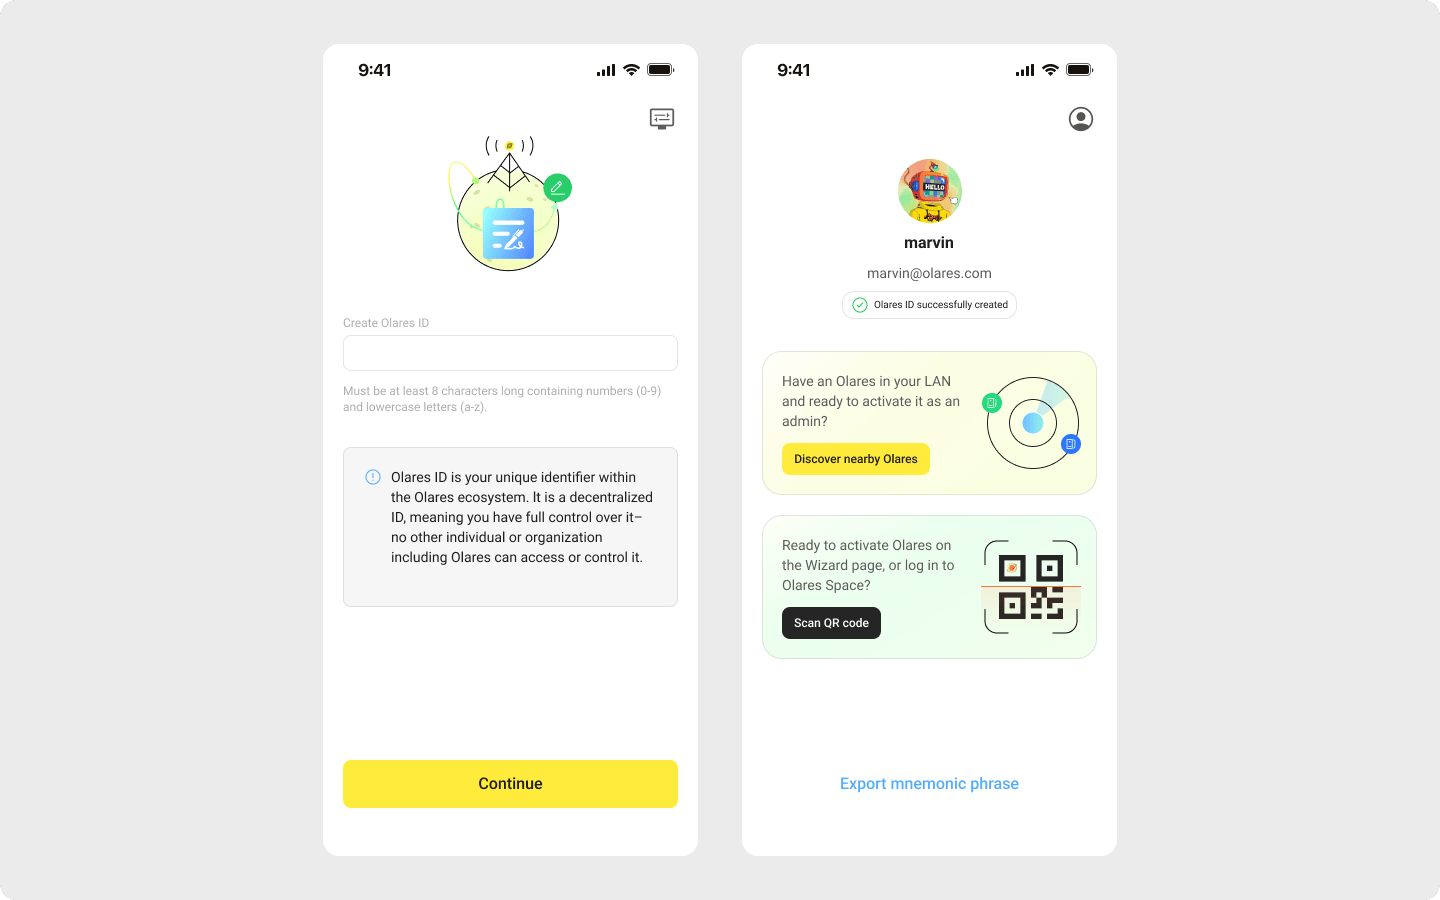
sudo.You have created an Olares ID using the LarePass app, and have backed up your 12-word mnemonic phrase.
Step 1: Download and prepare the standalone CLI tool
Download the standalone Olares CLI package.
bashcurl -sSOL https://cdn.olares.com/common/olares-cli-amd64.8cbdc32.tar.gzExtract the downloaded file.
bashtar xzf olares-cli-amd64.8cbdc32.tar.gzGrant executable permissions to the extracted binary file.
bashchmod +x olares-cli
Step 2: Retrieve the FRP list
Find an available FRP host to enable remote access to your device using the standalone CLI.
Run the following command. Replace
{olares-id}with your registered Olares ID.bash./olares-cli wizard frp {olares-id}Example:
bash./olares-cli wizard frp [email protected]Select a host address from the output list and note it down for the activation step. For example,
bb.hongkong.frp.olares.com.
Step 3: Install Olares
For Olares One hardware
A fresh Olares One device is shipped in an uninstalled state. You must run the installation command to set up Olares first before you attempt activation.
Run the install command as root.
bashsudo olares-cli installWhen prompted to enter the domain name, enter
olares.com.When prompted for the Olares ID, enter the one you registered in the LarePass app.
Wait for the installation process to finish. The terminal outputs a wizard URL and a default password. Note down these details for the activation step.
Example:
- Wizard URL: The local gateway address, such as
http://192.168.31.127:30180. - Password: The default Olares login password.
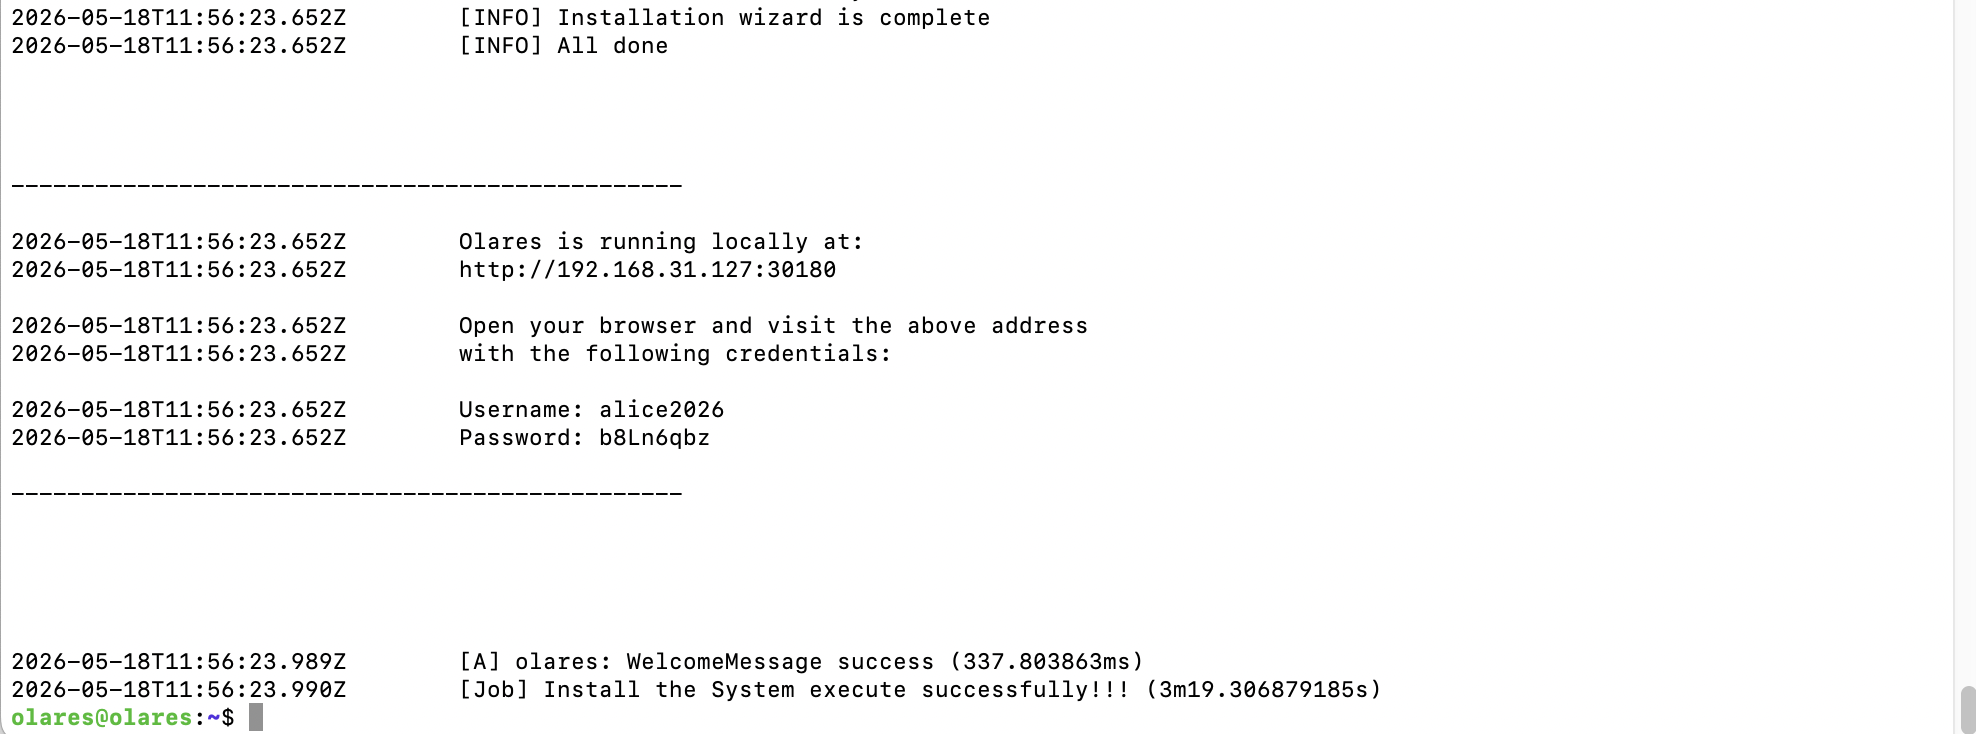
- Wizard URL: The local gateway address, such as
Step 4: Activate Olares
Run the activation command to configure and secure your device. This process connects your Olares ID to the device and configures network tunneling and credentials.
Prepare your activation command based on the following required parameters:
Parameter Description olares-idThe Olares ID you created in LarePass, for example [email protected].mnemonicThe 12-word mnemonic phrase of your Olares ID. passwordThe default Olares login password from Step 3. reset-passwordA new login password to replace the default one. authurlThe Wizard URL from Step 3. vaultThe Wizard URL from Step 3, followed by /server.bflThe Wizard URL from Step 3. hostThe FRP host address from Step 2. enable-tunnelSet to trueto enable tunnel mode.Replace the placeholders in the following command with your specific values, and then run it.
bashsudo ./olares-cli wizard activate {olares-id} \ --mnemonic "{mnemonic}" \ --password="{password}" \ --reset-password="{reset-password}" \ --authurl={authurl} \ --vault={vault} \ --bfl={bfl} \ --host={host} \ --enable-tunnel=trueExample:
If the Olares ID is
[email protected], the Wizard URL ishttp://192.168.31.127:30180, and the selected FRP host isbb.hongkong.frp.olares.com, run:bashsudo ./olares-cli wizard activate [email protected] \ --mnemonic "abcdef abcdef abcdef abcdef abcdef abcdef abcdef abcdef abcdef abcdef abcdef abcdef" \ --password="b8Ln6qbz" \ --reset-password="Ab1234@" \ --authurl=http://192.168.31.127:30180 \ --vault=http://192.168.31.127:30180/server \ --bfl=http://192.168.31.127:30180 \ --host=bb.hongkong.frp.olares.com \ --enable-tunnel=trueWait until the terminal displays a message indicating that activation finished successfully.
Next step
You can now log into Olares using your Olares ID and the login password you specified in reset-password.