Coordinate multiple AI agents with Paperclip
Paperclip is an open-source platform for coordinating multiple AI agents under one unified workspace. By setting up a virtual company, you add AI agents powered by Claude Code, Codex, OpenCode, Cursor, or other providers, and assign them issues to work on. Whether the task involves coding, research, or content creation, Paperclip manages the workflow.
Running Paperclip as a self-hosted app on Olares ensures that your API keys, task history, and agent outputs remain entirely private on your device.
Learning objectives
In this guide, you will learn how to:
- Install Paperclip on Olares.
- Configure API keys for the agents you plan to use.
- Set up the initial admin user account.
- Set up your first company, agent, and task.
- Create an issue and track agent progress.
- Monitor operations and metrics from the dashboard.
- Optional: Use local models with Paperclip.
Upgrade notes
Starting with V1.0.22, Paperclip uses the official image and requires new environment dependencies. Your runtime environment might change after upgrading.
- If you haven't initialized Paperclip or have no important data, uninstall the app, delete all related data, then reinstall.
- If Paperclip is already initialized, your existing data is preserved, but you might need to reconfigure local agent settings and environment dependencies. If you run into issues after upgrading, contact the Olares team.
Install Paperclip
Open Market and search for "Paperclip".
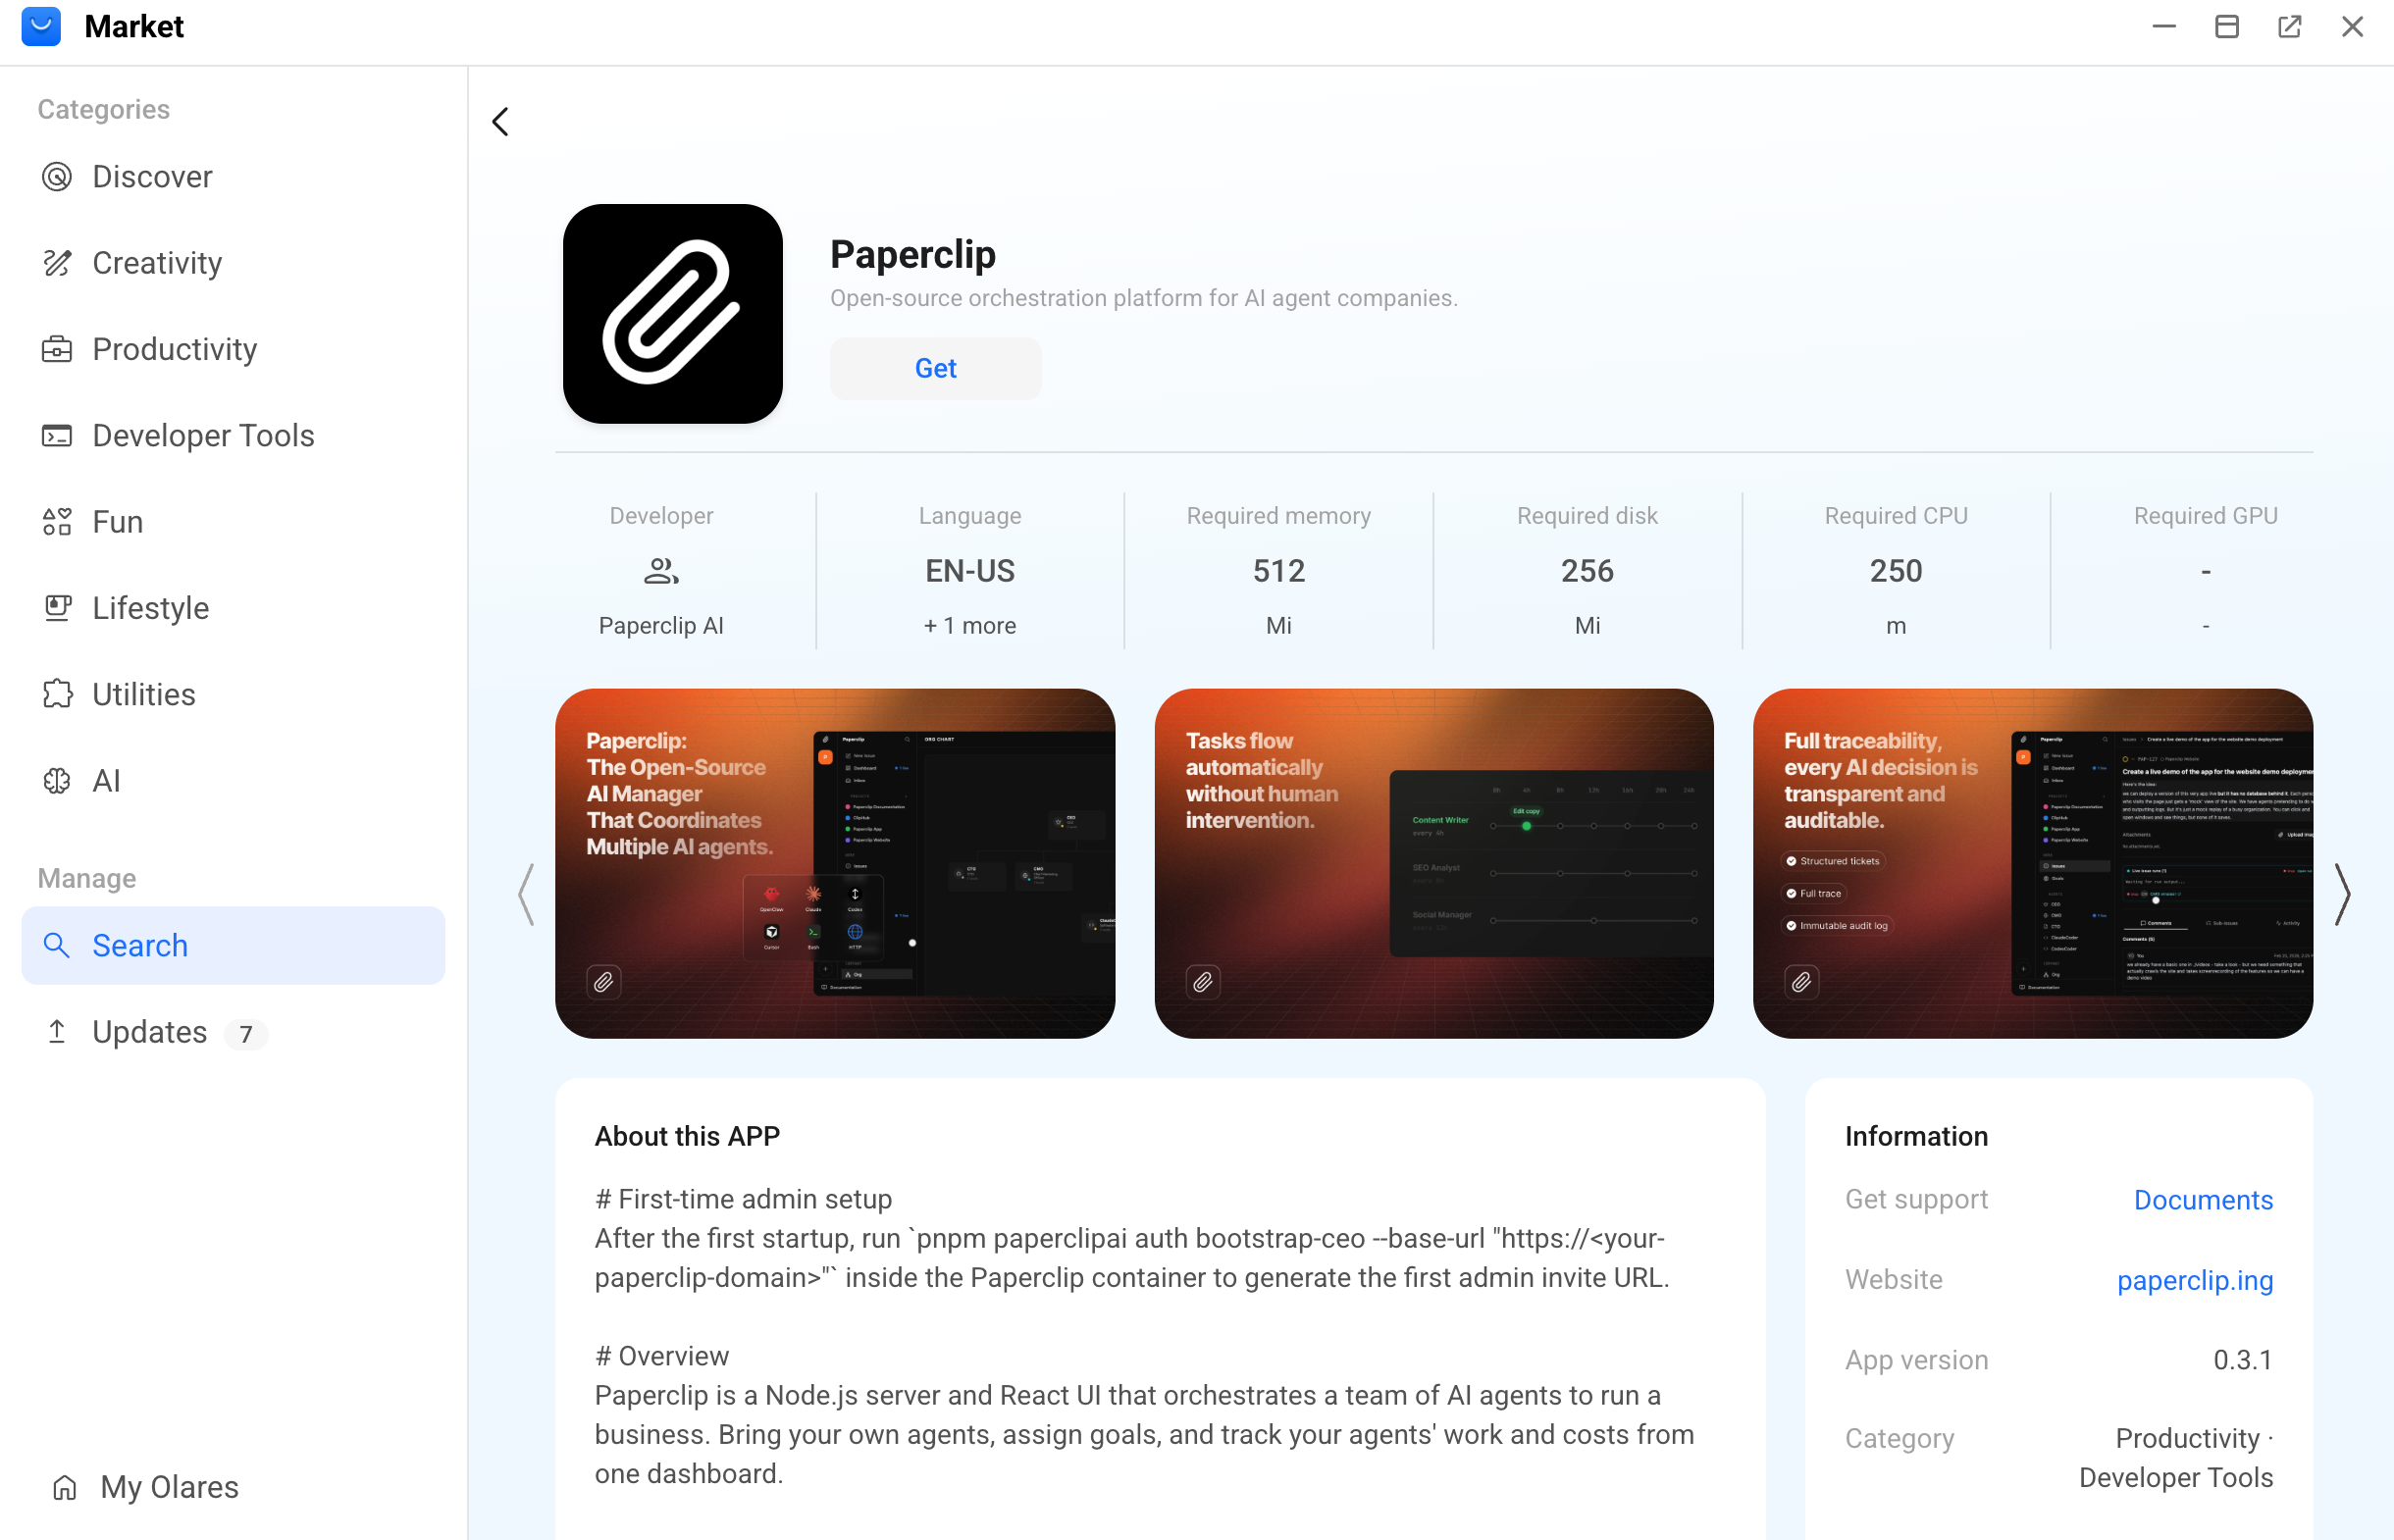
Click Get, then click Install. When the installation finishes, two shortcuts appear in the Launchpad:

Initialize Paperclip
After installing Paperclip, create the first admin account to complete the initial setup. If you plan to use cloud models, configure your API keys first.
Configure API keys
Each agent requires an API key for its underlying model provider. You configure these keys as environment variables in the Settings app.
TIP
Before creating an admin account, set up your API key in Settings so cloud models can be used immediately.
Open Settings, then go to Applications > Paperclip > Manage environment variables.
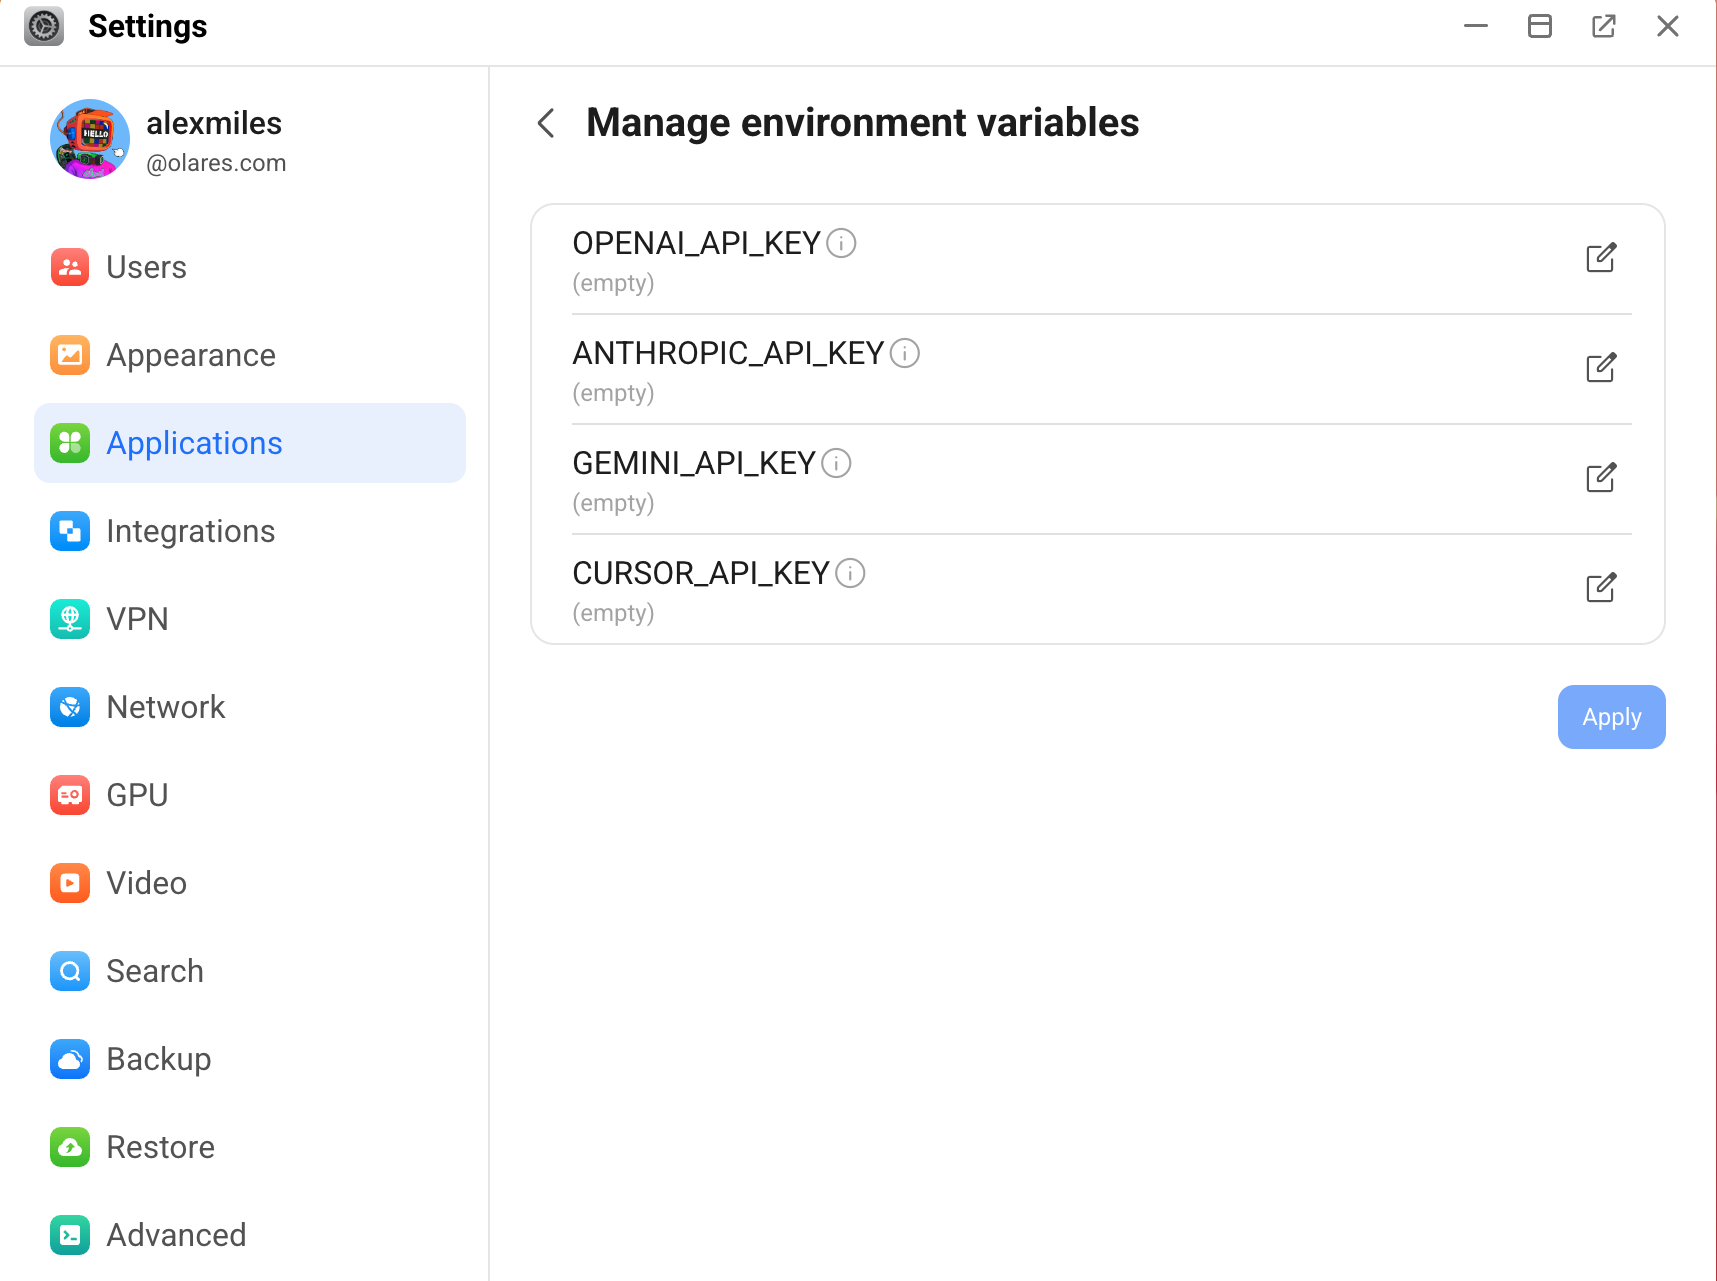
Click edit_square next to a variable, enter your API key in the Value field, then click Confirm.
Paperclip supports the following variables:
Variable Used by ANTHROPIC_API_KEYClaude Code, OpenCode, Pi OPENAI_API_KEYCodex, OpenCode, Pi GEMINI_API_KEYGemini CLI, Cursor CURSOR_API_KEYCursor Click Apply to save and apply the new keys.
Add more API keys later
Return to this section to add or update keys at any time. Repeat this procedure and restart Paperclip to apply new configurations.
Create an admin account
Paperclip ships without a default user account. To access the platform for the first time, you need to create an admin account through the registration flow.
Open Paperclip from the Launchpad, and click Create account.
On the sign-up page, fill in the required information and submit.
After sign-up, click Claim this instance to bind the admin account.
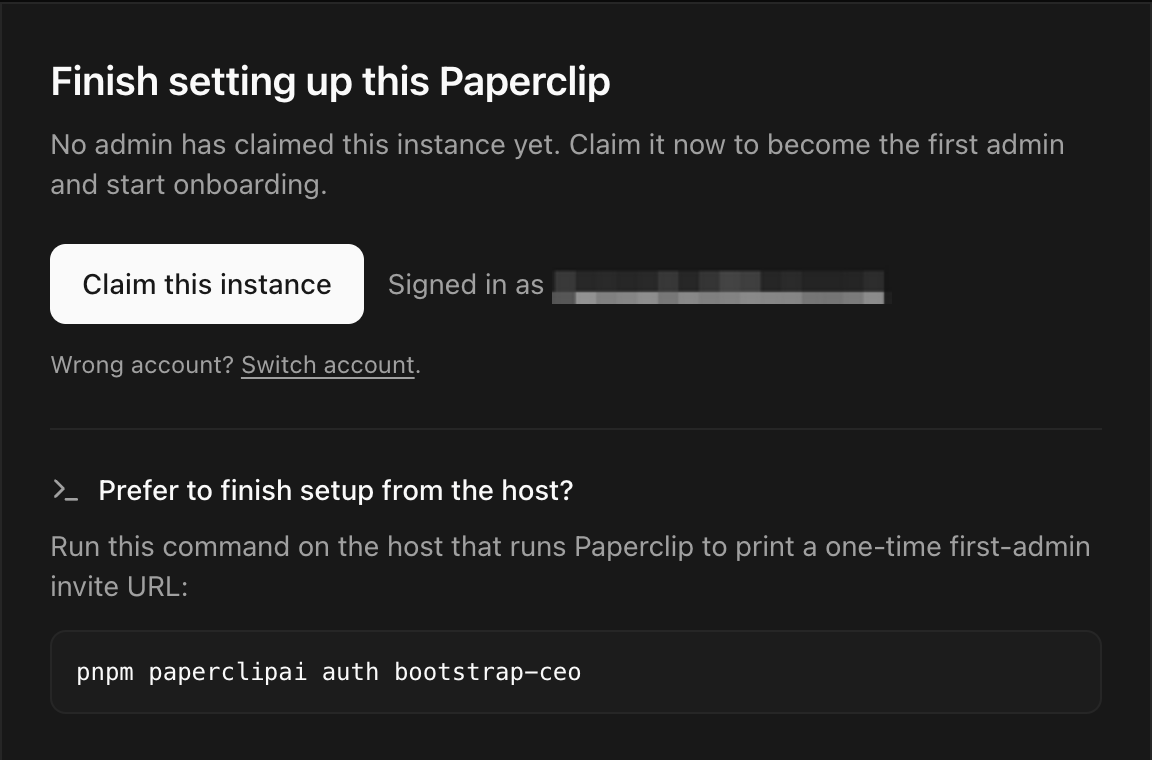
Name your company and finish the onboarding process as instructed.
Create your first company
A Paperclip workspace is organized around a virtual company structure. This company organizes your agents and tasks.
On the Company tab, configure the basic information:
a. Specify a name for the company.
b. (Optional) Specify the mission or goal.

c. Click Next.
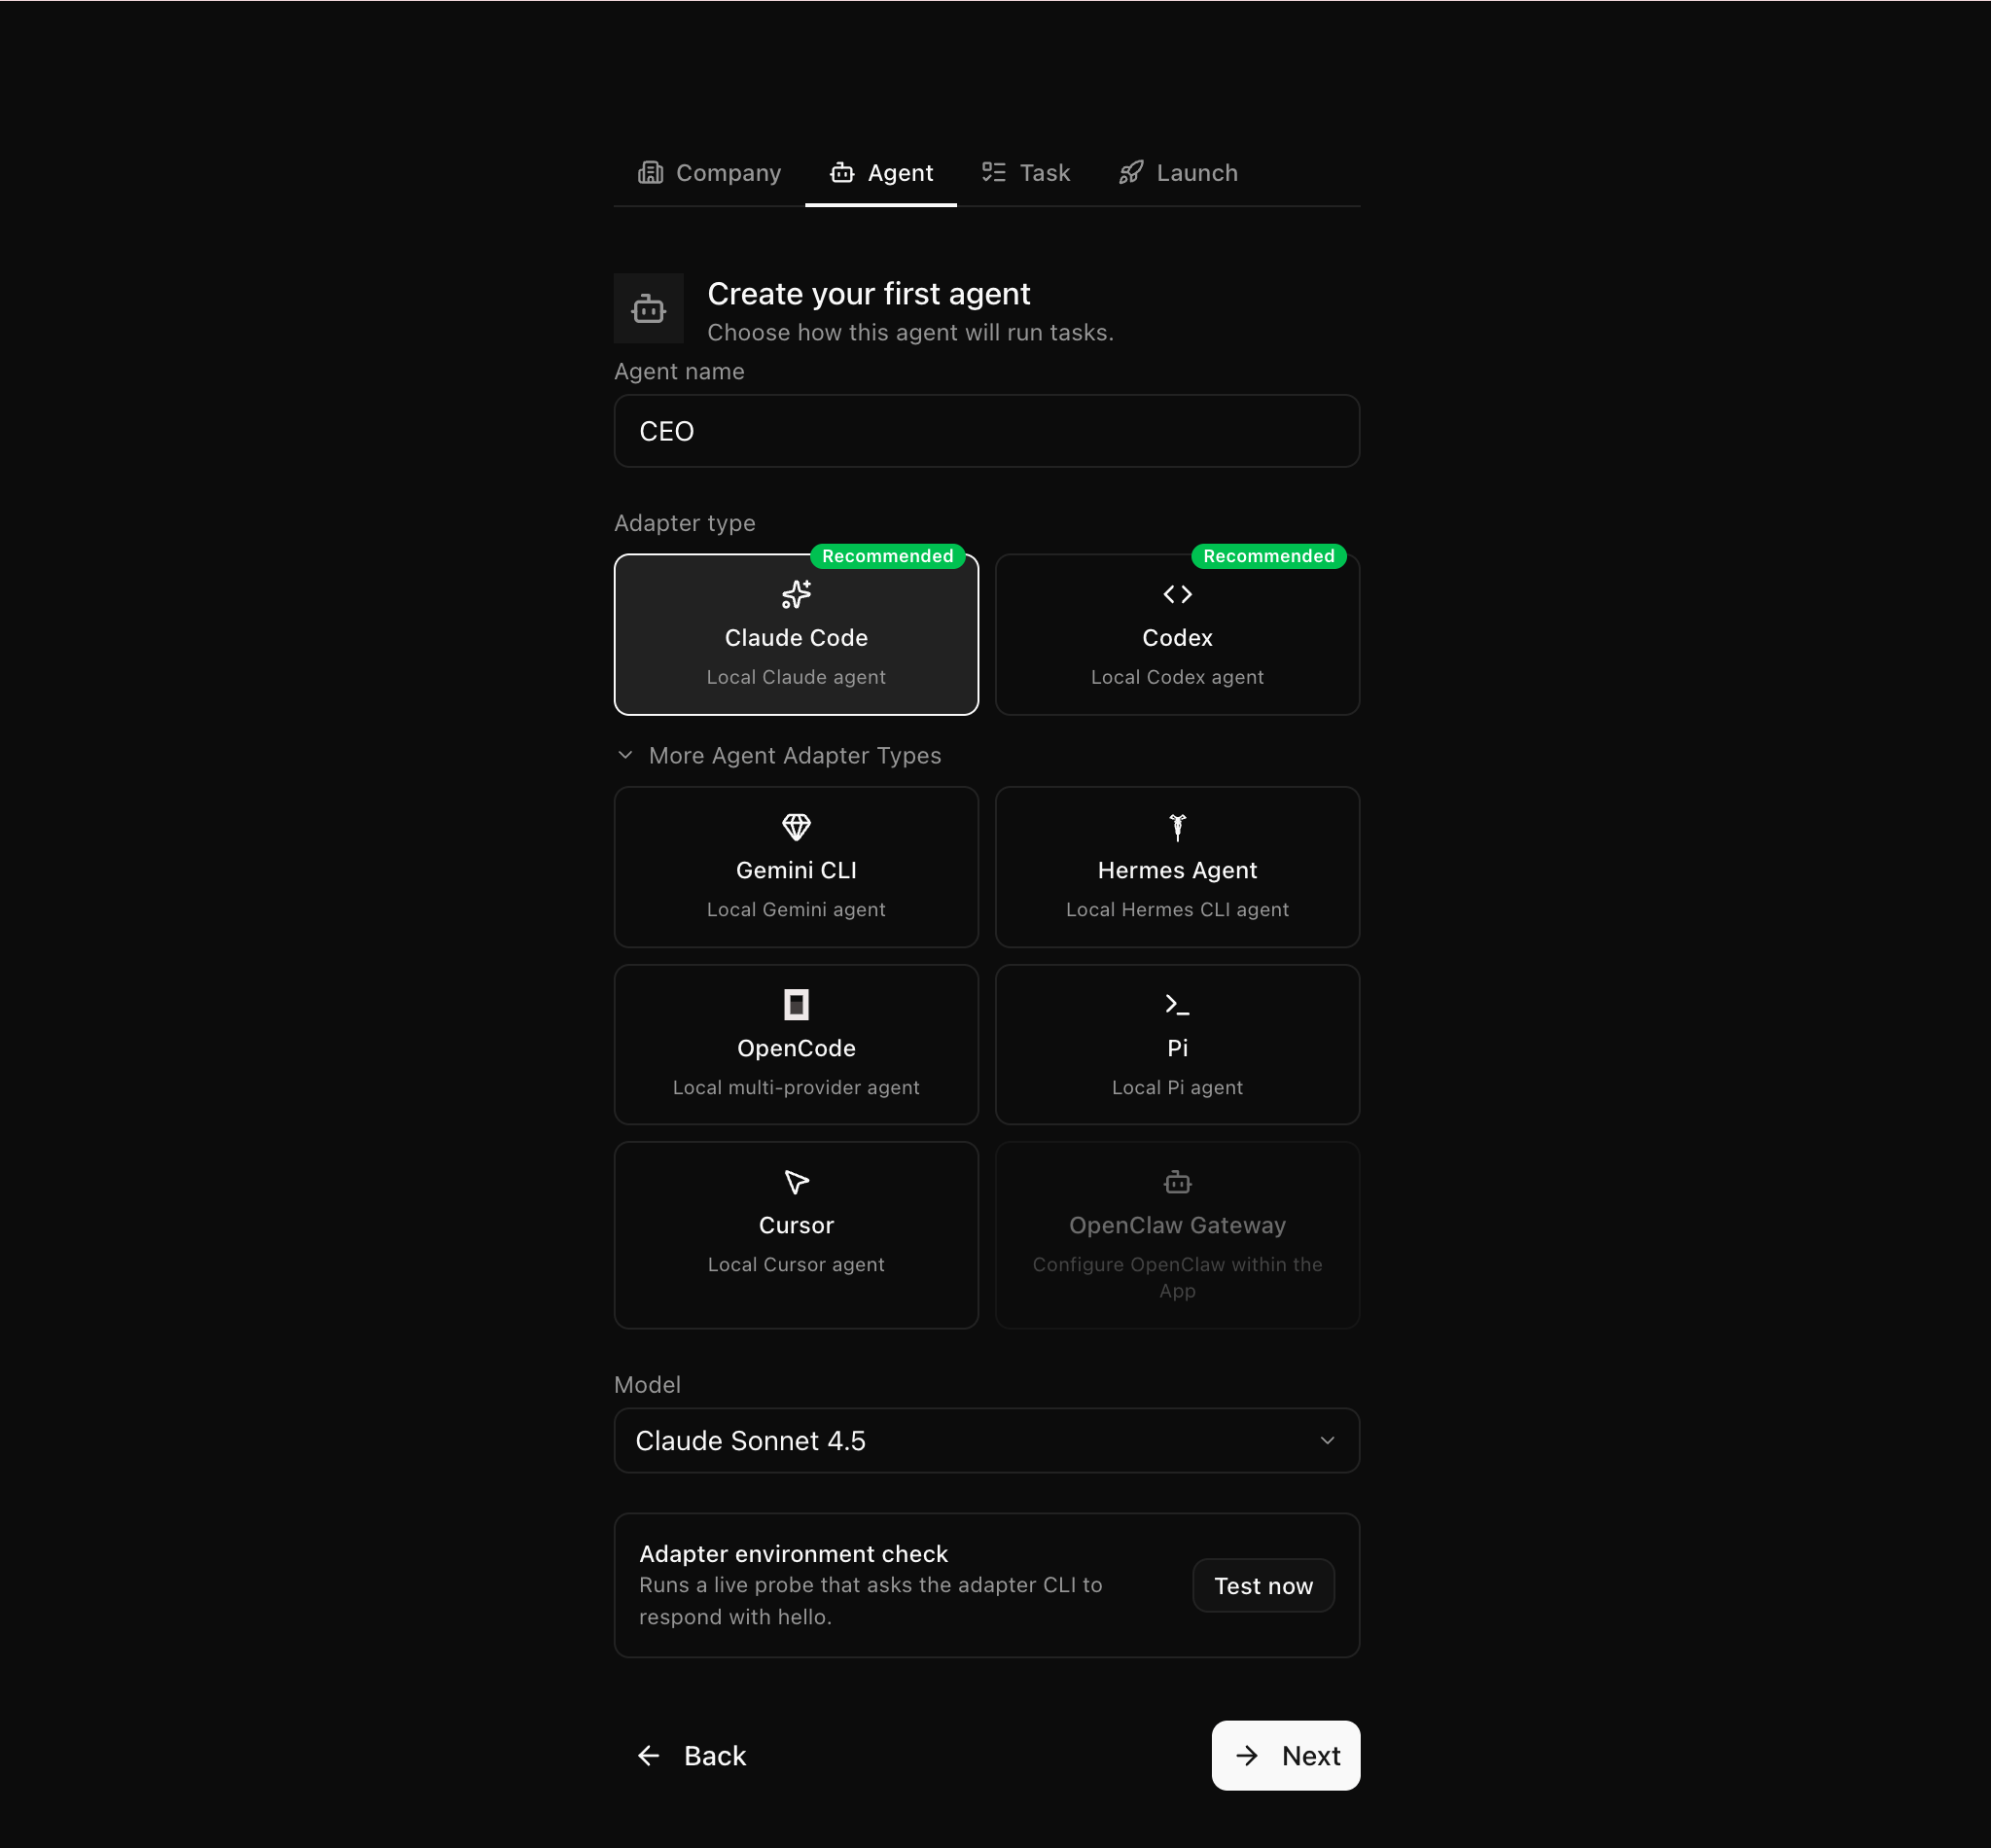
On the Agent tab, create your first agent:
a. Specify the following settings:
- Agent name: Use the default name CEO or a custom one.
- Adapter type: Select the underlying framework. For example, select Claude Code (Local Claude agent) or Codex (Local Codex agent).
- More Agent Adapter Types: Expand to select alternatives like OpenCode or Cursor.
- Model: Select a specific AI model from the drop-down list.
b. Click Test now to verify the configuration works with your API key.
c. Click Next.
TIP
To review the API key requirements for each adapter, see Which agent adapters does Paperclip support.
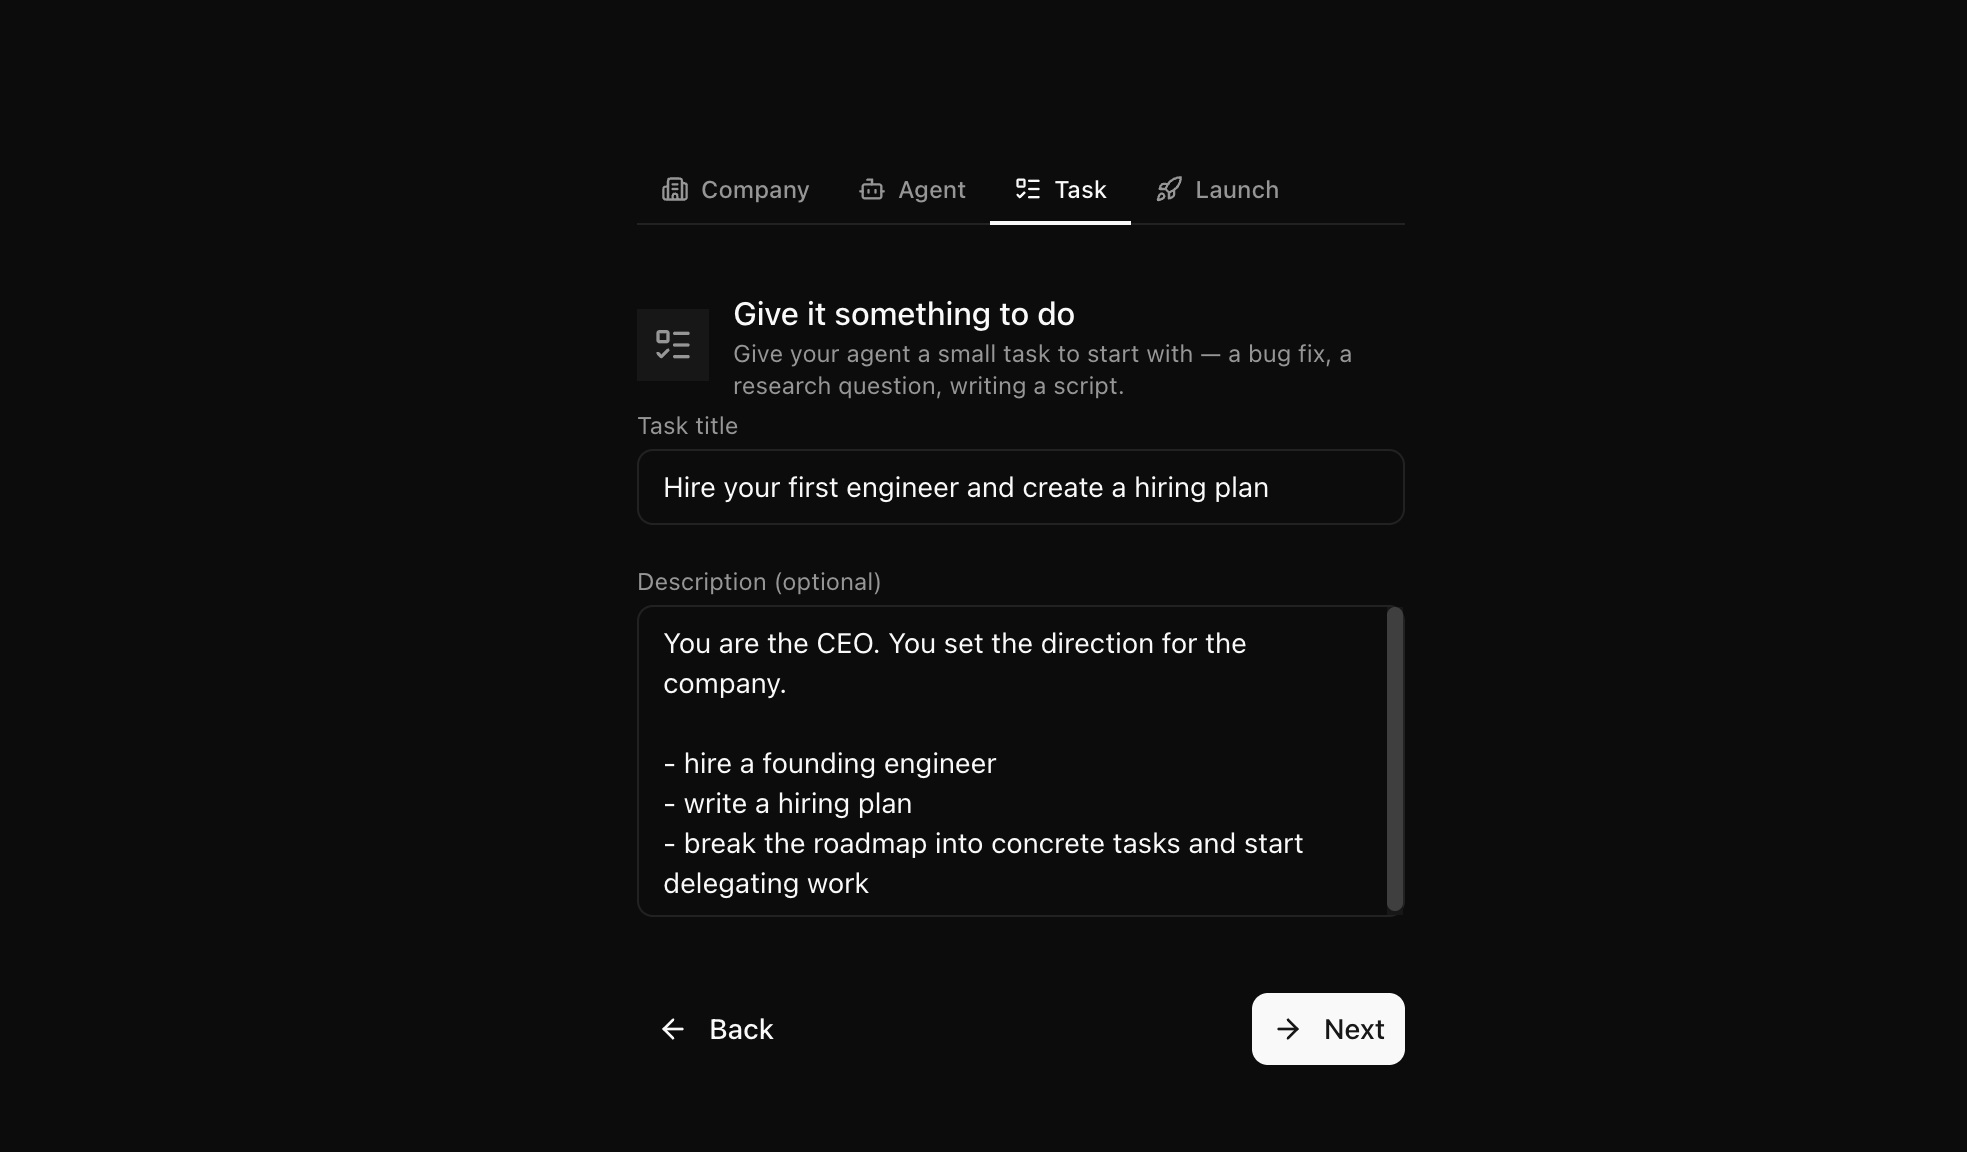
On the Task tab, define your first task:
a. Task title and Description: Specify the title and description, or keep the defaults.
b. Click Next. This task automatically converts into your first issue after the setup is completed.
Click Create & Open Issue. The Issues page opens, displaying your active workspace.
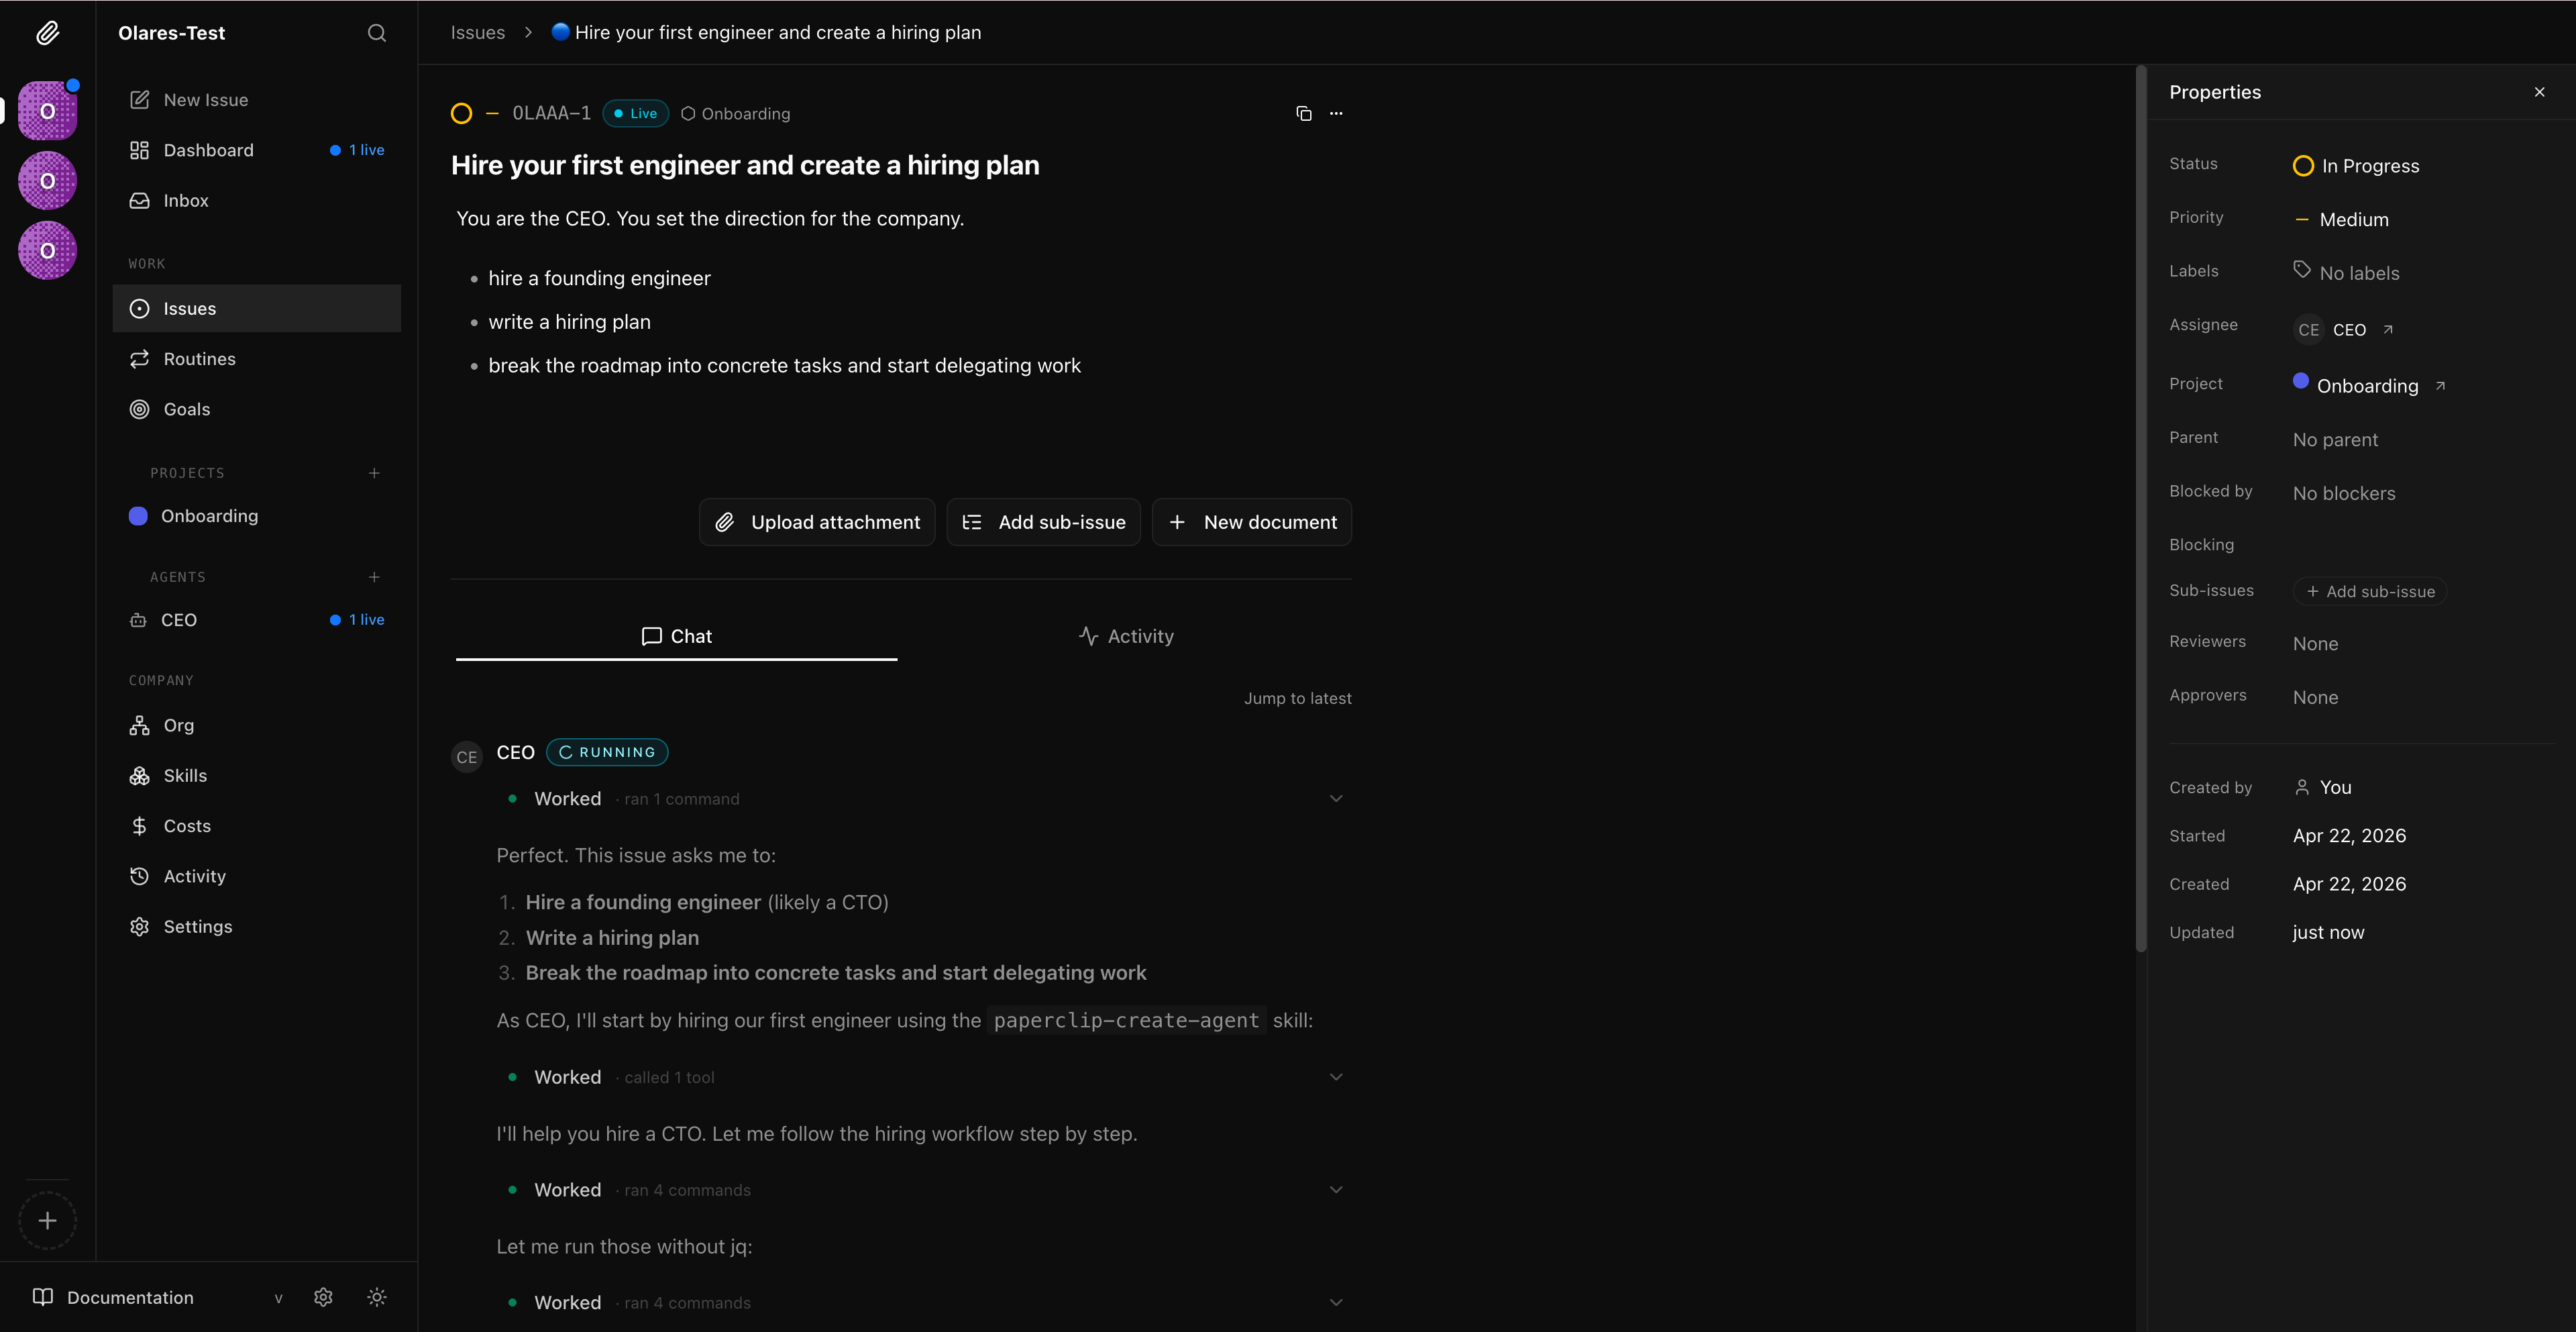
Create and track issues
In Paperclip, all work happens through issues. When you create an issue, Paperclip assigns it to an existing agent. If no suitable agent exists for the specific request, Paperclip automatically "hires" a new one to complete the job.
On the Issues page, click New issue in the left sidebar.
Specify details for the issue. For example:
- Issue title: Write a guide on AI servers.
- Description: Hire a writing agent to research and draft a 200-word article explaining the benefits of self-hosting AI models.
- Assignee: Select CEO to evaluate the requirements.
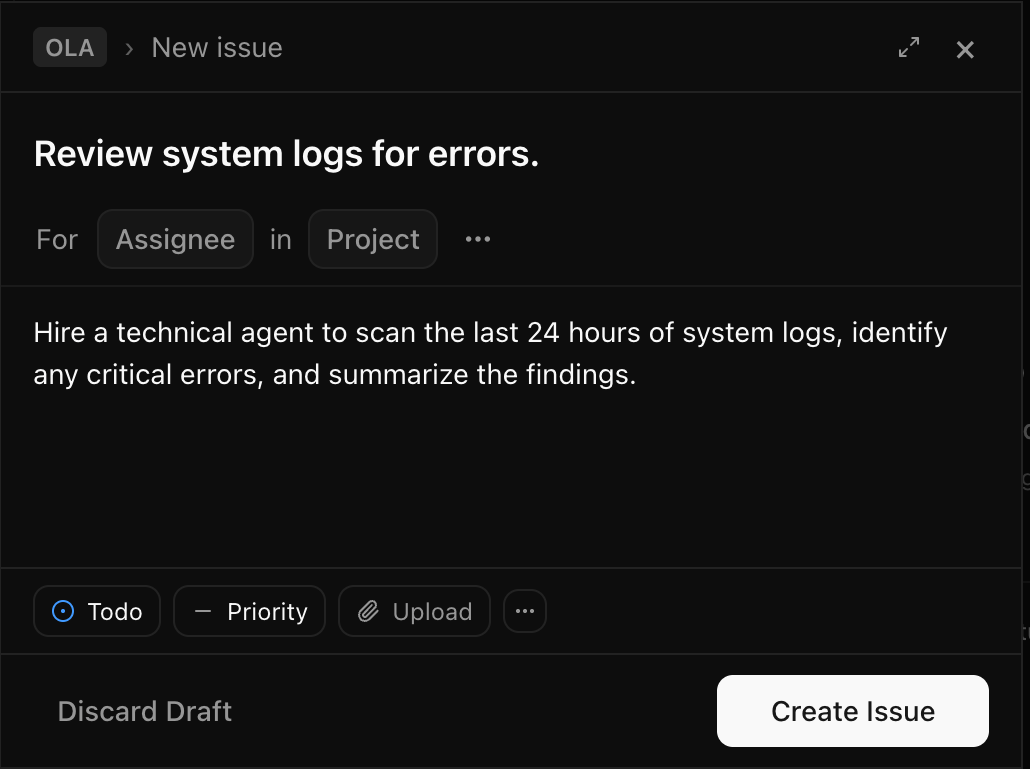
Click Create Issue. Paperclip assigns the issue and the agent starts working.
Click Inbox in the left sidebar to monitor incoming requests and execution progress. If the assigned agent decides to delegate the task, a hiring request appears in your inbox.
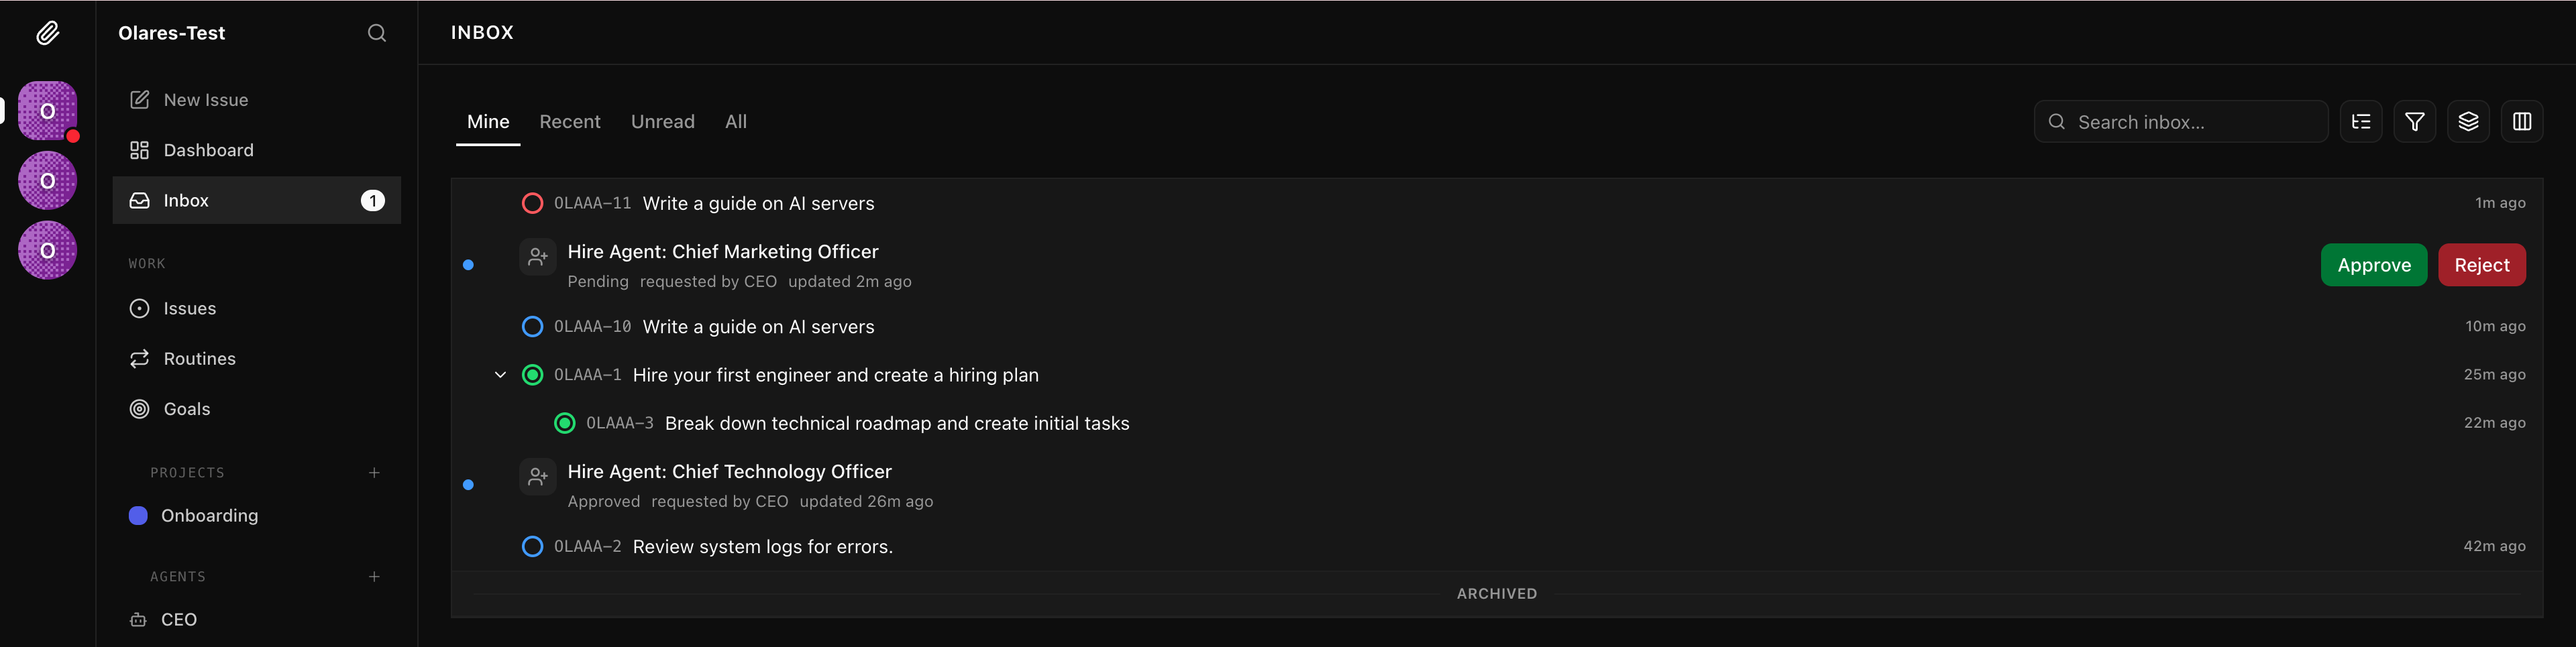
Go to the Agents section in the left sidebar to see the newly hired writer agent and its details.
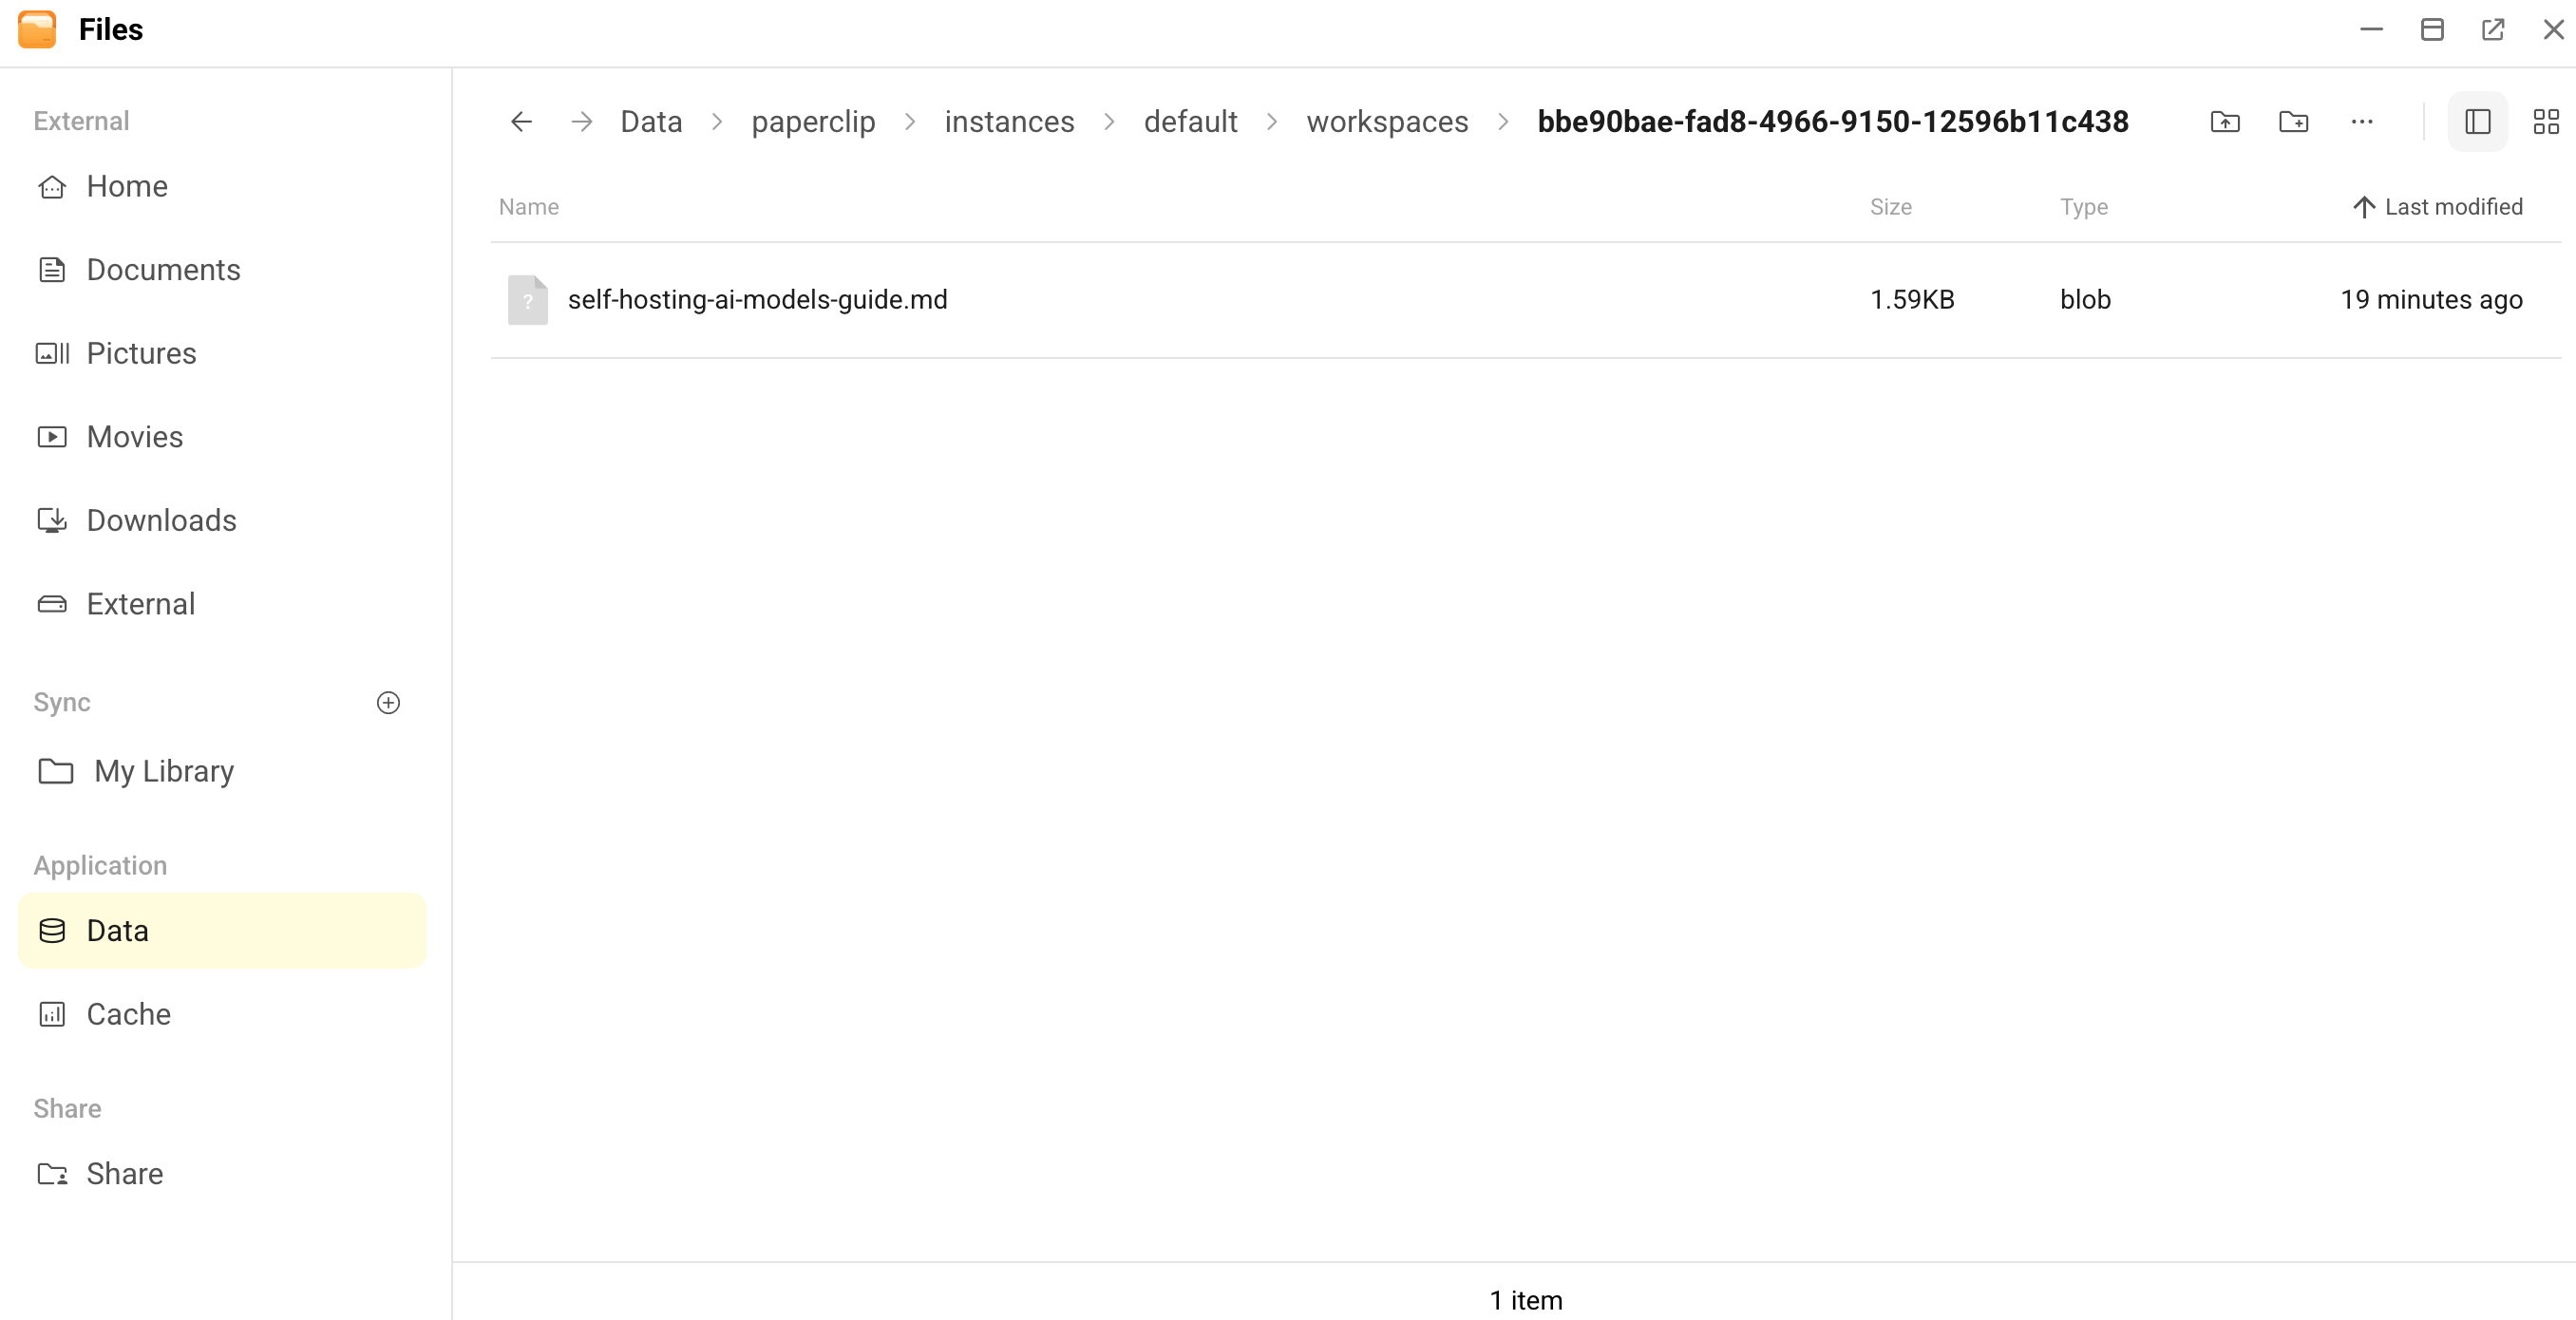
Review the agent's output:
a. Go to the Issues page, then select the issue to view its details. Look for the output directly in the chat history.

b. If the output is missing from the chat, enter a comment in the issue asking the agent for the file path. Open the Olares Files app, then go to the specified directory to retrieve your document.
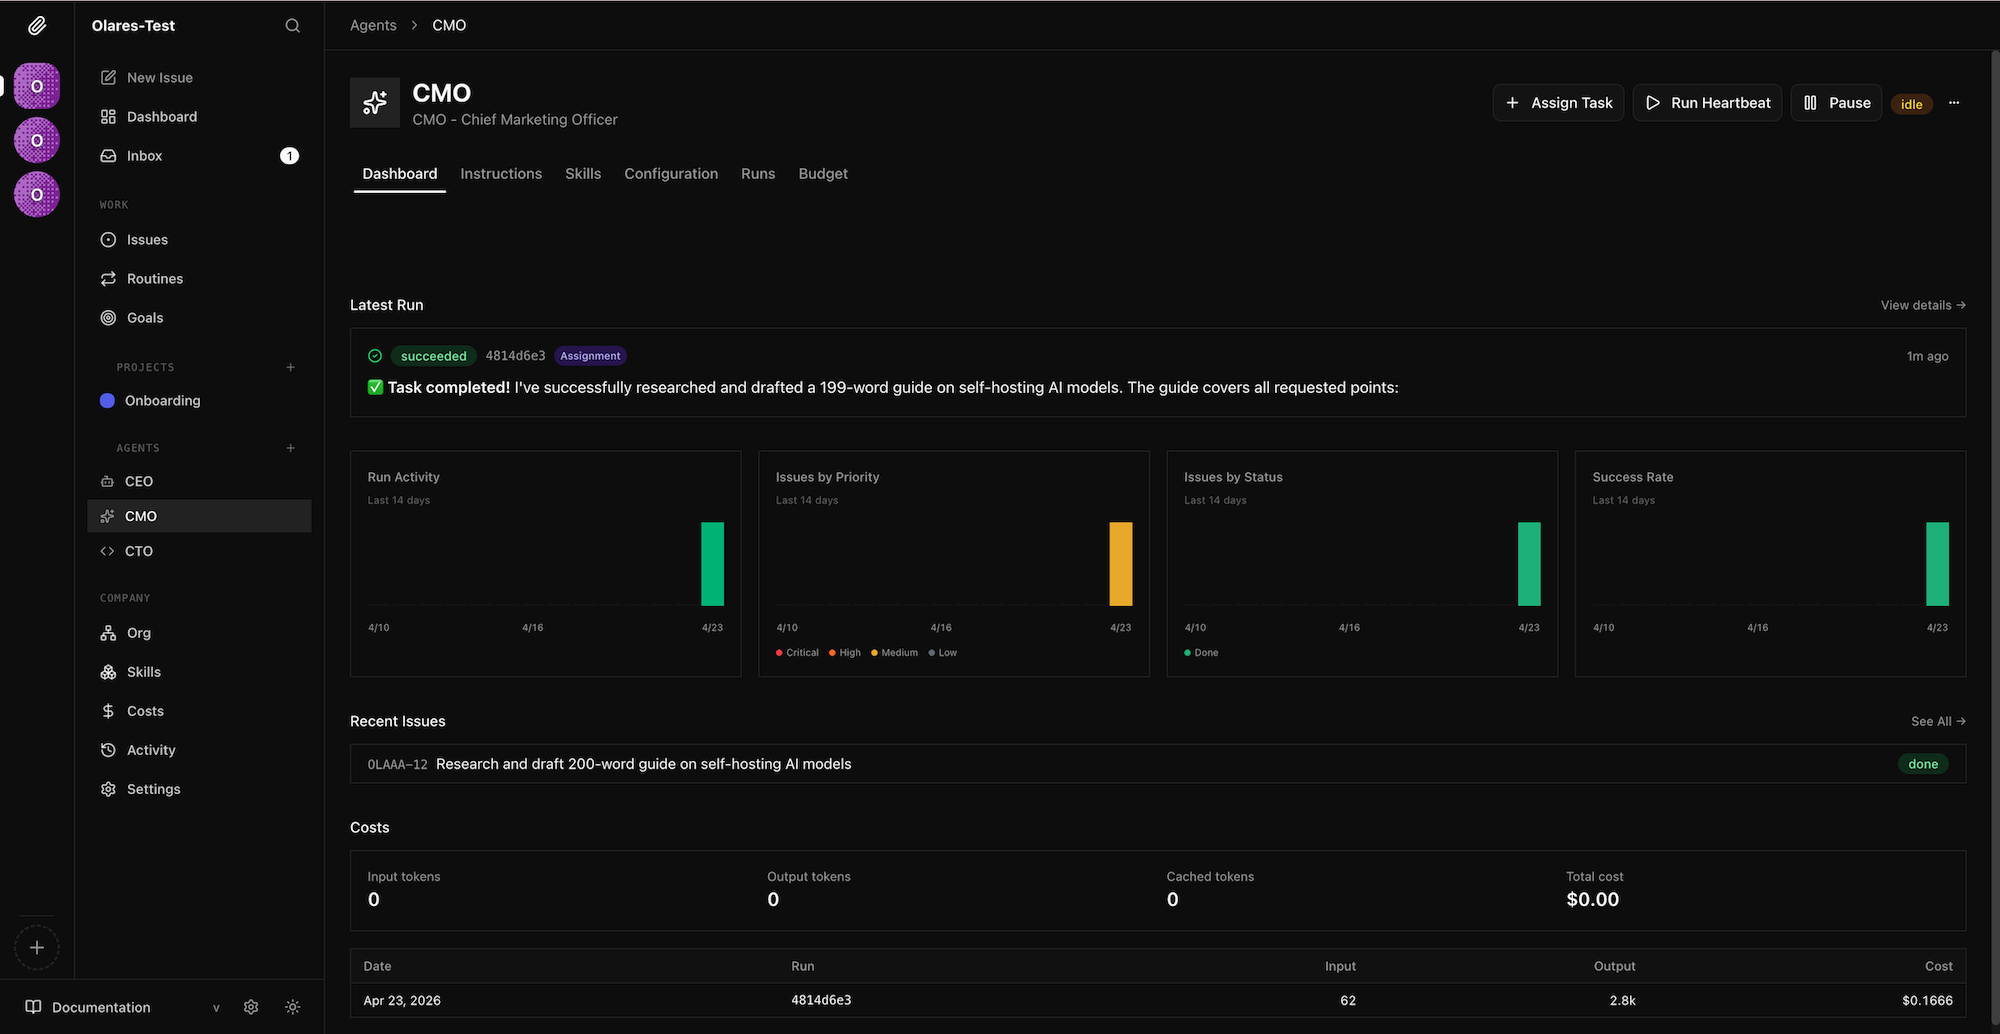
Monitor operations from the dashboard
As your agents complete issues, use the dashboard to track your company's overall performance, monitor API costs, and identify potential bottlenecks.
Click Dashboard in the left sidebar.

Review the top agent cards to see the most recent tasks your agents worked on and their execution duration.
Check the high-level metrics to monitor operational health, such as the total API cost incurred for the current month.
Analyze the 14-day trend charts to spot performance changes:
- Run Activity: Check the total number of agent executions.
- Issues by Priority: View active issues grouped by urgency (critical, high, medium, and low).
- Issues by Status: Track progress by reviewing which issues are in progress, completed, or blocked.
- Success Rate: Monitor the execution success rate of your AI workforce.
Scroll to the activity log to audit recent system events and agent behaviors. This log provides a chronological trail of all recent tasks.
Use local models in Paperclip
Use local models with caution
Paperclip is a fully autonomous multi-agent collaboration platform. Running it entirely on local models can cause workflow disruptions due to model capability limits, context overflow, or concurrency restrictions, potentially leading to cascading failures.
Consider using a hybrid configuration: assign high-performance cloud models to critical roles such as CEO or CTO, while using local models for execution-focused agents to reduce costs. Alternatively, designate local models as cheap model for less demanding tasks.
Carefully assess the capabilities of each model and your workflow requirements to determine the optimal setup.
Use OpenCode to call local models
Independent OpenCode instance
This OpenCode runs inside the Paperclip container and is separate from the OpenCode app installed from the Olares Market. You need to configure it independently.
Install a model app from the Market. For this example, we’ll use
gemma4:26b.When creating an agent, choose OpenCode as the runtime. Select a temporary model such as big-pickle to finish the initial setup. You will replace it with the local model configuration in the next step.
After initialization, configure the local model:
a. Open the Files app, and go to Data > paperclip > paperclip > .config > opencode.
b. Rename
opencode.jsonctoopencode.jsonand open it in edit mode.c. Replace the default configuration with the following example (using gemma4:26b as the model):
- Replace
<your-olares-id>in the configuration with your specific Olares ID. - Ensure that the
baseURLends with/v1to provide OpenAI-compatible API access through Ollama.
json{ "$schema": "https://opencode.ai/config.json", "model": "olares/gemma4:26b", "provider": { "olares": { "name": "Gemma4:26b (Ollama)", "npm": "@ai-sdk/openai-compatible", "models": { "gemma4:26b": { "name": "gemma4:26b" } }, "options": { "baseURL": "https://<your-olares-id>.olares.com/v1" } } } }- Replace
Restart the Paperclip container.
In Paperclip, go to Agents > Configuration > Permissions & Configuration to verify the newly added local model.

WARNING
If you do not plan to use the default
openai/gpt-5.1-codex-minias the cheap model, be sure to turn this feature off or switch to another available model.
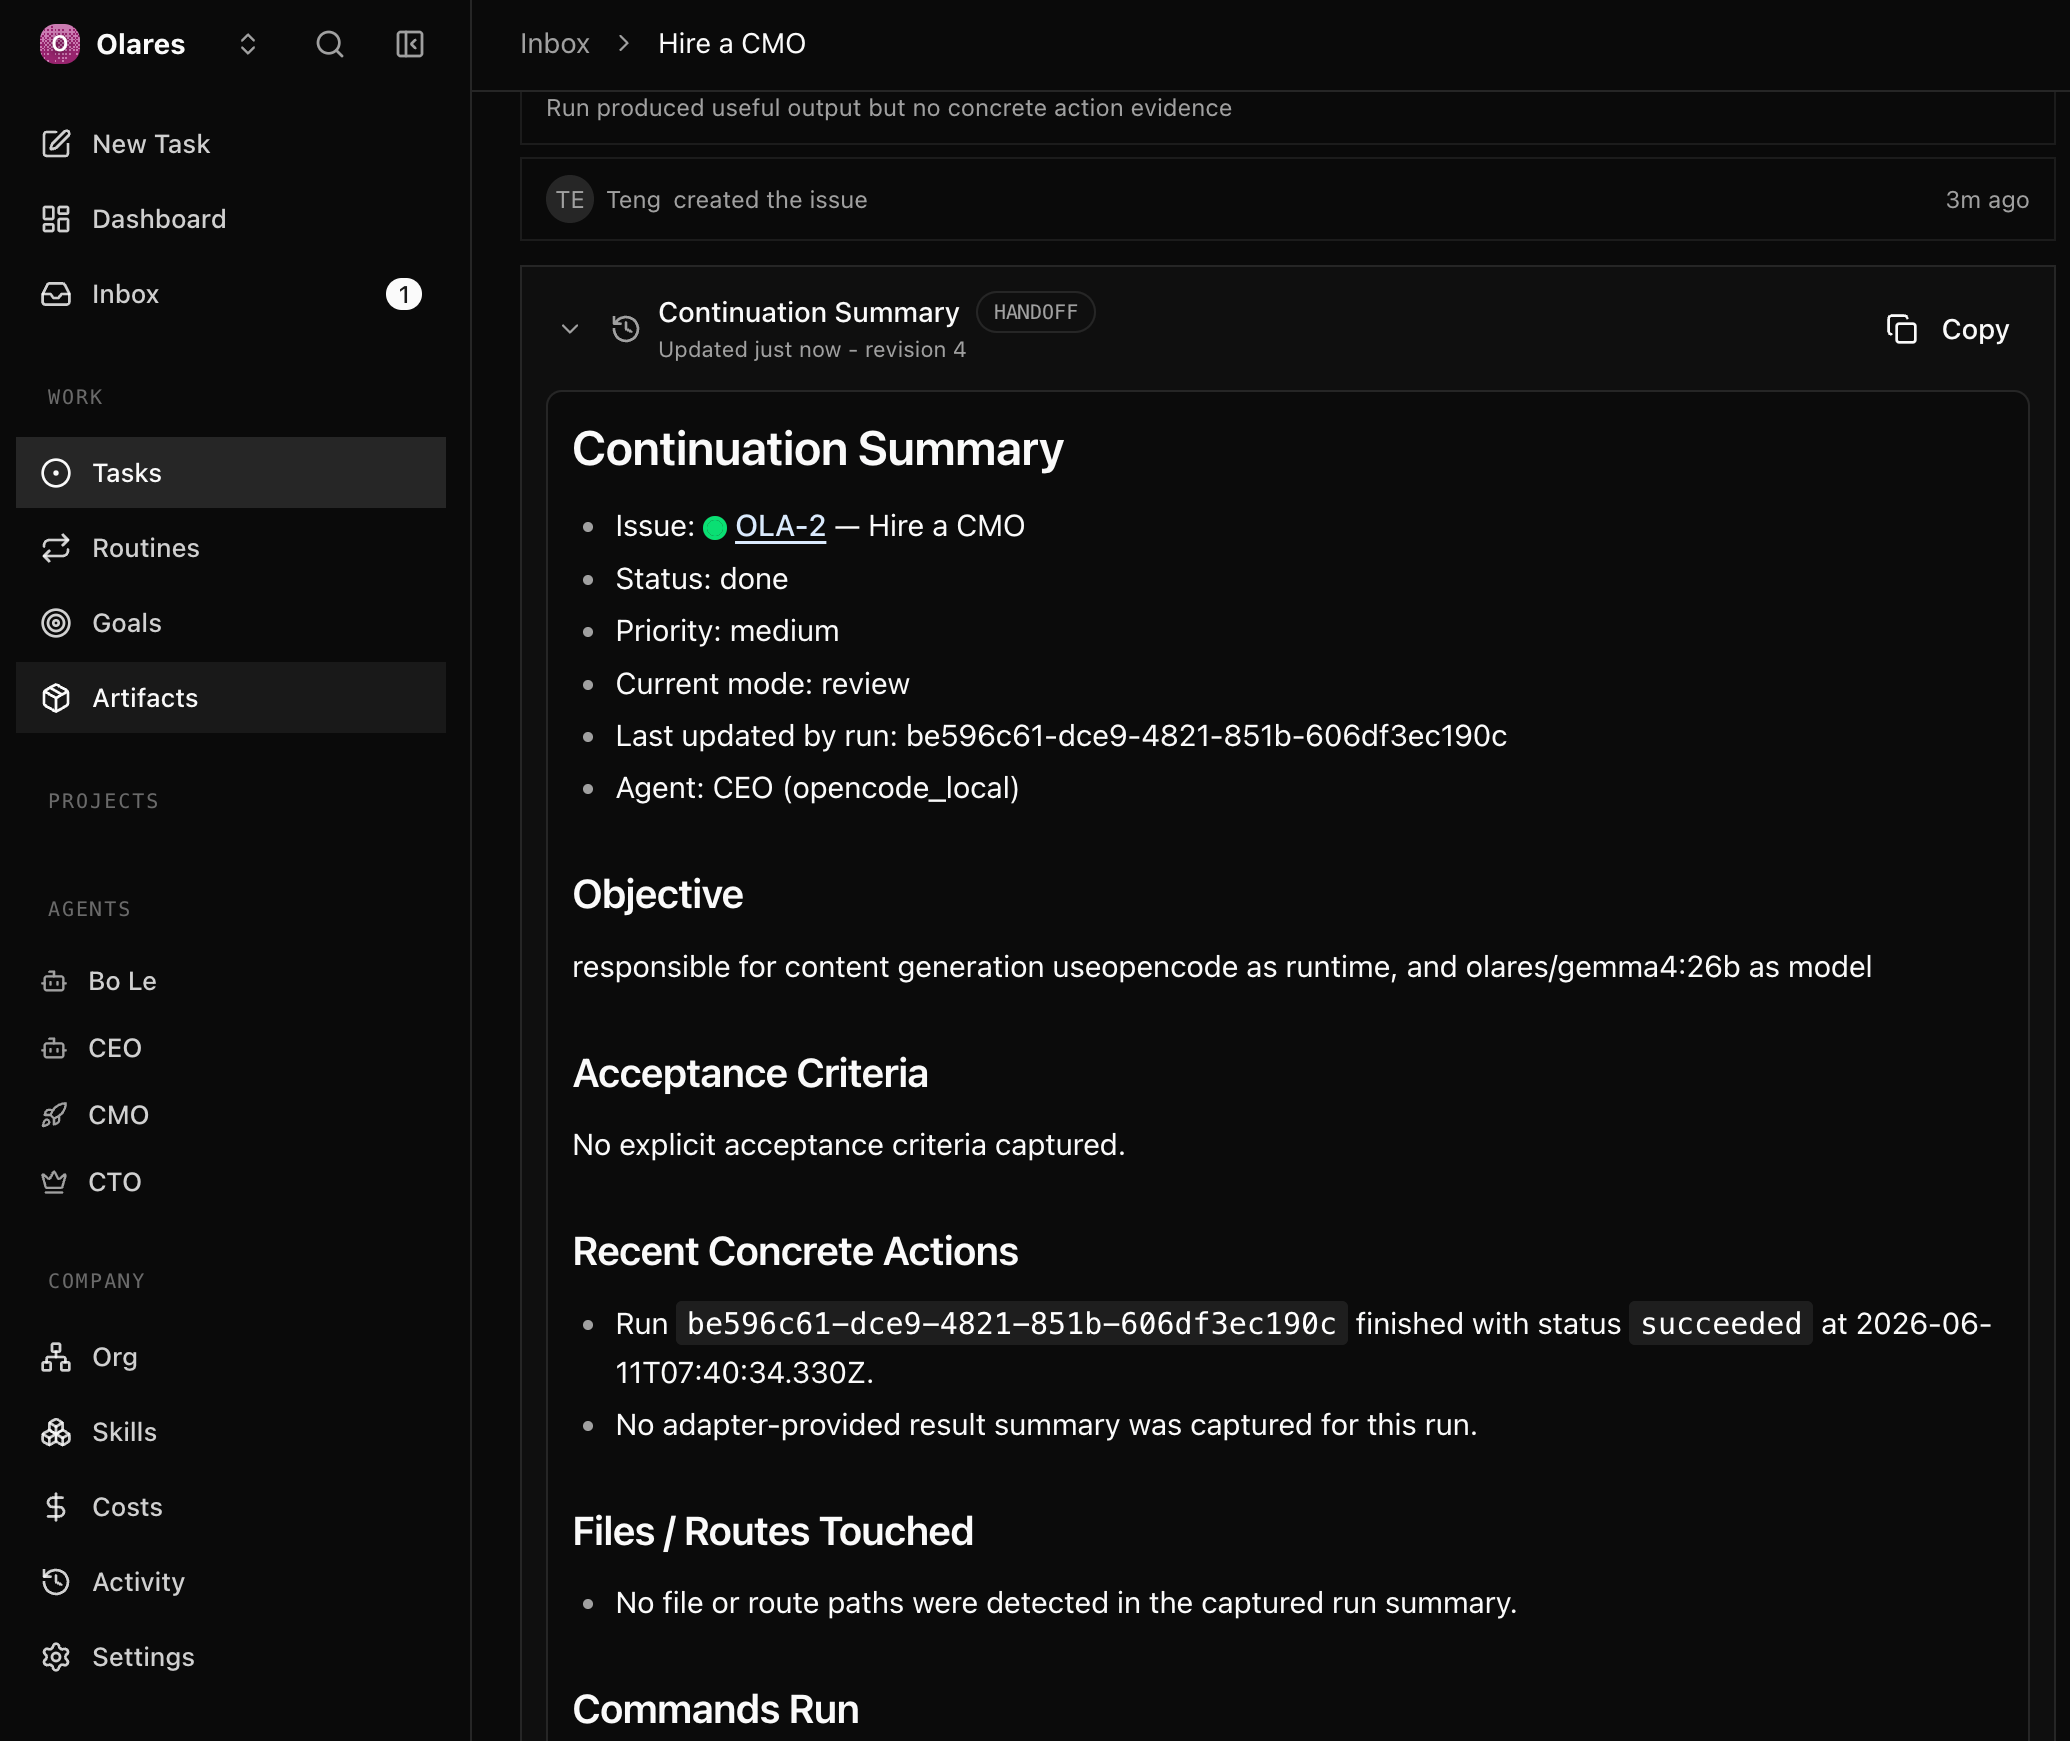
Test the workflow
You can monitor the execution process and result in the task's Activity > Continuation Summary.
Ask the CEO to hire a new agent:
- Task title: Hire a CMO
- Task description: Hire a content generation agent that uses opencode as the runtime and olares/gemma4:26b as the model.
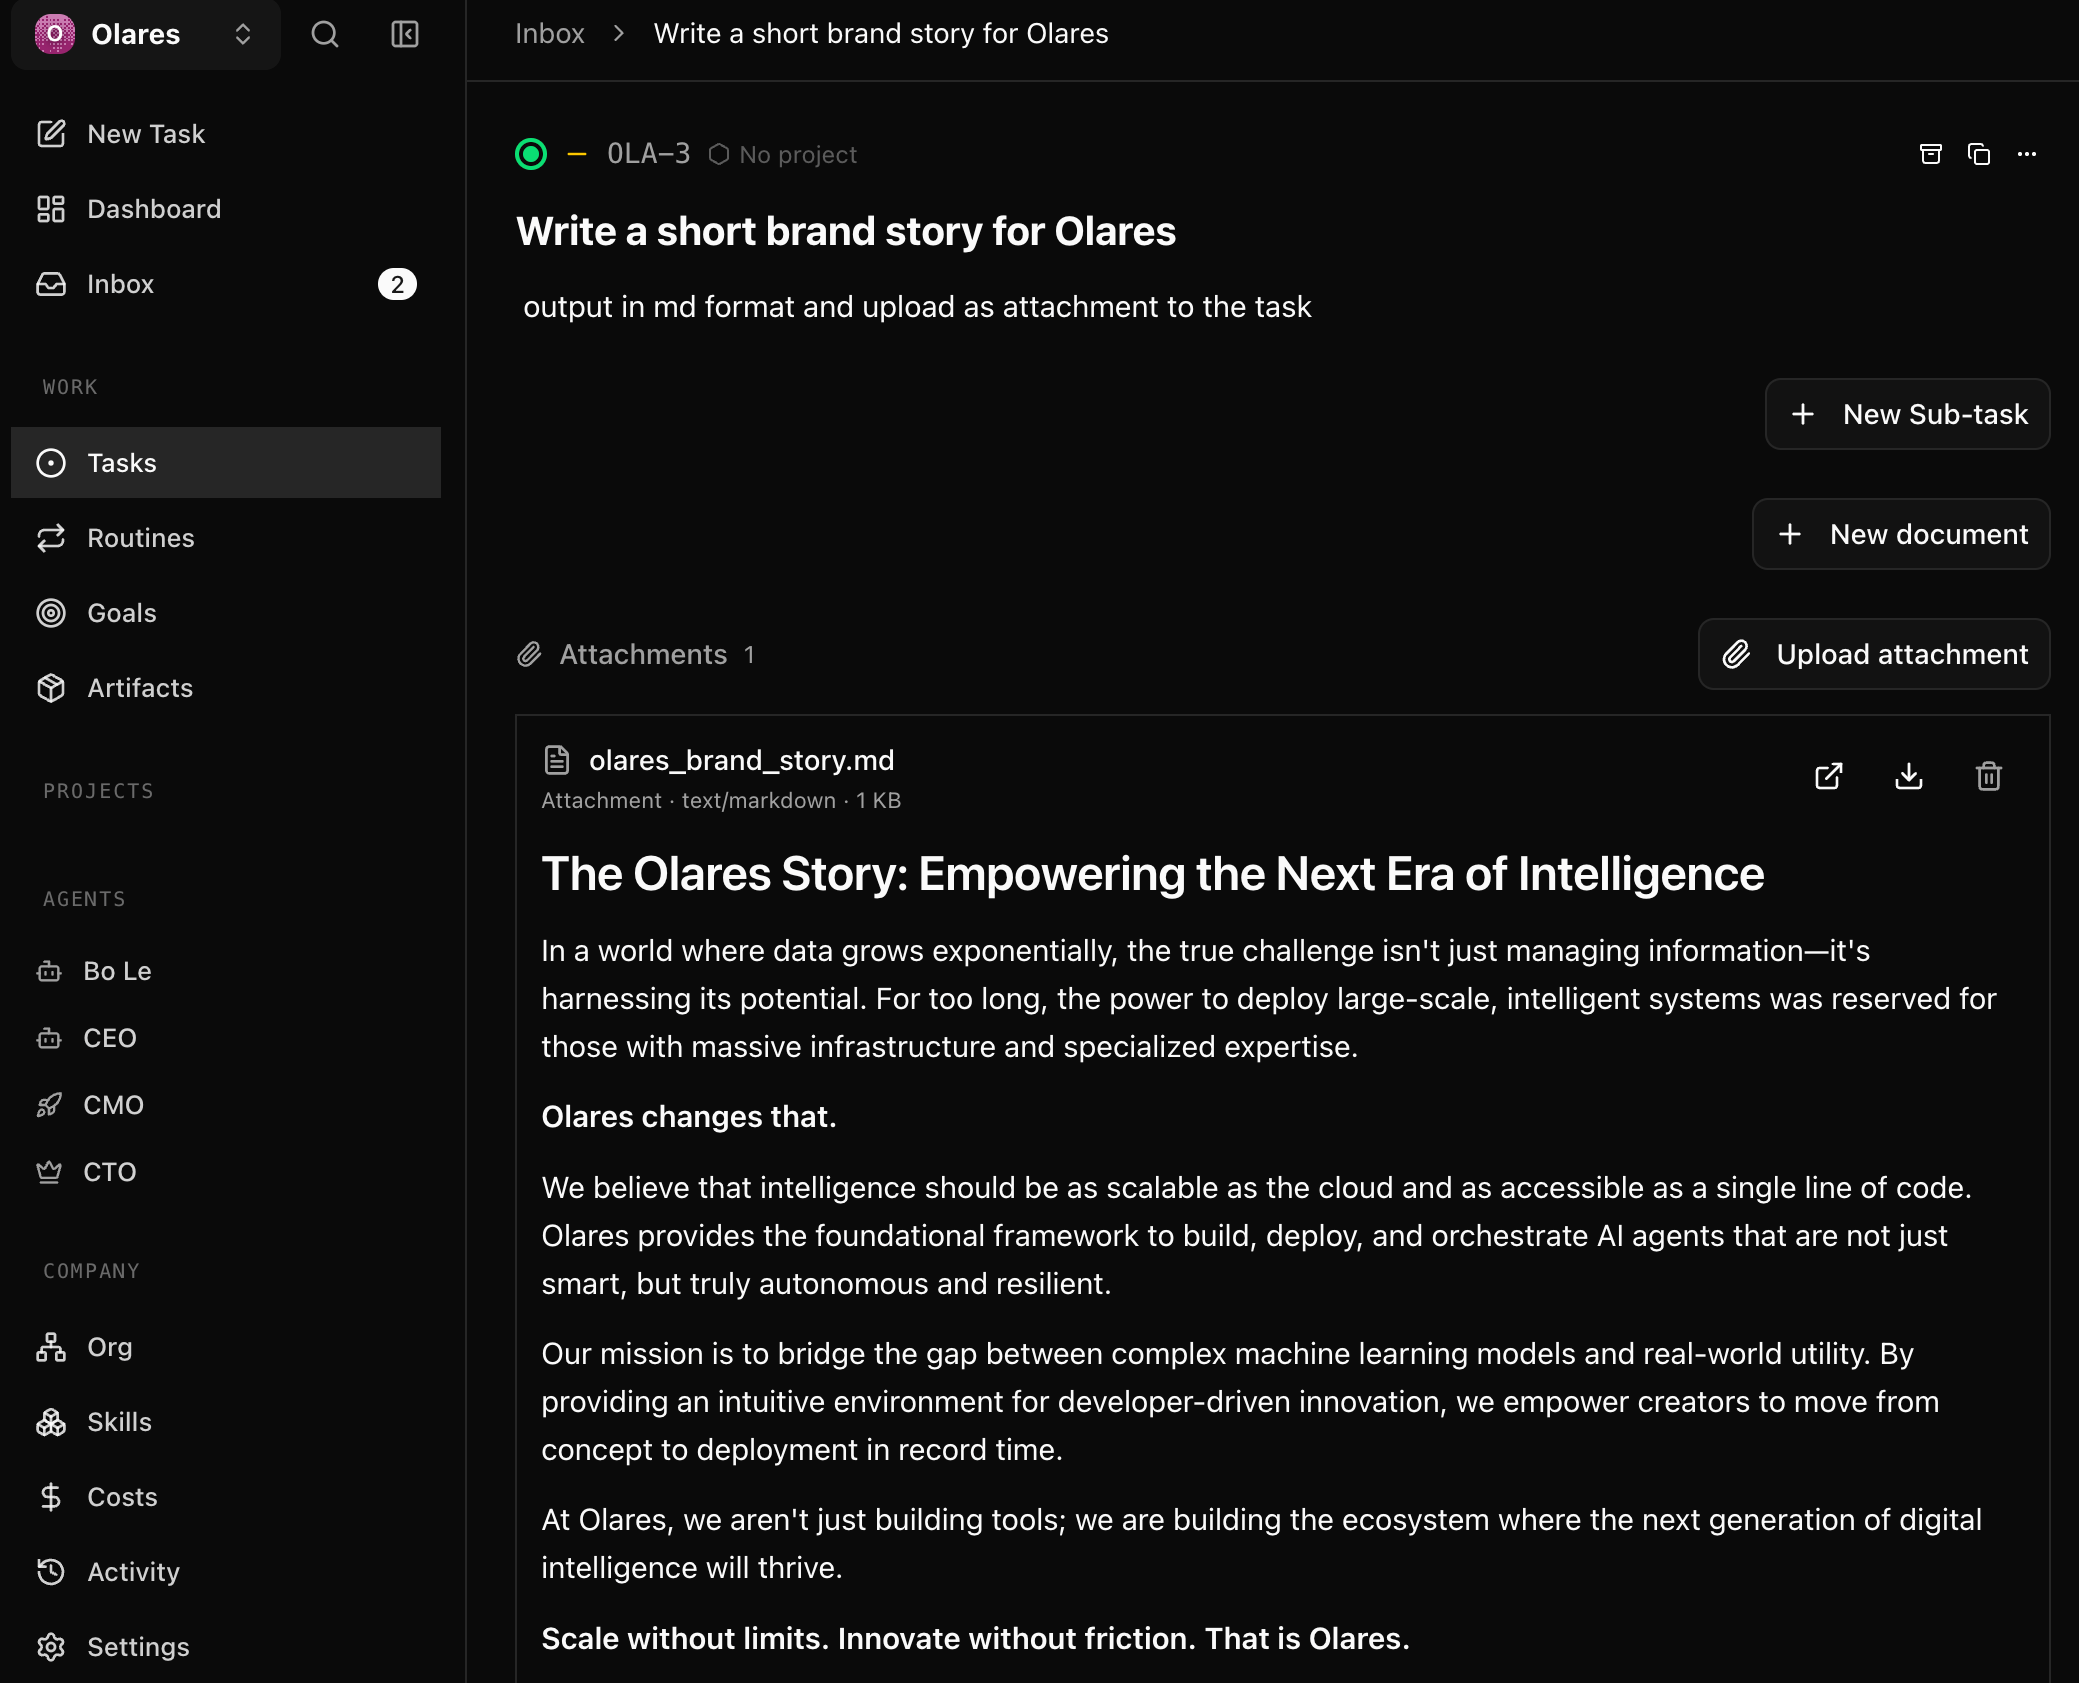
Ask the CMO to write a brand story:
- Task title: Write a brand story
- Task description: Output in md format and upload the final result as an attachment to the task.
FAQs
Which agent adapters does Paperclip support?
Paperclip currently supports the following agent adapters. You configure specific API keys as environment variables depending on the adapter you choose:
- Claude Code: Requires
ANTHROPIC_API_KEY. - Codex: Requires
OPENAI_API_KEY. - OpenCode: Requires
ANTHROPIC_API_KEYorOPENAI_API_KEY. - Pi: Requires
ANTHROPIC_API_KEYorOPENAI_API_KEY. - Cursor: Requires
CURSOR_API_KEY.
Can I use Hermes Agent as an agent runtime?
Yes, but it is not recommended for production environments. Note the following:
This Hermes Agent runs inside the Paperclip container and is separate from the Hermes Agent app installed from the Olares Market. You need to install and configure it separately in the Paperclip CLI (
pip install hermes-agent).The Hermes Agent and Paperclip adapter are still in development. Connection stability issues might require significant debugging.
Ensure the following configurations are correct, otherwise the agent might fail to work:
- Turn off the manual approval setting to prevent Paperclip from timing out while waiting for approval when calling the agent:
bashhermes config set approvals.mode "off" hermes config set approvals.cron_mode "approve"- Ensure your Hermes Agent has
PAPERCLIP_API_KEYset and the Paperclip Skills installed so it can fetch and modify tasks in Paperclip.
Codex adapter fails to authenticate
After you update OPENAI_API_KEY and restart Paperclip, the Codex adapter might still fail to authenticate. This happens because the codex login command attempts to open a local browser for OAuth, which the background container cannot do.
To resolve this issue, run a manual device-auth login:
Open Control Hub, then go to Browse > paperclip-{username} > Deployments > paperclip.
Under Pods, click the pod name to view its containers, then click terminal next to the paperclip container to open the pod terminal.
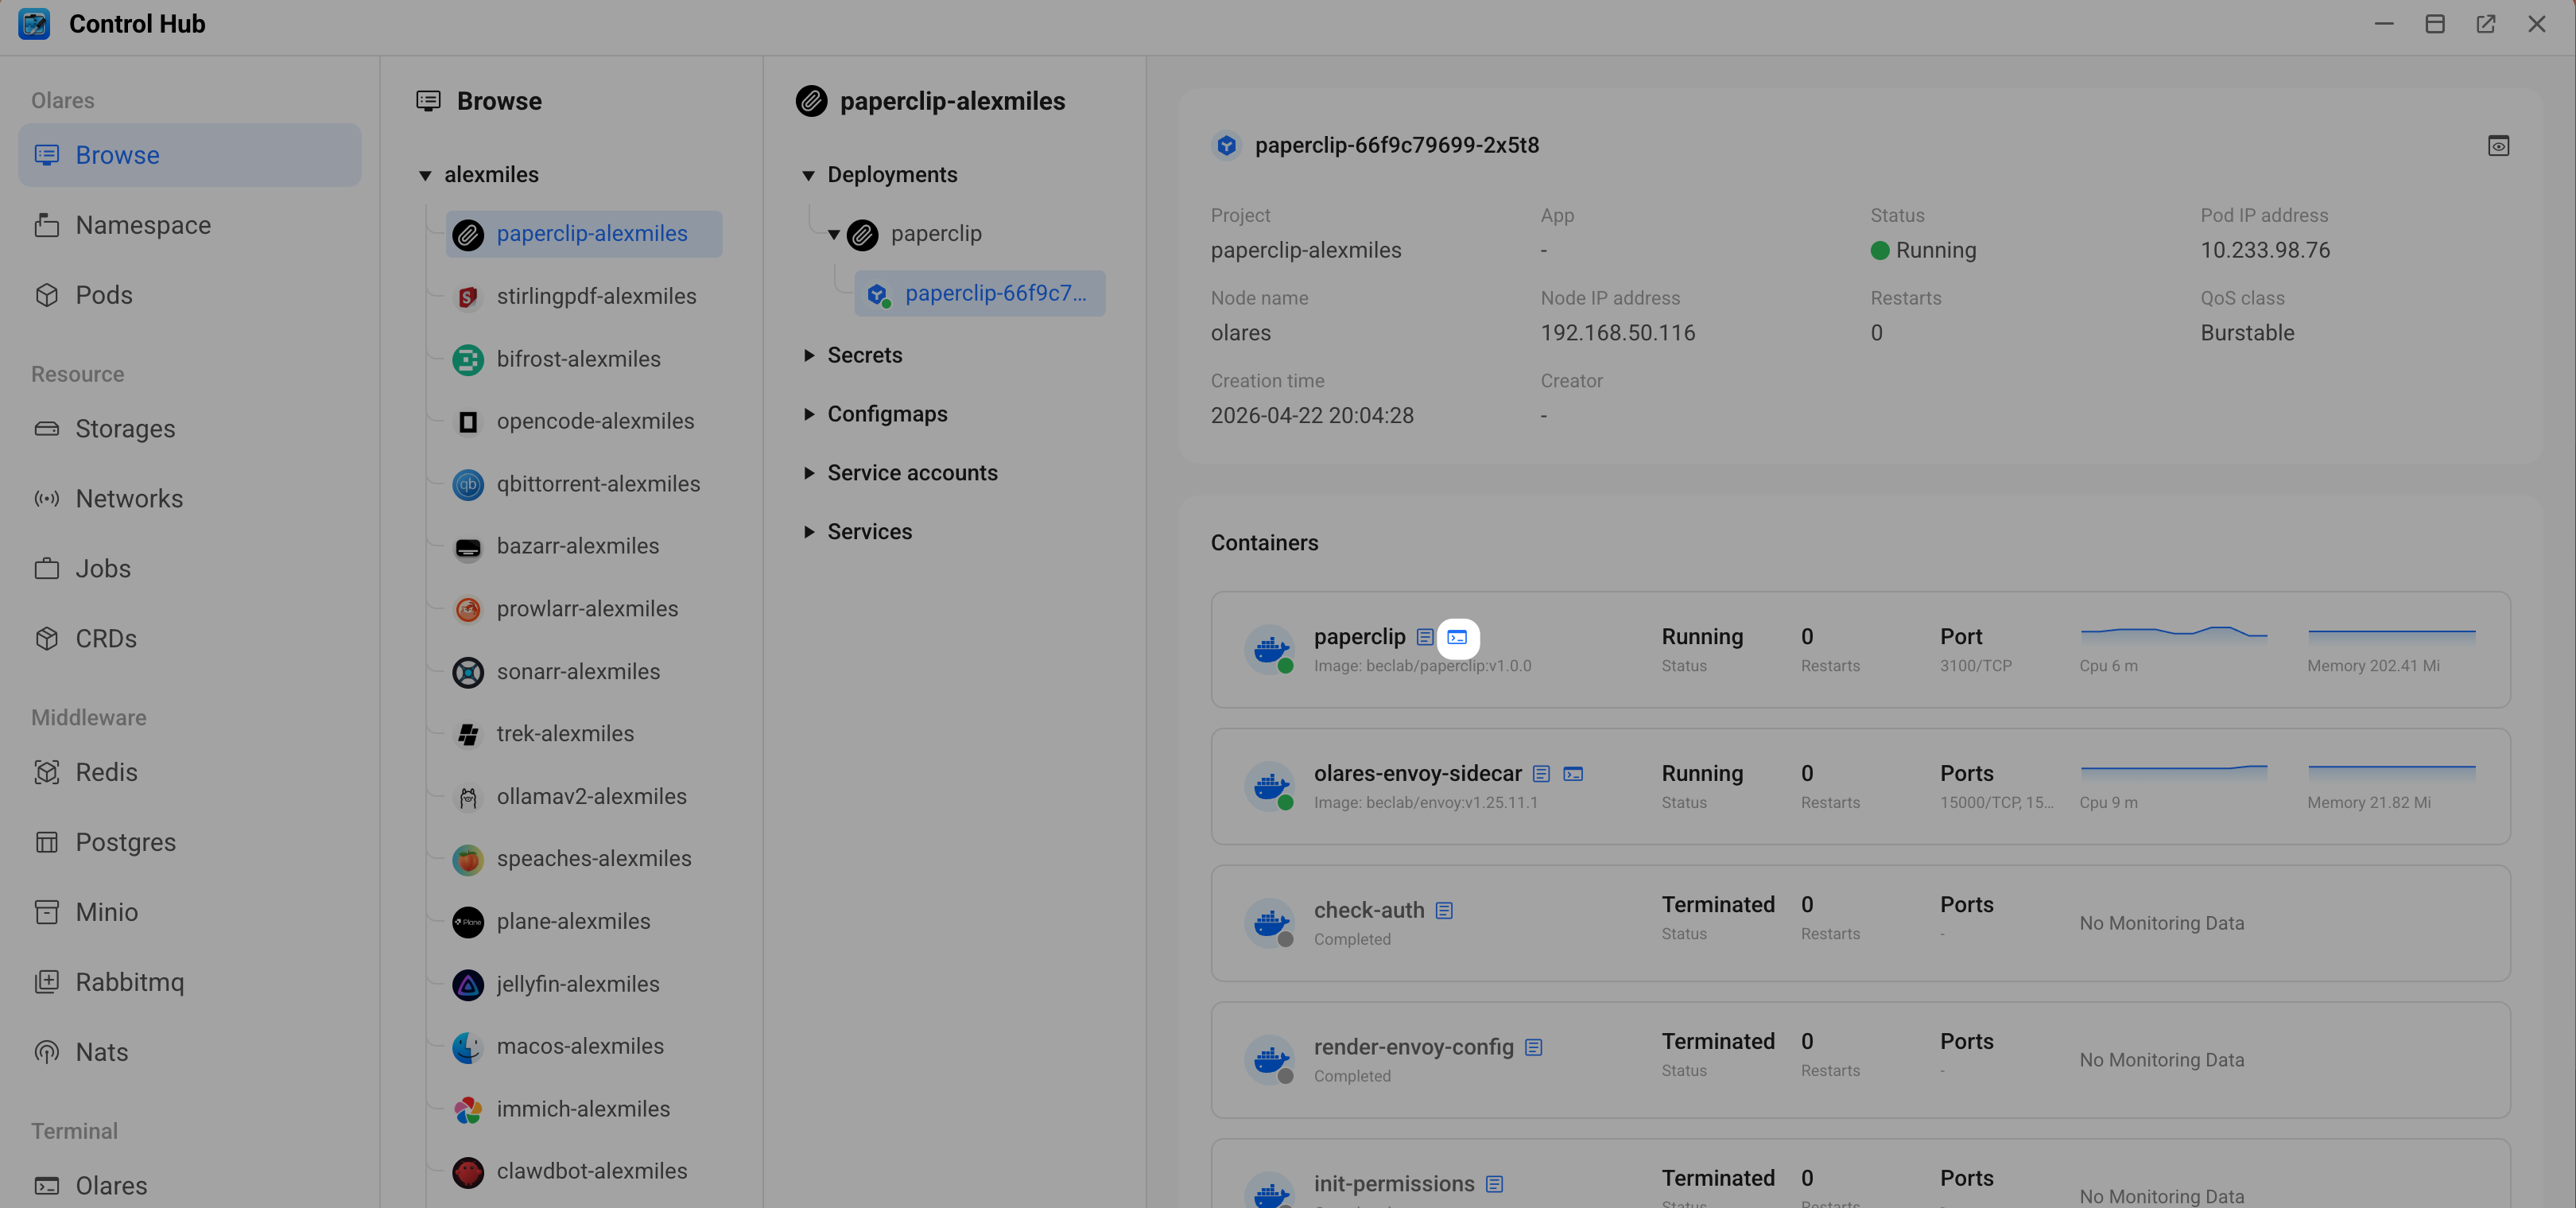
Type the following command, then press Enter:
bashcodex login --device-authOpen the device-auth link in your browser and sign in to complete the authorization. Then retry the Codex adapter in Paperclip.

Learn more
- Paperclip documentation: Official docs for concepts, features, and configuration.
- Orchestrate multi-agent workflows with oh-my-openagent: Run multi-agent collaboration inside a single OpenCode instance on Olares.
- Set up OpenCode as your AI coding agent: Install and configure OpenCode, a common Paperclip adapter.