
What Does Self-Hosting Cost Beyond the Hardware?


The server you buy is where self-hosting costs start, not where they end. A fair comparison also counts electricity, extra storage and backups, repairs and replacements, any paid software or services, and the hours you spend on upkeep. The cloud side needs the same care: count the subscription plus every charge your plan adds.
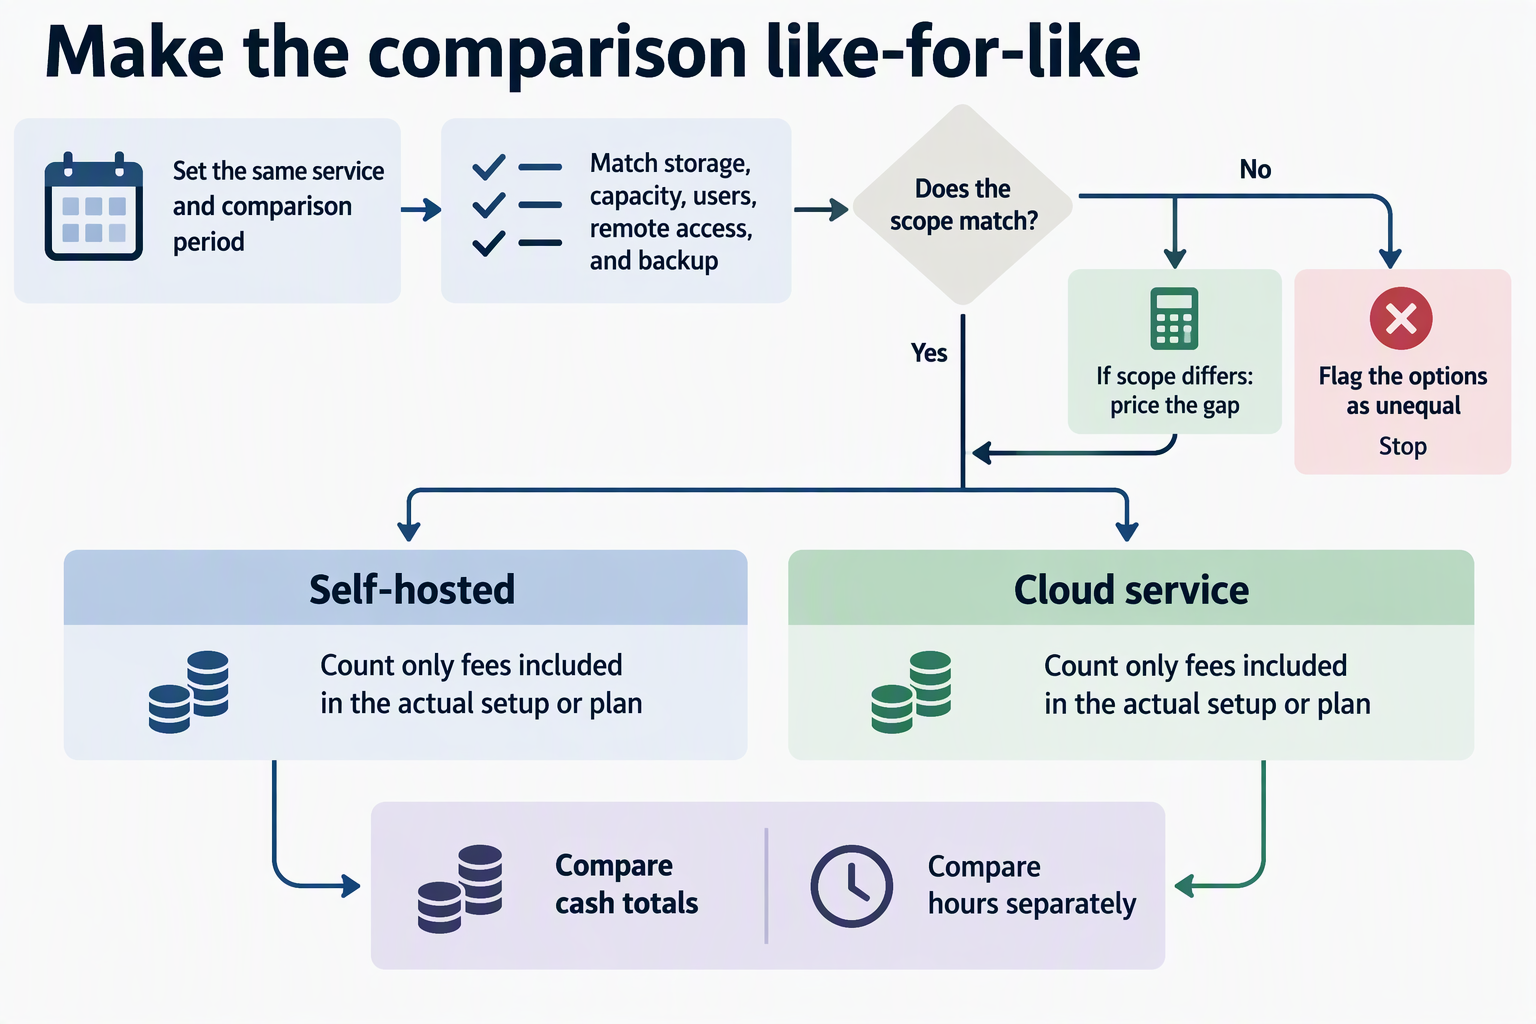
To keep the comparison honest, match both options to the same service and the same time period. Then total the cash for each option and list the hours separately, so neither side looks cheaper than it really is.
Build a Like-for-Like Cost Inventory
Start by defining the service each option has to deliver, then pick one comparison period, such as one year or three years, and use it for both. A cloud plan with 200 GB and no backup can’t fairly be compared with a home server that has 4 TB and a backup drive.
Write down the scope before you price anything: how much storage and capacity you need, how many users, how you’ll reach the service from outside your home, and what backup you expect. If one option falls short on any of these, add the cost of closing that gap, or note that the two options aren’t equal.
| Cost category | Self-hosted | Cloud service |
|---|---|---|
| Starting cost | Server purchase (cash); already-owned gear shown two ways | Subscription price for the matched plan |
| Electricity | Server plus any always-on add-ons | Usually built into the price |
| Storage and backup | Added drives, backup target | Extra storage tiers, if needed |
| Repairs and replacements | Failed drives, parts, eventual replacement | Not billed to you separately |
| Paid software or services | Licenses, subscriptions, offsite backup | Usage, transfer, or add-on fees, if your plan has them |
| Setup or migration | Parts, paid setup help | Setup or migration fees, if charged |
| Maintenance time | Hours for upkeep and fixes | Hours spent managing the account |
Treat every row as conditional. Only count a fee when your actual setup or plan includes it. A cloud plan’s headline price may not include the storage, transfer, or backup you need, so check the plan terms for those charges before you compare. On the self-hosted side, a server bought just for this project counts as cash in your period. If you already own the hardware, show what you’ll spend from today forward separately from a full lifecycle view.
Keep maintenance as a count of hours in this inventory. Turning hours into dollars is a separate decision, covered below.
Estimate Electricity From Actual Use
Use this formula: average watts ÷ 1,000 × hours in your period × your price per kWh. Dividing by 1,000 turns watts into kilowatts, and multiplying by hours gives kilowatt-hours (kWh), which is the unit your utility bills you in.
Use average draw, not the maximum rating on the power supply or adapter. A power adapter’s rating shows the most it can deliver, not what the machine uses on a normal day. A plug-in power meter can measure average draw over a few typical days. Count everything that runs because of the setup, including external drives or a separate backup device.
For the price, use the rate on your own utility bill. For a rough reference, EIA’s electricity-price explainer reports a preliminary 2025 U.S. residential average of 17.30 cents per kWh. EIA also notes that prices vary by locality, so treat that number as a dated national average, not your rate. For a closer starting point, EIA’s average electricity prices by state list rates by sector. Your bill is still the best input.
Run the formula over the same period you picked for the inventory. A yearly figure only makes sense next to a yearly cloud total.
Separate Cash Outlay From Your Time
Keep two totals for each option: dollars spent and hours spent. A lower cash total doesn’t mean less total effort, and mixing the two can hide that difference.
Track planned upkeep, such as updates and backup checks, separately from unplanned troubleshooting. If you pay a contractor or a support service, that money goes in the cash column, not the hours column. Use the same approach on the cloud side and count any time you spend managing the account, settings, or data exports.
If you want one combined number, choose an hourly value for your time, write it down, and show that dollar figure on its own line. No single hourly rate is correct for everyone, so the assumption should stay visible.
Previously bought hardware needs its own decision. It isn’t free, and it isn’t a new purchase either. In a forward-looking view, you count only the cash you’ll spend from today. In a lifecycle view, allocate each purchase over its expected useful life and show any replacement assumptions. Do not charge both the full purchase price and its depreciation for the same period. Pick one view, label it, and stick with it for the whole comparison.
FAQs
Should I count a spare PC I already have as free?
Only in a forward-looking view, and you should label it that way. In a lifecycle view, allocate the hardware’s cost over its expected useful life, with replacement assumptions shown separately and without double counting. Showing both views makes the trade-off clear.
What period should I compare over?
Choose one that fits how long you expect to keep the setup, then use it on both sides. A longer period spreads the hardware cost out, while a shorter one makes the upfront purchase look larger.
Can I use the national average electricity price?
It works as a reference point when you don’t have your bill handy. Your local rate can be far higher or lower, so swap in your utility’s price per kWh before you make a decision.
What if the cloud plan doesn’t match my self-hosted setup?
Then the comparison isn’t like-for-like yet. Move up to the plan tier that matches your storage, users, and backup needs, or add the cost of the missing features to whichever option falls short.