
How to Test a Home Server Restore Without Rebuilding Everything


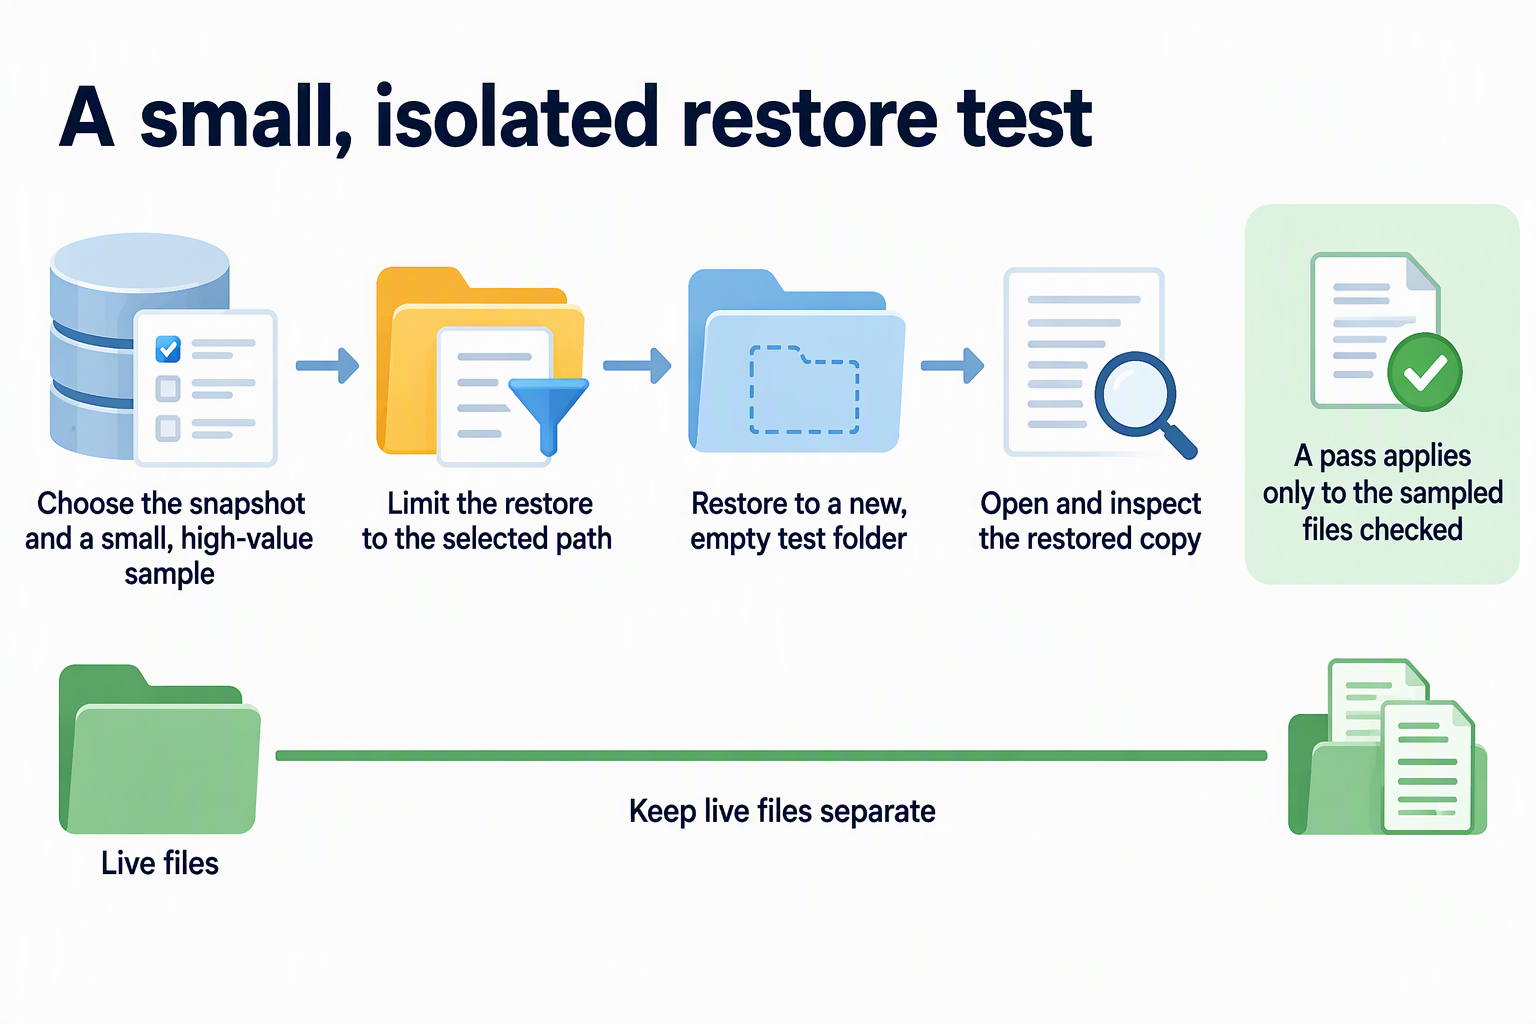
The safest home server restore test is a small one. Pick one high-value file or folder from an existing backup, restore it to a separate empty folder, and open the restored copy. That shows whether the backup gives you back something usable, which a “backup completed” message cannot.
You don’t have to rebuild the server or touch your live files to do this. A passing sample tells you about the files you restored and checked. The example below uses Restic, so its commands and defaults belong to Restic, not to every backup tool.
Run a Small Restic Restore to a Separate Folder
With Restic, you can pull a few files out of one snapshot and put them in a test folder while the originals stay where they are. These steps follow the stable Restic documentation for version 0.19.1. If you run a different version, match each step to your version’s docs.
- Pick a small, high-value sample. Choose something you would hate to lose, such as a folder of tax PDFs, one family photo album, or a spreadsheet you use every month. A small set restores quickly and is easy to inspect by hand.
- Choose the snapshot that matches your question. If you want to know “could I get last month’s version back?”, pick the snapshot from that point, not just the newest one. Write down which snapshot you used.
- Limit the restore to those paths. Restic’s selected-path restore method lets the restore command use –include or –exclude to restrict a snapshot restore to a subset of files. Use –include with the file or folder path you chose so the rest of the snapshot stays put.
- Create a new, empty target directory. Put it outside your live data folders and on a drive with room for the sample. This step protects your data because of Restic’s default target-overwrite behavior: the restore command overwrites files that already exist in the target directory. Never aim a test restore at the live source or at a folder that already holds files.
- Run the restore command and read the output. Pass your snapshot ID, the target folder, and your filter flag:
restic restore <SNAPSHOT_ID> –target /path/to/empty-test-dir –include /path/to/sample
Let the command finish. If Restic prints an error, copy the full output before you try anything else.
When the restore finishes cleanly, your sample should be sitting in the test folder, fully separate from the originals.
Check the Restored Files, Not Just the Backup Status
The proof is the restored copy itself, so inspect what landed in the test folder. A finished restore command only tells you the process ended. It doesn’t tell you whether the file you need is there and works.
Start with presence and structure. Open the test folder and confirm that every file and subfolder you selected is there, with names and folder layout you recognize. A missing file or a folder that comes back empty means the sample failed, even if the command looked successful.
Next, check the contents. Open each file in the program you normally use for it. A PDF should display every page. A photo should show the full image, not a blank or partial one. A spreadsheet should open with its sheets and recent entries in place. If the live original hasn’t changed since the snapshot, put the two side by side and compare file sizes and a few details you know well.
Finally, judge the file by its job. Ask whether you could use this copy today if the original were gone. If you can read it, edit it, or print it the way you normally would, the sample passes at the file level. That is the only conclusion this check supports. Opening a file confirms the file, not an app or database that might depend on it.
Know What a Pass or Failure Actually Means
A pass means the files you selected were restored from that snapshot and passed the checks you performed. It is solid evidence for that sample, but it does not prove that every other file in the snapshot is intact. It also cannot show that an app, a database, or the whole server could be brought back from the same backup.
Those broader recovery paths need their own distinct procedures and tests.
Write the result down in those terms: which snapshot, which files, and which checks you ran. A note such as “photo album from the June snapshot restored and opened” is accurate. “Backups work” is not, because that claim covers far more than you tested.
Repository checks answer a different question. What Restic repository checks examine depends on the flag you use. The default check looks at structural consistency. Adding –read-data also reads the stored pack data, which can take longer and use more bandwidth. Both are useful health diagnostics for the repository. Neither one pulls a file out for you to open, so neither can stand in for the restore-and-inspect test above.
When the restore fails or the output suggests damage, keep the evidence first. Restic’s repository-damage troubleshooting guidance says the first step is to check the repository, including with restic check –read-data, and to keep a copy of the check output because it may be needed later. Save the original restore error alongside it. Treat the check as your next diagnostic, not as an automatic explanation. A failed restore can have other causes, such as a wrong path in –include or a target folder you can’t write to, so confirm those details before you assume the repository is damaged.
FAQs
Does a successful file restore mean my app or database backup works too?
No. A file-level home server restore test confirms only the files you restored and opened. Apps and databases may depend on more than the files you sampled, so a readable copy of one folder doesn’t show that the service would start or that its data is consistent. Test those recovery paths separately, using the procedure for that app or backup method.
Can I use these Restic steps with another backup tool?
Not directly. The –include option and the default overwrite behavior described here come from Restic’s own documentation. Other tools may select files differently or handle an existing target folder in a different way. Before you test another tool, find out how it restores selected paths and what it does to files already in the destination. Then apply the same idea: small sample, empty folder, inspect the result.
What should I record after each restore test?
Record the snapshot you used, the exact files or folders you restored, where you restored them, and what you checked, such as “opened all 12 PDFs.” If the test failed, save the restore output and any repository check output with your notes. This record shows exactly what has been proven so far, and it gives you a clear starting point if you need to troubleshoot or repeat the test with a different sample.